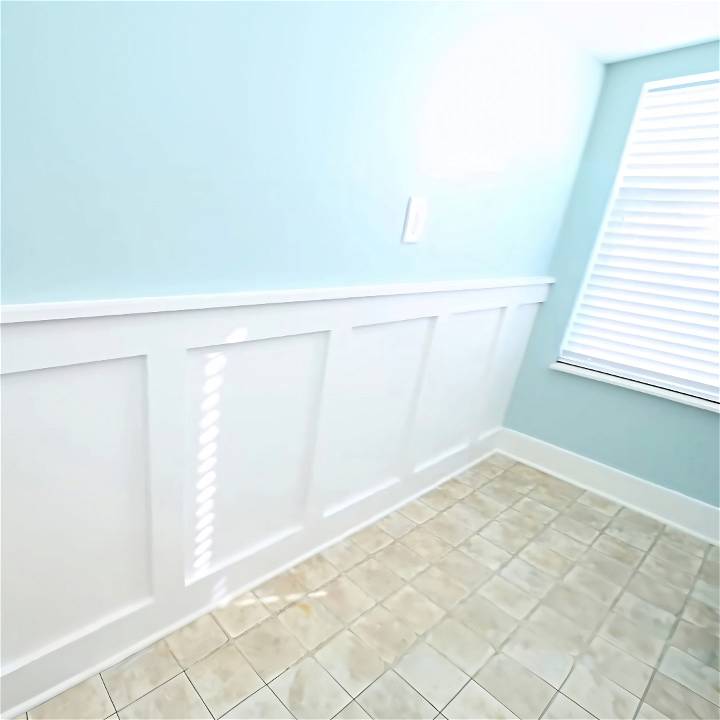
When I decided to give my laundry room a much-needed makeover, I knew wainscoting would add the charm and character the room desperately needed. The board and batten style seemed perfect for a DIY enthusiast like me despite it being my first attempt at such a project. Here's a step-by-step guide on how I achieved this transformation; hoping it will inspire and guide you through your DIY journey.
Materials Needed and Why
- MDF Boards: I chose MDF for its affordability and smooth finish. It's easy to work with, especially for a beginner.
- Paint (Blue-Green and White): The blue-green gave the room a vibrant look, while the white offered a classic contrast for the wainscoting.
- Baseboards: Upgrading to taller baseboards elevated the room's overall aesthetic.
- Spackle and Caulk: Essential for smoothing out imperfections and sealing gaps, ensuring a professional finish.
- Tools (Saw, Level, Nail Gun, etc.): Basic DIY tools made the installation process manageable.
Planning and Preparation
Learn how to plan, prepare, and install wainscoting in your home with this step-by-step guide. From painting to installation, everything you need to know is covered here.
Step 1: Painting the Room
Painting was my first task. The blue-green paint revived the room instantly. I left the lower part of the walls for the white paint, which would later complement the wainscoting. Pro tip: Remove your baseboards before painting to avoid wall damage and to make installing new baseboards easier.
Step 2: Choosing and Cutting the MDF Boards
I bought a 4x8 sheet of MDF and had it cut into 18-inch sections at the store. Back in my workshop, I further cut these sections into strips for the trim. This stage required some precision, but it's nothing to be too worried about if you don't own a table saw — most hardware stores will make the cuts for you.
Installation
Learn how to install baseboards and wainscoting in 5 simple steps. From preparation to finishing touches, get your home renovation project done right.
Step 1: Installing New Baseboards
The new, taller baseboards were up next. I started in one corner and worked my way around the room, cutting miters as needed. A little trick I discovered was flipping the board to avoid my saw's arbor limitation.
Step 2: Preparing the Boards
Before installing the vertical battens, I joined longer pieces of MDF for the top rail with pocket holes and glue. Even though MDF isn't the strongest material for holding screws, I found this method effective for my purposes. I spackled the edges to prevent paint absorption, which can be a real paint (and time) saver.
Step 3: Painting MDF Pieces
I primed and applied a coat of white paint to all the MDF pieces before installing them. If I could do it over, I'd add an additional finish coat here to reduce the work needed after installation.
Step 4: Installing the Wainscoting
I measured and marked where the top rail would sit, then installed it using a leveling clamp for support. Afterward, I cut the vertical battens to size, slightly oversized on purpose to account for any unevenness along the bottom. I then secured each batten with brad nails, although I'd advise using adhesive for a firmer hold.
Step 5: Adding the Finishing Touches
I installed a cap board on top of the rail for added detail and mounted shoe molding along the baseboards for a polished look. Caulking and spackling the gaps and nail holes were crucial for a seamless appearance.
The Final Coat
The last step was applying two more coats of white paint to the trim. This really brought the project together, providing a crisp and professional finish that made all the effort worth it.
Reflections and Tips
This project taught me a lot, not just about wainscoting but about planning and executing DIY projects in general. Here are a few key takeaways:
- Prep Work is Key: Proper preparation, especially painting beforehand, makes the project smoother.
- Measure Twice, Cut Once: Taking accurate measurements and being precise with cuts cannot be overstated.
- Patience Pays Off: Don't rush the process. Taking your time, especially with painting and caulking, ensures a quality finish.
Choosing the Right Wainscoting Style
When it comes to wainscoting, selecting the right style is crucial for achieving the desired aesthetic and functionality. Let's explore various wainscoting styles, their characteristics, and how they can enhance your home.
1. Raised Panel Wainscoting
Raised Panel Wainscoting features panels that are slightly elevated from the wall surface. These panels often have decorative edges and are framed by vertical stiles and horizontal rails.
- Characteristics:
- Traditional Elegance: Raised panels exude timeless elegance and are commonly found in formal dining rooms, hallways, and entryways.
- Depth and Texture: The raised design adds depth and texture to the walls, making visual interest.
- Customization: You can choose from various panel designs, including square, rectangular, or arched patterns.
- Best Applications:
- Formal Spaces: Ideal for classic interiors, such as Victorian, Colonial, or Georgian-style homes.
- Traditional Dining Rooms: Raised panel wainscoting complements formal dining areas beautifully.
2. Flat Panel (Shaker) Wainscoting
Flat Panel Wainscoting, also known as Shaker wainscoting, features flat panels without intricate details. It embodies simplicity and clean lines.
- Characteristics:
- Minimalistic Aesthetics: Shaker wainscoting emphasizes simplicity, making it suitable for both modern and transitional interiors.
- Versatility: The lack of ornamentation allows it to blend seamlessly with various design styles.
- Functional Appeal: Easy to clean and maintain, making it practical for high-traffic areas.
- Best Applications:
- Contemporary Homes: Shaker wainscoting complements minimalist and Scandinavian-inspired interiors.
- Hallways and Mudrooms: Its practicality makes it an excellent choice for busy areas.
3. Beadboard Wainscoting
Beadboard Wainscoting consists of narrow, vertical planks with a distinctive bead-like groove between each plank.
- Characteristics:
- Cottage Charm: Beadboard exudes a cozy, cottage-style vibe, reminiscent of beach houses and country cottages.
- Texture and Visual Interest: The grooves make texture and add visual appeal to walls.
- Height Variation: Beadboard can cover the entire wall or be installed as a half-wall wainscoting.
- Best Applications:
- Farmhouse and Coastal Homes: Perfect for achieving a relaxed, coastal or rustic look.
- Bathrooms and Kitchens: Beadboard wainscoting is moisture-resistant, making it suitable for these areas.
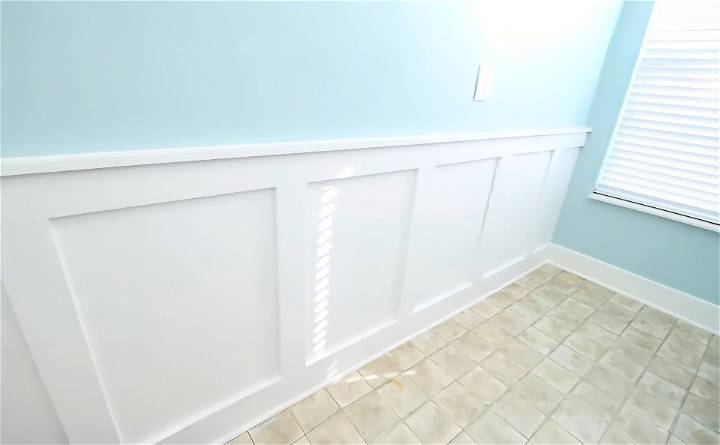
4. Board and Batten Wainscoting
Board and Batten Wainscoting features vertical boards (battens) separated by narrower strips (boards).
- Characteristics:
- Architectural Interest: The alternating pattern makes a striking visual effect.
- Height Customization: You can adjust the height of the battens to suit your space.
- Modern Adaptations: Board and batten wainscoting has evolved to include variations like “reverse board and batten.”
- Best Applications:
- Transitional Interiors: Works well in both traditional and contemporary homes.
- Entryways and Foyers: Makes a grand statement when installed in entry spaces.
Each option brings its own character and charm, so explore samples and visualize how they'll enhance your living spaces.
FAQs About DIY Wainscoting
Discover everything you need to know about DIY wainscoting with our comprehensive FAQs guide. Learn how to transform your space with this popular home improvement project.
1. What Is Wainscoting, and Why Should I Consider It?
Wainscoting refers to the decorative paneling or woodwork installed on the lower portion of interior walls. It serves both functional and aesthetic purposes:
- Protection: Wainscoting shields walls from scuffs, scratches, and everyday wear.
- Visual Appeal: It adds texture, depth, and architectural interest to your space.
2. What Are the Different Types of Wainscoting Styles?
There are several wainscoting styles to choose from:
- Raised Panel: Features elevated panels with decorative edges.
- Flat Panel (Shaker): Emphasizes simplicity and clean lines.
- Beadboard: Consists of narrow, vertical planks with bead-like grooves.
- Board and Batten: Alternating vertical boards and narrower strips.
3. Which Rooms Are Ideal for Wainscoting?
Consider wainscoting in the following areas:
- Dining Rooms: Raised panel wainscoting adds elegance.
- Hallways and Entryways: Any style works well here.
- Bathrooms and Kitchens: Beadboard is moisture-resistant.
5. How Do I Install Wainscoting?
Follow these steps:
- Measure and Plan: Determine the height and layout.
- Prepare the Wall: Remove baseboards and patch any holes.
- Install Panels: Attach panels using adhesive or nails.
- Add Molding: Install chair rail and baseboard molding.
- Paint or Stain: Finish with your desired color.
6. Can I DIY Wainscoting?
Absolutely! Many homeowners successfully install wainscoting themselves. Just follow tutorials, gather the right tools, and take your time. Remember, practice makes perfect!
Conclusion
The DIY wainscoting project transformed my laundry room from mundane to marvelous. It was a challenging yet rewarding experience that has prepared me for future DIY endeavors. With these steps and tips, I'm confident you can achieve similar, if not better, results in your own home. So why not give it a try? The satisfaction of making something beautiful with your hands is unparalleled. Get out there and build something awesome!


