Looking to personalize your space with unique touches that reflect your style? Dive into the world of DIY wall art and explore a world of creativity right at your fingertips. With 15 DIY wall art ideas and projects, you can transform your living space into a gallery of your own design. From textured macrame art to rug wall tapestries and faux watercolor landscapes, there's a plethora of options for every skill level and taste. Our guide offers easy-to-follow steps and tips to make your art project successful.
Taking the leap into making your own wall art doesn't just add a personal touch to your home; it also opens the door for customization and expression in ways store-bought art can't. Whether you're drawn to the simplicity of DIY large wall art on a budget or the charm of upcycling ideas for eco-friendly pieces, our collection of ideas, tips, and instructional content is designed to support your creative journey. Let's get ready to give your walls a breath of fresh air and discover new talents along the way.

How to Make DIY Large Wall Art on a Budget
Making stunning DIY wall art does not have to break the bank or require expert artistry. With a few simple materials and a dash of creativity, you can transform your living space into a gallery of personalized decor. Here, we explore three budget-friendly, large wall art ideas that blend transitional and aesthetic appeal for any room.
Textured Macrame Art
Materials Needed:
- 16x20 inch canvas
- Macrame cord
- Hot glue gun
- Tissue paper
- Mod Podge
- Off-white paint
Step by Step:
- Divide the Canvas: Mark your canvas into two sections; the top two-thirds and a smaller bottom third.
- Make Texture: Use hot glue to adhere the macrame cord onto the canvas in an endless rectangle pattern. Start and end the pattern in each section so it slightly overlaps, giving the illusion of continuity.
- Apply Tissue Paper: Coat the textured canvas with Mod Podge, then lay tissue paper across the entire surface, smoothing it into the crevices to unify the texture.
- Add Color: Once the Mod Podge is dry, paint the entire canvas off-white. For visual interest, consider painting the bottom third a slightly darker shade.
Rug Wall Tapestry
Materials Needed:
- Accent rug
- Wooden dowel
- Wood stain (optional)
- Brass nails
- Nail tacks
- Fabric glue (washable)
- Cream-colored tassels
Step by Step:
- Prepare Dowel: If desired, stain your wooden dowel and let dry. This will be the hanging rod for your tapestry.
- Attach the Rug: Fold the top of the rug over the dowel and secure it with brass nails for a removable set-up.
- Add Tassels: For an extra touch, use washable fabric glue to adhere tassels along the bottom edge of the rug.
- Hang: Use string, twine, or leather strips to hang your new tapestry by the dowel.
Faux Watercolor Landscape
Materials Needed:
- Watercolor paper
- Acrylic paints (various colors)
- Paintbrushes
- Water container
- Picture frame (optional)
- Duck cloth canvas (for matting, optional)
Step by Step:
- Draw Horizon: Lightly sketch the horizon line on your watercolor paper.
- Paint Sky and Shoreline: Dilute off-white acrylic paint for the sky and a beige or tan for the shoreline. Apply water to the paper first for a more fluid application.
- Add Mountains: Make distant mountains with diluted paint that blends the sky and shoreline colors. For the foreground, use a darker tone for contrast.
- Frame: Once dry, you can frame your artwork. Use duck cloth canvas as a unique matte or backing if needed.
Video Tutorial
For a more comprehensive guide, watch the step-by-step video tutorial on YouTube.
It pairs well with this written guide, enriching your understanding of each project with visual cues that bring these ideas to life.
Enhancing your home with unique and affordable wall art has never been easier. Experiment with these ideas, and don't hesitate to adapt them to your taste and existing decor. Happy crafting!
Customization Tips for Personalized DIY Wall Art
Making DIY wall art is not just about filling up empty walls; it's about expressing your personality and making your space truly yours. Here are some tips to help you customize your wall art and add a personal touch to your home:
- Incorporate Personal Photos: Choose your favorite memories and have them printed on canvas or fine art paper. Arrange them in a gallery wall format or as a single statement piece.
- Use Meaningful Quotes: Select quotes that inspire you or reflect your life philosophy. You can stencil them onto painted canvases or make lettering with vinyl decals.
- Play with Colors: Pick a color palette that resonates with you. Whether it's calming blues, energizing yellows, or elegant neutrals, let the colors you love guide your creations.
- Add Textures and Layers: Combine different materials like fabric, paper, or metal to add depth to your artwork. Textured elements can make your wall art more tactile and visually interesting.
- Reflect Your Hobbies: If you're passionate about a hobby, let it show in your wall art. For example, if you love music, use old vinyl records or sheet music as part of your design.
- Celebrate Your Heritage: Pay homage to your cultural background with patterns, symbols, or traditional art forms that have personal significance.
- Change with Seasons: Make wall art that you can switch out with the changing seasons or holidays. This keeps your decor fresh and allows you to celebrate different times of the year.
- Involve Family and Friends: Make it a group activity. Have your kids contribute with handprints or let friends leave their mark with signed art pieces.
Remember, the best wall art is the one that speaks to you and brings joy every time you look at it. Keep it simple, make it meaningful, and most importantly, have fun with it! 🎨🖼️
Maintenance and Care for Your DIY Wall Art
Ensuring your DIY wall art remains as vibrant and captivating as the day you made it requires some care. Here's how you can maintain your artwork to enjoy it for years to come:
- Protect from Sunlight: Direct sunlight can fade colors over time. Hang your art in a spot that doesn't get too much sun, or use UV-protective glass if it's framed.
- Dust Regularly: Gently dust your wall art with a soft, dry cloth. Avoid harsh cleaning products that can damage the surface.
- Keep Away from Humidity: Moisture can warp or damage your art. Try to hang it in a dry area of your home and avoid places like bathrooms or above kitchen sinks.
- Handle with Care: When moving your art, hold it by the frame or edges to avoid fingerprints or pressure marks on the canvas or paper.
- Rotate Artwork: Switching out your art periodically not only keeps your decor fresh but also prevents prolonged exposure to environmental factors that could cause damage.
- Repair Damage Promptly: If your art gets nicked or scratched, touch it up right away to prevent further deterioration.
- Use Quality Materials: When making your wall art, choose high-quality, durable materials that will stand the test of time.
By following these simple steps, you'll ensure that your DIY wall art continues to add beauty and personality to your home.
Upcycling Ideas for Eco-Friendly DIY Wall Art
Upcycling is not just a way to reduce waste; it's an opportunity to make something unique and personal for your home. Here are some ideas to transform everyday items into stunning DIY wall art:
- Old Magazines and Newspapers: Cut out images and words to make a collage. You can also roll pages into tubes and glue them side by side to make a textured mosaic.
- Fabric Scraps: Use leftover fabric pieces to cover canvas or make a patchwork design. Mix patterns and textures for a vibrant effect.
- Discarded Books: Salvage beautiful illustrations or interesting text from damaged books to use in your artwork. Book pages can also be folded into intricate shapes for a 3D effect.
- Wine Corks: Collect corks and arrange them into a board for a rustic look. You can paint them or carve them into mini sculptures.
- CDs and DVDs: Break old discs into pieces to use as shimmering mosaic tiles. Their reflective surface can add sparkle to your art.
- Wooden Pallets: Dismantle pallets and use the wood to make frames, signs, or even a canvas for painting.
- Bottle Caps: Flatten bottle caps and nail them to a wooden board in a pattern or shape. This can make an industrial-chic piece of art.
- Old Jewelry: Use broken or outdated jewelry pieces to add glamour and shine to your wall art. They can be glued onto canvases or hung in a shadow box.
By upcycling, you're not only crafting beautiful wall art but also making an environmentally conscious choice. Get creative and see what unique pieces you can make from the items around you!
Expert Interviews: Adding Professional Insight to Your DIY Wall Art
Incorporating expert advice into your DIY wall art projects can elevate them from good to great. Here's how you can use professional insights to enhance your creations:
- Seek Out Local Artists: Connect with artists in your community and ask if they'd be willing to share their tips and techniques for making wall art. Their firsthand experience can provide valuable guidance.
- Online Tutorials and Workshops: Many artists and interior designers offer online classes that can teach you new skills and methods. Look for workshops that focus on the type of wall art you're interested in.
- Social Media Platforms: Follow artists and designers on platforms like Instagram or Pinterest. They often share their creative process and can be a source of inspiration.
- Interviews and Articles: Read interviews with professionals in the field of art and design. They can offer insights into the latest trends and how to incorporate them into your work.
- Collaborate on a Project: If possible, collaborate with an artist on a piece of wall art. This hands-on experience is invaluable and can teach you techniques that you might not learn otherwise.
By tapping into the knowledge of experts, you can learn new approaches to DIY wall art that will make your projects stand out. Remember, every artist was once a beginner, so don't hesitate to reach out and learn from those who have mastered their craft.
Trending Techniques in DIY Wall Art
Keeping up with the latest trends can give your DIY wall art projects a contemporary edge. Here are some of the most popular techniques that are making waves in the world of DIY decor:
- Paper Crafts: Paper isn't just for writing; it's a versatile material for wall art. Try making paper shapes or origami figures to add a three-dimensional aspect to your artwork.
- Color Blocking: This technique involves using distinct blocks of color to make bold and vibrant designs. It's a simple yet effective way to make a statement on your walls.
- Mixed Media: Combine different materials such as fabric, metal, or wood to make a piece that has varied textures and depth. This approach can result in a more tactile and visually interesting piece.
- Gold Leaf: Adding gold leaf to your artwork can introduce a touch of luxury and shine. It's a simple way to elevate the look of your DIY wall art.
- Large-Scale Art: Don't be afraid to go big. Large-scale pieces can be a focal point in a room and are perfect for spaces like living rooms or over the bed.
- Sustainable Materials: Eco-friendly art is in. Use recycled or upcycled materials to make art that's not only beautiful but also kind to the planet.
- Bold Colors: While neutral tones have their place, don't shy away from using bold and bright colors. They can bring energy and life to any room.
- Light-Up Art: Incorporate lighting into your artwork to add a functional element. LED strips or fairy lights can make your art glow and change the ambiance of a room.
- Wooden Accents: Wood can add warmth and a natural feel to your artwork. Whether it's a wooden frame or a carved piece, it can bring an organic touch to your creation.
By incorporating these trending techniques into your DIY wall art, you can make pieces that are not only personal and meaningful but also stylish and modern.🎨🖌️
Budgeting and Planning for Your DIY Wall Art
Making DIY wall art is a fun and rewarding way to personalize your space, but it's also important to plan and budget effectively to ensure your project is both affordable and successful. Here are some tips to help you manage the financial and planning aspects of your DIY wall art projects:
- Estimate Costs: Before starting, list all the materials you'll need and estimate their costs. Include items like paint, brushes, canvases, and any special tools or supplies.
- Set a Budget: Decide on a total budget for your project. This will help you make cost-effective choices when purchasing materials and prevent overspending.
- Shop Smart: Look for deals at craft stores, use coupons, and consider purchasing some materials in bulk. Don't forget to check out thrift stores and online marketplaces for second-hand items.
- DIY Supplies: Some art supplies can be made at home. For example, you can make your own stencils or mix certain paint colors instead of buying them pre-made.
- Plan Your Design: Sketch your design beforehand to avoid wasting materials on trial and error. This will also give you a clear idea of what you need to complete your vision.
- Time Management: Consider the time you have available and set realistic goals for completing your project. Break down the process into smaller steps and schedule them accordingly.
- Avoid Waste: Use leftover materials from previous projects or find ways to repurpose scraps. This not only saves money but also promotes sustainability.
- Quality vs. Cost: While it's important to stay within budget, investing in certain high-quality materials can result in a better and longer-lasting piece of art.
- Track Spending: Keep receipts and track your expenses as you go. This will help you stay on budget and provide a reference for future projects.
By following these budgeting and planning tips, you can make beautiful DIY wall art that won't break the bank.
Frequently Asked Questions About DIY Wall Art
Making your own wall art can be a rewarding experience, but it's natural to have questions along the way. Here are some frequently asked questions that might help you as you embark on your DIY wall art journey.
What materials do I need to start making DIY wall art?
To begin, you'll need basic supplies like canvas, paint, brushes, and a palette. Depending on your project, you might also need items like paper, glue, fabric, or recycled materials.
Can I make wall art if I'm not good at drawing?
Absolutely! Wall art isn't limited to traditional sketches or paintings. You can make abstract pieces, collages, or use stencils and stamps to make beautiful art without needing to draw.
How do I choose a color scheme for my wall art?
Consider the room where the art will be displayed. Look at the existing colors and decor, and choose a palette that complements the space. You can also draw inspiration from nature, fashion, or art movements you admire.
What's the best way to frame DIY wall art?
You can purchase ready-made frames, have them custom-made, or even make your own from materials like wood or metal. The frame should enhance the artwork and match the style of the room.
How can I make my wall art look professional?
Take your time with each step, from preparing your canvas to applying the final touches. Use quality materials and research techniques to ensure a polished result. Don't rush the process.
Is it possible to make large-scale wall art at home?
Yes, you can make large-scale art by using bigger canvases or combining multiple smaller pieces. Just ensure you have enough space to work and display the finished piece.
How do I protect my wall art from fading?
Keep your art out of direct sunlight, consider using UV-protective varnish, and choose archival-quality materials that are designed to last.
Can I use digital tools to make wall art?
Digital art is a fantastic way to make wall art. You can use software like Adobe Photoshop or free tools like GIMP to design your piece, which you can then print and frame.
What are some eco-friendly options for DIY wall art?
Look for recycled materials, use non-toxic paints, and consider upcycling items like fabric scraps or old magazines. Being eco-friendly also means making art that you'll love for a long time, reducing the need for frequent updates.
How do I hang my DIY wall art securely?
Use appropriate hanging hardware for the weight of your piece, such as picture hooks, nails, or wall anchors. Make sure the art is level and securely attached to the wall.
Remember, the most important part of DIY wall art is to enjoy the process and express your creativity. There are no mistakes, only learning experiences and opportunities for growth. Happy crafting!
DIY Wall Art Ideas and Design Inspiration
Get inspired with our DIY wall art ideas and design inspiration. Transform your space with unique and creative decor. Start your DIY project today!
1. Large DIY Scale Wall Art and Winter Landscape Printable
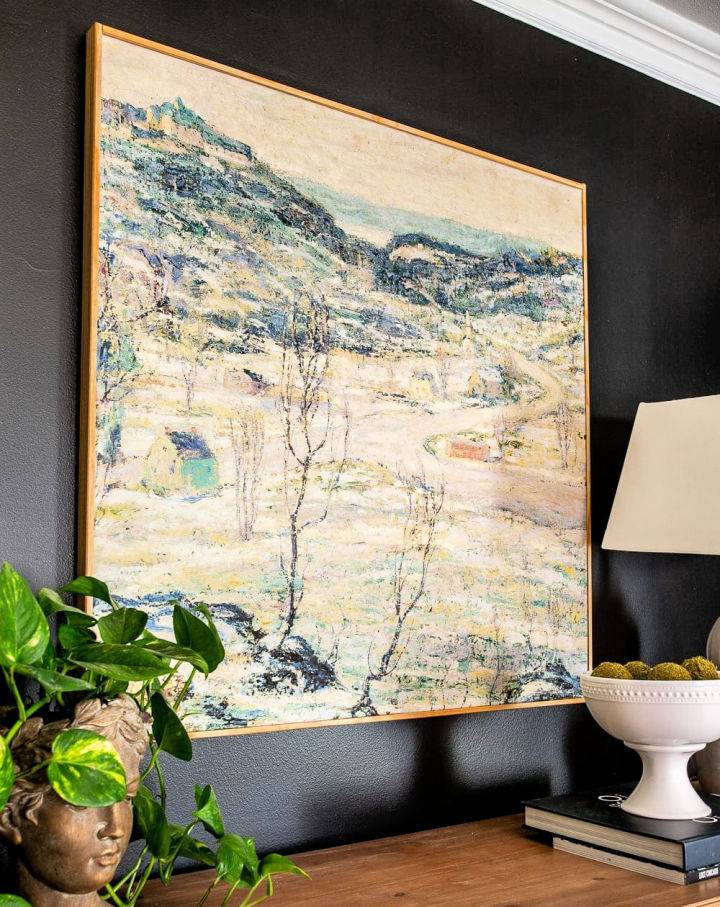
Make stunning, high-end looking wall art on a budget with this tutorial. Explore this DIY guide from Blesser House, where you'll learn to make a large scale wall art piece that looks like it's worth thousands, for less than $50.
This project involves a beautiful winter landscape that's versatile enough to display year-round. With simple tools and materials, you're guided through each step, from printing your image to framing it with a modern touch. Perfect for those new to DIY or looking to save on decor. Elevate your space with this accessible and engaging project.
2. Make a Canvas Art With Wrapping Paper
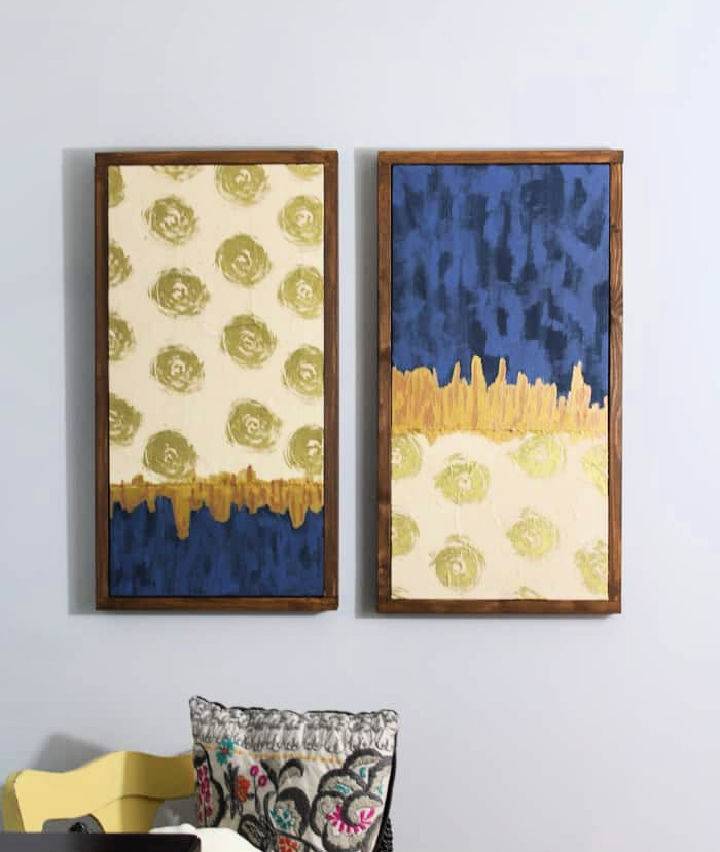
Remodel your home decor effortlessly with this ingenious idea. Turn luxurious wrapping paper into stunning DIY canvas art using a straightforward technique found at averageinspired. Not only is this project simple and affordable, but it also brings a personalized touch to any room. With a few supplies like canvas panels, Mod Podge, and your choice of paint, you can make eye-catching pieces that reflect your style. Follow these easy steps to enhance your walls with art that impresses.
3. Homemade Pressed Flower Frame Wall Art
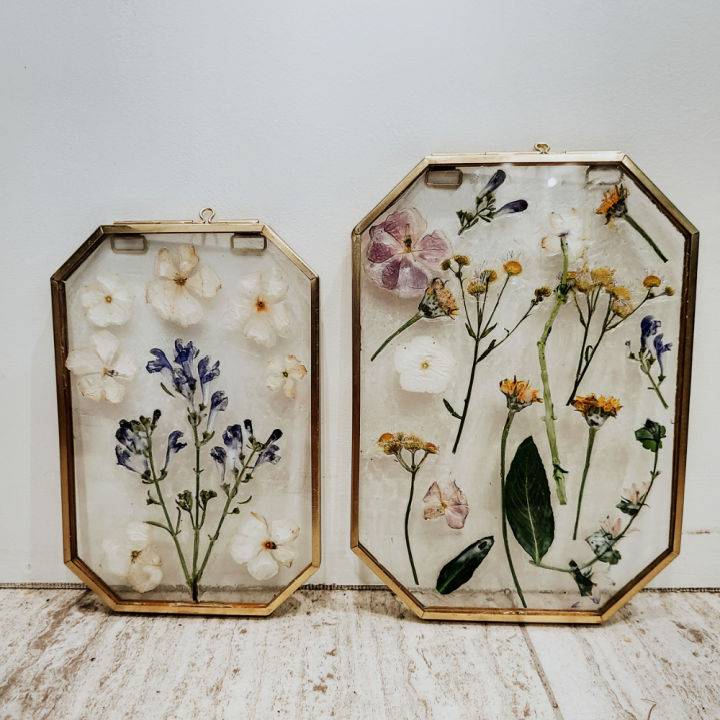
Learn how to preserve your summer memories with a timeless DIY pressed flower frame, a delightful project shared on Cool Mom and Collected. This engaging guide demonstrates a simple way to turn summer blooms into a piece of art that embodies the essence of the season.
By pressing flowers and arranging them in a frame, you can make an enchanting decor piece for your home. Ideal for adding a personal touch to your space, this DIY not only enhances your decor but also keeps your summer memories alive. Follow these straightforward steps to make a beautiful pressed flower frame that brings nature's artistry into your living space.
4. How to Make a Geometric Wood Art Piece
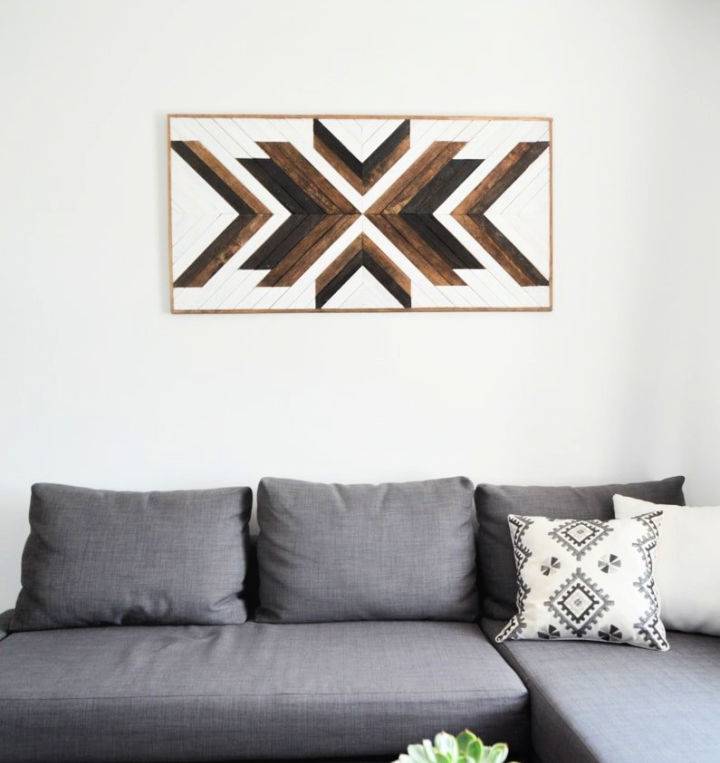
Elevate your home decor with your own hands by making a striking geometric wood art piece, as showcased on DIY Huntress. This detailed guide walks you through making a vast, eye-catching wall piece that combines rustic charm with modern design for less than $50.
With simple tools, a splash of paint, and a bit of creativity, you can personalize your living space. Ideal for anyone keen to add a handcrafted touch to their home, this tutorial is easy to follow and rewarding to complete. Say goodbye to blank walls and hello to your new, unique art piece.
5. Simple Yarn Wall Hanging on a Budget
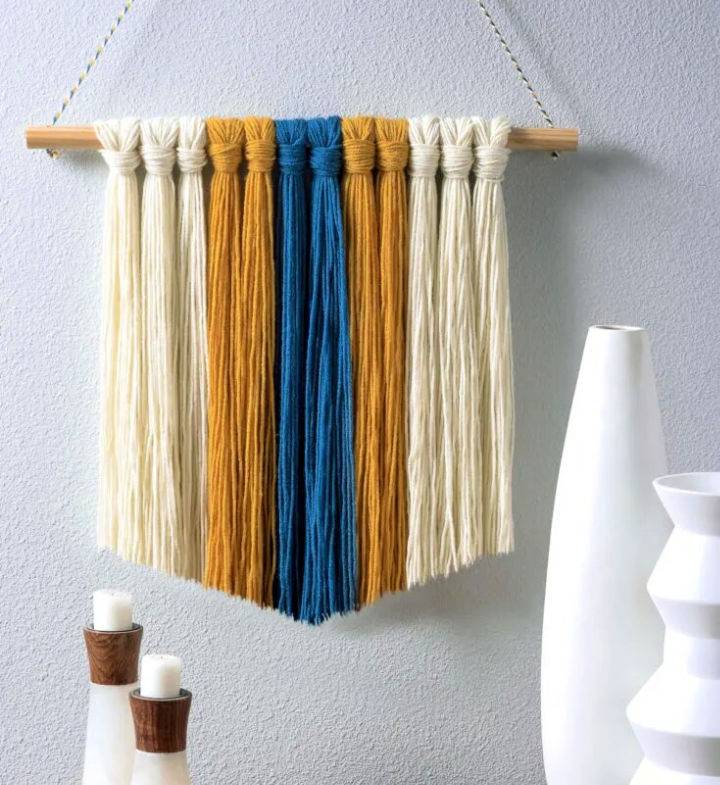
Brighten your space and add a touch of personality with a DIY yarn wall hanging that's both affordable and easy to create. No crafting experience? No problem. This tutorial is perfect for anyone looking to add charm to their home without breaking the bank.
From selecting vibrant yarn colors to tying and trimming, this guide walks you through each step, offering tips for customization along the way. Embrace the simplicity of this craft, ideal for enhancing any wall with color and texture. Ready to start making? Explore the straightforward process at DIY Candy and watch your creativity unfold.
6. Abstract Canvas Painting for Beginners
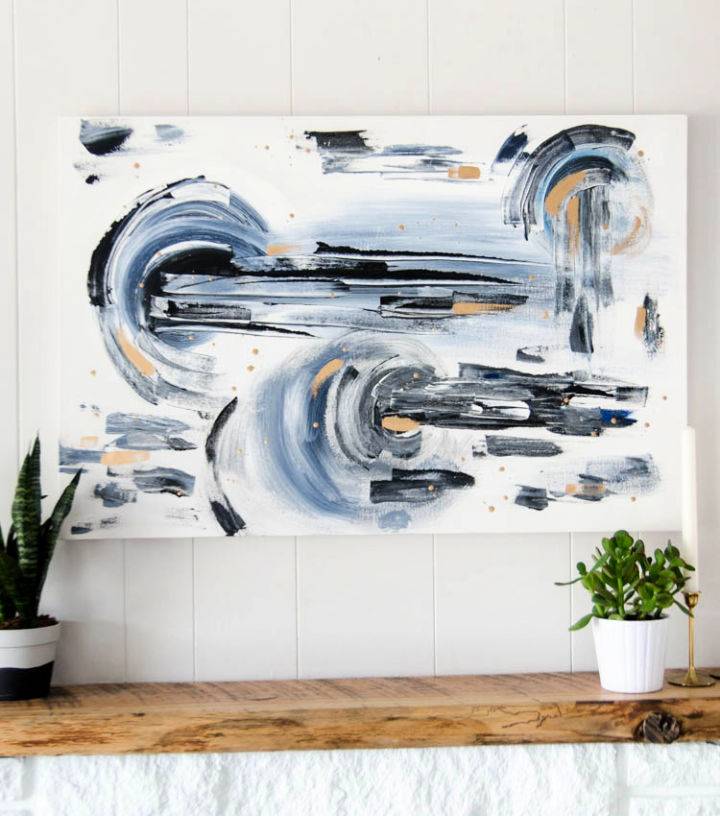
Tap into your artistic potential with a simple yet impactful approach to DIY abstract painting, designed for beginners. This Lemon Thistle tutorial breaks down the process into manageable steps, ensuring a fun and educational experience.
Using acrylic paints, a chip brush, and a palette knife, you'll explore the vibrant possibilities of abstract art on canvas. The tutorial even delves into using liquid gold leaf for an added luxe effect. Perfect for those looking to start their painting journey with confidence and creativity.
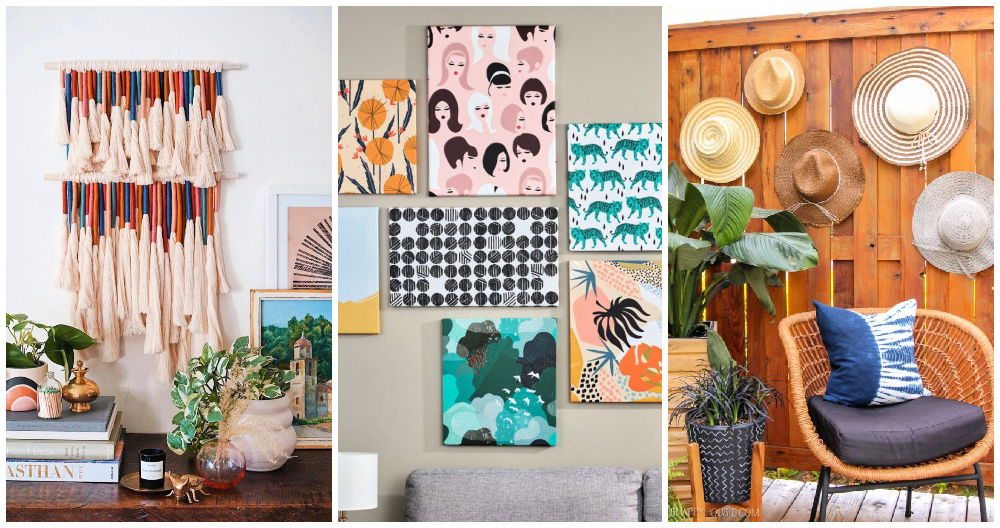
7. Fabric Panel Wall Art With Embellishments
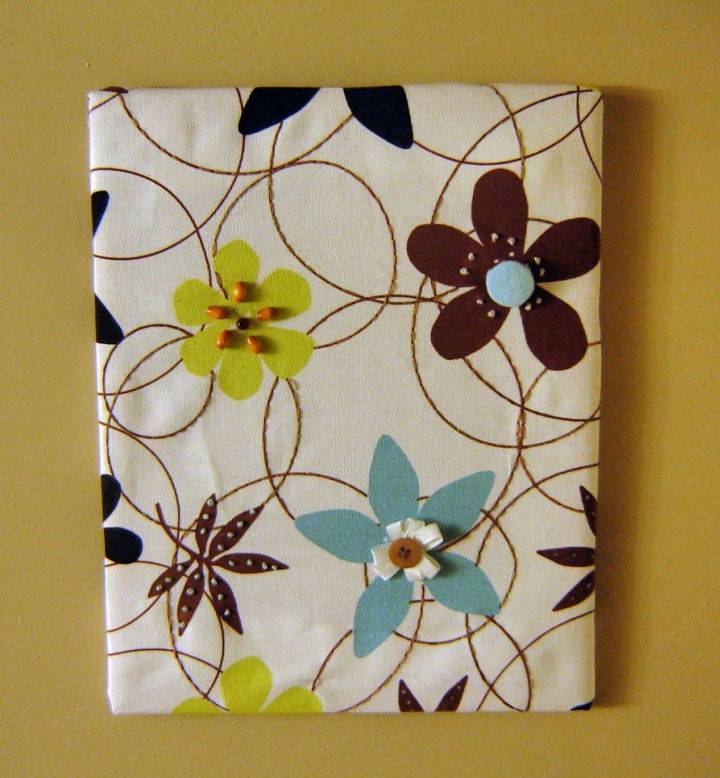
Bring a unique touch to your home decor with this easy-to-follow DIY guide on making fabric panel wall art with embellishments. Perfect for adding a personal flair to any room, this project allows for endless creativity.
Visit Instructables to discover how to turn simple materials into stunning wall art. This guide is ideal for anyone looking to enhance their living space with a handcrafted piece. Start your project today for a fun and rewarding way to beautify your home.
8. Making a Pallet Wood Sign
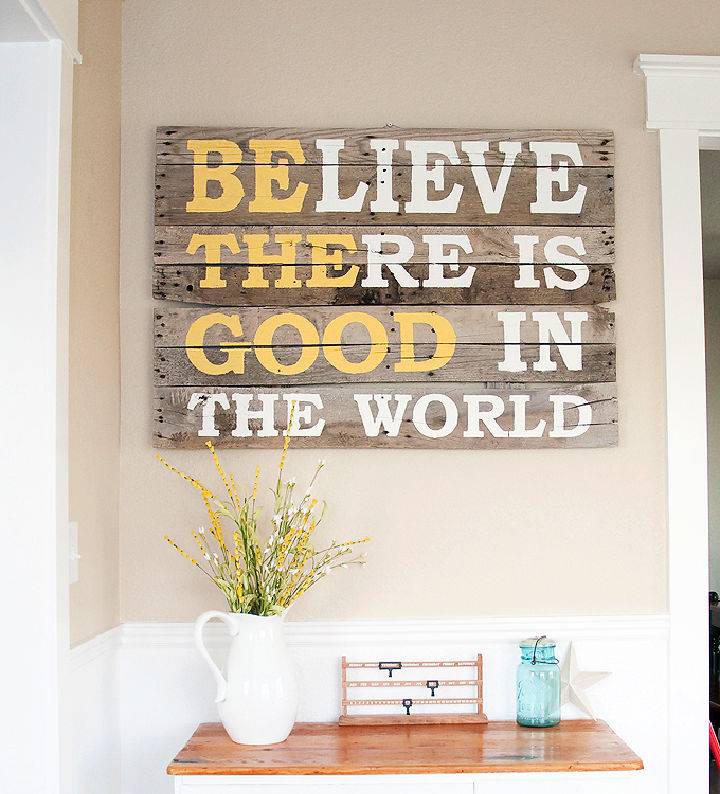
Uplift your decor with a personal touch by crafting a unique DIY pallet wood sign. This engaging project is detailed at Blooming Homestead, where you learn the essentials: gathering pallet wood, making stencils, and painting your design.
This guide breaks down the process into manageable steps, ensuring a delightful result. From selecting the wood to adding the final touches, each stage is aimed at makers of all skills. Dive into this helpful, instructive guide and infuse your space with a piece of handmade charm.
9. Easy DIY Macrame Wall Hanging for Beginners
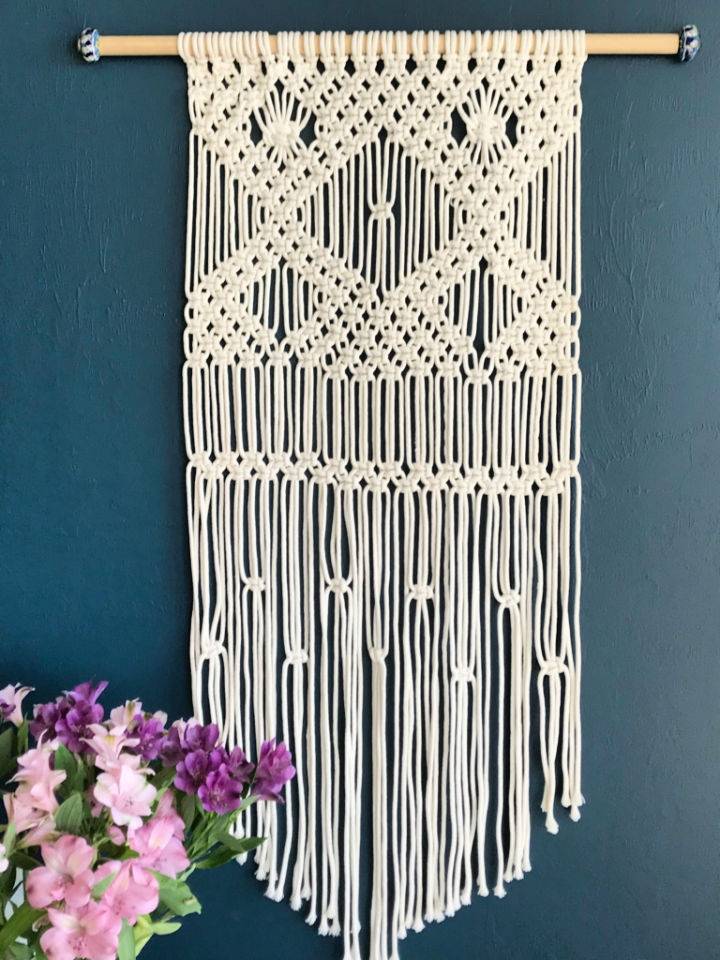
Discover the joy of making a macramé wall hanging with a beginner-friendly guide from My French Twist. Start your crafting adventure with easy-to-follow instructions, empowering you to weave beautiful patterns from the comfort of your home.
This tutorial cuts through the complexity, offering a step-by-step approach that ensures success for newcomers. Elevate your living space with a handmade piece that adds warmth and charm. Perfect for anyone looking to begin their macramé journey, this guide promises a rewarding experience with stunning results. Don't wait – begin crafting your masterpiece today!
10. Handmade Embroidery Hoop Wall Art
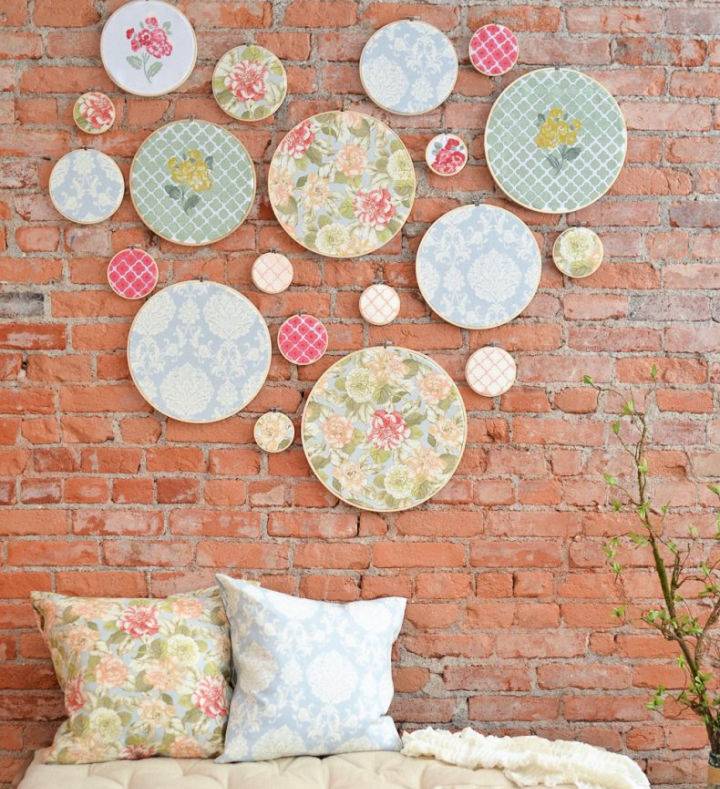
Upgrade your home decor effortlessly with DIY embroidery hoop wall art, a cost-effective way to add charm to your spaces. Follow this simple guide to breathe new life into those wide-ranging wall expanses. Utilizing fabrics, stencils, and a touch of creativity, you can fabricate a statement piece that reflects your personal style.
The process involves selecting your hoops, choosing fabrics, applying unique stencils, and finally, hanging your art seamlessly on the wall. For a detailed walkthrough on making these custom decorative pieces, visit Home Stories A to Z. This engaging project is not only easy to follow but also allows for endless customization to suit any room's decor.
11. DIY Photo Display From an Old Window
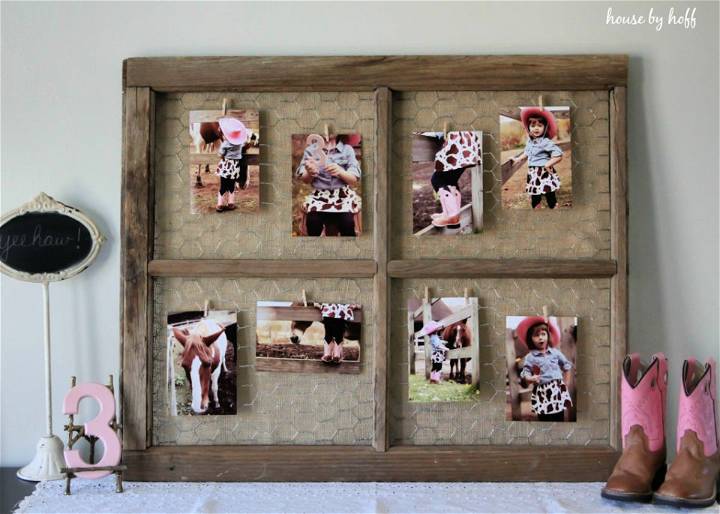
Get the charm of upcycling with this DIY guide on turning an old window into a distinctive photo display, brought to you by House by Hoff. This easy-to-follow tutorial walks you through attaching chicken wire and burlap to an antique window frame, making a rustic yet refined piece perfect for showcasing your favorite memories. Ideal for theme parties or simply adding a personal touch to your decor, it proves how a simple transformation can breathe new life into forgotten objects.
12. Make Your Own Hand-Stamped Canvas
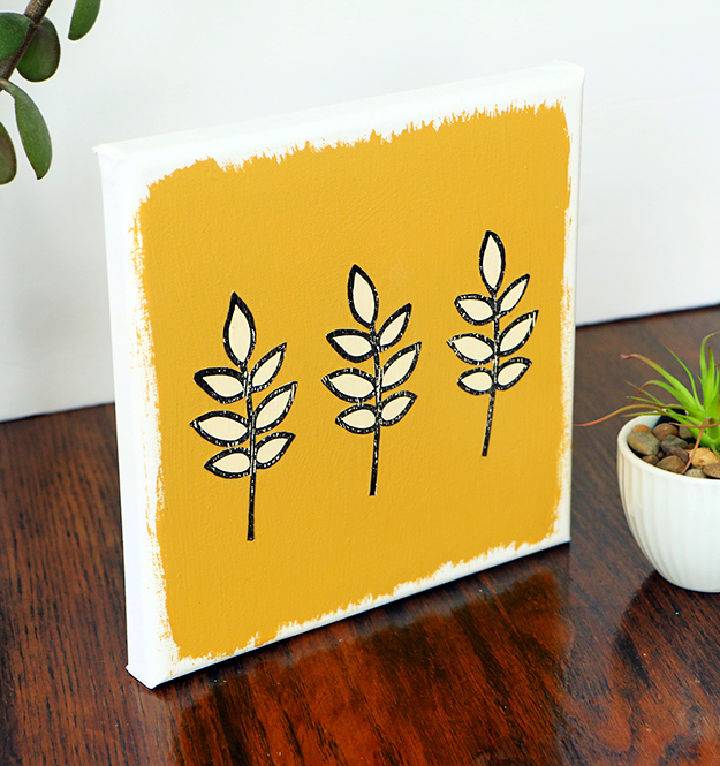
Brighten your living space with an effortless DIY stamped canvas art project. It's a fantastic method to introduce affordable artwork into any room, and the best part? No artistic skills required! By utilizing a simple Olive Branch Stamp from Happiness is Creating, you can transform an ordinary canvas into a striking piece of décor.
This project is not only simple but also allows for personal customization, offering a special touch to your home or office. Dive into the full tutorial for a step-by-step guide and make your artistic mark today!
13. DIY Wall Art Decor With Beach Stones
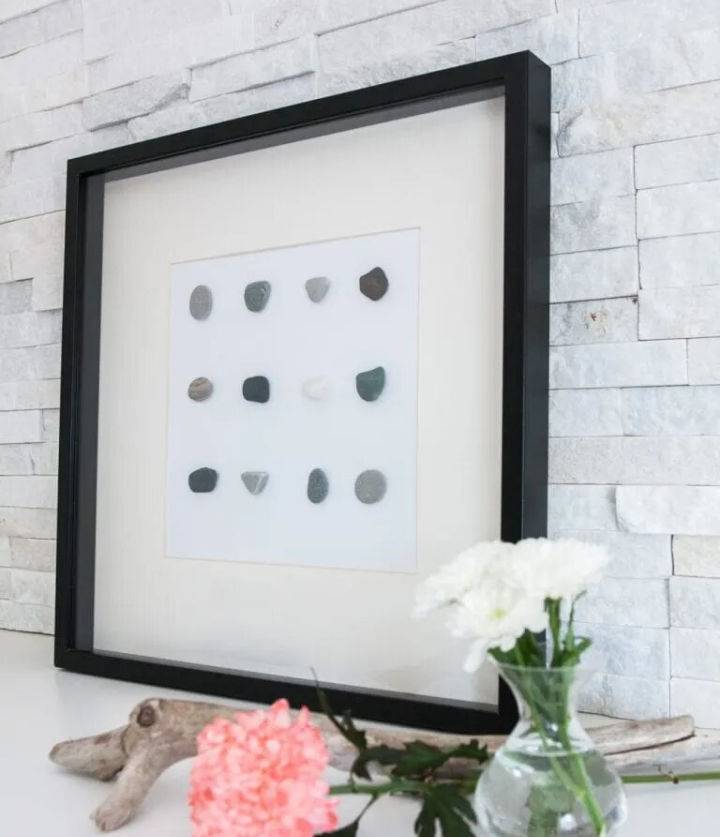
Refresh your home decor by crafting unique DIY wall art with beautiful beach stones— a perfect project for those looking to add a personal touch to their spaces without breaking the bank. Discover how you can turn a simple collection of stones into a modern piece of art by visiting Sustain My Craft Habit.
Their guide provides easy-to-follow instructions, ensuring your creation is both stylish and meaningful. Perfect for any room, this wall art project invites a piece of nature into your home, marrying simplicity with creativity.
14. Affordable Scrapbook Paper Wall Art
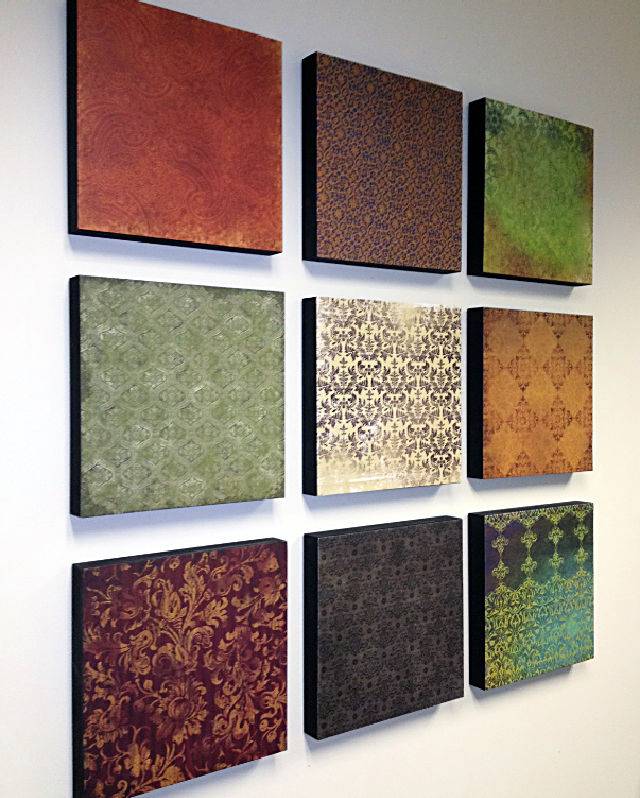
Refresh your walls with vibrant and unique art by transforming affordable scrapbook paper into stunning wall decor. Nomadic Decorator guides you through an easy, step-by-step process to make personalized art pieces.
With the right choice of scrapbook papers and simple materials, you can craft a colorful grid of patterns that adds life and creativity to any room. This DIY project not only saves you money but also lets you customize your space to match your style. Say goodbye to blank walls and hello to a splash of color and pattern with this fun and affordable DIY project.
15. Paper Quilling Artwork Design
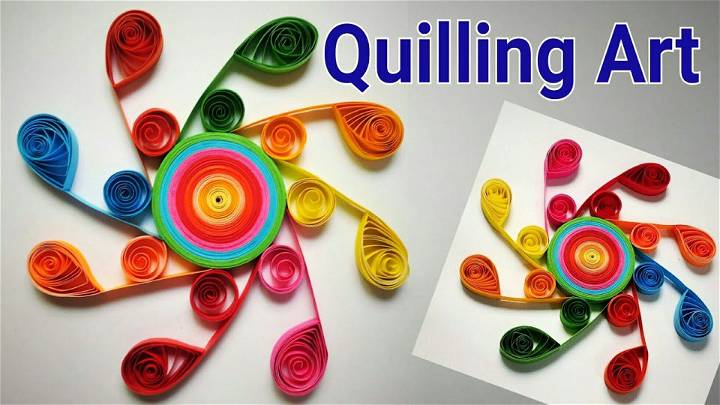
Discover how to make stunning quilling art with this easy-to-follow DIY guide. This instructive video walks you through making gorgeous paper quilling designs, perfect for greeting cards or personal projects. With clear, helpful instructions, you'll learn the basics of this timeless craft and start producing eye-catching artwork in no time. Perfect for crafters at any skill level, our tutorial ensures an engaging and rewarding experience. Click here to watch and begin your quilling journey: watch now.
Conclusion:
In wrapping up, our journey through 15 DIY wall art ideas and projects to make your own has hopefully sparked your imagination and given you the tools to transform your home into a personalized expression of your style. From mastering textured macrame art to making a vibrant faux watercolor landscape, this guide aims to equip you with the know-how to bring your vision to life. As you embark on your DIY wall art projects, remember that the true beauty lies in the personal touches and memories you make along the way. Let your walls tell your story, and let your creativity shine.


