Building a DIY washer-dryer pedestal has truly simplified my laundry routine. With minimal materials and a few tools, I transformed my laundry space into an efficient, elevated station. It was a weekend project and quite satisfying to complete. Following simple instructions saved me money and offered a customized solution that fits my space perfectly.
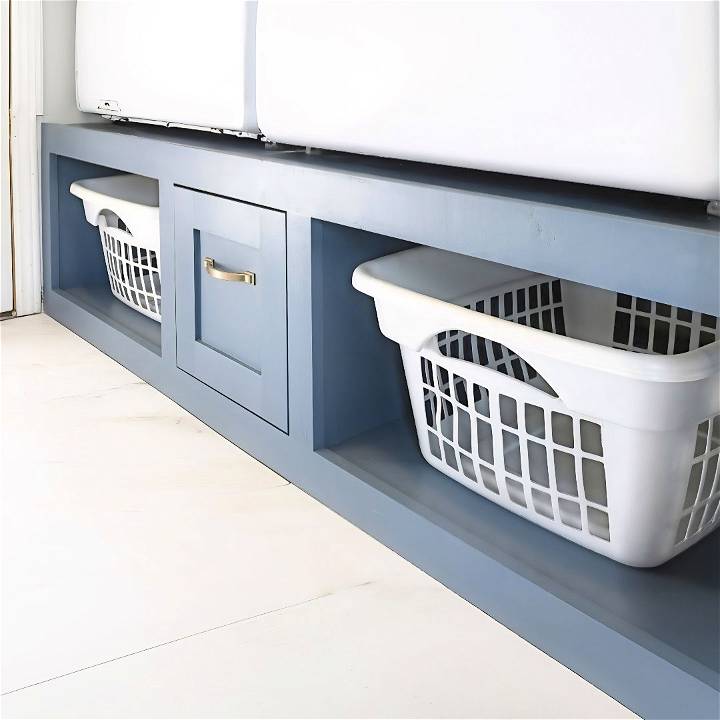
Building your own DIY laundry pedestal not only boosts functionality but also adds a personal touch. Painting it to match my decor made it even more rewarding. If you've been considering this, give it a try.
I'm here to share my experience so that these steps can help make your DIY washer-dryer pedestal project a breeze.
Materials Needed and Why
- 2x4s for the base: They provide a solid and durable frame that can support the heavy weight of the washer and dryer.
- Kreg Jig: Essential for making pocket holes that make the base strong and stable.
- Quarter-inch MDF or plywood: For cladding and making a smooth exterior. MDF is easy to paint and gives a nice finish.
- Three-quarter-inch plywood: For the top panel on which the washer and dryer sit, ensuring a sturdy platform.
- Pocket hole screws: To assemble the frame and attach the face frame securely.
- Glue: For additional bonding strength when assembling the drawer and face frame.
Step by Step Instructions
Learn how to build a DIY washer-dryer pedestal with these easy step-by-step instructions. Save space and add functionality to your laundry room.
Step 1: Building the Base
First, I cut all the 2x4s according to the dimensions I planned. The importance of making the base with 2x4s can't be overstressed, given the significant weight of the washer and dryer, especially when filled with water. I used a Kreg Jig to drill pocket holes at each end of the cut pieces, except for the ones that didn't require end-to-end joining. All assembly was done with two-and-a-half-inch pocket hole screws suitable for the 1.5-inch thick 2x4s.
Step 2: Adjusting for Laundry Baskets
One of my goals was to have space for laundry baskets under the pedestal. I measured my laundry baskets and left a 19-inch opening on each side of the pedestal for them. This required customization based on the basket size; hence, measure yours to adjust accordingly. Remember to account for the additional width added by the face frame when planning your openings.
Step 3: Adding the Face Frame
After assembling the base, I moved on to the face frame. To ensure a neat appearance and cover the edges of the MDF cladding, I built a face frame out of 1x3 boards, adjusting some pieces with a table saw to match the thickness of the combined 2x4 and quarter-inch cladding precisely. This step adds a polished look to the pedestal and helps in neatly defining the storage and basket areas.
Step 4: Cladding
Next, I cut and attached quarter-inch MDF panels to clad the base's interior where the laundry baskets would go. This step is crucial as it hides the 2x4 construction and gives the pedestal a sleek, finished look. If your pedestal is not going in a niche like mine, you'd also want to clad the exposed sides for a uniform appearance.
Step 5: Attaching the Top Panel
For the top panel where the washer and dryer would sit, I opted for three-quarter-inch plywood to ensure stability and durability. This panel was also cut to size and securely attached to the base. This layer is critical as it supports the heavy appliances and needs to withstand vibration and movement.
Step 6: Building the Drawer
The large drawer was the most exciting part for me. I cut pieces for the drawer, following dimensions that allowed it to fit within the pedestal's central section. The drawer was assembled with pocket holes and equipped with a half-inch bottom to support heavier items, such as bottles of detergent. I also made a simple front for the drawer using a router to build a slot for the panel and pocket holes to assemble the frame.
Step 7: Final Touches
After assembling all parts, it was time for sanding and painting. I chose a paint that matched my laundry room's color scheme, providing a cohesive look. The last step was to carefully measure and cut out notches for vent and plug access, a crucial consideration that shouldn't be overlooked.
Installation Tips
Installing the pedestal required a helping hand due to its size and weight. We carefully maneuvered it into place, taking into account the slightly narrower space at the bottom of the wall. Ensure you measure both the top and bottom spaces where your pedestal will fit to avoid any installation struggles.
Customization Ideas for Your DIY Washer Dryer Pedestal
Building a DIY washer-dryer pedestal not only adds functionality to your laundry space but also offers an opportunity to inject a bit of your personal style into the room. Here are some customization ideas that can help you tailor your pedestal to your preferences and the overall decor of your home.
- Choose Your Color Palette: Select a color that complements the walls and appliances in your laundry room. You can go for a classic white for a clean look, a bold black for a modern touch, or even a vibrant color to add some cheer. Use high-quality paint suitable for wood, and consider a semi-gloss finish for easy cleaning.
- Add Decorative Molding: For a more sophisticated look, consider adding decorative molding to the front and sides of your pedestal. This can give it a built-in, furniture-like appearance. You can find various styles of molding at your local hardware store.
- Incorporate Patterns or Designs: If you're feeling artistic, stencil a design or pattern onto the pedestal. Geometric shapes, floral patterns, or even a simple chevron can make your pedestal stand out. Use painter's tape to build sharp lines and edges.
- Functional Hardware: Install drawer pulls or handles that match the hardware in your home for a cohesive look. If you've added a drawer or cabinet to your pedestal, choose hardware that is not only stylish but also ergonomic.
- Top It Off with a Countertop: If you have a front-loading washer and dryer, consider adding a countertop on top of the pedestals. This provides a seamless surface for folding clothes and can be made from various materials like wood, laminate, or even stone, depending on your budget.
- Non-Slip Surface: To keep your appliances securely in place, apply a non-slip pad or rubber mat on the top surface of the pedestal. This will prevent any movement and reduce vibrations during the washer's spin cycle.
- Light It Up: Add some LED strip lights underneath or around your pedestal for better visibility and a modern touch. Choose lights with an adhesive backing for easy installation and ensure they are safe for use in high-moisture areas.
Incorporate these ideas to craft a functional pedestal that reflects your style. Ensure the design is practical and harmonizes with your laundry room.
Storage Solutions for Your DIY Washer Dryer Pedestal
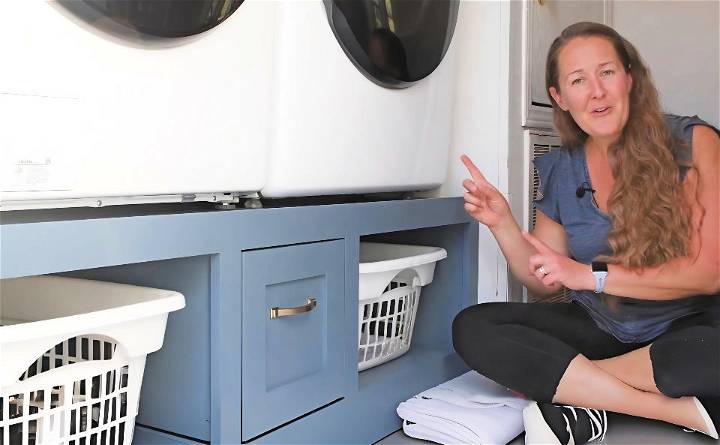
When designing a DIY washer-dryer pedestal, incorporating smart storage solutions can significantly enhance the functionality of your laundry area. Here's how you can maximize the utility of your pedestal with practical storage ideas:
- Built-In Laundry Baskets: Consider making dedicated spaces for laundry baskets within your pedestal. This can be as simple as leaving open spaces beneath the washer and dryer or installing pull-out drawers. Label each section for lights, darks, and delicates to streamline your laundry sorting process.
- Customizable Shelving: Add adjustable shelves on the sides or back of the pedestal. These shelves can hold laundry essentials like detergent, fabric softener, and stain removers. With adjustable shelving, you can modify the space as your storage needs change.
- Retractable Ironing Board: A fold-out ironing board can be a game-changer in a small laundry room. Design a retractable board that slides into the pedestal when not in use, saving space and keeping your laundry area clutter-free.
- Hooks and Hangers: Install hooks or a retractable clothesline on the side of the pedestal. This is perfect for air-drying delicate items or hanging clothes straight from the dryer to prevent wrinkles.
- Accessory Holders: Attach small bins or caddies to the pedestal's sides to store items like clothespins, hangers, and mesh bags for washing delicate items. This keeps these small but essential items within easy reach.
- Security Features: If you have young children or pets, consider adding safety locks to any drawers or compartments to prevent accidental access to laundry supplies.
- Ventilation: Ensure that any storage compartments have proper ventilation, especially if you're storing damp items like cleaning cloths or if the storage area is close to the dryer vent.
By integrating storage into your DIY washer-dryer pedestal, you'll make your laundry space more organized and efficient.
Troubleshooting Common Issues
When undertaking a DIY project like building a washer-dryer pedestal, you might encounter a few hiccups along the way. Here's a guide to troubleshooting some common issues you may face, presented in a clear and straightforward manner.
- Wobbly Pedestal: If your pedestal wobbles, check to ensure that all legs are even. Use a level to confirm the pedestal is flat. You can adjust the leg height or add shims under the legs to achieve stability.
- Drawer Misalignment: Drawers that don't close properly may be misaligned. Check the drawer slides and make sure they are installed evenly. Adjust the position of the slides or lubricate them if they stick.
- Wood Splitting: When screwing into wood, pre-drill holes to prevent splitting. Choose the correct screw length and drill bit size to match the thickness of your wood.
- Paint Peeling: Ensure the wood is properly sanded and cleaned before painting. Use a primer designed for wood, and allow adequate drying time between coats.
- Noisy Operation: If the pedestal amplifies the noise of the washer or dryer, add insulation. Use rubber mats or vibration pads under the appliances to dampen the sound.
- Moisture Damage: Protect your pedestal from moisture by sealing the wood with a waterproof sealant. Make sure there's adequate airflow around the appliances to prevent condensation.
- Difficulty in Leveling: Use adjustable feet on your pedestal to make leveling easier. This allows for minor adjustments to accommodate uneven floors.
- Scratches and Scuffs: Apply a durable top coat to protect the paint from scratches. For existing marks, use a touch-up pen that matches the paint color.
By anticipating issues and knowing how to address them, you'll be better prepared for challenges in your DIY project. Patience and attention to detail are key to success.
FAQs About DIY Washer Dryer Pedestal
Find answers to faqs about DIY washer and dryer pedestals. Learn how to build, benefits, dimensions, and essential tips for making your own pedestal.
A washer-dryer pedestal is a platform built to raise your washing machine and dryer off the ground. This is not only ergonomically beneficial, making it easier to load and unload your laundry without bending over, but it also provides extra storage space underneath.
Building your own pedestal can be a cost-effective alternative to buying one. It allows you to customize the size and look to fit your laundry room, and you can add features like drawers or shelves for additional storage.
Measure the combined length and width of your washer and dryer and add at least 2 inches to each measurement to determine the minimum size for your pedestal. This ensures a proper fit and stability for your appliances.
Yes, you can design your pedestal with storage in mind. Consider adding compartments for laundry baskets or drawers for supplies. This not only maximizes the functionality of your pedestal but also helps keep your laundry area organized.
To ensure your pedestal remains stable and secure, it's important to add sturdy legs and a solid base. Measure and cut four pieces of 2x4 lumber to the desired height for the legs. Attach these to the corners of your frame, making sure they are perpendicular to the ground. Use a level to check the evenness of the structure. For added stability, consider attaching the pedestal to the wall or floor. Always double-check that the pedestal is level before placing your appliances on top to prevent any movement or vibration during use.
Conclusion
Taking on a DIY washer-dryer pedestal project is easier than it seems. Give it a try and see the difference for yourself. This guide can help you get started, making your laundry days smoother and more enjoyable.


