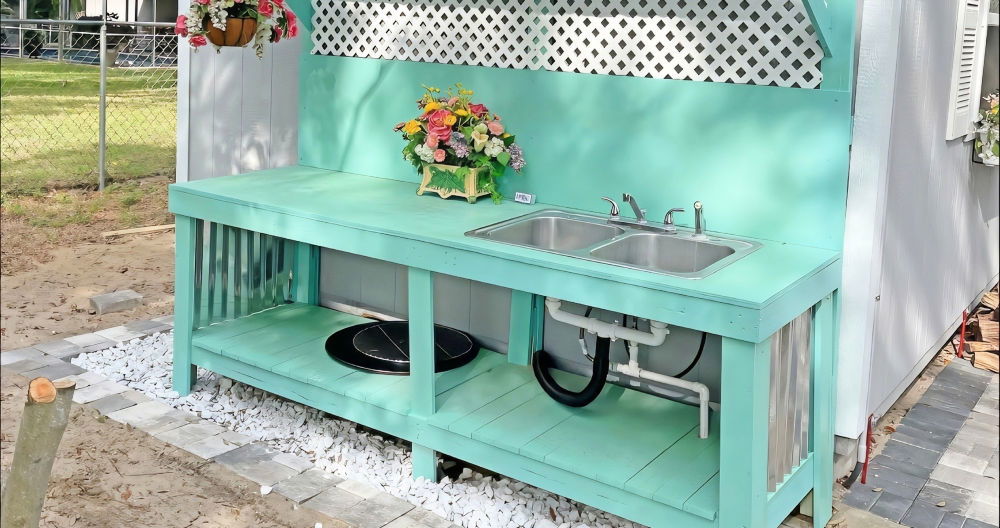
Building my own DIY washing machine was surprisingly simple and rewarding. I started with a plastic bucket, a plunger, and a few other basic items. Gathering the supplies was quick, and it felt empowering to know I wouldn't need to rely on electricity or a costly machine. This project also offered me a practical way to save water and energy.
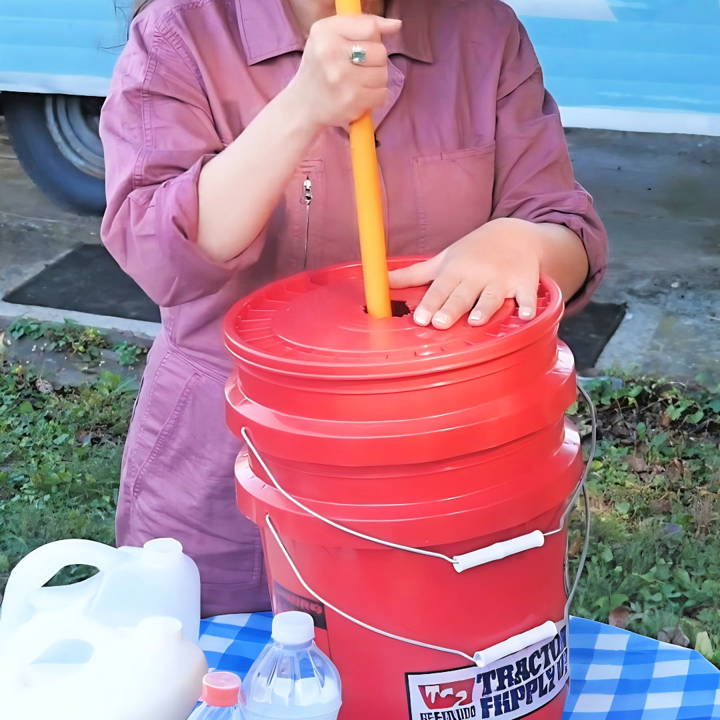
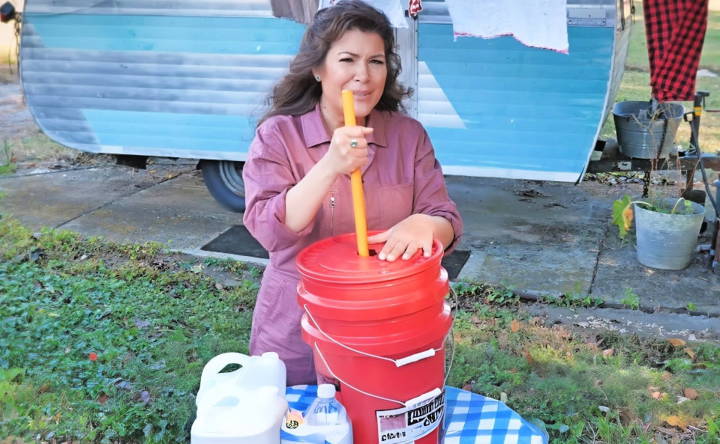
The process involved drilling a hole in the bucket lid for the plunger handle, which acts as the agitator. After placing clothes and soapy water in the bucket, I moved the plunger up and down to mimic a washing machine's action. It was amazing to see how well this simple setup cleaned my clothes.
I'm sharing this guide in the hope that it helps you, too.
Materials You'll Need and Why
- Two 5-gallon buckets: These buckets will form the core of your washing machine. Ensure they are without holes or cracks. I like using these because they're sturdy and can hold enough water and clothes for a wash.
- A brand new plunger: The plunger will act as your agitator to get the clothes clean. Emphasis on new here, as using an old one could introduce unwanted germs into your washing.
- A drill with a large drill bit: This is for making holes in one of the buckets, which will mimic the inside of a traditional washing machine drum, allowing water to move freely during the wash.
Step by Step Instructions
Learn how to build your own DIY washing machine with our step-by-step guide. Save money and customize your perfect laundry solution today!
Step 1: Preparing the Buckets
First, take one of your 5-gallon buckets. This will be your inner bucket, where the clothes and water will actually go. Using your charged drill, begin making holes throughout the bottom and sides of the bucket, starting about 6 inches down from the top and stopping about an inch above the bottom. This pattern ensures that enough water movement occurs to clean your clothes without compromising the bucket's structure.
Step 2: Assembling Your Washing Machine
Place your drilled bucket inside the undrilled one. These will nest together, with the bottom bucket catching the water that drains through the holes. This setup mimics the washing and draining phases of a traditional washing machine.
Step 3: Adding the Clothes and Detergent
Now it's time to load your DIY washing machine. Add your clothes to the inner bucket (the one with holes). I usually do small to medium loads to ensure there's enough room for agitation. Then add water. Hot water works best, but if you're off-grid, room temperature water will suffice. Just make sure to pour enough water to cover your clothes. Add your homemade or preferred laundry detergent. Remember, a little goes a long way!
Step 4: Washing Your Clothes
Here's where the new plunger comes into play. Use the plunger to agitate the water and clothes, mimicking the motion of an actual washing machine. Do this for about 5-10 minutes, depending on how dirty your clothes are. It's surprisingly effective and somewhat therapeutic!
Step 5: Rinsing and Drying
Once you're satisfied with the wash, lift the inner bucket to let the soapy water drain into the outer bucket. Discard this water responsibly. Refill with clean water for rinsing, repeating the agitation process to rinse the clothes. You might need to do this a couple of times to remove all the soap thoroughly.
After rinsing, wring the clothes out as best as you can and hang them to dry. I find this method not only easy but incredibly satisfying. There's something about washing your clothes by hand that makes you appreciate the effort that goes into it.
Tips for a Better Experience
- Use vinegar during the rinse cycle: Adding a cup of distilled white vinegar to your rinse water can act as a natural fabric softener and help remove any leftover soap residue. Plus, it doesn't leave any smell behind once the clothes are dry.
- Drill quality holes: Ensure the holes you drill are smooth and devoid of any sharp edges to prevent snagging your clothes.
Advanced DIY Modifications
When it comes to enhancing your DIY washing machine, advanced modifications can significantly improve its functionality and efficiency. Here's a detailed guide on how to make some sophisticated upgrades to your machine.
Water Recycling System
Discover the benefits of a water recycling system, learn why you should install it, and find out how to set it up for sustainable living.
Why Install It?
A water recycling system allows you to reuse water, conserving a precious resource and reducing your water bill. It's particularly useful in areas with water scarcity.
How to Set It Up:
- Collect the Drainage: Attach a hose to the machine's drain pipe to redirect used water into a storage tank.
- Filter the Water: Set up a simple filtration system using sand and charcoal to remove detergent and lint.
- Reuse: Connect the storage tank to the washing machine's water inlet, using a pump to ensure adequate water pressure.
Smart Home Integration
Unlock efficiency with smart home integration. Discover why and how to integrate smart devices seamlessly into your home today!
Why Integrate?
Connecting your washing machine to your smart home system can provide convenience, such as remote start and monitoring wash cycles through your smartphone.
How to Integrate:
- Choose a Smart Plug: Find a smart plug that is compatible with your home automation system.
- Connect to Wi-Fi: Ensure your smart plug is connected to your home Wi-Fi network.
- Set Up the App: Install the corresponding app on your smartphone and follow the setup instructions to control your washing machine remotely.
Solar Power Conversion
Discover the benefits of solar power conversion and learn how to switch to solar energy for a greener, cost-effective future. Find out why go solar today!
Why Go Solar?
Solar power is a renewable energy source that can power your washing machine, making it more eco-friendly and potentially off-grid.
How to Convert:
- Solar Panels: Install solar panels on your roof or in your yard where they can get maximum sunlight.
- Battery Storage: Use batteries to store solar energy for use when the sun isn't shining.
- Inverter: An inverter will convert the stored DC power into AC power suitable for your washing machine.
Vibration Reduction
Learn why vibration reduction is crucial and discover effective methods to minimize vibrations for smoother, more efficient operations.
Why Reduce Vibration?
Excessive vibration can be noisy and may cause wear and tear on your machine and the surfaces it rests on.
How to Reduce Vibration:
- Balance the Load: Always ensure your laundry is evenly distributed within the drum.
- Upgrade the Feet: Install anti-vibration pads or adjustable feet to absorb the movement.
- Secure the Machine: Make sure the washing machine is level and securely fastened to the floor or a stable base.
Upgrade your washing machine's performance with these advanced DIY modifications. Prioritize safety and consult a professional if unsure.
Upcycling and Repurposing
Upcycling and repurposing old washing machine parts is not only eco-friendly but also a creative way to reduce waste. Here's how you can give a new life to washing machine components:
Transforming the Drum into a Fire Pit
Discover the easy steps to transform a drum into a fire pit. Learn why this DIY project enhances outdoor living and provides a cozy ambiance.
Why Do This?
The drum of a washing machine is made of stainless steel, which can withstand high temperatures, making it perfect for a fire pit.
Steps:
- Clean the Drum: Remove any residues and clean the drum thoroughly.
- Secure the Base: Attach sturdy legs to the drum to keep it stable when in use.
- Safety First: Place the fire pit on a non-flammable surface and away from flammable materials.
Making a Unique Table
Learn how to make a unique table with our easy step-by-step guide. Discover the benefits and the necessary steps to make your custom furniture piece.
Why Make a Table?
The glass door of a front-loading washing machine can be turned into a stylish tabletop.
Steps:
- Choose the Base: Use the drum or another sturdy base to support the glass door.
- Assemble: Secure the glass on top of the base with strong adhesive or brackets.
- Finish: Sand any rough edges and add a sealant for a polished look.
Making a Planter
Discover why building a planter enhances your garden's beauty and follow step-by-step instructions to build your own unique planter effortlessly.
Why Build a Planter?
The drum's holes provide excellent drainage and airflow for plants.
Steps:
- Prepare the Drum: Clean the drum and apply rust-proof paint if desired.
- Add Soil: Fill the drum with potting soil suitable for the plants you wish to grow.
- Plant: Choose plants that thrive in well-drained soil and plant them in the drum.
Building a Compost Tumbler
Discover how to build a compost tumbler with our step-by-step guide. Save money, recycle waste, and make rich compost for your garden easily!
Why Build a Compost Tumbler?
A compost tumbler is a great way to recycle organic waste into nutrient-rich compost for your garden.
Steps:
- Modify the Drum: Drill additional holes for aeration if needed.
- Mount the Drum: Set up a frame to hold the drum and allow it to rotate.
- Use: Fill with organic waste and turn regularly to aid decomposition.
Repurpose your old washing machine to save money and help the environment. These fun, simple projects need basic tools. Always wear protective gear.
Troubleshooting Common Issues
If you're facing problems with your DIY washing machine, don't worry. Most issues have simple solutions that you can handle yourself. Here's a guide to help you fix some of the most common issues:
The Machine Won't Start
- Check the Power Supply: Make sure your machine is plugged in and the outlet is working. You can test the outlet by plugging it into another device.
The Machine Won't Spin
- Balance the Load: An unbalanced load can prevent the machine from spinning. Rearrange or remove some items to balance the load.
The Machine is Leaking
- Inspect Hoses and Seals: Look for any signs of wear or damage on the hoses and seals. Replace them if necessary to stop leaks.
The Machine is Noisy
- Level the Feet: A washing machine that's not level can become noisy. Adjust the feet to stabilize the machine.
The Machine Won't Drain
- Check the Drain Hose: A clogged drain hose can cause water to remain in the drum. Clean out any blockages to restore proper drainage.
The Machine Smells Bad
- Clean Regularly: Regular cleaning can prevent odors. Run an empty cycle with vinegar or use a washing machine cleaner.
The Door Won't Open
- Wait for the Lock: Some machines have a delay before the door unlocks. If it doesn't open after a few minutes, check for an error code.
Error Codes
- Consult the Manual: If your machine displays an error code, refer to the manual. It will tell you what the code means and how to fix it.
Follow these steps to solve common DIY washing machine issues. Always unplug before repairs and consult a professional if unsure.
FAQs About DIY Washing Machine
Explore our faqs about DIY washing machines for tips, troubleshooting, and efficient repair solutions. Save money and time with our expert advice!
It’s recommended to clean your washing machine monthly to prevent residue buildup and odors. If you have hard water or use your washer frequently, consider cleaning it every three months.
For a top-loader, follow these steps:
Set the washer to the largest load size and hottest water setting.
Add 2 cups of vinegar and let the machine fill up.
Pause the cycle and let it sit for an hour.
Run a second cycle with 1 cup of baking soda.
Leave the lid open until the washer dries completely.
To prevent mold and mildew:
Use the right amount of detergent; excess can leave residue.
Remove wet clothes promptly after the wash cycle.
Wipe down the gasket and door seals regularly.
Keep the door ajar after use to allow air circulation.
For hard water buildup:
Run a cycle with water softener or a mix of vinegar and water.
Use a commercial descaler if the buildup is severe.
Install a whole-house water softener to prevent future issues.
Yes, you can use essential oils:
Add a few drops to your detergent or fabric softener.
Use oils that are safe for laundry, like lavender or lemon.
Avoid oils that may stain clothes or degrade rubber seals.
Wrapping It Up
Building a home-made washing machine is easier than it seems. Start your own DIY washer today, and you'll see how efficient and eco-friendly it can be!


