Making a DIY wasp trap that works is easier than you might think. Last summer, we had a wasp problem in our backyard. So, my friend and I decided to make a homemade wasp trap. We used a simple plastic bottle, some sugar water, and a bit of dish soap. It was effective and didn't take much time or effort.
Such DIY projects are not only cost-effective but also keep your living space safe. Seeing those wasps get trapped one by one gave us a sense of accomplishment. By making your own DIY wasp trap, you will feel the same. I'm helping with this guide so you can take control of any wasp situation easily.
Go ahead and try it. You'll be amazed at how little effort it requires to make a difference.
Materials You Will Need
Let's start by gathering the materials. Each item plays a crucial role in making the wasp trap effective:
- Plastic Bottle (1-2 liters): The body of the trap.
- Scissors: To cut the bottle.
- Honey: Acts as the sweet bait.
- Sugar: Adds extra attraction for the wasps.
- Warm Water: Helps in dissolving sugar and honey to make the bait more effective.
Step by Step Instructions
Learn how to make a DIY wasp trap with our step-by-step guide. Easy instructions on making, assembling, and placing your trap for effective wasp control.
Step 1: Prepare Your Plastic Bottle
To begin with, take an empty plastic bottle. Make sure it is clean and dry to ensure the bait will be as attractive as possible.
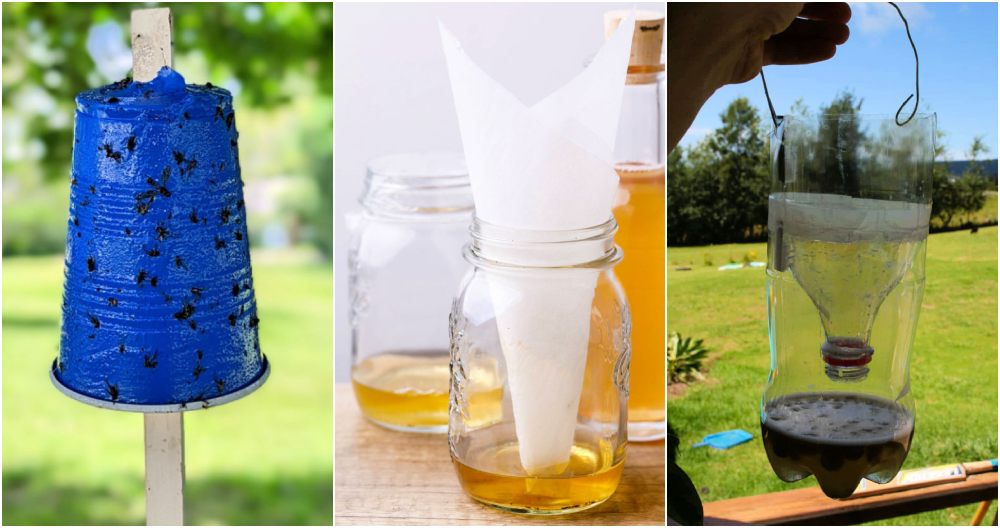
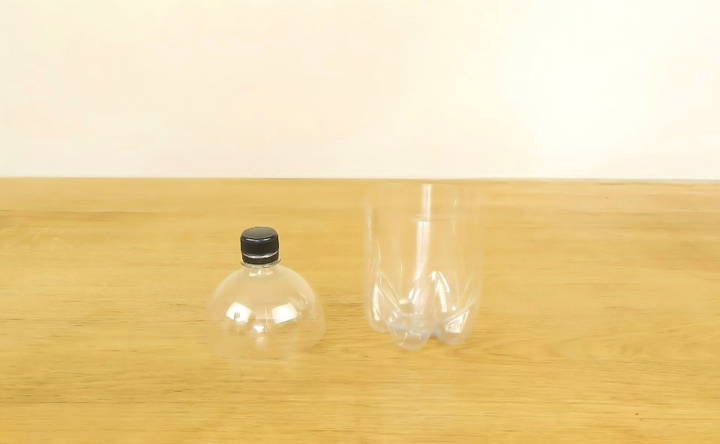
- Cut the Bottle: Using a pair of scissors, carefully cut the bottle in two. You should make this cut about one-third of the way down from the top. This means you will have a larger bottom part and a smaller top part.
Step 2: Make the Sweet Bait
The next step is preparing a sweet bait. Wasps are attracted to sweet substances, so honey and sugar make the ideal bait.
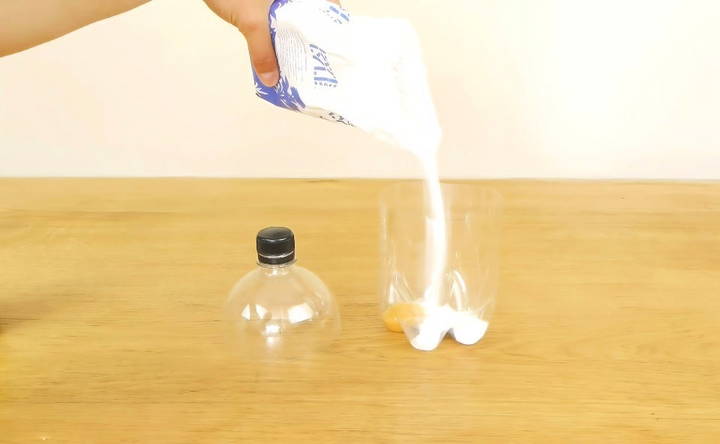
- Add Honey: Pour a spoonful of honey into the bottom part of the bottle.
- Sprinkle Sugar: Add a sprinkle of sugar into the bottle for added sweetness. Wasps cannot resist a sugary treat.
- Dilute with Warm Water: Add warm water to help dissolve the sugar and honey. This attracts the wasps more effectively.
- Stir gently to mix the ingredients, making a sweet syrupy liquid at the bottom of the bottle.
Step 3: Assemble the Trap
Now that your bait is ready, it's time to assemble the trap.
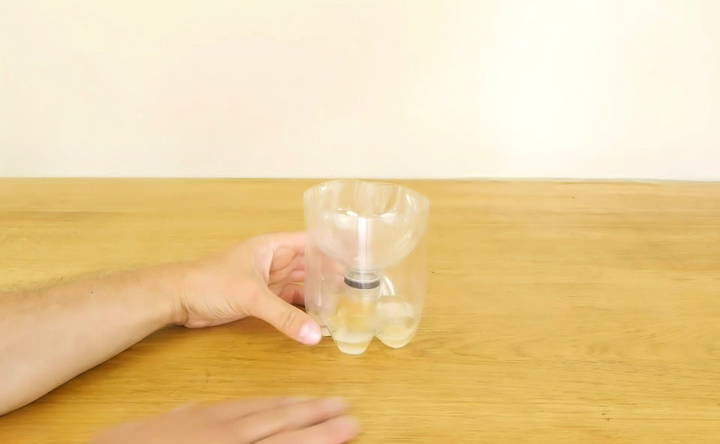
- Inverting the Top Part of the Bottle: Remove the lid from the smaller top portion of the bottle.
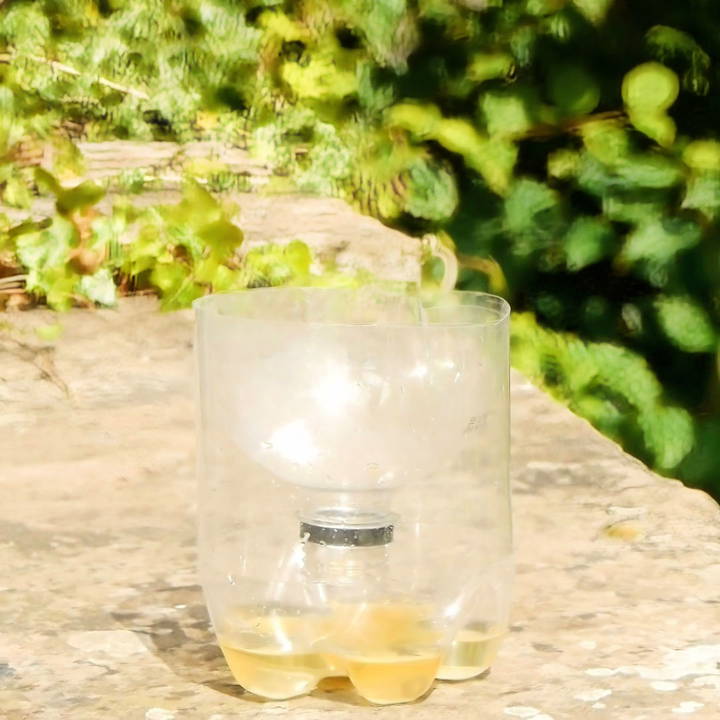
- Flip it upside down and insert it into the larger bottom portion. This should make a funnel leading into the bait.
- Secure the Trap: Make sure the inverted top part fits snugly and securely into the bottom part.
Step 4: Placement of the Trap
Where you place the trap is just as important as how you make it.
- Optimal Placement: Put the trap in an area where wasps are commonly seen.
- Ideal places include near your outdoor dining area, in the garden, or close to the house entrance.
- Positioning Tips: Make sure the trap is stable and won't tip over easily.
- Avoid placing the trap too close to where people are actively sitting as this could attract wasps closer before they enter the trap.
How It Works
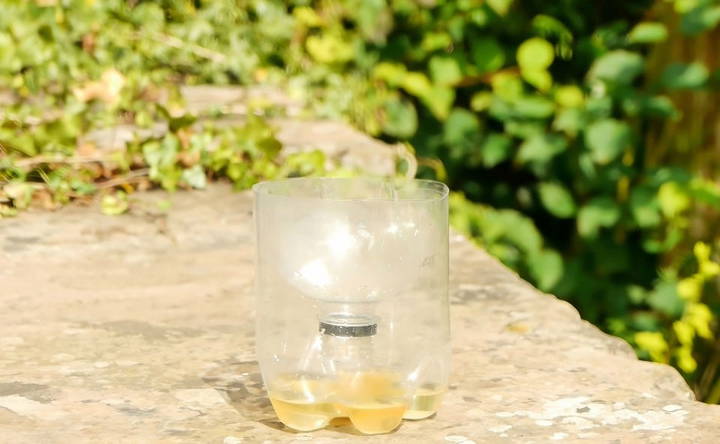
Wasps are lured by the sweet scent emanating from the trap. Once they crawl through the funnel's hole, they become trapped inside and are unable to figure out how to escape.
Additional Tips for Effectiveness
To make your wasp trap even more effective, here are some additional tips:
- Changing the Bait Regularly:
- Replace the bait every few days to keep it fresh and attractive for wasps.
- Check for Escaped Wasps:
- Make sure there are no gaps around the edges where wasps could escape.
- Multiple Traps:
- If you have a major wasp problem, consider making multiple traps and placing them at different strategic locations around your area.
Safety Measures
While making and setting up the wasp trap, always remember:
- Wear Protective Gear:
- If you're allergic or particularly sensitive to wasp stings, wear protective gloves and clothing while handling the trap.
- Handle with Care:
- Always approach the trap cautiously to avoid wasp stings.
Alternative Wasp Control Methods
When it comes to managing wasps in your environment, it's important to consider methods that are effective yet minimize harm to both wasps and other beneficial insects. Here are some alternative strategies to keep wasps at bay:
- Natural Repellents: Plants like spearmint, thyme, and eucalyptus can act as natural deterrents for wasps. Planting these around your home or outdoor areas can help keep wasps away.
- Decoy Nests: Wasps are territorial and unlikely to build a nest near another colony. Hanging a fake wasp nest can trick wasps into thinking the area is already claimed.
- Essential Oils: A mixture of clove, geranium, and lemongrass essential oils can be used as a spray to repel wasps without harming them.
- Physical Barriers: Installing fine mesh screens on windows and doors can prevent wasps from entering your home.
- Water Traps: A non-lethal water trap can be made by placing a dish of soapy water under a light at night. The light attracts the wasps, and they often fall into the water and drown.
- Manual Removal: If a nest is not too large, it can be carefully removed and relocated during the night when wasps are less active. This should only be done wearing protective clothing.
- Professional Help: For large or hard-to-reach nests, it's safest to call in professional pest control services.
Use these methods to manage wasp populations safely. Wasps are important for pollination and pest control, so it's better to deter than eliminate them.
FAQs About DIY Wasp Trap
Discover essential FAQs about DIY wasp traps: learn how to make and maintain effective traps to manage wasp problems safely and efficiently.
The bait for your wasp trap depends on the season. In early spring, wasps seek protein, so bacon grease or meat grease works well. During summer, they look for sugar, so a mixture of vinegar, water, and something sweet like jam (but not honey, to avoid attracting bees) is effective.
For best results, hang your wasp trap about four feet off the ground. Choose a location at least 10 yards away from areas where your family gathers, plays, or works. A tree limb or fence post can be ideal spots for hanging the trap.
Yes, DIY wasp traps can be reused. After disposing of the trapped wasps and cleaning the trap, you can refill it with fresh bait and reposition it. This makes it a sustainable and cost-effective solution for managing wasps around your home.
Homemade wasp traps can be just as effective as store-bought ones. They are easy to assemble and use household items, making them a convenient and low-cost option. With the right bait and placement, they can efficiently trap and drown wasps.
It's important to check your DIY wasp trap every few days to ensure it remains effective. Replace the bait as needed, especially after rain or if it has dried out. Regular maintenance also involves cleaning the trap to prevent odors and the potential spread of disease. If you notice a significant decrease in the number of wasps caught, it may be time to change the location of the trap.
Conclusion
Making a DIY wasp trap is an easy, cost-effective method to control wasp activity around your home. By following these simple steps, you can enjoy outdoor activities without the constant bother of wasps. The key is consistency and ensuring that the traps are set up correctly and attractively baited.


