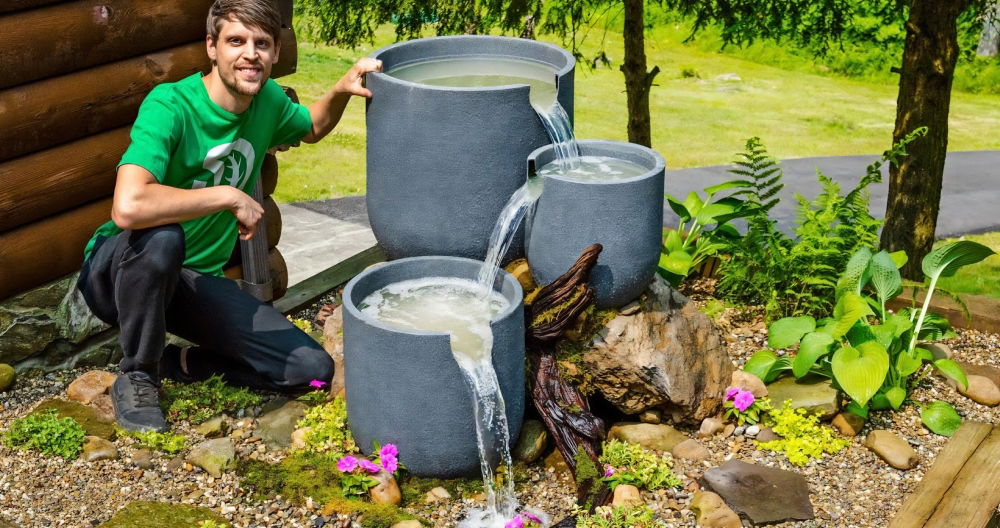
Building a DIY water feature can be a serene addition to any garden, providing a soothing atmosphere while showcasing your creativity. With a few simple materials and some basic tools, you can construct a homemade DIY water feature that enhances the beauty of your outdoor space. Whether it's a small fountain, a cascading waterfall, or a gentle pond, a water feature can become the focal point of your garden.
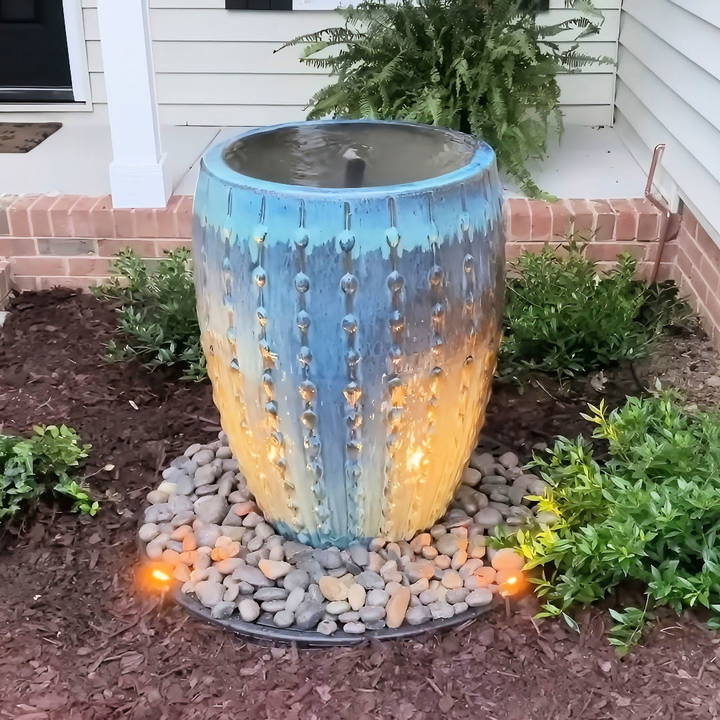
Starting your own DIY water feature project is easier than you might think. You'll need a container, a water pump, some tubing, and your choice of decorative elements like stones, plants, or sculptures. By following step-by-step instructions, you can quickly make a homemade DIY water feature that reflects your personal style.
Ready to get started? Continue exploring to discover more detailed tips and inspirations for your garden water feature.
Materials You'll Need
Before we dive into the steps, let's gather our materials. Each item plays a crucial role in the successful creation of our water feature.
- Large Pottery: This is your feature piece. Choose something sturdy and aesthetically pleasing.
- PVC Pipe and Fittings: These will allow the water to flow through your feature.
- Water Pump (e.g., FT 300 Fountain Tech): Essential for circulating water.
- Reservoir Basin (36 inches wide): Holds the water that recirculates through the feature.
- Silicone Sealant: Prevents water leaks.
- Masonry Bit: To drill holes in pottery if necessary.
- Level: Ensures everything is even.
- Sand, Gravel, or Crushed Rock: For leveling and stabilization.
- Dumbbell (or Hand Tamper): Compacts the soil.
- 2x4 Lumber (or any straight piece of wood): Assists with leveling.
Step by Step Instructions
Make a lovely DIY water feature with step-by-step instructions. Learn how to prepare, set up, level, and maintain your beautiful water feature.
Step 1: Prepare the Reservoir
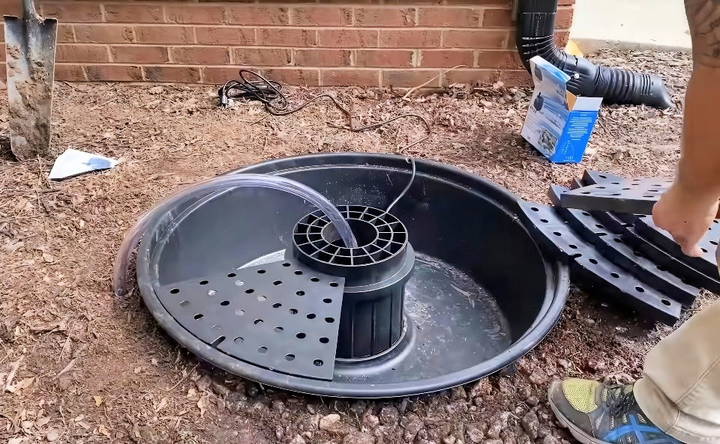
- Dig the Hole: Start by digging a hole to fit the size of your reservoir. Mine was 36 inches wide and about a foot deep.
- Level the Base: Use sand or gravel at the bottom of the hole to make a stable base. Compact it with a dumbbell if you don't have a hand tamper.
- Place the Reservoir: Insert your reservoir into the hole, ensuring it has a slight lip above ground to prevent contamination.
Step 2: Setting Up the Pottery
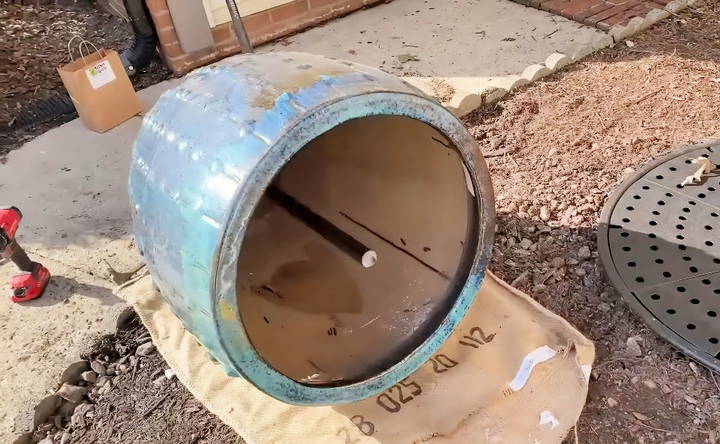
- Drill a Hole: If your pottery isn't pre-drilled, use a masonry bit to make a hole at the bottom for the PVC pipe.
- Add the PVC Pipe: Measure the required length of the PVC pipe and cut it. Insert it through the hole in the pottery.
- Seal with Silicone: Apply silicone sealant around the PVC pipe where it meets the pottery to ensure a watertight seal. Add extra sealant on the inside and outside of the pottery for added security.
- Install the Pump: Place your water pump in the reservoir. Connect the PVC pipe to the pump using the appropriate fittings.
Step 3: Leveling the Pottery
- Initial Positioning: Place the pottery on top of the reservoir and use the circles at the base as a guide to center it.
- Check Level: Rest a 2x4 across the top of the pottery and place a level on it. Adjust the pottery to ensure it's level in all directions.
- Fine-Tuning: If the pottery leans, use additional sand or small stones to level it further.
Step 4: Finishing Touches
- Add Water: Begin filling the pottery and the reservoir with water.
- Secure the PVC: If your PVC pipe feels unstable, you can add side supports to keep it straight.
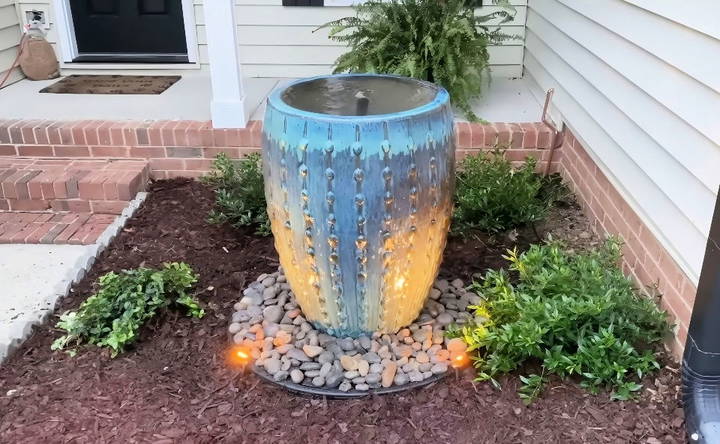
- Adjust Flow: Once the water level is adequate, turn on the pump and adjust the water flow as desired.
Maintenance and Tips
- Regular Cleaning: Periodically remove the top grates to clean any sediment buildup and maintain your pump.
- Use Water Additives: Invest in water feature liquid to prevent algae growth and keep mosquitoes at bay.
- Winter Care: Remove and store the pump during winter months to avoid freezing and damage.
Safety Precautions for DIY Water Features
Safety is paramount when making a DIY water feature. Here's a comprehensive guide to ensure you and your loved ones can enjoy your water feature without worry.
Before You Begin
- Check Local Regulations: Some areas have specific codes regarding water features. Ensure compliance to avoid legal issues.
- Call Before You Dig: Contact local utilities to mark underground lines before digging to prevent accidents.
During Construction
- Wear Protective Gear: Use gloves, goggles, and ear protection when working with tools and materials.
- Tool Safety: Ensure all electrical tools are suitable for outdoor use and have a ground-fault circuit interrupter (GFCI) to prevent electric shock.
Water and Electricity
- Electrical Components: All electrical installations should be performed by a qualified electrician. Waterproof and bury electrical lines at least 18 inches deep.
- Lighting: Use lights rated for underwater use and follow the manufacturer's instructions for installation.
Child and Pet Safety
- Supervision: Never leave children or pets unattended near the water feature.
- Depth and Design: Avoid steep sides and deep water if children or pets will be around. Consider a shallow stream or pondless waterfall.
Water Quality
- Stagnant Water: Keep the water moving to prevent mosquitoes and algae growth. A proper filtration system is essential.
- Chemicals: If you use chemicals to treat the water, store them safely and use according to the label.
Regular Maintenance
- Inspect Regularly: Check for wear and tear, especially in pumps and liners, to prevent leaks and failures.
- Winter Care: If you live in a cold climate, take steps to winterize your water feature to prevent damage from freezing.
By following these safety precautions, you'll make a serene and secure environment for everyone to enjoy. Safety first ensures the lasting enjoyment of your DIY water feature.
FAQs About DIY Water Feature
Discover the essential FAQs about DIY water features. Get expert answers to help you make a stunning and functional water feature at home.
Making a DIY water feature can be as simple as placing a Corten Steel Water Bowl in your garden for a modern look, or installing a solar-powered fountain for a more dynamic display. For those with a tight budget, a still water bowl can add depth to your outdoor space without the need for power. If you prefer the sound of moving water, consider a solar-powered water pump that creates a bubbling fountain.
The type of water feature you choose depends on the space you have. For smaller gardens, a slim, vertical fountain or wall-mounted feature might be best. If you have more room, you could create a multi-level water rill. Consider the overall aesthetic of your garden and how much maintenance you’re willing to undertake.
Yes, you can build a water feature that requires minimal upkeep. For example, a stone and gravel fountain doesn’t need a collection pond, reducing the need for cleaning. Using a gravel-filled reservoir for water recirculation can also help keep maintenance low.
Absolutely! You can opt for a DIY solar-powered water fountain which uses renewable energy to power the pump. This allows you to enjoy the benefits of a water feature while being environmentally conscious.
Safety is paramount when designing a DIY water feature, especially if children or pets are around. To make your water feature safe:
Choose a design that doesn't have deep water areas.
Install barriers or fencing if necessary to prevent unsupervised access.
Use a grid or mesh beneath the surface of larger features to prevent falls.
Avoid using toxic chemicals for cleaning or maintenance that could harm children or animals.
Regularly check for sharp edges or loose components that could cause injury.
Conclusion
Making a DIY water feature is a rewarding project that significantly enhances any outdoor space. The tranquil sound of flowing water is not just relaxing but also a beautiful focal point for your garden or patio.


