Building a DIY water pump can be a fun and rewarding project. I once took on the challenge of making a tiny water pump for my small garden. The process taught me a lot about how pumps work and what materials are needed. With a few simple tools and some patience, I was able to make a reliable pump that worked perfectly for watering plants.
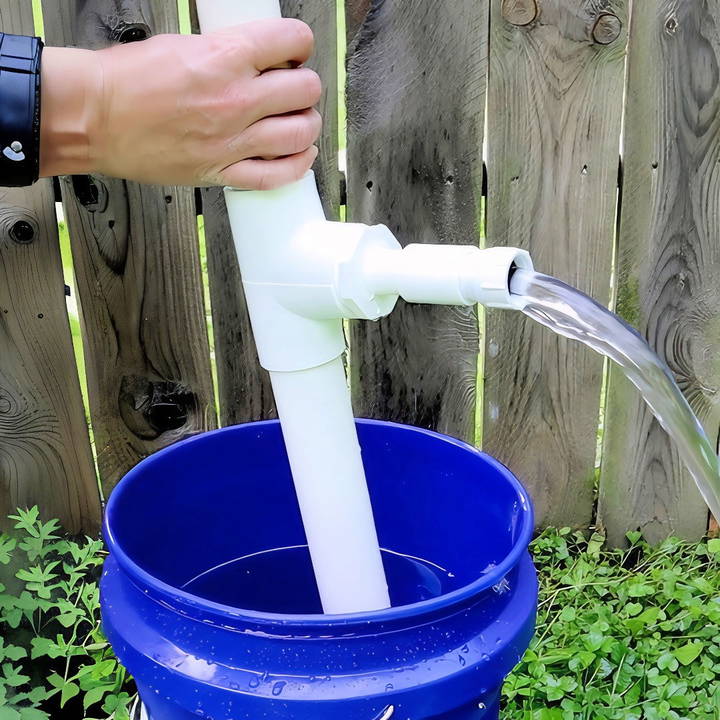
I'm here to guide you through the steps to make a tiny water pump that fits your needs. These steps will help you understand the basics and get started right away.
Materials You'll Need
Before diving into the process, let's talk about the materials required. Understanding why each part is used can give you a better grasp of the pump's functionality:
- PVC Pipes and Fittings: These form the main structure of the pump. I used 1.5-inch PVC for the body and ¾-inch PVC for the plunger. PVC is lightweight, durable, and resistant to corrosion, making it ideal for a water pump.
- Rubber Seal: This component, made from an old bicycle tire inner tube, acts as a check valve, ensuring water flows in one direction. This was the only part I purchased, costing me about six dollars.
- PVC Couplers and Tees: These connect various sections of the pipes together, forming the junctions and outlets required for the pump to function.
- Bolts and Nuts: These secure the rubber seal and other internal components, maintaining the integrity of the pump.
- Washers: Not just ordinary washers, but specific sizes that allow for the movement and restrict one-way flow in the pump.
- Hacksaw and Drill: Essential tools for cutting and drilling holes into PVC pipes and caps.
If you're resourceful like me, you might have most of these materials around your garage or workshop.
Step by Step Instructions
Learn how to build a DIY water pump with our step-by-step instructions. From constructing the housing to testing, get your project done right!
Step 1: Constructing the Pump Housing
The journey begins with making the main housing of the pump. This part involves the following steps:
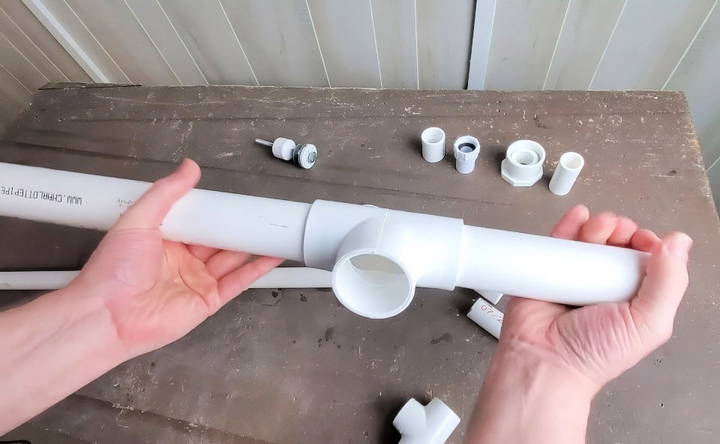
- Cutting PVC Pipes: Start with the 1.5-inch PVC pipe. I had a leftover piece about 18 inches long. Trim it if necessary, keeping the length in mind based on where you'll be using the pump.
- Making Flow Direction: Use a T-fitting at the top to direct the water flow outwards when pumped. Attach a coupler at the bottom to connect to your check valve setup.
The pump body is essentially a hollow tube that fills with water when you draw the plunger out and expels it when you push the plunger in.
Step 2: Building a Check Valve
The check valve is crucial for controlling water flow. It ensures water only enters from the bottom and exits through the side spout:
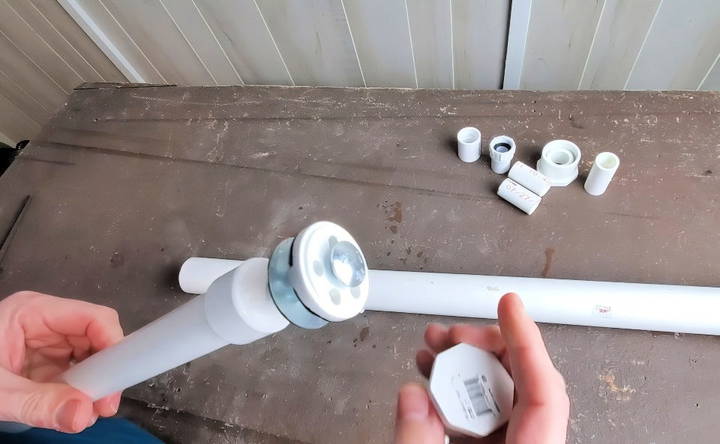
- Fabricating a Rubber Seal: From the inner tube, cut a circular piece and fix it with a bolt and nut through a drilled hole in a PVC plug.
- Assembling the Valve: Attach this plug to the coupler at the bottom of the housing. The valve functions by letting water in when the plunger is pulled up and preventing backflow when pushed down.
The rubber seal acts as a simple but effective check valve, allowing you to manipulate water flow without complex mechanics.
Step 3: Crafting the Plunger
Now, let's dive into the second critical component, the plunger, which will push and pull water through the pump:
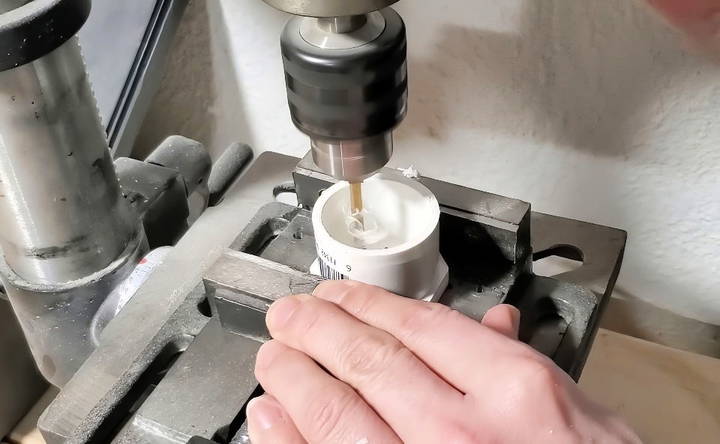
- Drilling the Holes: Drill holes into the end cap of a ¾-inch PVC pipe. These holes allow water movement during pumping actions.
- Attaching Fittings: Fabricate a component using PVC fittings that fit snugly inside the main housing but can move freely. Sand down any excess for a smooth fit.
The plunger essentially functions as a handle that allows you to make the necessary vacuum for pumping water.
Step 4: Assembling the Pump
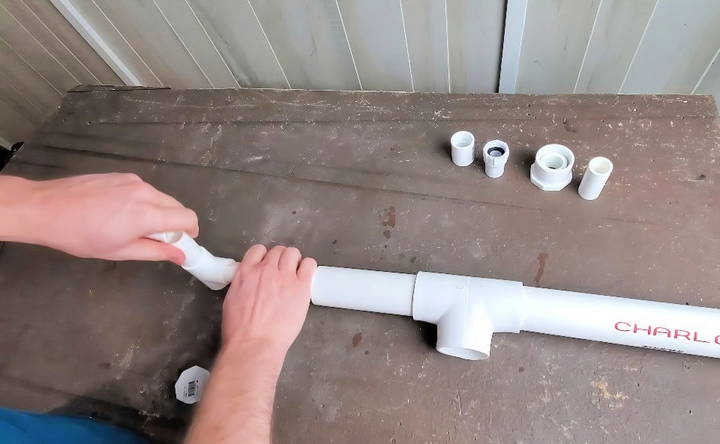
Once both the plunger and housing are prepared, putting them together is fairly straightforward:
- Insert the Plunger: Place the plunger inside the housing pipe. Ensure it fits snugly yet moves freely without obstruction.
- Attach a Handle: Use a T-fitting at the top of the plunger pipe to make a handle, which can make operating the pump more user-friendly.
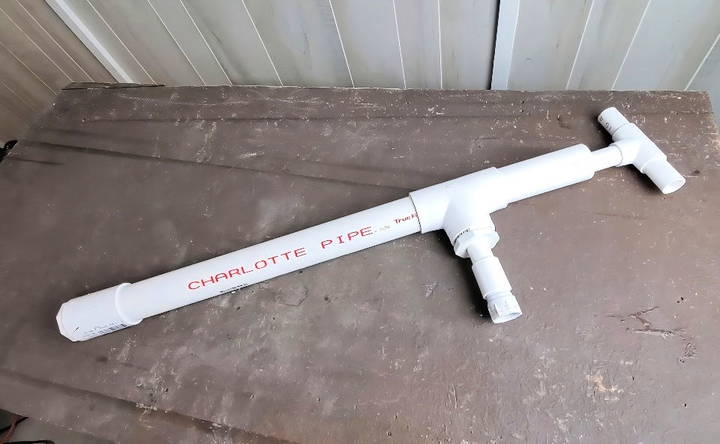
At this stage, your pump should be able to draw and expel water when the plunger is operated successfully.
Step 5: Testing the Pump
Testing your creation is crucial to make sure everything functions as intended:
- Priming the Pump: Insert the pump into a bucket of water and work the plunger up and down to fill the housing with water.
- Check for Leaks: Ensure that all joints and seals are tight, observing for leaks during operation.
- Observe the Flow: Take note of the water output through the side spout. If adjustments are needed, make them accordingly for smoother operation.
Testing validates all your hard work, and you'll likely feel a swell of satisfaction watching the fruits of your labor in action.
Troubleshooting Common Issues
Even with careful construction, your DIY water pump might encounter some problems. Here are common issues and how to fix them:
Pump Not Starting
If your pump doesn't start, check these areas:
- Power Supply: Ensure the pump is plugged in and the power switch is on. Check for blown fuses or tripped circuit breakers.
- Wiring: Inspect all connections for loose or damaged wires. Tighten or replace as needed.
- Motor: Listen for any unusual sounds. If the motor hums but doesn't start, it might be jammed. Turn off the power and manually rotate the motor shaft to free it.
Low Water Pressure
If the pump is running but the water pressure is low:
- Clogged Filter: Check the intake filter for debris. Clean or replace it if necessary.
- Leaks: Inspect all pipes and connections for leaks. Tighten or seal any loose joints.
- Impeller: The impeller might be worn or damaged. Turn off the power, open the pump housing, and inspect the impeller. Replace it if needed.
Pump Losing Prime
If the pump loses its prime and stops pumping water:
- Air Leaks: Check for air leaks in the suction line. Tighten all connections and ensure the suction line is submerged in water.
- Check Valve: Ensure the check valve is functioning properly. Clean or replace it if it's stuck or damaged.
- Water Level: Make sure the water source hasn't dropped below the pump's intake level.
Overheating
If the pump overheats and shuts down:
- Ventilation: Ensure the pump has adequate ventilation. Clear any obstructions around the pump.
- Duty Cycle: Check if the pump is running continuously. Allow it to cool down periodically.
- Motor Bearings: Worn bearings can cause overheating. Listen for grinding noises and replace the bearings if necessary.
Noisy Operation
If the pump is making unusual noises:
- Cavitation: This occurs when there's not enough water reaching the pump. Ensure the suction line is clear and the water source is adequate.
- Loose Parts: Check for any loose bolts or components. Tighten them to reduce noise.
- Vibration: Ensure the pump is mounted on a stable surface. Use vibration dampeners if needed.
Pump Running Continuously
If the pump runs continuously without shutting off:
- Pressure Switch: Check if the pressure switch is set correctly. Adjust the settings or replace the switch if it's faulty.
- Leaks: Inspect the system for leaks that might be causing the pump to run continuously. Fix any leaks found.
- Flow Rate: Ensure the pump's flow rate matches the system's requirements. An oversized pump might run continuously.
Maintain your DIY water pump to ensure smooth, efficient, and reliable operation. Regular care will extend its life.
Safety Precautions
When working on a DIY water pump project, safety should always be your top priority. Here are some essential safety precautions to follow:
Electrical Safety
- Turn Off Power: Always turn off the power supply before working on any electrical components. This prevents accidental shocks.
- Use Insulated Tools: Use tools with insulated handles to reduce the risk of electric shock.
- Check Wiring: Ensure all wiring is properly insulated and secured. Replace any damaged wires immediately.
Handling Tools
- Wear Protective Gear: Always wear safety goggles, gloves, and sturdy footwear to protect yourself from injuries.
- Use Tools Correctly: Follow the manufacturer's instructions for using tools. Never use a tool for a purpose it wasn't designed for.
- Keep Workspace Clean: A tidy workspace reduces the risk of accidents. Keep tools and materials organized.
Water Safety
- Avoid Wet Conditions: Do not work with electrical components in wet or damp conditions. Water and electricity are a dangerous combination.
- Check for Leaks: Regularly inspect the pump and connections for leaks. Fix any leaks immediately to prevent water damage and electrical hazards.
- Proper Ventilation: Ensure the pump is installed in a well-ventilated area to prevent overheating.
Chemical Safety
- Handle Chemicals Carefully: If your project involves chemicals (like sealants or lubricants), handle them with care. Follow the safety instructions on the labels.
- Wear a Mask: Use a mask to avoid inhaling fumes from chemicals.
- Store Chemicals Safely: Keep chemicals in a secure place, away from children and pets.
Mechanical Safety
- Secure Moving Parts: Ensure all moving parts are properly secured and covered to prevent injuries.
- Avoid Loose Clothing: Wear fitted clothing to avoid getting caught in moving parts.
- Turn Off Before Adjusting: Always turn off the pump before making any adjustments or repairs.
General Safety Tips
- Read the Manual: Always read the pump's manual and follow the manufacturer's safety guidelines.
- Have a First Aid Kit: Keep a first aid kit nearby in case of minor injuries.
- Work with a Partner: If possible, have someone assist you. They can help in case of an emergency.
By following these safety precautions, you can minimize risks and ensure a safe and successful DIY water pump project.
FAQs About DIY Water Pumps
Discover answers to common questions about DIY water pumps. Learn the basics, types, and troubleshooting tips for your homemade water pumping systems.
DIY water pumps can be used for various purposes, including:
Gardening: Watering plants and lawns.
Aquariums: Circulating water in fish tanks.
Small-scale irrigation: For home gardens or small farms.
Water features: Such as fountains or ponds.
Emergency water transfer: Moving water from one place to another during floods or leaks.
Safety is crucial when working with water and electricity. Here are some tips:
Insulate electrical connections: Use waterproof connectors and sealant.
Use a low-voltage power source: To reduce the risk of electric shock.
Wear protective gear: Such as gloves and safety glasses.
Test the pump in a controlled environment: Before using it in a real-world application.
If your DIY water pump isn’t working properly, try these troubleshooting tips:
Check the power source: Ensure the battery or power supply is functioning.
Inspect the impeller: Make sure it is not clogged or damaged.
Verify the connections: Ensure all pipes and fittings are secure and leak-free.
Test the motor: Check if the motor is running smoothly and not overheating.
To improve the efficiency of your DIY water pump, consider these tips:
Optimize the impeller design: Ensure the impeller blades are well-shaped and balanced to reduce resistance and increase water flow.
Use a more powerful motor: A higher wattage motor can pump water more effectively.
Reduce friction: Use smooth, clean pipes and fittings to minimize friction losses.
Seal all connections properly: Prevent leaks that can reduce the pump's efficiency.
Regular maintenance: Clean the pump and check for wear and tear regularly.
Using a DIY water pump for drinking water is possible, but it requires extra precautions:
Use food-grade materials: Ensure all components that come into contact with water are safe for drinking.
Avoid contamination: Keep the pump and water source clean to prevent bacterial growth.
Regularly sanitize the pump: Clean and disinfect the pump parts regularly.
Test the water quality: Periodically test the water to ensure it remains safe for consumption.
Insights and Tips
- Be Resourceful: Let available parts guide your build. The dimensional constraints should derive from what you have on hand.
- Precision Isn't Necessary: Minor imperfections, like uneven gasket cuts, typically don't hinder the pump's effectiveness.
- Keep Spare Parts Handy: Future adjustments might require spare parts, so keep extras in your toolbox.
In conclusion, Making a DIY water pump can be simple and educational. By following these steps, you'll have a functioning pump and learn a lot along the way!


