Building a DIY water tower is a practical, eco-friendly project that allows you to save and utilize rainwater effectively. This guide will provide a detailed process to help you build a water tower from reclaimed materials, like scrap wood and repurposed rain barrels. With this water tower, you can collect rainwater for gardening, cleaning, and other outdoor tasks, making it an ideal solution for areas without direct water access. Let's dive in!
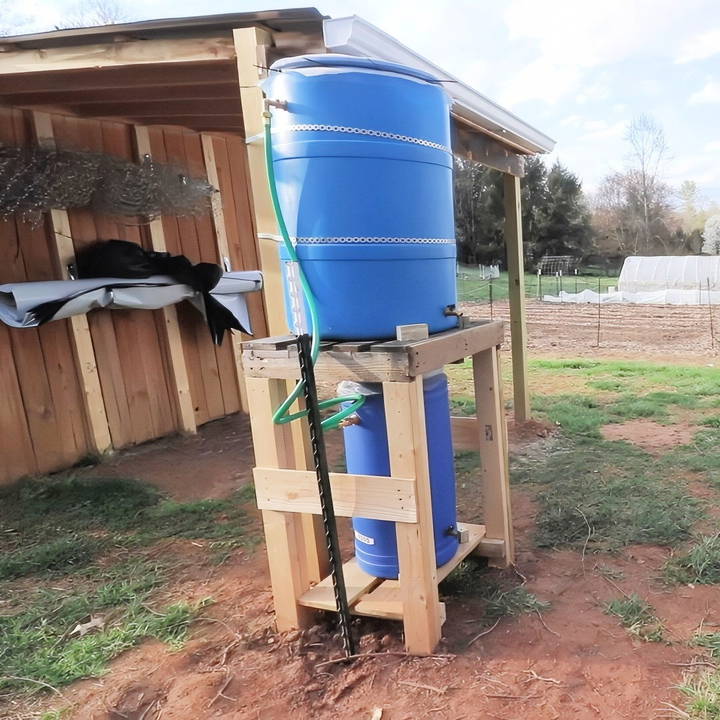
Why Build a DIY Water Tower?
Collecting rainwater is a great way to conserve resources, especially if you live in an area without convenient access to water sources. A DIY water tower, which relies on gravity for water flow, can provide an efficient solution for anyone looking to use natural rainfall for practical purposes like watering a garden, cleaning tools, or providing water for animals. This DIY project can also be cost-effective since it uses scrap materials, making it budget-friendly and sustainable.
Materials Needed
This project primarily uses materials that are either free or inexpensive. Below is a comprehensive list of items you'll need:
- Two 55-gallon barrels: Preferably recycled, as they're cost-effective and eco-friendly. Check with local restaurants, farms, or food processing plants for used barrels.
- Wooden Pallet: Serves as the primary base. The pallet should be sturdy enough to hold the weight of two full barrels.
- Scrap 2x4 lumber: Used to reinforce and stabilize the structure.
- Spigot: For controlled water release.
- Hose adapter: Connects the water tower to a hose for easy access.
- Window screen: Acts as a filter to prevent debris from entering the barrels.
- Zip ties: Used to secure the screen over barrel openings.
- Metal hanger straps: For extra structural support.
- T-posts (optional): Added support to stabilize the tower.
Step by Step Instructions
Learn how to build a DIY water tower with step-by-step guidance, from base setup to connecting it to your rain gutter system.
1. Setting Up the Base
Start with a sturdy pallet. This serves as the foundation for the water tower, supporting the weight of both barrels. To ensure stability, select a pallet that is in good condition, ideally one made from hardwood for extra durability. If the ground is uneven, consider leveling it by digging a small area and filling it with gravel or compacted dirt.
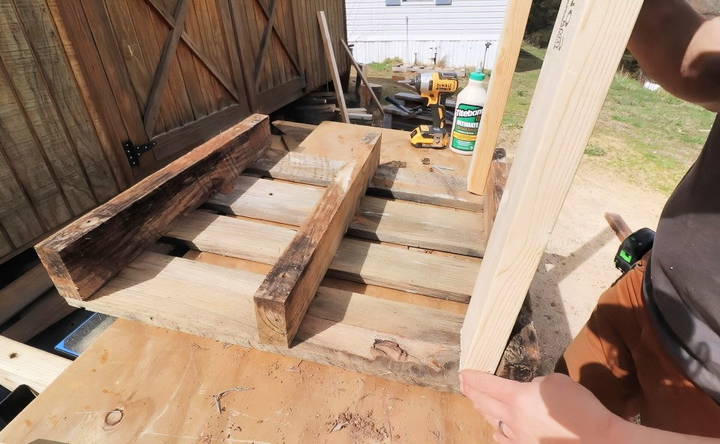
2. Preparing the Pallet and Support Structure
- Modify the Pallet: Break down and rearrange the wood on the pallet if it's not the ideal shape or size for the barrels. Reinforce it with additional scrap 2x4s for extra strength, as each barrel will hold about 400 pounds of water when full.
- Attach Legs: Use 2x4 lumber for the legs of the tower. Attach these securely to the pallet, doubling up on each leg for added strength, as the tower will be under significant weight.
3. Positioning the Water Tower
Locate an area close to a rain gutter to capture the maximum amount of rainwater. The tower's height should allow it to sit just below the gutter's downspout, ensuring easy collection. Additionally, make sure the site allows the barrels to be elevated enough for gravity-fed water flow.
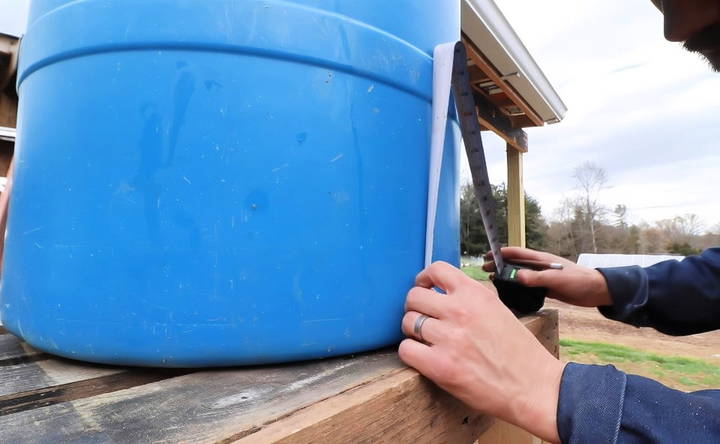
4. Adding the Water Barrels
Learn how to prepare and connect water barrels effectively with our guide on overflow management and hose connections for optimal use.
Barrel Preparation
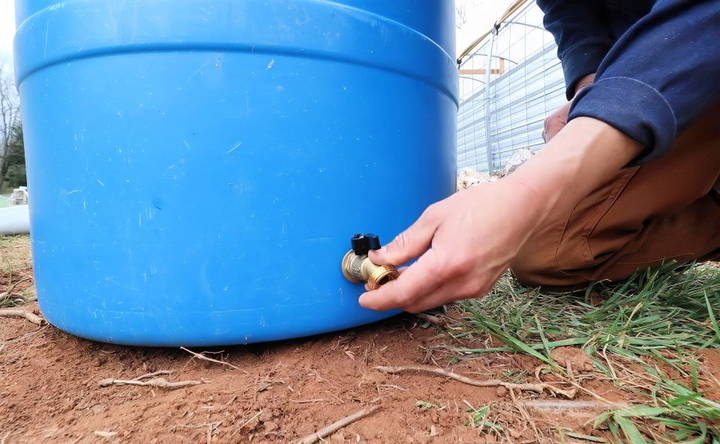
- Install the Spigot: Drill a hole near the base of each barrel for the spigot. Use a hole saw bit to make a hole large enough for the spigot's threading, ideally about 2.5 inches from the bottom.
- Fit the Spigot: Insert the spigot and secure it from the inside. Make sure it's watertight by adding a washer or sealant if needed.
Overflow and Hose Connection
- Drill an Overflow Hole: This should be near the top of each barrel. Connect an elbow fitting to this hole to direct overflow water to the second barrel or another location.
- Attach a Hose Adapter: This adapter will allow you to connect a hose to the water tower, providing access to stored water for various uses.
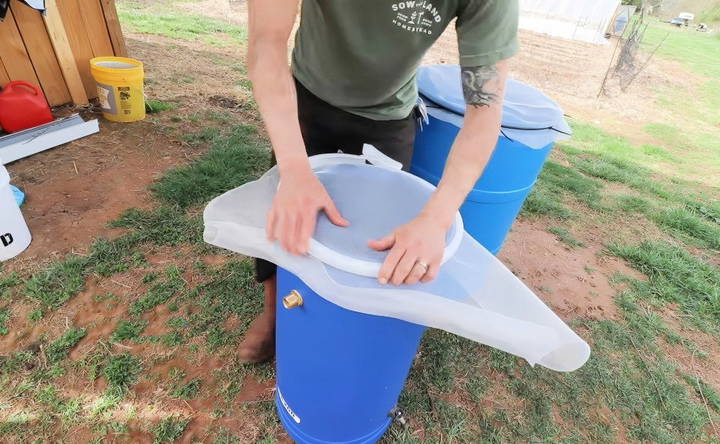
5. Building a Filtered Cover
Rainwater collection systems require filtration to keep leaves, dirt, and insects out. Here's how to build an effective screen for each barrel:
- Use Window Screen Material: Cut a piece of window screen large enough to cover the barrel opening.
- Secure with Zip Ties: Place the screen over the barrel top and attach it securely with zip ties. This builds a barrier that filters debris while allowing rainwater to flow in freely.
If your barrel has a locking lid, use it in addition to the screen for extra protection.
6. Connecting to the Rain Gutter
To divert water from your gutter to the barrel:
- Install a Rain Diverter or Use an Adapter: Attach a standard gutter diverter to your rain gutter or add an adapter that fits a hose leading to the barrel.
- Secure the Hose: Connect a spare hose from the diverter or gutter outlet directly into the barrel. Make sure the hose sits tightly to prevent water from leaking out.
7. Stabilizing the Structure
To ensure the tower stays upright, particularly in high winds or when fully loaded, you may want to add extra supports:
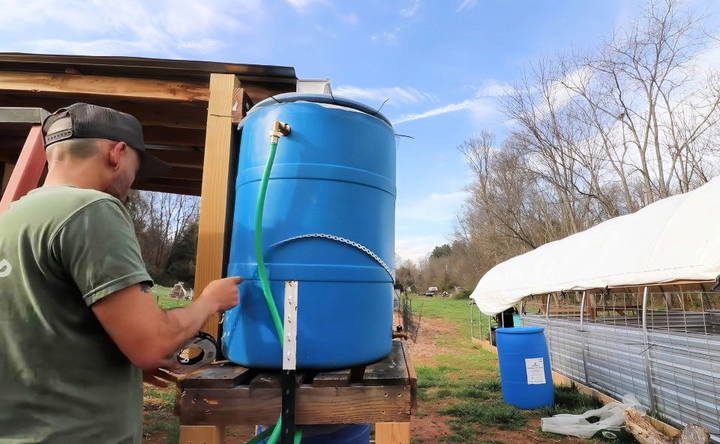
- Attach Metal Hanger Straps: Wrap these straps around key points on the barrels and secure them to the wooden structure. This provides additional strength and reduces movement.
- Use T-Posts for Extra Stability: Drive T-posts into the ground around the water tower and connect them to the structure with screws or straps for added stability.
8. Testing and Adjusting
Once your DIY water tower is assembled, it's time to test it:
- Fill the Barrels: Pour a small amount of water in to ensure there are no leaks at the spigot or overflow connections.
- Check Stability: Confirm that the structure holds up well under weight and that the water flows smoothly through the spigot.
- Adjust if Necessary: If you notice any instability, reinforce the legs or add additional support where needed.
Tips for Maximizing Your DIY Water Tower
- Regularly Clean the Screen and Spigot: To keep your water flow clear, check the screen and spigot for debris regularly.
- Consider Adding a Second Barrel: If one barrel doesn't meet your water needs, expand the system by connecting a second barrel to the overflow outlet.
- Use Eco-Friendly Materials: Whenever possible, use reclaimed or natural materials to keep the project environmentally friendly.
- Store Water Safely: Ensure the water tower is not exposed to direct sunlight for long periods to prevent algae growth. Alternatively, treat the water with safe additives if you plan to use it for extended periods.
Benefits of Your DIY Water Tower
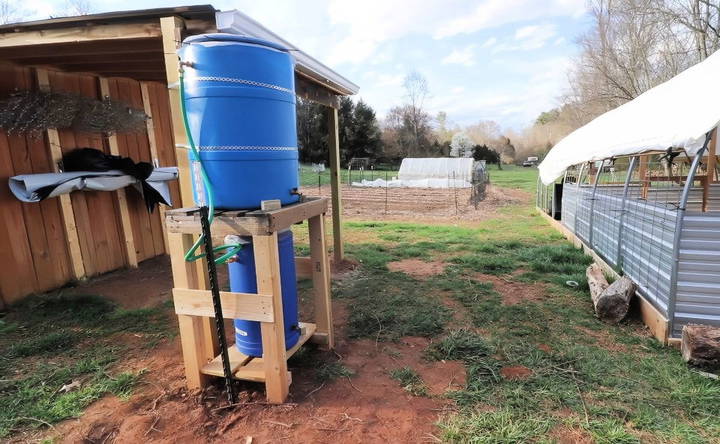
- Cost Savings: By using scrap wood, repurposed barrels, and minimal purchased parts, this project is both budget-friendly and effective.
- Water Conservation: Collecting rainwater reduces dependency on municipal water and promotes sustainable water use.
- Accessibility: The gravity-fed design means no need for a pump, making it accessible and easy to use.
Conclusion
Building a DIY water tower is a rewarding project that brings many benefits to your home and garden. This sustainable water system, built from scrap materials, is easy on the wallet and environmentally friendly. By following this guide, you'll have a reliable rainwater collection system that supports your garden, conserves water, and stands the test of time. Whether you're a DIY enthusiast or just looking to make a difference in your water use, this water tower is a great addition to any backyard.
Take pride in knowing you're making a positive impact on the environment—and saving some money in the process!
FAQs About DIY Water Tower
Discover essential FAQs about building a DIY water tower, covering setup, materials, and maintenance tips for efficient water storage.
It's recommended to use food-grade barrels to avoid contamination, especially if you plan to use the water for gardening or drinking (with filtration).
The elevation depends on your needs. Higher placements improve water flow for gravity-fed systems. Around 3-4 feet high is usually sufficient for garden watering.
You can use other materials like cinder blocks or purchase affordable lumber if scrap wood isn’t available. Just ensure the structure is stable and can handle the water weight.
Regulations on rainwater collection vary. Check local guidelines to ensure compliance, especially if you plan to use collected water for drinking.
You can often find used food-grade barrels at local restaurants, breweries, or farms. When calling, ask for “food-grade barrels” as they are safe for water storage. Look specifically for those used to store ingredients like vinegar or syrup, as they’re typically easier to clean.
For an effective overflow system, you’ll need an elbow fitting attached to an upper hole in each barrel. This directs excess water into another barrel or a safe outlet, preventing overflows that could destabilize your structure.
Yes, mosquito larvae can enter even through screened openings. To prevent this, use a fine mesh and consider adding natural mosquito deterrents like mosquito dunks, which are safe for water you plan to use on plants.
Yes, placing concrete blocks or pavers under the legs can prevent them from sinking into the ground, adding stability and prolonging the lifespan of the structure by reducing moisture exposure to the wood.
Check seals and fittings periodically to ensure they're watertight. Cleaning the barrels and filter screen regularly also prevents blockages and keeps water flow steady. Draining and cleaning the barrels fully at least once per season can help maintain water quality.
Yes, adding glue to the joints, in addition to screws, builds a stronger and longer-lasting structure by reinforcing connections that may loosen over time.
To increase water pressure, make sure the tower height is adequate. Placing the water spigot on the lower barrel also helps, as the additional water weight from above can increase flow rate naturally.


