In a world where we're constantly looking for sustainable options, I've discovered a great way to make DIY reusable wax strips at home. The best part? They're completely zero waste, cost-effective, and super simple to make. I'm excited to share these DIY wax strips with you, which only require a few materials and a little bit of time.
Why Make Your Own Wax Strips?
Hair removal can often come with a lot of waste—single-use wax strips, plastic packaging, and excess materials. Making reusable strips not only reduces waste but also saves you money in the long run. Store-bought wax strips are convenient but can quickly add up in cost. By making your own, you're getting a sustainable alternative that you can use repeatedly. Plus, you can customize them to the perfect size for your needs, which makes the process more efficient.
What You'll Need to Make the Strips
The key material for making these wax strips is cotton fabric. Based on my own experience, muslin fabric works wonders, but there are other options that can work just as well, like old cotton t-shirts or denim. Here's a breakdown of what you need:
- Muslin Fabric (or other cotton material): This is my go-to choice because it's sturdy and can be reused multiple times. I usually buy plain, unbleached muslin, which you can find for as little as $1 per yard. However, any cotton fabric will work as long as it isn't stretchy. The stretch in fabrics like jersey makes them too flimsy for waxing purposes.
- Scissors: A good pair of fabric scissors will help you cut your strips cleanly and efficiently.
- Ruler/Measuring Tape: To make sure your strips are the right size, you'll need a ruler or measuring tape to measure out your cuts.
- Iron (optional): Ironing the strips before using them helps to smooth out any wrinkles or puckering in the fabric, making for a cleaner waxing experience.
Step by Step Instructions
Learn how to make and use custom wax strips with sugar wax at home with our easy, step-by-step instructions. Save money and time!
Step-by-Step: Cutting the Fabric
- Select Your Fabric: I typically head to my local fabric store and grab about a quarter of a yard of muslin, which costs next to nothing and will last a long time. If you want to get creative, you can choose patterned fabric, but I prefer plain cotton for its simplicity.
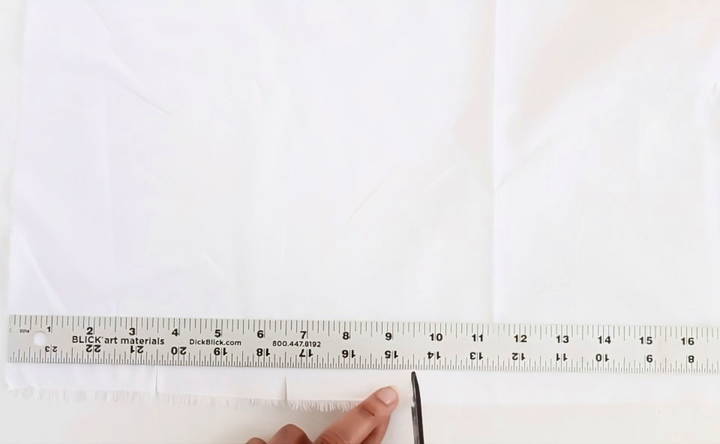
- Cut Off the Selvage: When you purchase fabric, it often comes with a selvage edge that you'll want to remove before cutting. The selvage is the tightly woven edge of the fabric, and it doesn't work well for waxing strips because it doesn't fray the same way the rest of the fabric does. Once this is trimmed away, your fabric is ready to be cut into strips.
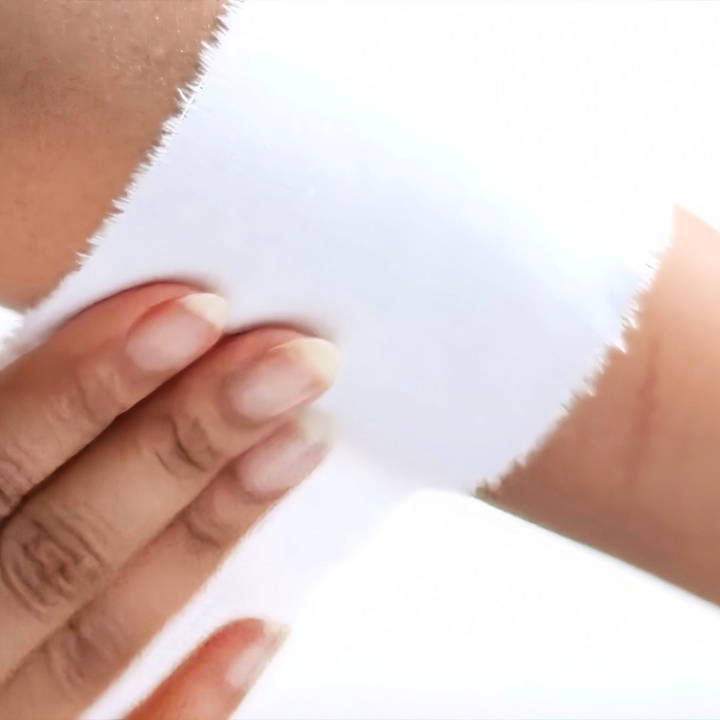
- Snip and Rip: A great trick I've learned is to snip into the fabric at your desired width and then rip the rest of the way. This works particularly well with cotton fabrics, and it ensures that your strips are cut along the grain, meaning they'll hold up better during waxing. The standard width for strips is about 3 inches, but feel free to adjust this to fit your personal preference.
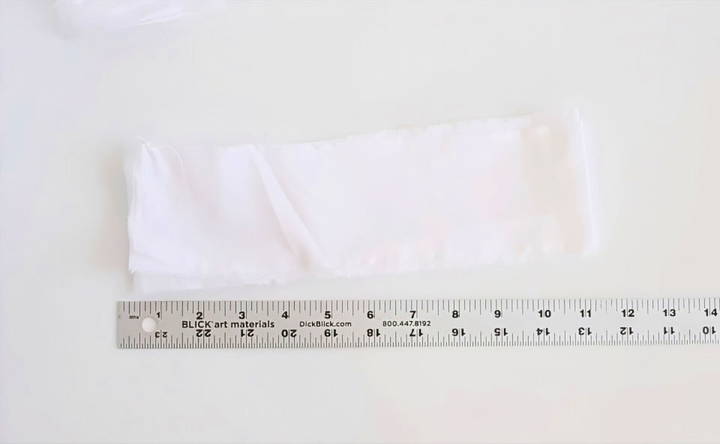
- Cut to Length: The beauty of DIY is that you can customize these strips to your needs. I typically cut my strips about 9 inches long, but if you prefer shorter strips for areas like your upper lip or eyebrows, you can make smaller cuts. Keep any leftover pieces, as these are perfect for smaller areas.
- Trim the Frays: After cutting, you'll notice some frayed edges—this is normal! You can trim away the loose threads for a cleaner look, but don't worry if the edges are not perfectly smooth. It doesn't affect how well they work.
Customizing Your Strips
One of the best parts of making your own wax strips is that they are completely customizable. You can make strips in different sizes depending on the area you're waxing. I like to make a few smaller strips to use on my upper lip and eyebrows, while longer strips are perfect for legs or arms.
- Another tip: If you have any leftover fabric scraps from your main cuts, don't throw them away! They can be repurposed into smaller strips for more delicate areas.
Prepping the Fabric for Use
Once your strips are cut, it's a good idea to iron them. I've found that ironing the fabric makes the strips easier to work with, and they adhere to the wax better. A quick steam can smooth out any wrinkles or puckering that may have happened during the cutting process.
If you don't have an iron handy, it's not a dealbreaker—you can still use the strips, but they might not lay as flat when applying the wax.
Using the Strips with Sugar Wax
Now that your strips are ready, you'll need wax. I'm a big fan of using homemade sugar wax, which is gentle on the skin and super easy to make. I've maked an entire playlist of tutorials on how to make and use sugar wax, but for now, here's a quick breakdown:
- Make the Wax: The basic ingredients are sugar, lemon juice, and water. Heat them together until the mixture reaches a honey-like consistency.
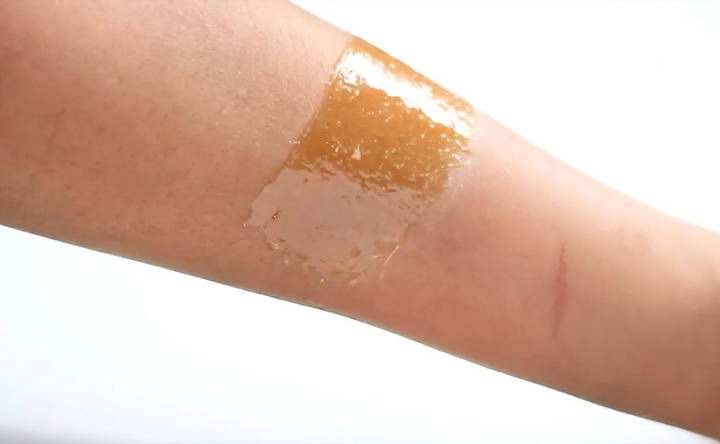
- Apply the Wax: Spread a thin layer of the sugar wax onto your skin in the direction of hair growth.
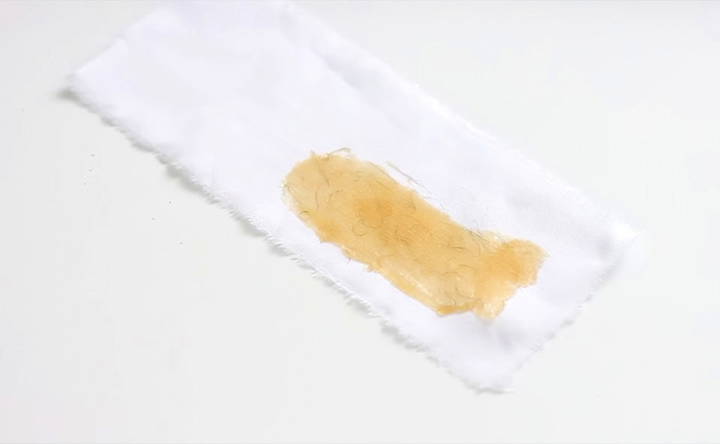
- Place the Strip: Press one of your fabric strips onto the wax, smoothing it down so it adheres well to the wax.
- Remove the Strip: Hold your skin taut, then quickly pull the strip off in the opposite direction of hair growth. The fabric will grab the wax and the hair, leaving you with smooth skin.
Cleaning and Reusing the Strips
One of the most satisfying parts of this project is how reusable these strips are. After each waxing session, you can rinse them in warm water to remove the wax. Sugar wax is water-soluble, so it washes right out without the need for soap or any special cleaners. Lay the strips flat to dry, and they're ready to use again next time.
This not only makes the process more sustainable but also saves you from having to constantly buy new strips. It's a win for both your wallet and the environment!
Troubleshooting Common Issues
When using DIY wax strips, you might encounter some common problems. Here are practical solutions to help you achieve the best results.
Wax Not Sticking to Hair
- Problem: The wax doesn't stick to the hair, making it difficult to remove.
- Solution: Ensure your skin is clean and dry before applying the wax. Avoid using lotions or oils beforehand. If your skin is oily, dust a bit of baby powder on the area to absorb excess oil. Also, make sure the wax is at the right temperature – not too hot or too cold.
Wax Too Sticky or Runny
- Problem: The wax is too sticky or runny, making it hard to handle.
- Solution: If the wax is too sticky, it might be too hot. Let it cool down slightly before using it. If it's too runny, you may need to cook it a bit longer to achieve the right consistency. The wax should be thick enough to spread easily but not so thick that it hardens quickly.
Skin Irritation or Redness
- Problem: Your skin becomes red or irritated after waxing.
- Solution: Apply a soothing lotion or aloe vera gel to calm the skin. Avoid hot showers, tight clothing, and direct sunlight for at least 24 hours after waxing. If irritation persists, consider using a different type of wax or consult a dermatologist.
Wax Not Removing All Hair
- Problem: Some hair remains after waxing.
- Solution: Ensure you apply the wax in the direction of hair growth and pull the strip off quickly in the opposite direction. If some hair is left, you can reapply the wax to the same area once more, but avoid doing it more than twice to prevent skin irritation.
Wax Hardens Too Quickly
- Problem: The wax hardens before you can apply it properly.
- Solution: Work in small sections to ensure you can apply the wax and strip before it hardens. If the wax hardens too quickly, you might need to warm it up slightly to make it more manageable.
Wax Residue Left on Skin
- Problem: Sticky wax residue remains on your skin after removing the strip.
- Solution: Use a bit of oil (like baby oil or olive oil) to remove any leftover wax. Gently rub the oil onto the residue until it dissolves, then wipe it off with a clean cloth.
Pain During Waxing
- Problem: Waxing is too painful.
- Solution: To minimize pain, ensure your hair is the right length (about 1/4 inch). Hold your skin taut while pulling off the strip quickly. You can also take a mild pain reliever 30 minutes before waxing to reduce discomfort.
By addressing these common issues, you can improve your DIY waxing experience and achieve smoother results.
Safety Precautions
When using DIY wax strips, it's important to follow safety precautions to avoid any potential issues. Here are some key tips to ensure a safe and effective waxing experience.
Test for Allergies
Before using any wax, perform a patch test. Apply a small amount of wax to a small area of your skin and wait 24 hours. If you experience redness, itching, or irritation, do not use the wax.
Avoid Sensitive Areas
Do not use wax strips on sensitive areas such as the face, genitals, or any area with broken or irritated skin. These areas are more prone to irritation and injury.
Check Wax Temperature
Always check the temperature of the wax before applying it to your skin. The wax should be warm but not hot. Hot wax can cause burns. Test the wax on the inside of your wrist before applying it to larger areas.
Clean and Dry Skin
Ensure your skin is clean and dry before waxing. Remove any lotions, oils, or sweat. This helps the wax adhere better and reduces the risk of infection.
Use Proper Technique
Apply the wax in the direction of hair growth and remove it in the opposite direction. This technique helps to minimize pain and ensures more effective hair removal.
Avoid Over-Waxing
Do not wax the same area more than twice in one session. Over-waxing can cause skin irritation and damage. If some hair remains, use tweezers to remove it instead.
Post-Wax Care
After waxing, apply a soothing lotion or aloe vera gel to calm the skin. Avoid hot showers, tight clothing, and direct sunlight for at least 24 hours to prevent irritation.
Be Cautious with Medications
If you are taking any medications that affect your skin, such as retinoids or acne treatments, consult with a healthcare professional before waxing. These medications can make your skin more sensitive and prone to damage.
Store Wax Properly
Store your wax in a cool, dry place away from direct sunlight. Proper storage ensures the wax maintains its effectiveness and prevents contamination.
Know When to Seek Help
If you experience severe pain, prolonged redness, or signs of infection after waxing, seek medical advice. It's important to address any adverse reactions promptly.
By following these safety precautions, you can enjoy a safer and more comfortable DIY waxing experience. Always prioritize your skin's health and well-being.
FAQs About DIY Wax Strips
Get answers to common FAQs about DIY wax strips, including usage tips, benefits, and troubleshooting for smooth, hair-free skin at home.
Yes, you can reuse the fabric strips:
Wash the strips: Rinse them in warm water to remove any wax residue.
Dry them thoroughly: Make sure they are completely dry before using them again.
Check for wear and tear: Replace any strips that are frayed or damaged.
Homemade wax typically lasts for 1-2 months if stored properly:
Airtight container: Keep the wax in an airtight container to prevent it from drying out.
Room temperature: Store it at room temperature, away from direct sunlight.
Check for changes: If the wax changes color or smells off, it’s time to make a new batch.
Yes, you can experiment with different ingredients:
Vinegar instead of lemon juice: Some people use vinegar, but lemon juice is preferred for its refreshing feel.
Natural honey: Using natural honey can enhance the quality of your wax.
Essential oils: Add a few drops of essential oils for a pleasant scent and additional skin benefits.
Adjusting the consistency of your wax is simple:
Too thick: Add a tablespoon of water at a time and stir until you reach the desired consistency.
Too thin: Increase the amount of sugar and honey to thicken the mixture.
Yes, you can use other materials if you don't have fabric strips:
Coffee filters: Cut them into the desired shape and size.
Paper bags: Use clean, sturdy paper bags as an alternative.
Magazine covers: Glossy magazine covers can also work in a pinch.
Final Thoughts: Embracing a Zero-Waste Routine
Making your own reusable wax strips is an easy and effective way to cut down on waste and make your beauty routine more eco-friendly. With just a bit of fabric and a few basic supplies, you can make strips that work just as well as store-bought versions but at a fraction of the cost. Plus, they're fully reusable, making them a fantastic zero-waste solution.
From my experience, once you try this DIY method, you'll never want to go back to disposable wax strips. It's a small change that makes a big difference—both for the planet and for your personal care routine. Give it a try, and you'll see just how easy it is to make the switch to a more sustainable way of hair removal.


