Making your own DIY wedding bouquet can be a rewarding and personal touch to your special day. This guide offers step-by-step instructions to help you craft a beautiful bouquet with ease. You'll learn which flowers to choose, how to arrange them, and how to secure your bouquet to endure the celebration. With these simple, clear steps, you'll have a stunning bouquet that adds a personal and memorable touch to your wedding.
Making a wedding bouquet yourself not only saves money but also allows for a more personalized arrangement that reflects your style. From selecting the flowers to the final wrap, each step is carefully outlined to ensure success. Follow along to discover how to make a wedding bouquet that stands out.
Understanding the Basics
Creating a DIY wedding bouquet is a beautiful way to add a personal touch to your special day. Let’s begin by understanding the basics of bouquet-making, which will set the foundation for your floral masterpiece.
- Flower Types and Meanings: Every flower has its own meaning and significance. Roses symbolize love and are a classic choice for weddings. Peonies represent prosperity and are known for their lush, full blooms. For something unique, consider ranunculus or anemones, which bring a pop of color and texture to any arrangement.
- Greenery and Filler Plants: Greenery adds volume and a natural look to your bouquet. Eucalyptus is popular for its soft, silvery leaves and pleasant scent. Baby’s Breath, with its delicate white flowers, is a timeless filler that complements any flower choice.
- Bouquet Shapes and Sizes: The shape of your bouquet should complement your wedding dress and overall theme. A round bouquet is versatile and works well with various dress styles. A cascading bouquet can add drama and is ideal for more formal weddings.
- Color Palette: Your bouquet should match or complement your wedding’s color scheme. Soft pastels are perfect for a romantic, gentle look, while bold colors can make a statement and stand out in photos.
- Symbolism and Tradition: Incorporate elements that have personal significance to you. For example, a flower from your first date or a sprig of lavender for good luck. These details make your bouquet uniquely yours.
Choose elements that resonate with you and your partner for a successful DIY wedding bouquet. It's about the story behind each bloom, not just the look. Keep it simple, take your time, and enjoy creating a beautiful part of your wedding day.
Materials Needed:
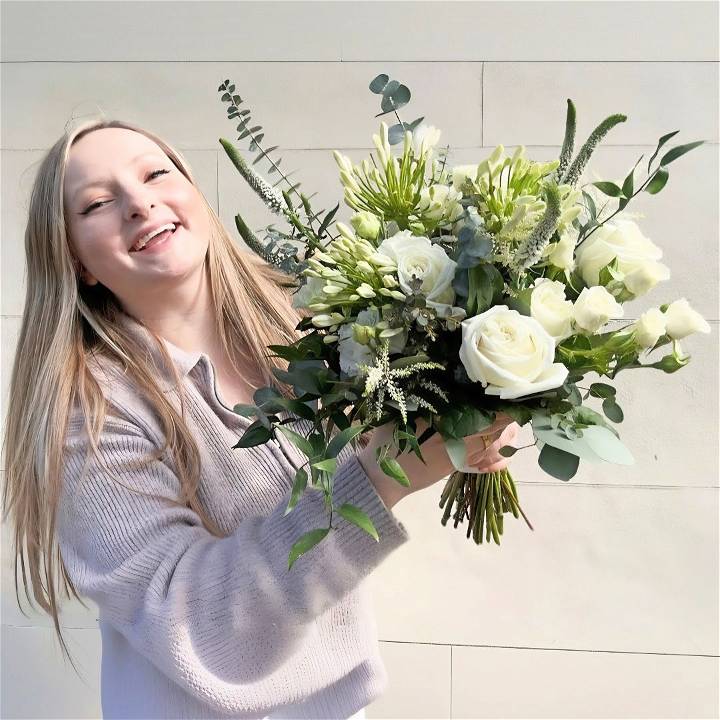
- Variety of Eucalyptus: To achieve a rich texture and a firm base for your bouquet, I usually go for four types: populous, silver dollar, gunnii, and baby blue. Eucalyptus adds a fresh scent and lush greenery to the arrangement.
- Ruscus: This acts as filler foliage, enhancing the bouquet's green theme while adding volume.
- Neutral Colored Flowers: I recommend white Casablanca roses, Eustoma (or lisianthus), spray roses, agapanthus, white Veronica, and astilbe for a touch of elegance and softness.
- Floral Tape and Raffia (or string): For binding the bouquet. I've found waterproof floral tape offers extra security.
- Ribbon: To wrap around the stem for a finished look. White or ivory works best for a neutral theme.
- Floral Scissors and Pins: These are used to trim stems and secure the ribbon.
Step by Step Instructions
Learn how to create a stunning bouquet with our step-by-step instructions from building the base to trimming and finishing. Perfect for DIY enthusiasts!
Step 1: Build Your Base with Foliage
Starting with your eucalyptus varieties, employ the spiral technique to create a structured yet unstructured base. Holding one stem in your hand, place the next stem at an angle, turning slightly after each addition. This method helps in forming a firm yet flexible structure. Integrate the ruscus the same way, focusing on forming a 'skirt' like shape around the edges for added drama and volume.
Step 2: Structure and Volume
Using populus stems can add a draping effect that introduces a different texture and shape, enhancing the bouquet's overall look. Remember, the goal here is not to overcrowd the base but to create a well-structured support for your flowers.
Step 3: Introduce the Flowers
Start with your Casablanca roses. Make sure to remove the guard petals for a neater appearance. Intersperse the roses within your foliage base, ensuring even distribution and a balanced look. Follow with the eustoma, spray roses, and finally, add the agapanthus, Veronica, and astilbe. These flowers provide varied textures and depth, enhancing the bouquet's aesthetic.
Step 4: Secure the Bouquet
Once satisfied with your arrangement, secure the stems using floral tape. I find it helpful to wrap the tape several times around the binding point for added stability. Then, cover the tape with a carefully chosen ribbon. This not only conceals the tape but also adds an elegant finish.
Step 5: Trim and Finish
Trim the stems at an angle for water absorption if you’re preparing it ahead of time. However, if it's for immediate use, trim the stems straight across for a neater look that sits well in the bride's hands. Secure the ribbon with pins for that final touch of elegance.
Personalization Tips
When it comes to making your DIY wedding bouquet, personalization is the key to creating a piece that truly represents you and your love story. Here are some tips to help you infuse your personality into your bouquet:
- Incorporate Your Heritage: If you have flowers or plants that are significant to your culture or family heritage, consider including them in your bouquet. This not only adds a personal touch but also honors your roots.
- Use Meaningful Embellishments: Attach small charms, lockets, or pieces of fabric from a loved one’s garment to the bouquet’s handle. These items can serve as a sentimental reminder of those who are important to you.
- Play with Colors: Choose flowers in shades that have a special meaning for you, perhaps reflecting your favorite colors or reminding you of a significant moment in your relationship.
- Add a Scent: Scented flowers or herbs can evoke memories and emotions. Lavender for calmness, rosemary for remembrance, or your favorite scented bloom can make your bouquet even more memorable.
- Consider the Season: Incorporate elements that reflect the season of your wedding. Autumn leaves, spring blossoms, or summer berries can add a timely and thematic touch.
- Think Beyond Flowers: Don’t be afraid to think outside the traditional floral box. Incorporating non-floral elements like feathers, beads, or even fruits can make your bouquet stand out.
By using these tips, you'll make a bouquet that's beautiful and meaningful. It should reflect you and your journey with your partner. Enjoy creating something special for your wedding day and beyond.
Preservation Techniques
After your wedding day has passed, preserving your bouquet allows you to keep a tangible piece of your special day. Here are some straightforward techniques to help you maintain the beauty of your bouquet for years to come.
- Air Drying: The simplest method is to hang your bouquet upside down in a dry, dark place. This process can take a few weeks, but it’s an easy way to maintain the shape and color of your flowers.
- Pressing: For a more artistic preservation, select a few flowers to press. Place them between parchment paper within the pages of a heavy book. After a few weeks, you’ll have beautifully pressed flowers that can be framed or used in a scrapbook.
- Silica Gel: If you want to preserve the natural color and shape of your flowers, silica gel is an effective option. Bury your blooms in a container of silica gel for a week, and they will dry out without losing their vibrancy.
- Epoxy Resin: For a modern twist, you can encase individual flowers or petals in clear epoxy resin. This creates a lasting keepsake that can be used as a paperweight or decorative item.
- Professional Freeze-Drying: Consider investing in professional freeze-drying services if you want a near-perfect preservation. This method is more costly but will maintain the bouquet’s three-dimensional shape and color.
- Maintenance: Once preserved, keep your flowers in a shadow box or glass case to protect them from dust and sunlight, which can cause fading over time.
Use these techniques to make your wedding bouquet a lasting memento. Pick the method that fits your style and budget to have a beautiful, enduring reminder of your wedding day.
Troubleshooting Common Issues
When crafting a DIY wedding bouquet, you might encounter a few hiccups along the way. Here’s how to solve some common issues with practical solutions:
- Wilting Flowers: If your flowers start to droop, trim the ends of the stems at an angle under running water. Then, place them in a vase with fresh, cool water and a penny to help them perk up.
- Color Fading: To prevent your flowers from losing their vibrant color, keep them out of direct sunlight and away from heat sources. If they do fade, a light mist of water mixed with flower food can help revive them.
- Loose Stems: If stems begin to slip, tighten your bouquet’s binding with floral tape. For extra security, you can also insert a few hidden pins through the tape and into the stems.
- Mismatched Blooms: Sometimes, flowers can vary in color or size. To create a cohesive look, group similar shades together or use greenery to fill gaps and blend the differences.
- Allergies: Be mindful of common floral allergies. If you or your guests are sensitive, opt for hypoallergenic flowers like roses, peonies, or orchids.
- Seasonal Availability: If a desired flower is out of season, consult with a florist for alternatives that have a similar appearance or meaning.
Prepare for issues and address them to create a stunning, durable wedding bouquet. Patience and flexibility with flowers are essential.
FAQs About DIY Wedding Bouquet
Get answers to common questions about DIY wedding bouquets! Learn tips, tricks, and essential info for crafting beautiful bouquets for your big day.
To assemble your bouquet, follow these steps:
Start with four flowers at the center of the dome.
Add other flowers around the center one by one to create a dome shape.
Use a rubber band or floral tape to bind the stems where they naturally join.
To finish the handle:
Cut the stem ends to the same length, about 7 to 8 inches long.
Dry off the stems with paper towels.
Wrap the stems with ribbon, starting at the top bind and spiraling down.
It’s best to create your bouquet the day before your wedding to ensure the flowers are fresh. However, you can plan and practice making your bouquet well in advance.
Selecting the right flowers is crucial for your bouquet. Consider these points:
Seasonality: Choose flowers that are in season to ensure they are at their freshest.
Personal taste: Pick flowers that reflect your style and the wedding theme.
Durability: Opt for hardier flowers like roses that can withstand handling and last throughout the day.
Color scheme: Coordinate the colors of your flowers with your wedding palette.
Texture and variety: Mix different textures and sizes to add depth and interest to your bouquet.
To keep your bouquet fresh:
Store it in a cool, dark place until the wedding.
Keep the stems submerged in water.
Avoid direct sunlight and heat sources.
Mist the flowers lightly with water to keep them hydrated.
Final Thoughts
Wrapping up, learning how to make a wedding bouquet yourself is both fulfilling and budget-friendly. By following these DIY wedding bouquets, you can create a beautiful, personalized bouquet that adds a special touch to your big day. The process is simple, and the result is memorable. Enjoy your journey into crafting a unique DIY wedding bouquet that will help make your wedding truly special.


