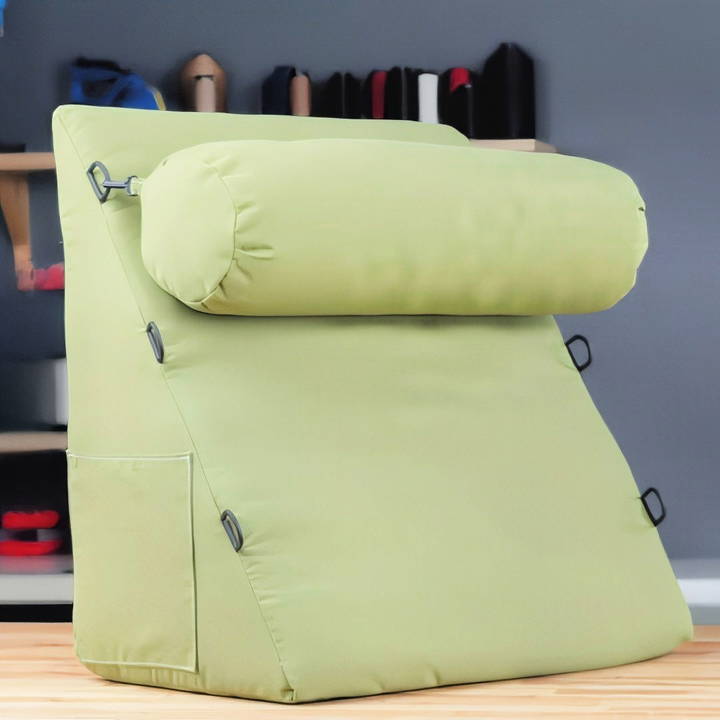
A wedge pillow is an incredibly useful addition to your home, whether for lounging, reading, or providing extra support. Here, you'll find the steps to make a DIY wedge pillow from firm foam and upholstery fabric, making it perfectly suited to your comfort needs. Not only will you have a functional pillow, but you'll also gain the satisfaction of crafting something with your hands.
Materials and Tools You'll Need
Before we begin the step-by-step process, gather the following materials and tools to make the process smooth and efficient:
Materials:
- 2 yards of outdoor canvas upholstery fabric (we used Olive-colored Outdura® fabric for durability and weather resistance).
- CushionRite® Foam (3" thick, 24"x80" firm foam is ideal, but you can opt for softer foam depending on your preference).
- Cushion Wrap Silk Film (to wrap the foam, making it easier to fit inside the fabric cover).
- 1/2" Polyester Batting (adds a soft layer over the foam).
- CushionRite® Foam & Fabric Spray Adhesive (for bonding foam layers together and securing batting).
- YKK Fixed Snap Hook (2 pieces) (optional for attaching a bolster pillow or additional features).
- Sewable Nylon D-rings (6 pieces) (optional for adding extra straps or features to the wedge pillow).
- 1/2" Basting Tape (helps with fabric construction).
- Bolster Pillow Insert (20" x 6") (optional but can be added for extra neck or back support).
Tools:
- Sewing machine (a heavy-duty machine like the Sailrite® Ultrafeed® LS is ideal for thick fabric).
- Foam Saw (such as the Sailrite® Blade Foam Saw) for precise foam cutting.
- Foam Shaper (for refining the foam edges).
- Measuring tools (Sewing Gauge Ruler, Clear Acrylic Ruler, and Tape Measure).
- Pins, fabric clips, and fabric scissors.
- Pinking shears (to prevent fabric fraying).
- Iron (to press seams).
- Chalk pencil or marker (for marking fabric).
- Vacuum with a detachable hose (to compress the foam when fitting it into the cover).
Step by Step Instructions
Learn how to make a DIY wedge pillow with easy steps from cutting foam to assembling the cover. Explore detailed measurements and instructions!
Step 1: Cutting the Foam
Start by cutting your foam to make the wedge shape. Since the wedge pillow needs to provide incline support, you'll need to cut the foam into specific shapes.
Foam Cutting Measurements:
- Back Panel: 20" wide by 20" high.
- Front Panel: 20" wide by 12" high (this will form the sloped front).
- Side Panels: 20" high by 12" deep.
- Top Slant: 25" from front to back.
How to Cut the Foam:
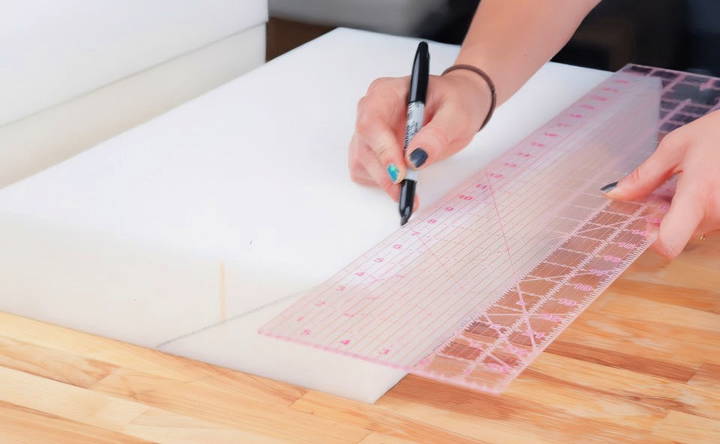
- Take your 24"x80" foam and cut two panels measuring 20"x20" and two panels measuring 20"x12".
- Mark a diagonal line from one corner of the foam panels to the opposite corner using a straight edge.
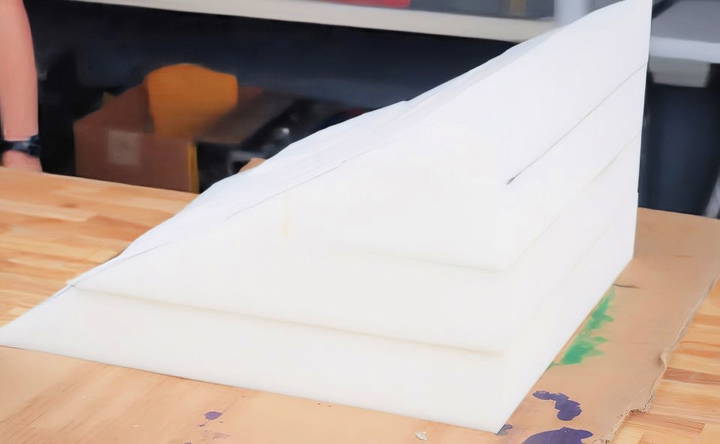
- Cut along the lines carefully with a foam saw to make the wedge shape. Once cut, stack the panels to ensure they fit well together in the form of a triangle.
- Use a foam shaper to smooth any rough edges or imperfections.
Step 2: Gluing the Foam Layers
Now that the foam is cut, the next step is to glue the layers together to ensure they hold their wedge shape.
- In a well-ventilated area (or wearing a protective mask), spray the foam panels with CushionRite® Foam & Fabric Spray Adhesive on both sides of the pieces you plan to bond.
- Align the foam layers carefully and press them together.
- Once glued, allow the foam to cure. This process will bond the layers securely, and you can further smooth any uneven edges with the foam shaper if necessary.
Step 3: Preparing the Fabric Panels
While the foam adhesive cures, you can begin working on the fabric cover for the wedge pillow. For this project, we'll be using an outdoor canvas fabric to make it durable and easy to clean.
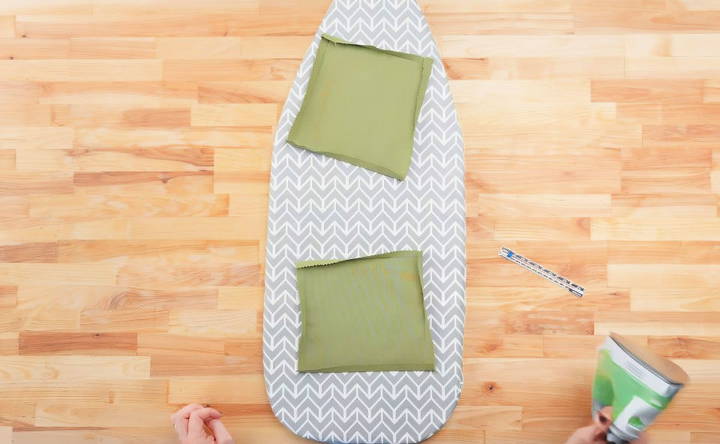
Fabric Measurements:
- Back Panel: 20"x20".
- Front Panel: 20"x12".
- Side Panels: 20"x12" (these will cover the slanted side of the wedge).
- Bottom Panel: 20"x13".
Steps for Cutting the Fabric:
- Cut the fabric panels according to the measurements mentioned above.
- Press a 1/2" seam on all sides of the fabric panels using an iron. This will help with easy assembly later.
Step 4: Assembling the Wedge Cover
Now that your fabric is cut and prepared, it's time to assemble the cover.
- Pocket Addition (Optional): If you want pockets on the side of your wedge pillow, pin a small pocket (around 8"x6") onto one of the side panels. Place it near the bottom for easy access, and sew along three edges, leaving the top open.
- Sewing the Side Panels: Pin the side panels to the back panel, right sides together, and sew with a 1/2" seam allowance. Ensure your stitching is strong as this will hold the fabric together under pressure.
- Attaching the Front Panel: Pin and sew the front panel to the side panels, ensuring the wedge shape starts to form.
- D-Rings and Clip Installation (Optional): If you're adding D-rings for straps, mark positions 7" apart along the front panel seams and sew them securely into place.
- Sewing the Bottom Panel: Attach the bottom panel to the other pieces. Leave an opening along the bottom back seam—this is where you'll insert the foam later.
- Finishing the Seams: Clip the corners (but not the seams) to allow the fabric to lay flat and reduce bulk. Use pinking shears to prevent fraying.
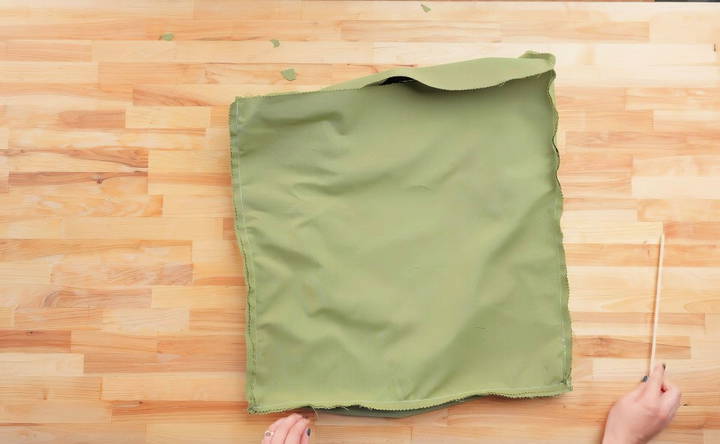
Step 5: Inserting the Foam into the Fabric Cover
Once the fabric cover is ready, the next challenge is inserting the foam into the fabric casing.
- Wrap the Foam: Before inserting, wrap the foam in a layer of polyester batting to add softness and smooth out any sharp edges.
- Cover with Silk Film: Use silk film to wrap the foam. This will help shrink the foam using a vacuum, making it easier to insert into the fabric cover.
- Use the Vacuum: Place the vacuum hose against the foam (wrapped in silk film) and remove as much air as possible. This will temporarily compress the foam.
- Insert the Foam: Quickly insert the shrunken foam into the fabric cover through the opening. Once the foam is in place, it will expand to fit the cover snugly.
- Final Stitching: Once the foam is in place and you're happy with the fit, sew the final seam closed. You can use a ladder stitch for a nearly invisible seam, or add a zipper or Velcro if you'd like the cover to be removable.
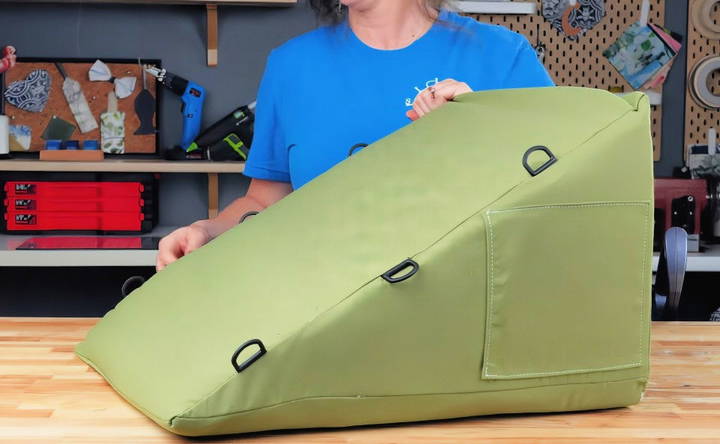
Step 6: Making an Optional Bolster Pillow
For added comfort, you can make a bolster pillow that can be clipped to the wedge pillow.
Bolster Pillow Measurements:
- Main Panel: 20"x12".
- End Circles: Diameter of 6".
Steps:
- Sew the Bolster: Sew the main panel into a tube by folding it in half lengthwise and stitching along the open edge.
- Attach the End Circles: Pin the circular fabric pieces to each end of the tube and sew them together.
- Insert the Pillow Form: Insert a bolster pillow form and close the seam using a ladder stitch or a hidden zipper.
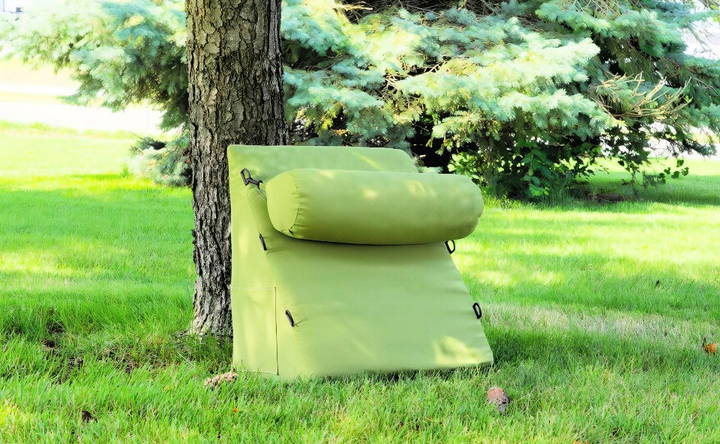
Step 7: Enjoy Your DIY Wedge Pillow!
Congratulations! You've now crafted your very own wedge pillow. This versatile cushion can be used for reading, lounging, or even outdoor relaxation. With the optional pockets and bolster pillow, it becomes a customizable addition to any room or patio.
Whether you're propping it against a wall, using it as a leg rest, or relaxing under a tree, this wedge pillow offers a stylish and functional solution to your comfort needs.
Final Tips:
- You can use softer foam for a more cushioned feel.
- Choose waterproof fabric if you plan to use the wedge outdoors frequently.
- Experiment with different sizes and shapes for personalized comfort.
By following these steps, you can make a durable and comfortable wedge pillow that fits your exact needs. Enjoy the satisfaction of crafting something functional and stylish with your hands!
FAQs About DIY Wedge Pillow
Discover answers to common questions about DIY wedge pillows. Learn how to make and customize your perfect support pillow at home.
For this project, a 3-inch thick foam is recommended. This thickness provides firm back support while keeping the wedge pillow sturdy enough for lounging or reading. If you prefer a softer cushion, you can opt for medium or soft foam instead.
If you’re using standard foam, it’s best to leave the Silk Film on as it protects the foam from water. However, if you're using Dry Fast Foam (designed for outdoor use and quick drying), remove the Silk Film after shrinking the foam into the cover.
Use a vacuum to shrink the foam wrapped in Silk Film. Place the vacuum hose on the foam to remove air, compressing the foam enough to easily insert it into the fabric cover. If the foam expands too quickly, repeat the process.
Yes! For outdoor use, Dry Fast Foam is recommended since it dries quickly. For indoor use, you can opt for standard or antimicrobial foam, which offers firm support and durability.
Use a foam shaper to smooth out any rough edges or imperfections. This tool helps refine the foam after cutting, ensuring a smooth surface before inserting it into the cover.
If the foam doesn't fit after insertion, try reshaping it using a foam shaper or repositioning the fabric cover. Additionally, you can wrap the foam in polyester batting to adjust the fit and smooth out imperfections.
You can make the cover removable by adding a zipper or Velcro closure along one seam. This allows for easy cleaning or replacing the foam if necessary.
An outdoor canvas fabric like Outdura® is recommended for durability, especially if you plan to use the pillow outdoors. This fabric is weather-resistant and easy to clean.


