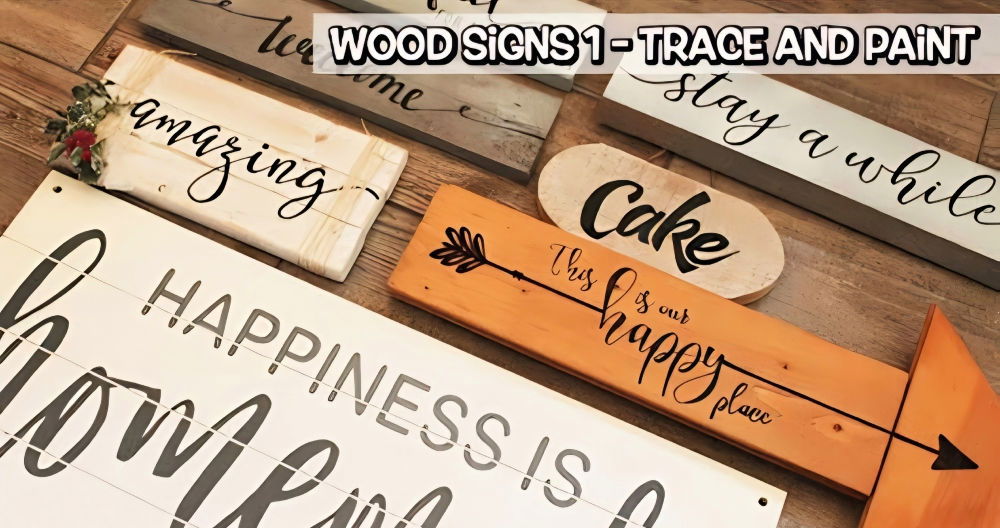
Making a DIY welcome sign can add a personal touch to your home. This project is perfect for anyone interested in crafting and looking to add a warm greeting to their entrance. With a few materials like wood, paint, and stencils, you can make a custom welcome sign that matches your style. The process is simple, enjoyable, and allows for plenty of creativity.
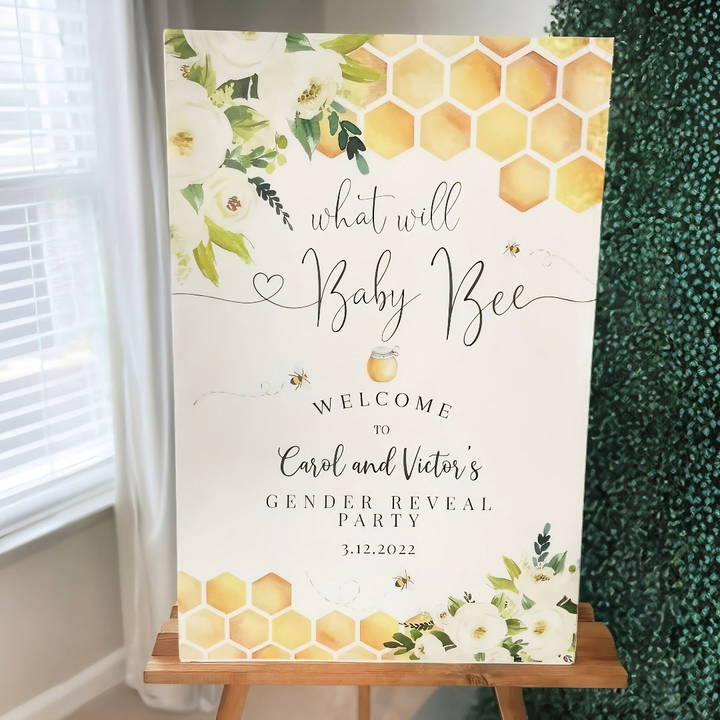
You can make your easy DIY welcome sign as colorful or minimalist as you like. Start by selecting a wooden board, then decide on your design and colors. Paint the base layer, apply stencils for letters, and add any decorative elements you prefer. It's a fun way to spend an afternoon and results in a beautiful piece to greet your guests.
Why Make Your Own Welcome Sign?
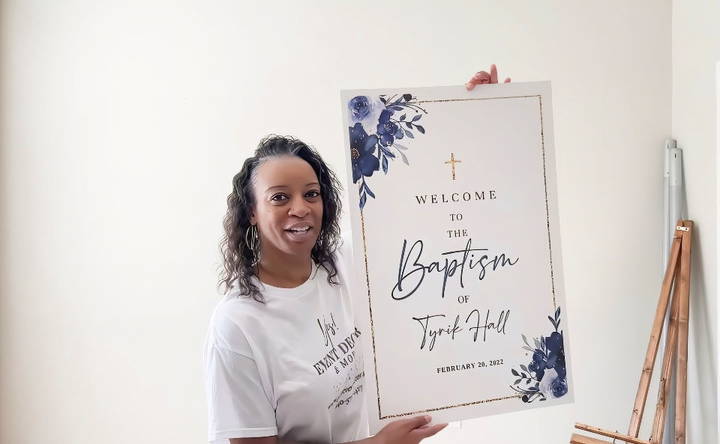
Custom welcome signs are a great way to personalize your event because they provide a unique touch that can't be bought off the shelf. When you make your own, you can tailor every detail—colors, size, text, and design—to fit perfectly with your event theme. Plus, it can be more cost-effective than buying a pre-made sign.
Materials Needed
Before we get started, let's talk about the materials you'll need:
- Template Design: You can find these on platforms like Etsy. They offer a wide range of designs that can be customized for any occasion. I choose Etsy because of their diverse selection and ease of customization.
- Computer/Laptop: To access and customize the template online.
- Printer or Printing Service (e.g., Walmart): For printing your final design. Choosing between a glossy or matte finish will depend on your personal aesthetic preference.
- Foam Board (optional): If you choose not to print directly on thick board material, you will need this to mount your poster.
- Adhesives (Glue Dots or Double-sided Tape): For sticking the poster to the foam board if you're not printing directly on a board.
Step by Step Instructions
Make a charming DIY welcome sign with our easy step-by-step instructions. Perfect for beginners looking to add a personal touch to their home entryway.
Step 1: Selecting and Customizing Your Template
Finding the Perfect Template
The first thing I do is head over to Etsy. Here's how to find the right template:
- Search for Templates: Type in "welcome sign" followed by the style of your event, like "baby shower" or "wedding.”
- Choose and Customize: Look through the options and choose a template. Most available are templates, which means you can customize them. Check for templates that allow you to edit text and sometimes even colors.
Customizing the Template
Once you found a template you like, now it's time to customize:
- Sizing: Templates often allow for different sizes. I usually opt for a 20x30 inch size as it is standard and looks great at events. If not available, a 24x36 inch size works well too.
- Personalization: Add the personalized details—names, dates, event details—directly on the template.
Step 2: Ordering and Designing
Placing Your Order
After customizing your sign, place your order on Etsy:
- Select Size and Details: Double-check all customizations—make sure the names and dates are spelled correctly!
- Proceed to Checkout: Add your customized template to the cart and purchase it.
Designing on Their Platform
After purchase, you'll receive instructions via email, but you can also access them through Etsy:
- Download Instructions: These will guide you on how to proceed to their design website.
- Edit Your Design: Their site will let you further edit the template if you haven't already done so.
Step 3: Printing Your Sign
Printing Options
When it comes to printing, you have two main options:
- Print on Paper: Use a service like Walmart Photo Center, which I use often. Go to their website and choose 'Posters.' Here's what to do:
- Select Size: Choose the same size you customized.
- Finish Type: I usually pick matte because it's available for same-day pickup.
- Upload Design: Upload your finalized design and place the order.
- Direct Print on Foam Board: Opt for this if you want a ready-to-display option without needing to mount later. It's more expensive but saves time.
DIY Foam Board Mounting
If you print a paper poster, you'll need to mount it:
- Acquire Foam Board: Easily found at dollar stores or craft supply stores.
- Adhesive Application: Carefully apply glue dots or double-sided tape to the back of your sign and mount it on the board.
- Attachment: Place the sign carefully on the foam board and press gently.
Step 4: Collecting and Finalizing
Pickup and Finishing Touches
- Collect Your Sign: Once printed, pick it up from the store. Inspect the quality to ensure everything has come out correctly.
- Mounting (if needed): For paper prints, use the mounting steps above to attach to a foam board.
Useful Tips
- Double-Check Details: Always double-check names and dates before finalizing the design.
- Clear Vinyl Option: If your event is outdoors, consider a clear vinyl covering to protect the sign from elements.
- Transport Carefully: Use a sturdy bag to prevent damage during transportation.
Personalization Tips for Your DIY Welcome Sign
Making a DIY welcome sign is not just about crafting a piece of decor; it's about making a statement that reflects your personality and greets your guests with warmth. Here are some tips to help you personalize your welcome sign:
- Choose a Theme That Reflects You Think about what represents you or your family. Are you a beach lover, or do you prefer a cozy cabin vibe? Select a theme that resonates with your interests and hobbies.
- Select Colors That Speak to You Colors can set the mood. Choose a color palette that you love, and that complements your home. Soft pastels can make a welcoming, gentle touch, while bold hues can make a striking statement.
- Incorporate Your Name or Initials Adding your family name or initials can give your welcome sign a personal touch. Consider different fonts and sizes to find the perfect fit for your design.
- Add a Personal Quote or Message Do you have a family motto or a favorite quote? Use it on your welcome sign to share a piece of your philosophy with visitors.
- Decorate with Symbols or Icons Personalize your sign with symbols that have meaning to you, like a family crest, a national flag, or icons that represent your passions, such as musical notes for music lovers.
- Use Materials That Have a Story If you have materials that are significant to you, such as wood from an old family barn or pebbles collected from a memorable vacation, incorporate them into your sign.
- Celebrate the Seasons Consider making interchangeable elements on your sign to celebrate different seasons or holidays, which can be a fun way to keep your decor fresh and relevant.
- Engage the Kids: If you have children, get them involved. Their handprints, drawings, or ideas can add a charming and whimsical element to the sign.
- Reflect Your Heritage Celebrate your cultural background with patterns, colors, or words that pay homage to your heritage.
- Think Outside the Box: Your welcome sign doesn't have to be traditional. Think of unique ways to display your greeting, like using a chalkboard for daily messages or a digital screen for a modern twist.
The goal is to make a sign that you're proud to display and that makes your guests feel truly welcomed.
Common Mistakes to Avoid in DIY Welcome Sign Projects
When making a DIY welcome sign, it's easy to get caught up in the excitement and overlook some common pitfalls. To ensure your project is successful and enjoyable, here are some mistakes to steer clear of:
- Overcomplicating the Design Keep it simple. A cluttered sign can be overwhelming and hard to read. Stick to a clear and concise message with a clean design.
- Ignoring the Size and Scale Consider the space where you'll display the sign. Make sure the size is appropriate—not too small to be unnoticed, nor too large to be overpowering.
- Forgetting About Weather Resistance If your sign will be outdoors, use materials that can withstand the elements. Protect your sign with a suitable sealant to prevent damage from sun, rain, or wind.
- Neglecting Readability Choose fonts and colors that are easy to read from a distance. Avoid cursive or overly decorative fonts that might be difficult to decipher.
- Using Low-Quality Materials Invest in good-quality materials that will last. Cheap materials might save money initially but can lead to a less durable sign.
- Skipping the Planning Phase Take the time to plan your design, layout, and materials. Rushing into the project without a clear plan can result in mistakes and wasted resources.
- Overlooking the Hanging Method Plan how you will hang or display your sign. Ensure it's secure and won't cause damage to your walls or door.
- Disregarding Personal Style Your welcome sign should reflect your personal taste. Don't follow trends that don't resonate with you; choose elements that you truly enjoy.
- Forgetting to Have Fun Remember, this is a creative project. Don't stress over perfection. Enjoy the process and the unique touch you're adding to your home.
By avoiding these common errors, you'll be on your way to making a beautiful, durable, and personal welcome sign that you'll be proud to display.
Maintenance and Care for Your DIY Welcome Sign
Taking care of your DIY welcome sign is crucial for ensuring it stays looking great and lasts for years to come. Here's how you can maintain and protect your creation:
- Choose the Right Materials Start with materials that are durable and suitable for the sign's location. For outdoor signs, materials like treated wood, metal, or weather-resistant paints are best.
- Seal It Properly Apply a sealant to protect your sign from moisture, sunlight, and extreme temperatures. For wooden signs, a clear varnish or polyurethane coating works well.
- Regular Cleaning: Keep your sign clean of dust, dirt, and cobwebs. Gently wipe it with a soft, damp cloth. Avoid harsh chemicals that can damage the finish.
- Touch-Up as Needed Inspect your sign regularly for any chips, cracks, or fading. Touch up the paint or finish as needed to keep it looking fresh.
- Avoid Direct Sunlight If possible, place your sign where it will be shaded for part of the day. Prolonged exposure to direct sunlight can fade colors over time.
- Be gentle when handling your sign. Rough treatment can cause unnecessary wear and tear.
- Store Safely If you need to store your sign, wrap it in a soft cloth and keep it in a cool, dry place. Avoid stacking heavy items on top of it.
- Check for Repairs Periodically check for any loose parts or damage that may need repairing. Fixing small issues promptly can prevent bigger problems later.
By following these simple maintenance and care tips, your DIY welcome sign will remain a charming and welcoming addition to your home for many years.
FAQs About DIY Welcome Sign
Explore the FAQs about DIY welcome signs, which offer expert guidance, tips, and answers for making your personalized welcome sign at home.
To make your welcome sign stand out, consider using bold colors and creative fonts. You can also add interchangeable elements to celebrate different seasons or holidays. For example, changing out the ‘O' in HOME with different holiday-themed pieces can give your sign a fresh look throughout the year.
Yes, you can make a welcome sign without any woodworking skills. Look for pre-cut wood boards at your local craft store or use reclaimed wood. You can then decorate your sign with paint, vinyl lettering, or even chalkboard paint for a customizable option.
The best way to protect your outdoor welcome sign is to apply a weather-resistant sealant. This will help to prevent damage from sun exposure, rain, and other environmental factors. Make sure to reapply the sealant periodically to maintain its protective qualities.
Yes, there are many creative alternatives to a traditional wooden welcome sign. You can use a picture frame with a handwritten message, turn an old door into a chalkboard sign, or even repurpose a mailbox into a unique greeting. These alternatives allow you to express your personal style and make a welcoming atmosphere.
The size of your DIY welcome sign should be determined by the space where it will be displayed. For a front porch or entryway, a larger sign is visible and welcoming from a distance. A good rule of thumb is to make the sign at least one-third the width of your door for balance. For indoor signs, consider the wall space and surrounding decor; a smaller sign can be a subtle addition, while a larger one can serve as a focal point. Always measure your space and visualize the sign before you start your project.
Final Thoughts
Making a DIY welcome sign for your event is an easy way to add a personal touch that your guests will appreciate. By customizing your own design, you ensure your sign perfectly matches your event theme. Whether you choose to print it yourself or use a professional service, each step in this guide provides flexibility to accommodate various skill levels and budgets. I've shared my process to ensure you can make a beautiful, personalized welcome sign with confidence and ease. Happy crafting!


