Building a DIY welding cart can be a rewarding project. Not only does it help you organize your tools, but it also offers the satisfaction of a homemade solution tailored to your needs. A DIY welding cart is an excellent step to making a functional workspace, providing easy access to your welding equipment.
Whether you're designing a simple cart or adding extra features, this project allows for customization based on your requirements. By following a step-by-step approach, you can efficiently assemble a homemade DIY welding cart that fits your tools and workspace. This process involves basic welding and fabrication skills, making it an achievable task with the right guidance.
Ready to get started? Explore the next section to dive into the detailed steps and tips for building your DIY welding cart.
Choosing the Right Materials
Discover the importance of choosing the right materials. Learn why quality matters for both aesthetics and functionality in your projects.
Why Quality Matters
Materials play a crucial role in the durability and functionality of any project. For this welding table and cart, I opted for high-grade steel for its robustness, resistance to wear, and capability to withstand high temperatures. The choice of materials was influenced by my desire for a long-lasting and sturdy workplace.
Necessity Beyond Aesthetics
Aside from durability, the practical uses of each material were considered. For instance, I needed a tabletop that could handle heavy welding tasks without deformation. The steel's thickness and strength were essential for supporting substantial projects and tools.
Design and Planning: Ensuring Functionality and Efficiency
Discover effective design and planning strategies. Learn how detailing ensures functionality and efficiency in your projects. The blueprint to success.
The Blueprint
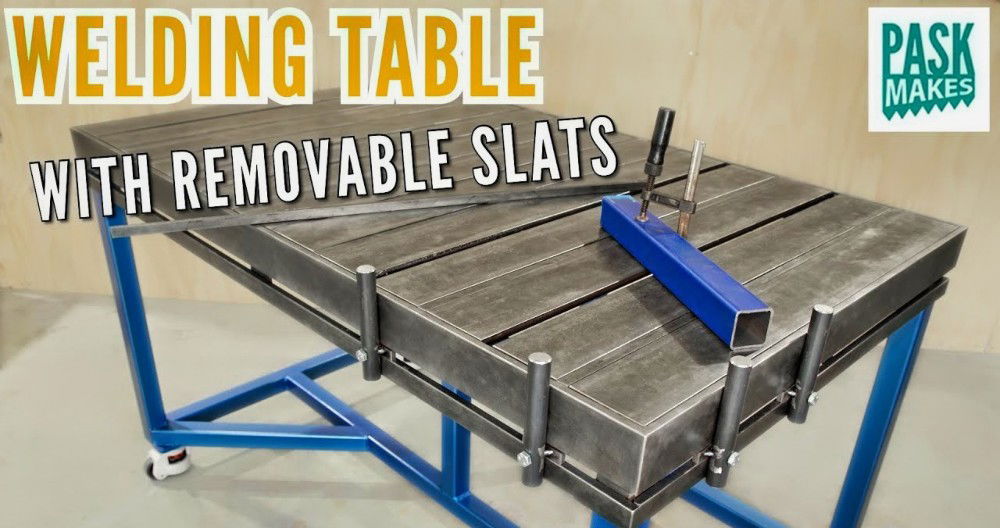
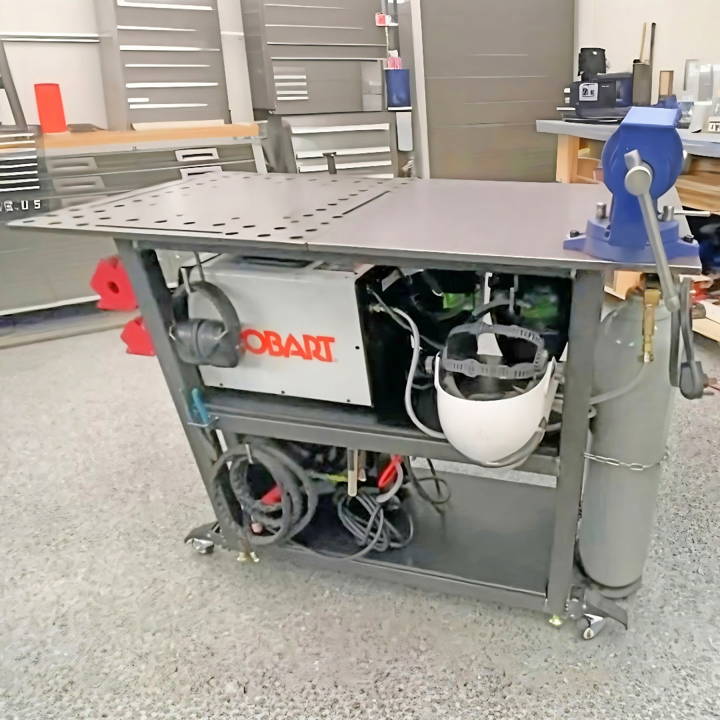
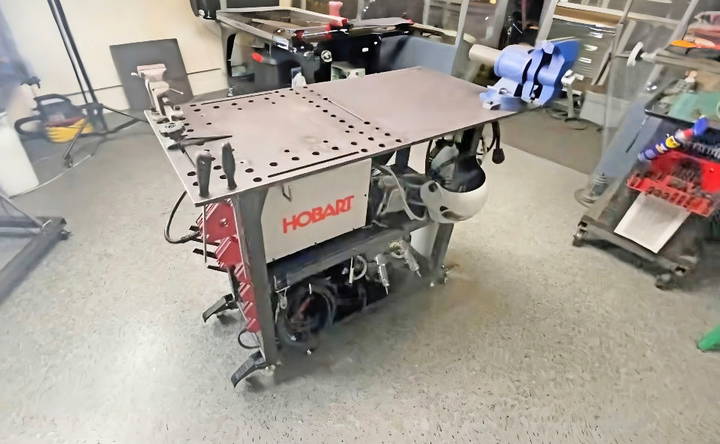
The design phase involved drafting a table that could serve multiple purposes besides welding – from holding tools and supplies to providing a mobile solution within the workshop. Features like custom slots for hold-downs, integrated hooks for hanging tools, retractable wheels for mobility, and leveling feet for stability were all part of the blueprint.
Why Detailing is Key
Each design decision aimed to enhance the table's utility. For example, the retractable wheels meant I could easily move the table around the workshop, while the custom slots allowed for secure clamping of workpieces. Such details ensured that the table would not only serve its primary purpose but also offer convenience and adaptability.
Step by Step Instructions
Learn how to make a DIY welding cart with step-by-step instructions and custom features to enhance your welding experience. Perfect for any skill level.
From Paper to Metal
Translating the blueprint into a tangible product involved cutting, welding, and assembling the steel parts. Challenges arose, such as ensuring precision in cuts and welds to maintain the table's integrity and functionality.
Overcoming Obstacles
One particular challenge was ensuring the table's surface was perfectly flat and integrated seamlessly with the retractable wheel mechanism. After some trial and error, including adjustments to the wheel assembly and fine-tuning the tabletop alignment, the issue was resolved, highlighting the importance of flexibility and problem-solving in DIY projects.
Custom Features: Enhancing the Welding Experience
Discover how custom features enhance the welding experience, going beyond basic functions and tailoring to unique needs for optimal results.
Beyond Basic
Customization played a significant role in this project. The table features a unique hold-down system designed using CAD software and executed via plasma cutting. This system, along with the integrated hooks and slots, exemplifies how custom features can significantly improve workflow and organization in a workshop setting.
Tailoring to Needs
The inclusion of a specific shelf for the welders and a designated area for the gas tanks was another highlight. These tailored features ensured that every tool and supply had its place, thereby promoting efficiency and ease of access during projects.
Finishing Touches: A Personalized Workspace
Enhance productivity with finishing touches: a personalized workspace. Discover aesthetics, protection, and the impact of every detail in your workspace.
Aesthetics and Protection
The final steps involved applying a protective coating to the table and installing additional elements such as a vice and custom-made holders for frequently used tools. These finishing touches not only protected the table from wear and corrosion but also made it a more enjoyable and personalized workspace.
The Significance of Every Detail
Each element, from the coating to the tool holders, was chosen carefully to provide maximum benefit and satisfaction from the project. For instance, the vice installation was not only about adding functionality but also about integrating a piece with personal significance, thus making the table truly my own.
Building this welding table and cart was deeply fulfilling, highlighting the joy and satisfaction of hands-on creation and overcoming challenges.
Advanced Customization Options
When making a DIY welding cart, the goal is to have a functional, durable, and efficient workspace. Here are some advanced customization options that can make your welding cart more versatile and tailored to your specific needs:
Modular Storage Compartments:
- Why It's Useful: It allows for the organization of tools and accessories, making them easily accessible.
- How to Implement: Use detachable bins or drawers that can be rearranged according to the project requirements.
Adjustable Shelving:
- Why It's Useful: Accommodates different sizes of equipment and materials.
- How to Implement: Install rails with multiple slots so shelves can be moved up or down.
Foldable Side Tables:
- Why It's Useful: Provides additional workspace when needed without permanently taking up space.
- How to Implement: Attach tables with hinges that can be locked in place when extended and folded down when not in use.
Integrated Clamping Surfaces:
- Why It's Useful: Secures materials directly on the cart for stability during welding.
- How to Implement: Add a metal surface with clamping points or a built-in vise.
Tool Holders and Hooks:
- Why It's Useful: Keeps frequently used tools within arm's reach.
- How to Implement: Attach magnetic strips or hooks on the sides of the cart.
Wheeled Base with Locking Mechanism:
- Why It's Useful: Enhances mobility around the workshop while also providing stability when locked.
- How to Implement: Choose heavy-duty casters and ensure at least two have a strong locking mechanism.
Protective Guards:
- Why It's Useful: Shields sensitive components from sparks and spatter.
- How to Implement: Install metal guards around areas where electronics or flammable materials are stored.
Power Strip and Cable Management:
- Why It's Useful: Keeps power tools plugged in and cords organized.
- How to Implement: Mount a power strip on the cart and use cable ties or clips to secure cords along the frame.
Lighting Fixtures:
- Why It's Useful: Improves visibility, especially in dimly lit areas.
- How to Implement: Install LED lights under shelves or on the cart's handle for direct illumination.
Custom Paint Job or Decals:
- Why It's Useful: Personalizes the cart and can add a layer of rust protection.
- How to Implement: Use high-temperature paint suitable for metal surfaces and apply decals for a custom look.
The key to a successful DIY project is planning. Measure twice, cut once, and always prioritize safety.
Troubleshooting Common Issues
Building a DIY welding cart can be a rewarding project, but it's not uncommon to run into a few hiccups along the way. Here's a guide to troubleshooting some common issues you might encounter:
Unstable Cart
- Cause: The wheels may not be properly attached or the frame isn't square.
- Solution: Check all the connections and tighten any loose bolts. Use a carpenter's square to ensure the frame is perfectly perpendicular at the corners.
Insufficient Storage Space
- Cause: Underestimating the amount of equipment and tools needed.
- Solution: Consider adding additional shelves or hooks. Use vertical space effectively with stackable bins.
Difficulty in Maneuvering
- Cause: The cart may be too heavy or the wheels are too small.
- Solution: Use larger, heavy-duty wheels that can handle the weight and provide smooth movement. Ensure at least two wheels have a locking mechanism for stability.
Rust Formation
- Cause: Exposure to moisture or not using rust-resistant materials.
- Solution: Apply a coat of rust-preventive paint and store the cart in a dry area. Regularly inspect for any signs of rust and treat them early.
Tools Falling Off
- Cause: Lack of secure storage or movement causing tools to shift.
- Solution: Install magnetic strips or lipped edges on shelves to hold tools in place. Consider custom holders for specific tools.
Cart is Too Bulky
- Cause: Overbuilding or not considering the workspace size.
- Solution: Reassess the cart's size and remove any unnecessary parts. Design with a focus on compactness and mobility.
Difficulty Following Plans
- Cause: Complex designs or unclear instructions.
- Solution: Simplify the design where possible and seek out clearer, step-by-step instructions with visuals.
Welds Breaking or Bending
- Cause: Weak welds or incorrect welding techniques.
- Solution: Review welding techniques and ensure you're using the right type of weld for the material. Practice on scrap pieces before attempting on the cart.
Excessive Vibrations
- Cause: Loose parts or uneven surfaces.
- Solution: Double-check all connections and add bracing if necessary. Ensure the cart is used on a flat, even surface.
Lack of Customization
- Cause: Following plans too rigidly without considering personal needs.
- Solution: Adapt plans to include features that match your specific requirements. Don't be afraid to modify designs to better suit your workflow.
Handle these issues to make your welding cart reliable and functional. Simple solutions often work best.
FAQs About DIY Welding Cart
Discover essential faqs about DIY welding cart, covering tips, materials, and step-by-step guidance to enhance your DIY welding projects.
To ensure stability and durability, use thicker gauge metal for areas that will bear more weight, like the base for gas cylinders. Make sure all welds are complete and not just tack welds. Use a speed square to check that all parts are aligned correctly before final welding.
Absolutely! You can customize your welding cart by planning the dimensions and storage spaces to fit your welder, additional equipment like a water cooler or TIG pedal, and any other tools you want to have handy. Sketch out your design before starting and adjust the materials list accordingly.
Yes, safety is paramount. Always wear protective gear like a welding mask and gloves. Be mindful of ventilation, especially if welding galvanized materials, to avoid inhaling harmful fumes. Ensure that the wheels and casters are securely attached and that the cart is balanced to prevent tipping.
To manage electrical cables on your welding cart, consider installing cable hooks or hangers. These can be made from bent metal rods or tubing. Position them on the sides of the cart to keep cables organized and easily accessible. Ensure the hooks are smooth to prevent damage to the cables.
The best way to protect your welding cart from rust is to apply a rust-resistant primer and paint. After constructing your cart, clean the metal surfaces thoroughly, apply the primer, and then finish with a coat of paint. This will not only protect your cart but also give it a professional look.
Final Thoughts
Wrapping up our discussion on building a DIY welding cart, there's no better way to organize your tools and enhance your welding projects. Building a homemade DIY welding cart offers flexibility and customizability tailored to your specific needs. Plus, it's a rewarding project that helps you save money and improve your skills in the process. Start your project today and enjoy the benefits of a personalized welding solution.


