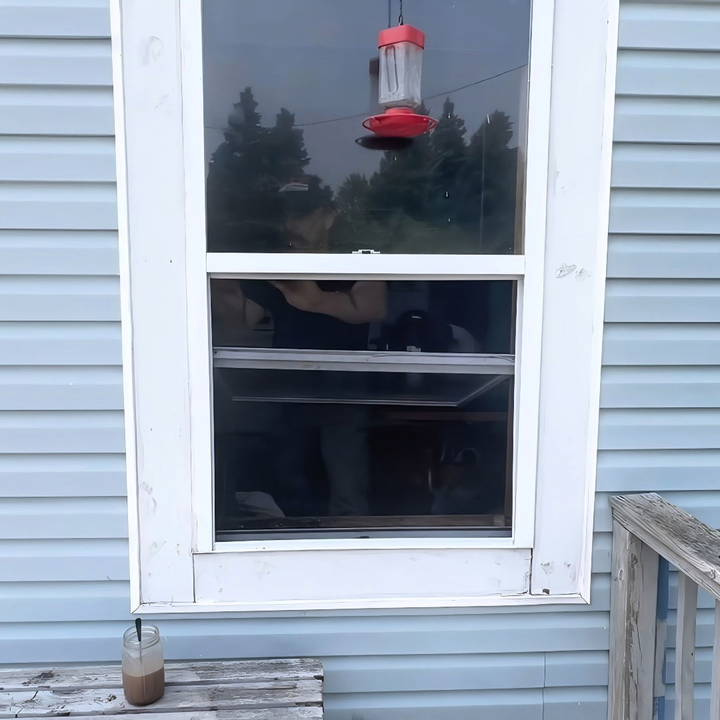
Starting a DIY window screen project can be very exciting. I once decided to replace my old, torn window screens myself. First, I gathered all the materials: a screen frame kit, a roll of screening material, and a spline roller. With these supplies, I carefully measured my window dimensions to ensure an accurate fit.
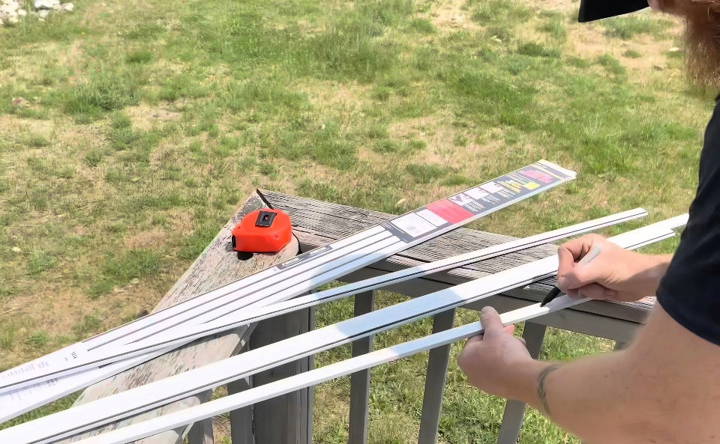
Building the screen was simpler than I thought. I cut the frame pieces to match my window's size and connected them using the provided corner pieces. Next, I laid the screen material over the frame and secured it using the spline roller. This whole process made me feel quite accomplished.
If you're planning this DIY window screen project, I'm helping with this guide to ensure you succeed and enjoy the results.
Materials You'll Need
Before we get started, let's gather the necessary materials:
- Screen Roller Tool - Essential for securing the screen into the frame.
- Carpenter Knife - Needed for precise cuts.
- Tape Measure - Accurate measurements are crucial to ensure the screen fits perfectly.
- Hacksaw - Used to cut the screen frame to size.
- Straight Edge - To guide your cuts and keep lines straight.
- Marker or Pencil - For marking measurements on the frame.
- Screen Frame Kit - Usually includes frame pieces and corner connectors.
- Window Screen Material - Choose a screen material suitable for your needs.
Step by Step Instructions
Learn how to build DIY window screens with our easy, step-by-step instructions. Perfect for beginners looking to upgrade their home!
Step 1: Measure Your Window
First, measure the dimensions of the window where the screen will fit. Measure from one end of the window frame to the other, inside the lip where the screen will sit. Write down both the width and height measurements.
- Tip: Measure twice, cut once. This ensures accuracy and saves material from wastage.
Step 2: Prepare Your Screen Frame Kit
Take out your screen frame kit which should come with frame pieces and corner connectors. Lay out all the components on a flat surface. Remember, the corner pieces will occupy some space, so you need to subtract that from the total length of the frame pieces.
- For example, if the corner pieces take up ¾ inch each, you'll need to subtract 1.5 inches from the total length of each side (for two corner pieces).
Step 3: Cut the Frame Pieces
Mark the necessary lengths on the frame pieces using a marker or pencil. Use a hacksaw to cut the frame pieces to the appropriate lengths. Make sure to cut smoothly and straight.
- Tip: Use the straight edge to guide your cuts for precision. Be patient—rushing this step can lead to crooked frames.
Step 4: Assemble the Frame
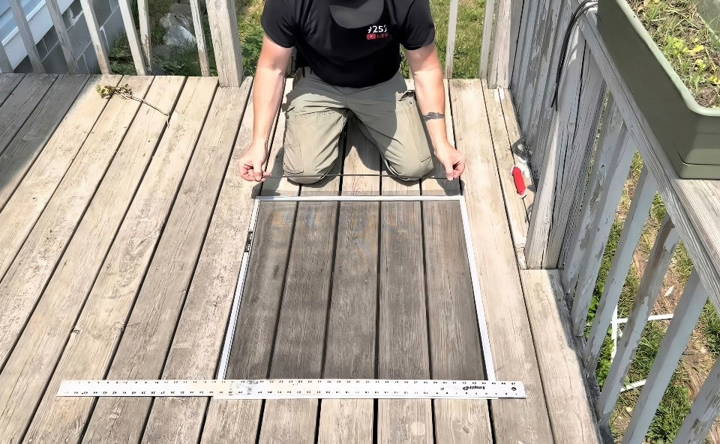
Insert the corner pieces into the ends of the frame pieces. Connect all four corners tightly ensuring that the frame is squared. Your assembled frame should resemble the dimensions of your window, minus the tiny allowance for the corner pieces.
Step 5: Lay Out the Screen Material
Lay your cut frame on a flat, clean surface. Roll out the screen material over the frame. Make sure there's enough overlap on all sides.
Step 6: Cut the Screen Material
Using the straight edge as a guide, cut the screen material, leaving a bit of overlap around the edges. This overlap will allow you to secure the screen into the frame snugly.
Step 7: Secure the Screen
This is where the screen roller tool comes into play. Starting from one corner, use the roller tool to press the screen into the groove on the frame. Insert the rubber spline (provided with the kit) over the screen and press it down into the groove using the rounded side of the roller tool.
Work your way around the frame, ensuring the screen is taut and evenly spread.
- Tip: Start from the middle of each side to maintain even tension on the screen.
Step 8: Trim the Excess Screen
Once the screen is secured, use the carpenter knife to carefully trim away any excess screen material. Leave a small allowance around the edges - about ¼ inch - in case you need to re-tighten the screen in the future.
Final Step: Install the Screen
Carefully place the finished screen into the window frame. Make sure it fits snugly and doesn't bow outwards or inwards.
Design Customization Ideas
When it comes to DIY window screens, functionality meets creativity. Your window screen doesn't just have to be a barrier against bugs; it can also express your personal style and complement your home's decor. Here are some design customization ideas that are easy to understand and implement:
- Choose Your Frame Wisely The frame of your window screen is like the canvas for your artwork. Select a frame material that's easy to work with and paintable. Aluminum frames are durable and can be painted to match your window trim. Wooden frames offer a classic look and can be stained or painted in any color.
- Paint Patterns With some masking tape and spray paint, you can build geometric patterns on your screen. Think stripes, chevrons, or even a Moroccan tile pattern. Just make sure the paint is suitable for the screen material and the outdoors.
- Add a Stencil Design Stencils are a great way to add intricate designs to your screen. You can purchase stencils or make your own. Use outdoor-friendly paint to apply the stencil design lightly so that it doesn't block airflow or visibility.
- Incorporate Nature If you're a nature lover, why not press small leaves or flowers into the screen for a subtle, natural decoration? Arrange them on the screen and then gently roll over them with a rubber roller to embed them into the material.
- Use Colored Screens Screens come in different colors, not just the standard gray or black. A colored screen can add a soft tint to your window and room. For example, a green screen can blend with your garden, while a blue one can give a calming effect.
- Attach Decorative Elements For a quick and festive touch, attach lightweight decorative elements to the screen. This could be anything from small flags to thin wooden cutouts. Use a strong adhesive that's designed for the screen material.
- Build a Privacy Screen If you want more privacy, use a tighter mesh or a screen with a pattern that obscures the view from the outside. You can also layer screens with different weaves to build a unique look that still lets in light and air.
Have fun and be creative with your DIY projects. Use these ideas as a base, mix and match, or build your own designs.
Tips for Maintenance and Repair
Keeping your DIY window screens in top shape is crucial for them to continue serving their purpose effectively. Here are some straightforward tips for maintaining and repairing your window screens, ensuring they last longer and look great:
- Regular Cleaning Firstly, gentle cleaning is essential. Use a soft brush or a vacuum with an upholstery attachment to remove dust and cobwebs. For a deeper clean, take the screens down and wash them with warm, soapy water. Rin't them thoroughly and allow them to dry completely before reinstalling.
- Inspect for Damage Periodically check your screens for any holes or tears. Even small damage can let in insects, so it's important to address these issues promptly. Clear nail polish can be a quick fix for tiny holes. For larger tears, you'll need to patch the screen or replace the mesh.
- Patch It Up To patch a hole, cut a piece of screen material that covers the damaged area, plus an extra inch around it. Use screen repair tape or adhesive for a temporary fix, or sew the patch on with a screen repair kit for a more durable solution.
- Replace the Screen Mesh. If the damage is too extensive, replacing the mesh might be necessary. Remove the spline (the rubber material that holds the screen in place), take out the old mesh, and lay the new screen over the frame. Use a spline roller to push the spline back into the groove, securing the new mesh.
- Check the Frame The frame should also be inspected for any bends or breaks. A bent frame can be gently straightened by hand. If the frame is broken, it might be possible to use a corner brace or splint to repair it.
- Lubricate Moving Parts If your window screen slides open and closed, ensure the tracks and rollers are clean. Lubricate them with silicone spray to keep the movement smooth and prevent rust.
- Store Screens Properly If you remove your screens during the colder months, store them in a flat, dry place to prevent warping and moisture damage.
By following these tips, you can ensure your DIY window screens remain functional and attractive for years to come.
Safety Precautions
When embarking on a DIY window screen project, safety is paramount. Here's a comprehensive guide to ensure you undertake your project safely and effectively:
- Wear Protective Gear Always wear safety glasses to protect your eyes from flying debris when cutting screen material or frame components. Gloves are also recommended to prevent cuts from sharp edges.
- Proper Tool Handling: Use tools designed for screen installation, such as a spline roller and a utility knife. Ensure you know how to use them correctly to avoid accidents. Keep tools in good condition and replace any that are damaged or worn out.
- Ventilation: If you're painting or applying any chemical treatments to your screen or frame, work in a well-ventilated area. Fumes from paints and solvents can be harmful if inhaled in enclosed spaces.
- Ladder Safety: If you need to use a ladder to install screens on higher windows, make sure it's stable and secure. Always maintain three points of contact (two feet and one hand) on the ladder.
- Careful Cutting When cutting screen material or frame pieces do so on a stable surface. Sharp blades are used to ensure clean cuts and reduce the risk of the material slipping.
- Secure Your Work Area Keep your work area tidy and free of obstacles to prevent tripping or stepping on tools. Store sharp tools safely when not in use.
- Child and Pet Safety: If you have children or pets, keep them away from the work area. Small parts and tools can be choking hazards, and sharp edges can cause injuries.
- Follow Instructions: If you're using a kit or following a tutorial, read through all instructions first. Understanding the process before you start can prevent mistakes and accidents.
- Know Your Limits If a part of the project seems beyond your skill level, don't hesitate to seek professional help. It's better to be safe than sorry.
By adhering to these safety precautions, you can enjoy a successful DIY project without compromising your well-being.
FAQs About DIY Window Screen
Discover answers to common questions about DIY window screen projects, including materials, tools, and step-by-step guides.
Measure the height and width of the window slot where the screen will fit. Subtract about 1.5 inches from both measurements to ensure the screen frame fits easily into the slot.
Yes, you can replace just the mesh. Remove the old spline and screen, lay the new screen over the frame, and use the spline roller tool to press the new spline and screen into the frame’s groove. Trim the excess screen with a utility knife.
Fiberglass mesh is the most common and affordable option. It’s durable, rust-resistant, and easy to work with. Other types include aluminum, which is more rigid, and solar screening, which can block more UV rays.
To ensure a perfect fit:
Double-check your window’s measurements before cutting the frame.
Cut the frame material accurately using a hacksaw.
Assemble the frame on a flat surface to maintain its shape.
Roll the screen material tightly to avoid wrinkles or sagging.
Install leaf springs or tension springs to keep the screen snug in its place.
Avoid these common mistakes:
Not measuring the window slot correctly, leading to a poor fit.
Cutting the screen material too small, which can't be fixed without a new piece.
Overstretching the screen material, which can cause tearing.
Skipping the use of a spline roller tool, resulting in a loose fit.
Forgetting to trim the excess screen, leaving an untidy appearance.
Conclusion:
Making your own DIY window screen is easier than it seems. You get full control over the size and materials used. Plus, it saves you money and time compared to buying pre-made screens. Get started today and see the difference. These simple steps will help you build a functional and durable window screen for your home.


