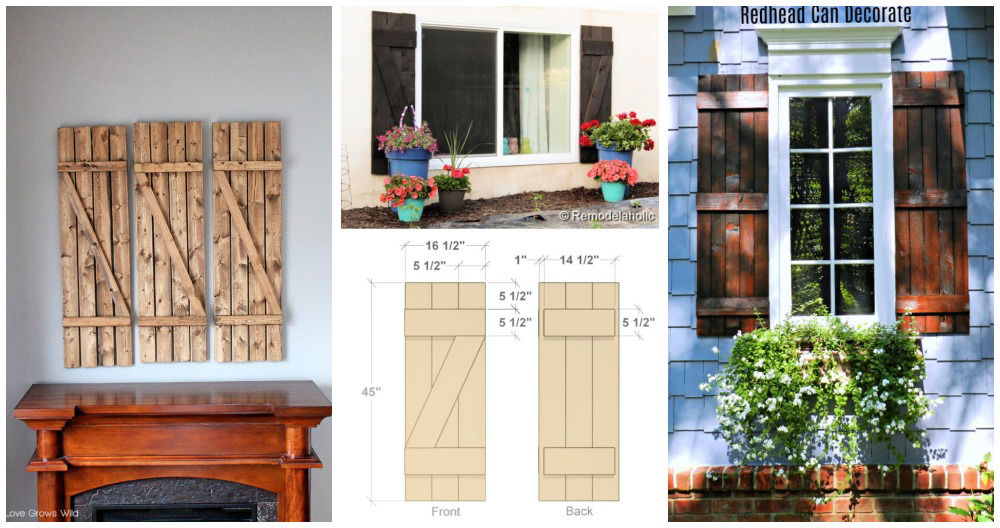
I moved into my new home last year, and I wanted to add both privacy and style to my windows. That's when I decided to make DIY shutters. It was an exciting project, as I love working with my hands, and it saved me money. These cheap window shutters were easy to make with some basic tools and supplies.
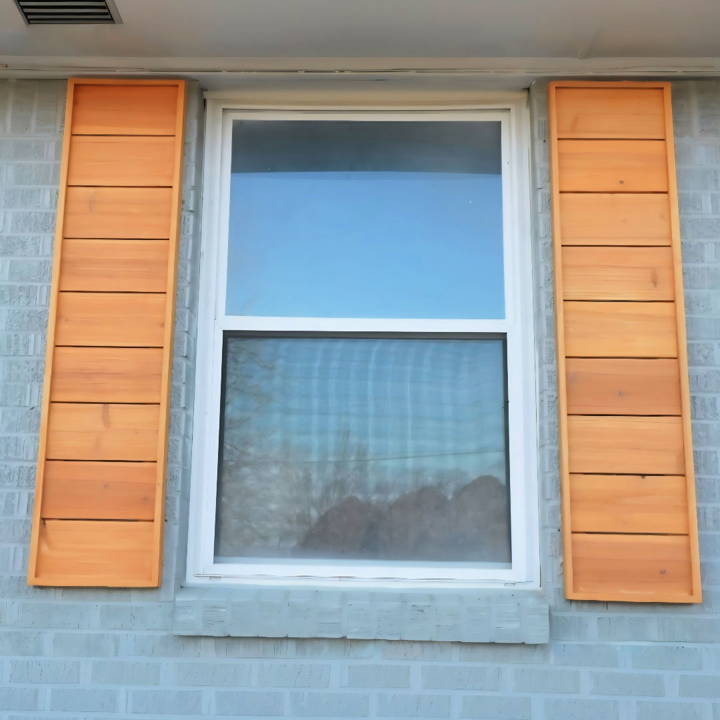
First, I chose wooden shutters for windows because they look elegant and blend well with my home's decor. With some patience and a few weekends, I completed them. Seeing the final product gave me immense joy and satisfaction. I'm sharing this to help you enhance your home's privacy and style.
Step by Step Instructions
Learn how to build DIY shutters with easy step-by-step instructions. Perfect for beginners wanting to boost curb appeal today!
Choosing Cedar Fence Pickets
- Why Cedar? Cedar was my material of choice for a few reasons. Its natural resistance to weather and water makes it ideal for outdoor projects. Plus, cedar is remarkably affordable, which is important for a budget-conscious DIYer like myself. It's also readily available, which saved me time hunting down materials.
Measuring and Cutting
The first step was removing my old shutters and taking precise measurements. The dimensions of my new shutters were designed to mirror the old ones, ensuring a perfect fit. Each horizontal slat was cut to 11 1/2 inches in length, allowing me to optimize each cedar board without wastage. For accuracy and clean cuts, I used a speed square and a finishing blade, making sure all edges were perfectly square.
Assembly Process
- Vertical Supports: After cutting my horizontal slats, I moved on to build vertical supports by ripping the cedar pickets into three equal pieces. This part of the process required a meticulous approach to ensure the supports were perfectly aligned with the slats.
- Gluing and Nailing: To assemble, I flipped the slats face down and applied outdoor-rated wood glue, followed by securing the pieces with 1-inch long nails. The glue choice here is crucial; I opted for Titebond III due to its strength and durability outdoors.
Sanding and Building the Frame
Before adding the frame, I sanded the assembled panel with 120 grit sandpaper. This step is vital as cedar can be quite rough straight from the store. Sanding not only smoothed out the surface but also enhanced the natural beauty of the cedar.
- Building the Frame: For the mitered frame, I cut additional cedar pieces an inch and a half wide. Each piece of the frame was cut individually to ensure a snug fit, acknowledging that the original measurements might not account for any slight discrepancies in squareness.
Staining
Choosing the right stain was paramount for protecting the cedar and achieving the aesthetic I desired. I opted for a natural cedar tone that accentuated the wood's innate beauty. I diverged from the recommended application method by using a rag, which allowed me to work the stain into every nook and cranny of the assembled shutters.
Installation Process
Installing the shutters involved making a cleat system for secure attachment to the house. After cutting scrap pieces of cedar to act as cleats, I fastened them to the brick with tapcon screws, ensuring they aligned with the top and bottom of the shutters. This step required precision, and opting to use my smartphone as a makeshift level proved incredibly handy.
Design Customization Ideas
DIY shutters let you match them to your style and home's unique character. Here are design ideas to make your shutters both functional and creative.
- Choose Your Style: Start by selecting a shutter style that complements your home. The classic board and batten design is timeless and works well with a variety of architectural styles. For a more rustic look, consider using cedar wood, which is durable and has a natural resistance to the elements. If you're aiming for a modern aesthetic, plywood shutters can be cut into sleek, clean lines for a contemporary feel.
- Play with Colors: Color can dramatically change the appearance of your shutters and your home. Bright colors like aqua or red can add a playful touch, while neutral hues can offer a subtle, sophisticated look. If you're unsure, you can never go wrong with classic white, black, or natural wood tones.
- Add Decorative Cutouts: For an extra personal touch, consider adding decorative cutouts to your shutters. This could be anything from geometric patterns to silhouettes of your favorite plants or animals. Not only do they add visual interest, but they also allow light and air to pass through.
- Incorporate Hardware: Hinges, clavos (decorative nail heads), and tie-backs can add both functionality and decorative detail to your shutters. Choose hardware that matches the style of your home and the shutters for a cohesive look.
- Consider the Finish: The finish of your shutters can greatly affect their longevity and appearance. If you choose to paint your shutters, make sure to use exterior-grade paint that can withstand the elements. For a natural look, consider sealing the wood to protect it while maintaining its natural beauty.
- Functional Features: If you live in an area with extreme weather, consider making your shutters functional. This means they can be closed to protect your windows during storms. Ensure they are properly sized and installed with the right hardware to handle the weight.
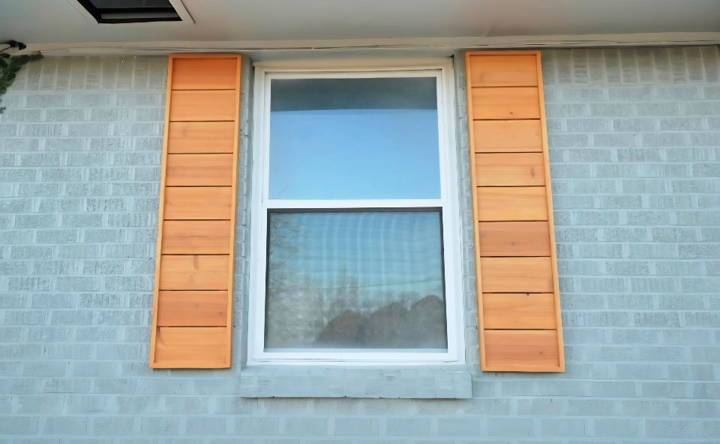
Implementing these ideas, your shutters can become a statement piece, improving your home's curb appeal. Focus on details for excellent DIY shutters, planning and executing with care.
Troubleshooting Common Issues
Building DIY shutters can be a rewarding project, but sometimes you might run into a few hiccups along the way. Here's a guide to help you troubleshoot some common issues you may encounter, ensuring your shutters turn out just right.
- Sticking or Jamming: If your shutters are sticking or not moving smoothly, check for any paint buildup or debris in the tracks. Sand down any rough edges and apply a silicone-based lubricant to ease movement.
- Warped Wood: Exposure to moisture can cause wood to warp. To prevent this, select high-quality kiln-dried wood and seal it properly before installation. If warping occurs, you may need to replace the affected slats.
- Loose or Squeaky Hinges: Over time, hinges may become loose or start to squeak. Tighten any loose screws and apply a lubricant to the hinges. If the problem persists, consider replacing the hinges with heavier-duty models.
- Misaligned Shutters: Ensure that your shutters are hung level and evenly spaced. If they're misaligned, they won't close properly. Adjust the hinge placement as needed to achieve proper alignment.
- Rot or Insect Damage: Regularly inspect your shutters for signs of rot or insect damage, especially if you've chosen wood that's prone to these issues. Treat the wood with a protective coating and repair or replace damaged sections promptly.
- Fading Color: The sun can cause the color of your shutters to fade over time. Use UV-resistant paint or stain and perform touch-ups as needed to maintain the vibrant color of your shutters.
- Difficulty in Installation: If you're having trouble installing the shutters, double-check the measurements and ensure you have the correct tools for the job. Sometimes, it helps to have an extra pair of hands, so don't hesitate to ask for help.
By being aware of these common issues and knowing how to fix them, you'll be well on your way to making beautiful, long-lasting DIY shutters.
FAQs About DIY Shutters
Discover the top faqs about DIY shutters, including installation tips, cost, materials, and maintenance for your perfect window treatment project.
Accurate measurements are key. Measure the height and width of your window frame from the outside edges. For traditional shutters, add about 2-4 inches to the width for proper coverage and aesthetics.
Yes, you can build functional shutters that provide privacy and protection from the elements. Plans range from basic to advanced, so choose one that matches your skill level. Functional shutters often use hinges and may require precise cutting and assembly.
After assembling your shutters, apply a finish that complements your home's exterior and provides additional protection. For installation, use exterior screws to attach the shutters to your home's siding or brick. Ensure they're level and securely fastened.
Start by considering the style of your home and the function you want your shutters to serve. For a traditional look, board and batten shutters are a classic choice and relatively easy to build. If you prefer a more rustic appearance, cedar shutters can add that charm and are naturally durable. Use design software or sketch your ideas on paper, including dimensions and patterns.
To protect your shutters from the elements, choose materials like cedar wood, which is naturally resistant to decay and insects. After construction, apply a weather-resistant finish such as an exterior paint or a sealant designed for outdoor wood. This will help to preserve the wood and maintain the appearance of your shutters over time.
Final Thoughts
Building your own DIY shutters is a rewarding experience that adds value to your home. I'm excited to share this with you and hope it inspires you to get started on your project.


