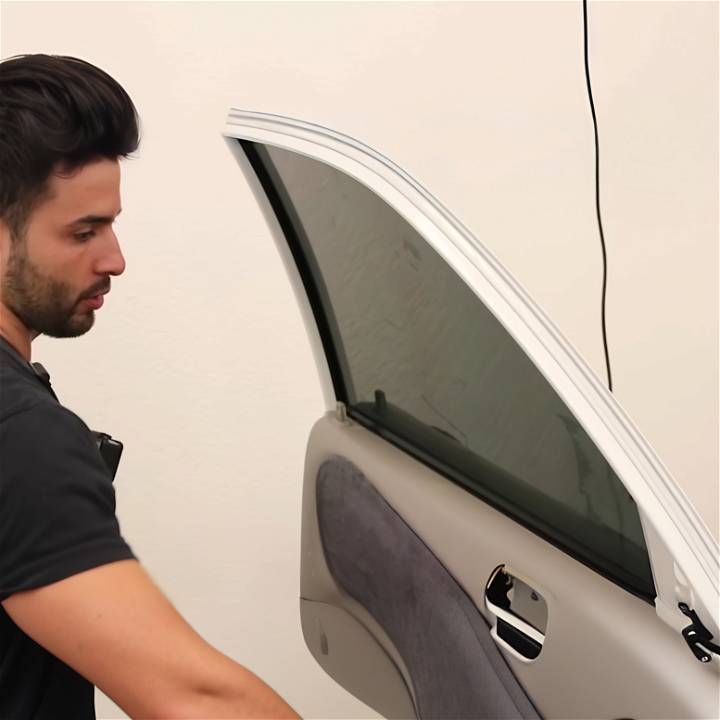
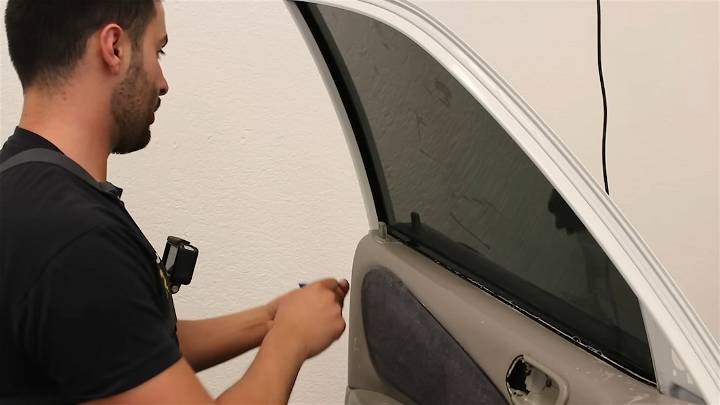
Starting with a simple thought, I decided to tint my own car windows. It seemed like a great way to save money and learn something new at the same time. I had never done anything like this before, so I began by gathering all the necessary tools and materials. It was important for me to make sure I understood the process before starting.
The first step was cleaning the windows thoroughly. This made sure that no dirt or dust would get trapped under the tint. Next, I carefully measured and cut the tint film to fit each window. This part required a lot of patience and precision. Applying the tint without bubbles or creases was challenging, but I kept a steady hand and took my time. After finishing, I stepped back to admire my work, feeling quite proud of what I had accomplished.

If I can do it, so can you. I hope my experience inspires you to give DIY window tinting a try. It's a rewarding project that not only improves the look of your car but also provides privacy and protection from the sun. With patience and careful execution, you'll be able to achieve great results. Remember, the key is to go step by step and not rush the process.
Why Tint Your Windows?
Window tinting is more than just an aesthetic enhancement for your vehicle. It offers numerous benefits that can significantly improve your driving experience. Here's why you should consider tinting your windows:
UV Protection
Window tints can block up to 99% of harmful UV rays, which can lead to skin aging and skin cancer. By tinting your windows, you're adding an extra layer of protection for you and your passengers.
Improved Privacy and Security
Tinted windows provide an increased level of privacy inside your vehicle. This not only deters prying eyes but can also discourage potential thieves who are less likely to break into a car if they can't see what's inside.
Enhanced Vehicle Appearance
Window tints can give your vehicle a sleek, sophisticated look. With a variety of shades available, you can choose a tint that complements your vehicle's color and style.
Increased Energy Efficiency
By blocking the sun's heat, window tints can help keep the interior of your car cooler, reducing the need for air conditioning and improving fuel efficiency.
Reduced Glare
Tinted windows can significantly reduce the glare from the sun and headlights, providing a more comfortable and safer driving experience.
While window tinting offers many benefits, it's important to check local regulations, as some areas restrict the level of tint allowed on vehicles.
Types of Window Tints
When it comes to window tinting, there are several types to choose from. Each type has its own unique properties and benefits. Here's a breakdown of the most common types:
Dyed Window Tint
This is the most affordable type of window tint. The tint is maked by adding dye to the adhesive layer. It provides a flat and opaque appearance that can enhance privacy and reduce glare. However, it may not offer as much heat rejection as other types.
Metalized Window Tint
Metalized tint uses tiny metallic particles embedded in the film to reflect sunlight, thereby reducing heat and glare. It's highly durable and resistant to scratching. However, it can interfere with cell phone and GPS signals.
Carbon Window Tint
Carbon tint provides excellent heat rejection and UV protection. It doesn't fade over time like dyed tint and doesn't interfere with signals like metalized tint. It also gives a stylish, matte-finish look to your windows.
Ceramic Window Tint
Ceramic tint is the highest quality window tint. It uses ceramic particles that are nonconductive and nonmetallic. It offers superior heat rejection, and UV protection, and doesn't interfere with electronic devices. It's also the most expensive type of tint.
When choosing a window tint, consider your specific needs, local laws, and your budget. Each type of tint has its pros and cons, so it's important to choose the one that best fits your requirements.
How to Tint Windows for Beginners
Tinting your car windows not only enhances its appearance but can also provide privacy and reduce heat and glare inside your vehicle. Here's a beginner-friendly guide to help you tint your windows like a pro.
Tools and Materials Required
Before you begin, gather the following tools and materials to ensure a smooth process:
- Window Tint Film
- Glass Cleaner
- Blue Max Squeegee (or any squeegee)
- Olfa Blade (ensure it's stainless steel to avoid glass damage)
- Scrubby Pad (or dishwasher scrub pad)
- Hard Card (like a debit card)
- Tri-Edge or Soft Triangle Card
- Angled Squeegee
- Scraper Blade
- Soap Solution (mix water with a few drops of dish soap)
- Spray Bottle
- Tape Measure
- Microfiber Towels
- Blow Dryer (as a substitute for a heat gun)
Step-by-Step Instructions:
Learn the basics of window tinting in this beginner-friendly guide. Discover tips, tricks, and techniques to achieve professional results at home.
Preparing the Window:
- Clean the Window: Start by thoroughly cleaning the window with glass cleaner to remove any dirt or debris. Use a scraper blade to remove any stubborn particles.
- Measure and Cut the Tint Film: Measure your window and cut the tint film accordingly, leaving extra inches around the edges for adjustment. Ensure the bottom of the film is aligned straightly.
- Wet the Window: Spray a liberal amount of the soap solution on the window. This helps in positioning the film and removing air bubbles later on.
Applying the Tint Film:
- Peel the Film: Carefully peel off the protective liner from the tint film. It's easier to do this by slightly dampening your fingers and separating the film from the liner.
- Apply the Film: Start from the bottom, gradually pressing the film onto the window. Use a squeegee to push out any air bubbles and excess water towards the edges.
- Trim the Edges: Use the Olfa blade for precision cutting of the excess film. It's essential to cut carefully to avoid damaging the window seal or glass.
- Heat Shrinking: For curved windows, use a blow dryer to gently heat the film and shrink it to fit the window contour perfectly. Move the dryer back and forth to prevent overheating in one spot.
- Final Touches: Once the film is applied, go over it once more with the squeegee or hard card to ensure no water pockets or air bubbles are left behind. Wipe the window with a microfiber towel for a clean finish.
Aftercare and Tips:
- Allow the tint to cure for a few days before rolling down the windows.
- Avoid using sharp objects near the tinted windows to prevent scratches.
Video Tutorial
To complement this guide, watch this step-by-step video tutorial for window tinting.
It pairs well with this written guide, providing a visual view of the techniques discussed in an easy-to-understand manner, ensuring you grasp the process thoroughly.
Tinting windows is a rewarding project that, with patience and precision, can greatly benefit your vehicle's aesthetics and functionality. Follow this guide and video tutorial closely to achieve professional-looking results on your first try
Troubleshooting
Even with careful preparation and execution, you may encounter some issues during or after the window tinting process. Here are some common problems and their solutions:
Bubbles in the Tint
Bubbles can form if the tint isn't applied smoothly or if there's dirt on the windows. To fix this, you can use a heat gun and a hard card to push the bubbles towards the edge of the window. If the bubbles persist, you may need to reapply the tint.
Peeling Tint
Peeling can occur over time due to wear and tear or improper application. If your tint starts to peel, it's best to remove it completely and apply a new layer.
Fading Tint
Over time, exposure to sunlight can cause your tint to fade. High-quality tints like carbon and ceramic are more resistant to fading. If your tint is fading, it may be time to replace it.
Hazy or Blurry Windows
This can happen immediately after application as the adhesive needs time to dry. Wait a few days for the haze to clear. If it doesn't, there may be an issue with the tint quality or installation.
If you're not confident in fixing these issues yourself, it's best to seek help from a professional. Window tinting can be a tricky process, but with patience and practice, you can achieve a great result.
Legal Considerations
Before you start tinting your windows, it's crucial to be aware of the legal implications. Laws regarding window tinting vary widely, so it's important to check your local regulations. Here are some key points to consider:
Tint Percentage
Most regions have laws specifying the maximum darkness or ‘Visible Light Transmission' (VLT) percentage allowed for window tints. This is the amount of light that can pass through your windows. Make sure your tint falls within the legal VLT percentage in your area.
Windshield Tinting
In many places, tinting the windshield is either completely prohibited or allowed only above a certain line. Check your local laws to see if windshield tinting is permitted.
Reflective Tints
Some regions prohibit the use of reflective or mirrored tints due to the potential glare they can cause for other drivers. If you're considering a reflective tint, make sure it's legal in your area.
Penalties
Violating tinting laws can result in fines, points on your license, or even impounding of your vehicle in some cases. It's important to comply with the laws to avoid these penalties.
Staying informed and respecting the law is a crucial part of any DIY project. Always check with local authorities or a legal professional if you're unsure about the regulations in your area.

Maintenance and Care
Proper maintenance and care are crucial to prolong the life of your window tints and keep them looking their best. Here are some tips:
Cleaning
Clean your tinted windows regularly to keep them clear and shiny. Use a soft cloth or sponge and a non-ammonia cleaner, as ammonia can damage the tint. Spray the cleaner onto the cloth, not directly onto the window, to prevent it from getting under the film.
Avoid Harsh Sunlight
While window tints are designed to block UV rays, prolonged exposure to harsh sunlight can still cause them to fade over time. If possible, park your car in the shade or in a garage.
Be Gentle
Avoid using sharp objects near your tinted windows to prevent scratches or tears. Be careful when loading and unloading items from your car.
Professional Inspection
Consider having your tinted windows inspected by a professional annually. They can spot any potential issues and recommend necessary repairs.
With proper care and maintenance, your window tints can remain in great condition for many years. Enjoy the benefits they bring to your driving experience!
FAQs About DIY Window Tint
Discover the answers to all your questions about DIY window tinting in our comprehensive FAQs guide. Learn everything you need to know before starting your project!
1. How long does window tinting take?
The time it takes to tint windows can vary depending on the number of windows and the type of vehicle. On average, it can take 2-4 hours for a professional to tint a car's windows.
2. How long does window tint last?
With proper care, window tints can last up to 10 years. High-quality tints like ceramic and carbon can last even longer.
3. Can I roll down my windows immediately after tinting?
No, it's recommended to wait at least 3-5 days before rolling down your windows. This allows the adhesive to dry properly.
4. Can window tint be removed?
Yes, window tint can be removed. However, it's a delicate process and may be best left to professionals to avoid damaging the windows.
5. Does window tinting affect GPS signals?
Some types of window tint, particularly metalized tints, can interfere with GPS signals. If you rely on GPS, consider using non-metallic tints like carbon or ceramic.
6. Is window tinting legal?
The legality of window tinting varies by location. Some regions have restrictions on the darkness of the tint and which windows can be tinted. Always check local laws before tinting your windows.
7. Does window tinting prevent glass from shattering?
While window tint doesn't prevent glass from breaking, it can hold shattered glass together, reducing the risk of injury in an accident.
8. Can window tinting protect against UV rays?
Yes, most window tints can block up to 99% of harmful UV rays, protecting your skin and the interior of your car from sun damage.
9. Does window tinting reduce heat?
Yes, window tinting can significantly reduce the amount of heat inside your car by reflecting sunlight.
10. Can I tint my windshield?
In many places, tinting the windshield is either completely prohibited or allowed only above a certain line. Check your local laws to see if windshield tinting is permitted.
Conclusion:
In conclusion, adding DIY window tint to your home can enhance privacy, reduce glare, and lower energy costs. With easy-to-follow instructions and affordable materials, this project is a practical and aesthetic upgrade for any homeowner.


