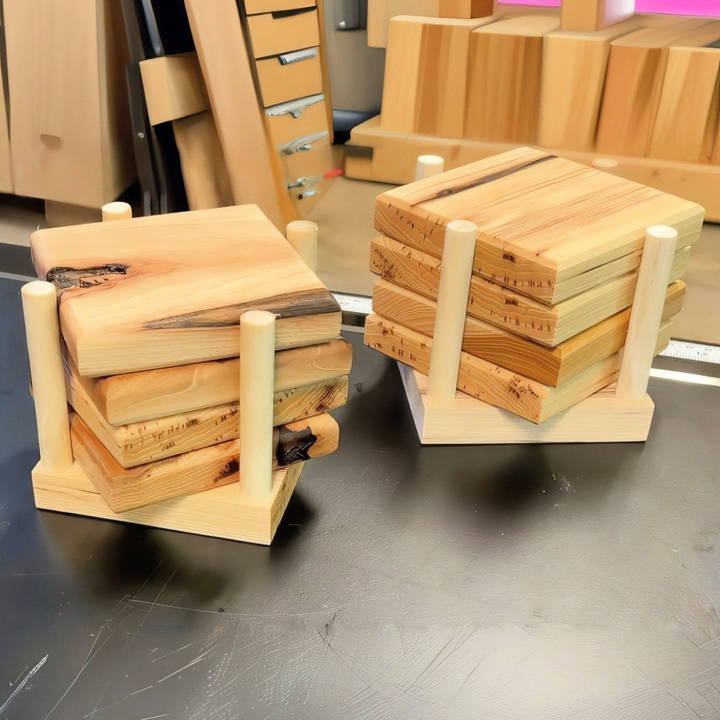
Building custom DIY wood coasters is a fun, straightforward project that adds a unique, rustic charm to your home or makes a perfect handcrafted gift. This tutorial covers the process of making wooden coasters, from a simple beginner design to an intermediate version with scrap wood, including clear steps for shaping, finishing, and adding a coaster holder. We'll also discuss safe woodworking practices, tools you'll need, and tips for finishing your coasters for durability and aesthetic appeal.
Materials and Tools Needed
Discover essential materials and tools needed for your project. Simplify your setup with our comprehensive guide. Optimize efficiency today!
Materials:
- Hickory Wood: Ideal for a rustic look, but any hardwood will work.
- Scrap Wood Pieces: Various types for the laminated design.
- Wood Glue (Titebond III recommended): For strong, waterproof bonding.
- Double-Sided Tape: Used for securing small pieces safely.
- Beeswax and Mineral Oil Finish: A food-safe finish that enhances wood grain.
Tools:
- Table Saw: For precise cutting of coaster squares.
- Planer: To smooth and flatten glued wood pieces.
- Router with Chamfer or Roundover Bit: For clean, rounded edges.
- Miter Saw: Useful for cutting wood to exact dimensions.
- Sandpaper (150-grit and finer): To smooth the coasters for a professional finish.
- Clamps: For securing wood pieces while gluing.
Safety gear, such as safety glasses, hearing protection, and a dust mask, is also essential when working with wood.
Step by Step Instructions
Learn how to make stunning DIY wood coasters with step-by-step instructions, from beginner to intermediate designs, including finishing tips and a holder.
1. Beginner Coasters: A Simple Approach
The beginner-friendly coaster project involves using hickory or other hardwood scrap pieces, making an attractive yet simple coaster without complicated glue-ups. Follow these steps to get started:
Cutting the Coasters
- Prepare the Wood: Start with square pieces of hickory or another hardwood.
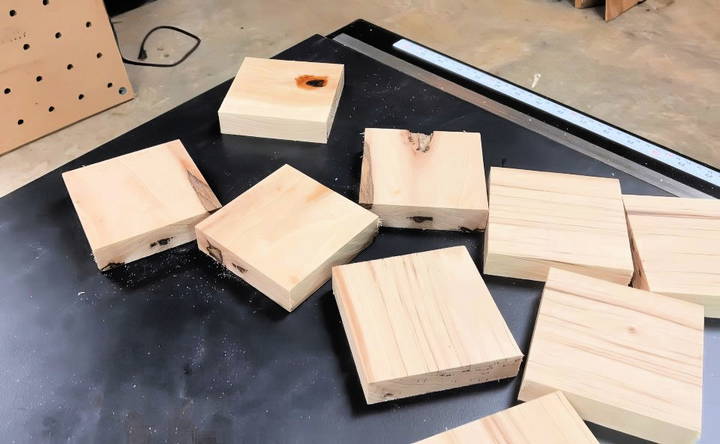
- Measure and Cut: Using a table saw, cut each piece into 4x4-inch squares. This size is perfect for a typical coaster.
- Plan Quantity: For each set, make four coasters. If you're also making a coaster holder, cut two additional pieces to act as its base.
Smoothing and Shaping
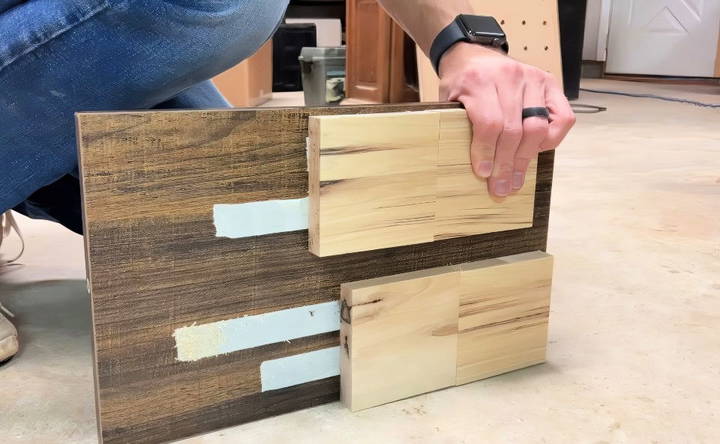
- Use the Planer: To ensure all coaster pieces are evenly smooth, use a planer. If you're working with smaller pieces, secure them with double-sided tape on a flat board to avoid movement during the planing process.
- Sanding: Sand each coaster thoroughly, starting with 150-grit sandpaper and moving to finer grits for a smooth finish.
Routing the Edges
- Choose Your Edge Style: For variety, use a chamfer bit on one set of coasters for a sharp, angled edge and a roundover bit on the other for a softer, curved edge. This gives you options and adds interest to your set.
- Router Safety: Ensure that you're using a router table if possible, as it provides greater control and precision, especially when shaping small objects like coasters.
2. Intermediate Coasters: Laminated Wood Design
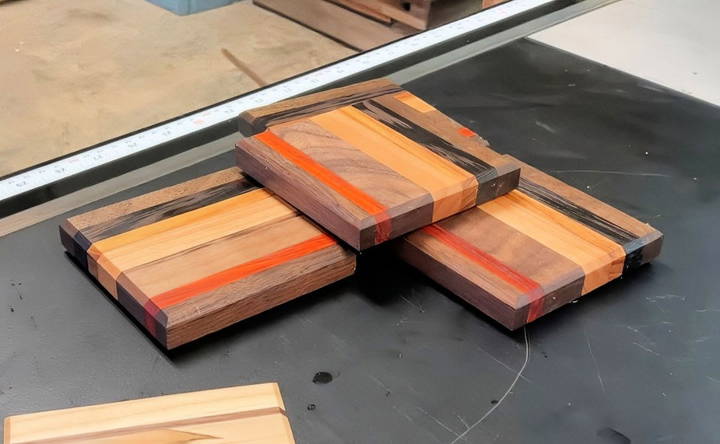
For the intermediate project, you'll use various scrap wood types to build a beautiful, laminated design. This method involves gluing and planing multiple pieces of wood together, resulting in a unique, multi-tone coaster.
Preparing the Wood for Lamination
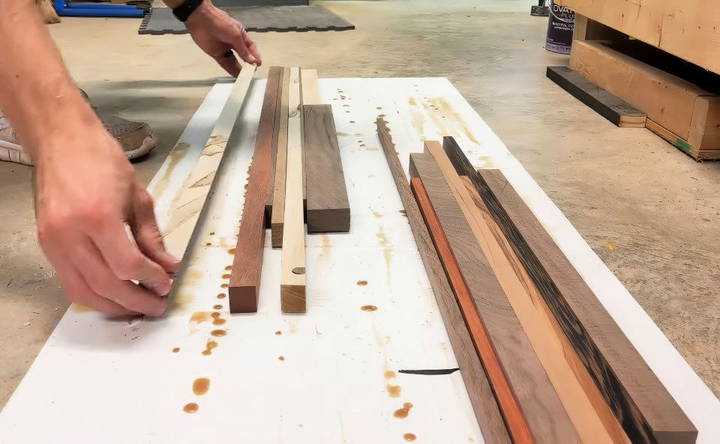
- Select and Cut Scrap Wood: Choose pieces of scrap wood with different grains and colors for an eye-catching pattern.
- Arrange the Pieces: Lay out the pieces in the desired pattern and glue them together, using wood clamps to hold them in place until dry.
Planing the Laminated Wood
- Secure the Board: Once glued, run the entire piece through a planer to achieve a flat, smooth surface. Ensure the grain of each piece runs in the same direction to avoid rough edges.
- Safety Tip: Avoid standing directly behind the planer, especially with laminated wood, in case any piece becomes dislodged.
Cutting and Shaping
- Cut Coaster Squares: With the laminated wood block, cut out 4x4-inch squares using a table saw or miter saw.
- Route the Edges: Like the beginner project, use either a chamfer or roundover bit on the edges to refine the coaster's look.
3. Making a Coaster Holder
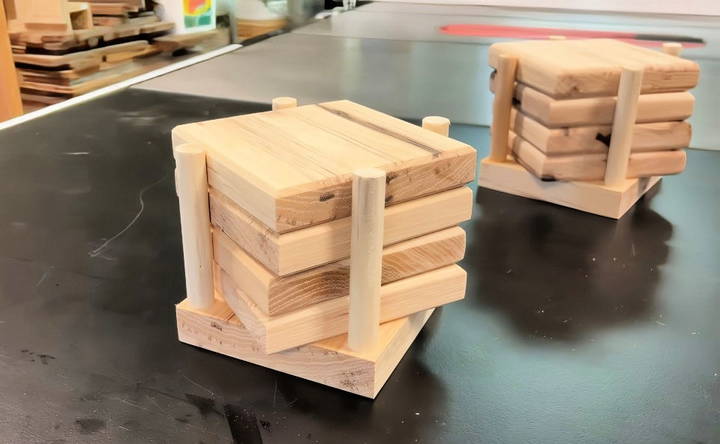
Adding a coaster holder is a thoughtful way to complete your set, offering both organization and presentation.
Designing the Holder
- Size and Shape: Measure the base to fit four coasters comfortably. Typically, this is around 4.5x4.5 inches for a set of 4-inch coasters.
- Choose the Wood: Use the same wood as the coasters for a cohesive look, or choose a contrasting wood type for visual interest.
Building the Holder
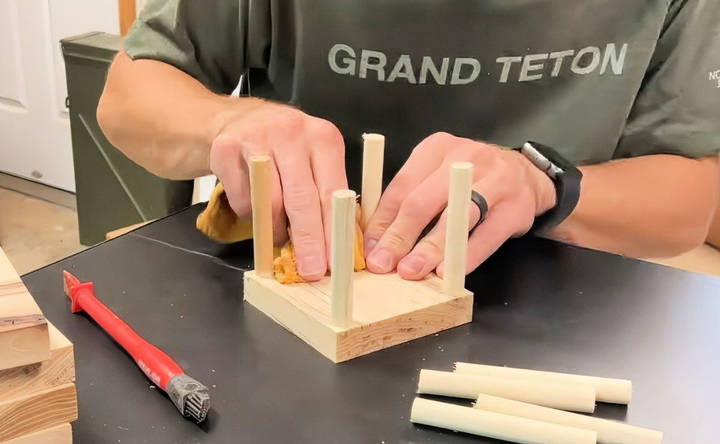
- Cut the Base and Sides: Cut a base and two side pieces to form a U-shape holder.
- Assemble with Glue: Secure the sides to the base with wood glue and clamp until dry.
- Sand and Smooth: Sand the holder to match the finish of the coasters, focusing on smoothness for easy handling.
4. Finishing and Protecting Your Coasters
A proper finish protects the coasters and brings out the natural beauty of the wood. Here's a reliable method for an easy, durable finish.
Choosing the Finish
- Use a Food-Safe Finish: A combination of beeswax and mineral oil works well, as it is both protective and easy to reapply when needed. This finish enhances the wood grain without altering the color dramatically.
Applying the Finish
- Rub On the Finish: Use a clean cloth to apply a thin layer of the beeswax and mineral oil mixture across all sides of the coaster. Let it sit for a few minutes to absorb.
- Buff for Shine: Buff the surface gently with a soft cloth until it achieves a satin sheen.
Reapplication and Care
- Regular Maintenance: For a longer-lasting finish, consider reapplying every few months, especially if the coasters see heavy use or exposure to moisture.
- Waterproof Glue: Since coasters are intended for use with drinks, it's wise to use waterproof glue like Titebond III to ensure longevity.
Pro Tips for Selling Your Coasters
Wooden coasters are popular at craft fairs and make excellent small gifts. Here are some tips to help you make the most out of selling your coasters:
- Show the Before and After: Consider bringing unfinished coasters to craft shows so potential buyers can see the transformation once the finish is applied. This can enhance their appreciation of the craftsmanship and might even encourage them to purchase the finish along with the coasters.
- Offer a Maintenance Kit: Sell a small can of the same finish (beeswax and mineral oil) with each set of coasters. This not only adds value but also gives customers the tools they need to keep their coasters looking like new.
- Build Customized Sets: Consider offering variations by mixing wood types or making themed sets with different edge styles. This small change makes each set unique and can attract customers who are looking for something a bit different.
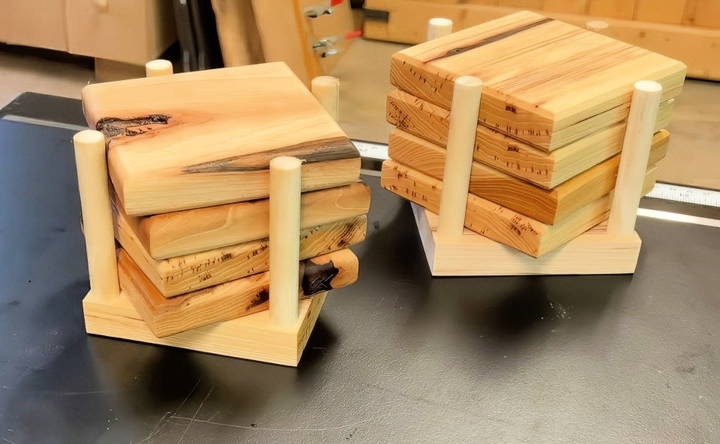
- Pricing and Presentation: Presenting your coasters with a holder adds perceived value and may allow you to charge more. Package them attractively, either tied with natural twine or in a simple box, to make them gift-ready.
Final Thoughts
Making DIY wood coasters is a rewarding project that lets you play with textures, wood types, and finishing techniques, whether you're a beginner or have some woodworking experience. Each step, from cutting and sanding to finishing, is an opportunity to learn a new skill or refine your craftsmanship. Plus, wood coasters make practical, beautiful additions to any home or a profitable product for craft fairs. By following the steps in this guide, you'll have a set of coasters that are not only functional but also a testament to your woodworking skills.
FAQs for DIY Wood Coasters
Discover answers to FAQs on DIY wood coasters, including materials, tools, steps, and tips for making personalized and stylish coasters.
If you don’t have a planer, you can start with wood that’s already the thickness you want. Alternatively, thorough sanding with progressively finer grits can help achieve a smooth finish, though it may take more time and effort.
Hot glue may work, but it’s generally not as secure as double-sided tape for this purpose. For best results, use high-quality double-sided tape to keep the pieces stable while planing.
A good thickness for wooden coasters is around 0.75 inches. This thickness provides durability while remaining lightweight.
You can use any oil-based finish, like Danish oil or polyurethane, to seal the wood. Avoid water-based finishes, as they can wear down with exposure to moisture. Apply wax as a final layer for a smooth feel.
It’s best to apply wax last, as wax is meant for a final polish rather than a durable seal. If using lacquer or varnish, apply them before adding any wax, as they don’t adhere well to waxed surfaces.
Wood glue usually needs about 24 hours to fully cure, but you can start working with the pieces after 4-6 hours if they're carefully handled.
For a standard set, cut each coaster to 4x4 inches. A coaster holder should be about 4.5x4.5 inches to hold four coasters comfortably.
Dowels of 0.5 inches in diameter work well for this type of project, providing both stability and ease of installation.
A set of four coasters typically sells for $20–$25. Adding a coaster holder can increase the price to around $30.


