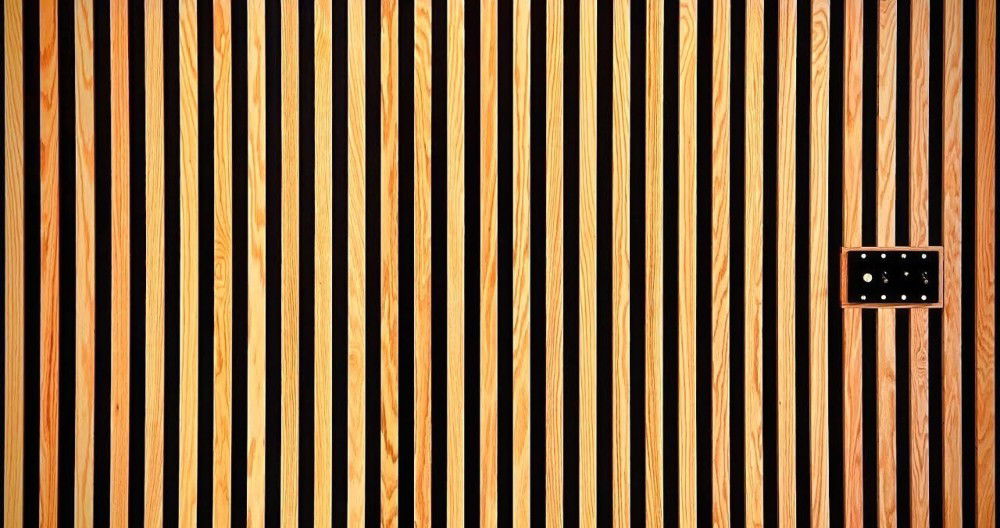
Sometimes, the simplest ideas can transform a space completely. This was certainly my experience when I decided to revamp the ceiling of my home office. I set out to make a DIY wood slat ceiling, an element not only aesthetically pleasing but also enhancing the room's acoustics. If you're interested in taking on a similar project, here's a detailed guide based on my experience, filled with practical advice and useful insights.

Before diving into the "how," let's discuss the "why." A wood slat ceiling isn't just about looking good. It offers acoustic benefits by dampening sounds and reducing echoes, which is perfect for spaces like an office. Additionally, adding lighting fixtures within the design enhances both function and ambiance, making it ideal for any work or creative environment.
Materials You Will Need
Selecting the right materials is crucial for the success of your DIY project. Here's what you will need:
- 1/2 inch Plywood: This is the core material for the slats. Plywood is sturdy yet lightweight, making it easy to work with.
- Furring Strips: These are essential for providing a framework to which the slats will be attached.
- Fiberglass Layers and Black Cloth: These materials are key for acoustic treatment. Fiberglass helps absorb sound, while the black cloth acts as a decorative cover.
- Water-Based Polyurethane: Useful for finishing the wood slats, providing a protective layer that also brings out the wood's natural beauty.
- 23 Gauge Pin Nailer and Pins: Necessary for attaching the slats securely to the furring strips.
- Plywood for Bulkheads: If adding lighting or need decorative bulkheads, this is necessary.
- Paint (White): Used for painting the bulkheads and trim strips.
- Sandpaper: Essential for smoothing down the edges and surface of the slats.
Each material serves a special role. They work together to not only enhance the ceiling's appearance but also to contribute to the room's overall functionality.
Step by Step Instructions
Learn how to install a DIY wood slat ceiling with our step-by-step guide. From prepping and cutting to finishing and installing, we cover everything in detail.
Preparing the Wood Slats
Learn how to prepare wood slats, cut plywood, sand, and finish with our comprehensive guide. Perfect steps for DIY enthusiasts and woodworkers.
Cutting the Plywood
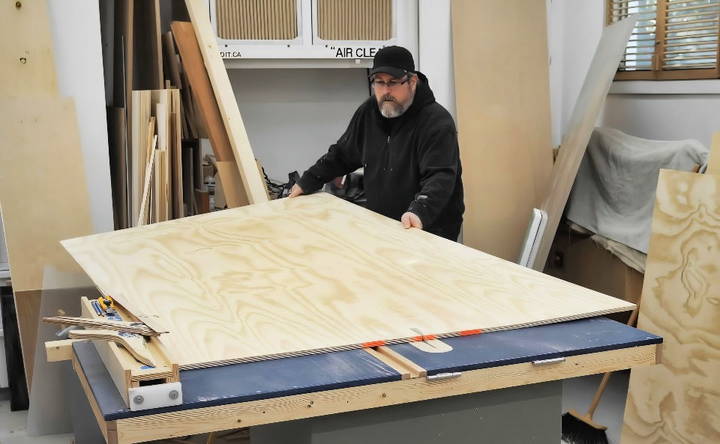
Start by cutting the plywood sheets. I first ripped the plywood sheet in half and then reset the fence to cut strips that were 3 and 7/8 inches wide. Each sheet yielded about 12 strips. It took two sheets of plywood to cover my office ceiling, with a consistent gap of 5/8 inch between each strip.
Sanding the Slats
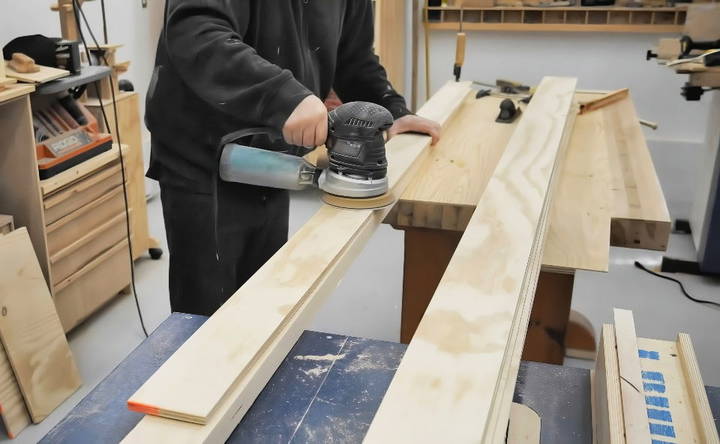
After cutting, sanding was the next step. I clamped 12 strips together, sanded one side, flipped them, and then sanded the other side. This process was critical to ensure every edge and face was smooth. Though it was time-consuming, thorough sanding resulted in a polished and professional look once the slats were in place.
Finishing the Slats
Once sanded, I painted two coats of water-based polyurethane onto each strip. Polyurethane is a great option because it protects the wood while still allowing its natural grain to shine through. Be prepared for this stage to take a fair bit of time, as each coat requires drying before the next can be applied.
Installing the Wood Slat Ceiling
Learn installing the wood slat ceiling with our expertise on setting up the framework, adding acoustic layers, fastening the slats, and trimming excess cloth.
Setting Up the Framework
To begin installation, I fastened the furring strips below the existing ceiling. These strips act as a support structure for the slats and need to be evenly spaced for a uniform look. The furring strips also allow for some air circulation—another acoustic improvement.
Adding Acoustic Layers
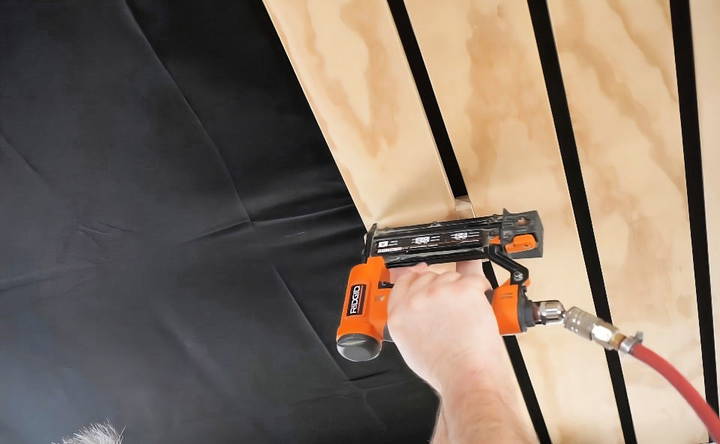
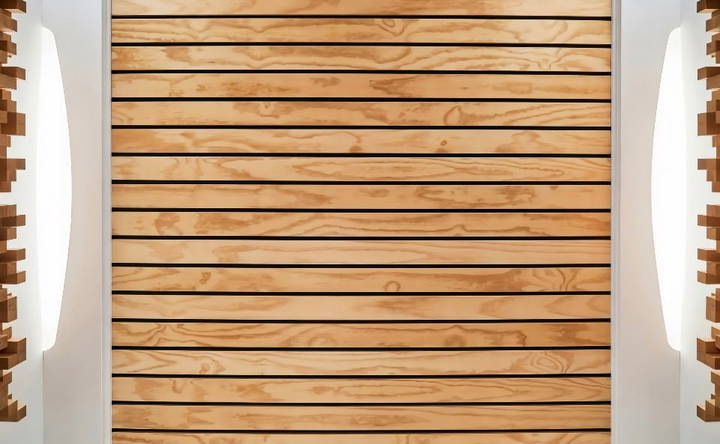
Before laying down the slats, I attached thin fiberglass layers between the furring strips. On top of this, I stretched and stapled a black cloth to cover the fiberglass. Not only does this combination improve sound absorption, but the black cloth also builds a shadow-line effect, making gaps between slats appear more defined.
Fastening the Slats
I used a 23-gauge pin nailer for attaching the slats. This tool is ideal for such tasks because it leaves hardly any visible marks. As I placed each strip, I gently pulled the black cloth taut to make sure it lay flat and wrinkle-free between the slats.
Trimming Excess Cloth
After all the slats were installed, I trimmed the excess black cloth around the edges. This required a sharp knife to ensure a clean cut, as the cloth was particularly tough.
Completing the Final Touches
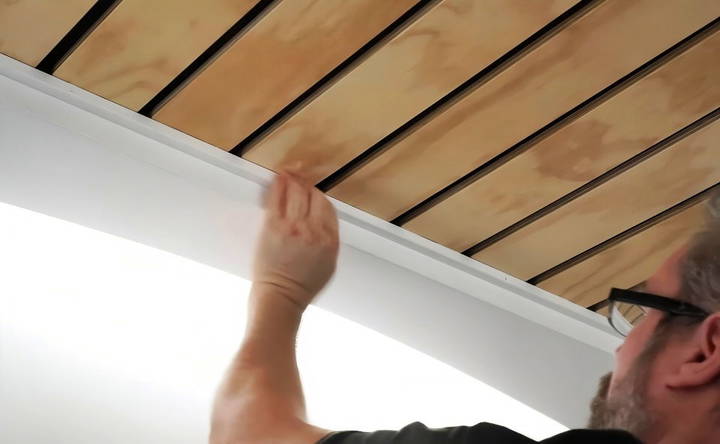
For the finishing touches, I had to deal with covering gaps and rough edges. I crafted trim strips from leftover plywood, painting them white with three coats to ensure a perfect finish. These were attached to the sides and over the edges of the black cloth, providing a neat and tidy border.
Reflecting on the Finished Project
With all elements in place, I was amazed at how different my office felt. Not only did the wood slat ceiling add a sophisticated visual element, but it dramatically improved acoustics, making it easier to edit videos and record voiceovers within the space.
Practical Tips and Advice
To ensure you're ready for this project, let me offer some pointers based on my own experience:
- Plan Your Layout: Before cutting, visualize and plan exactly how your slats will align. This minimizes wasted material and ensures consistency.
- Invest in Quality Tools: Tools like a pin nailer are worth the investment. They help you achieve a professional finish and make the process much more efficient.
- Work in a Well-Lightened Area: Good lighting will help you catch any imperfections in your work early on.
- Patience is Key: From sanding to painting, the process may take longer than expected, but patience is rewarded with high-quality results.
- Consider Your Ceiling Height: Remember that adding slats will lower the ceiling slightly, so check how this affects your room dimensions.
Design Inspiration and Variations
Building a wood slat ceiling can transform any room, adding warmth and texture. Here are some design ideas and variations to inspire your project:
Modern Minimalist
For a sleek, modern look, use evenly spaced, narrow wood slats. Choose light-colored wood like pine or birch to keep the space bright and airy. This design works well in living rooms and bedrooms, providing a clean, contemporary feel.
Rustic Charm
If you prefer a rustic aesthetic, opt for reclaimed wood. The natural imperfections and varied tones add character and warmth. This style is perfect for cozy spaces like a den or a cabin-themed room.
Bold and Dark
For a dramatic effect, paint the wood slats a dark color, such as black or deep brown. This builds a striking contrast, especially in rooms with high ceilings. Pair with modern furniture and minimal decor to balance the bold ceiling.
Geometric Patterns
Experiment with different patterns, such as herringbone or chevron. This adds visual interest and can make a small room feel larger. Use a mix of wood tones for a unique, eye-catching design.
Integrated Lighting
Incorporate LED strip lights between the slats for a modern touch. This not only enhances the aesthetic but also provides functional lighting. It's a great option for home offices or entertainment rooms where good lighting is essential.
Mixed Materials
Combine wood slats with other materials like metal or glass. For example, alternate wood slats with metal strips for an industrial look. This approach adds texture and depth, making the ceiling a focal point.
Accent Colors
Paint some of the slats in accent colors to match your room's decor. This can be a fun way to tie the ceiling into the overall color scheme of the room. It's especially effective in children's rooms or creative spaces.
Ceiling Beams
Add faux beams between the wood slats for a traditional look. This works well in large rooms with high ceilings, adding a sense of grandeur and architectural interest.
Eco-Friendly Options
Use sustainable materials like bamboo or reclaimed wood. Bamboo is durable and has a unique, natural look. Reclaimed wood is environmentally friendly and adds a rustic charm.
Multi-Room Consistency
Extend the wood slat design to other areas of your home for a cohesive look. For example, use the same wood slats in the hallway or on an accent wall. This builds a seamless flow from room to room.
By exploring these design variations, you can build a wood slat ceiling that perfectly suits your style and enhances your space.
Common Mistakes and How to Avoid Them
When installing a wood slat ceiling, it's easy to make mistakes that can affect the final look and durability. Here are some common pitfalls and how to avoid them:
Incorrect Measurements
- Mistake: Not measuring accurately can lead to gaps or uneven slats.
- Solution: Measure the ceiling area carefully. Double-check your measurements before cutting any wood. Use a level to ensure straight lines.
Uneven Spacing
- Mistake: Uneven spacing between slats can make the ceiling look unprofessional.
- Solution: Use spacers to maintain consistent gaps between slats. Check the spacing regularly as you work.
Poor Adhesion Techniques
- Mistake: Using the wrong adhesive or not applying it correctly can cause slats to fall.
- Solution: Choose a high-quality adhesive suitable for wood. Apply it evenly and press the slats firmly into place. Consider using nails or screws for extra security.
Ignoring Ceiling Imperfections
- Mistake: Not addressing ceiling imperfections can result in an uneven surface.
- Solution: Inspect the ceiling for any bumps or dips. Sand down high spots and fill in low spots with a suitable filler before starting the installation.
Skipping the Finishing Touches
- Mistake: Neglecting to finish the wood can lead to a less polished look and reduced durability.
- Solution: Sand the slats to smooth out any rough edges. Apply a stain or sealant to protect the wood and enhance its appearance.
Rushing the Process
- Mistake: Trying to complete the project too quickly can lead to mistakes.
- Solution: Take your time with each step. Ensure each slat is properly aligned and secured before moving on to the next one.
Not Planning for Lighting and Fixtures
- Mistake: Forgetting to plan for lighting and other ceiling fixtures can cause issues later.
- Solution: Plan the layout of any lights or fixtures before starting. Cut the slats accordingly to accommodate these elements.
Using Low-Quality Materials
- Mistake: Using cheap or low-quality wood can affect the final look and longevity.
- Solution: Invest in good-quality wood that is straight and free of defects. This will ensure a better finish and longer-lasting ceiling.
Overlooking Safety Precautions
- Mistake: Not following safety guidelines can lead to accidents.
- Solution: Wear safety gear, such as goggles and gloves. Ensure your workspace is well-ventilated and free of hazards.
By being aware of these common mistakes and taking steps to avoid them, you can achieve a beautiful and durable wood slat ceiling.
FAQs About DIY Wood Slat Ceiling
Discover answers to common questions about DIY wood slat ceilings, including materials, costs, and installation tips. Get your project started today!
A wood slat ceiling adds warmth, texture, and visual interest to any room. It can also help to improve acoustics by reducing echo. Doing it yourself allows for customization and can be more budget-friendly than hiring a professional.
Popular choices include pine, cedar, and redwood. Consider the look you want, the room's moisture levels, and your budget when selecting wood.
Spacing depends on your desired look and the slat width. A common spacing is 1/2 inch to 3/4 inch between slats. You can use spacers to ensure consistent gaps during installation.
Yes, you can often install a wood slat ceiling directly over an existing ceiling, such as drywall or plaster. If your existing ceiling is uneven, you may need to install furring strips to build a level surface for the slats.
Regular dusting with a soft cloth or vacuum attachment is usually sufficient. For deeper cleaning, you can use a damp cloth with mild soap and water. Avoid harsh chemicals or abrasive cleaners that could damage the wood.
Conclusion
While it might seem daunting at first, making a wood slat ceiling is entirely achievable with some patience and perseverance. This project showed me how transformative thoughtful design and craftsmanship can be. Whether you're searching for a way to improve acoustics or simply want to add a unique design element, this step-by-step approach can guide you to success. Try it out, and you might just find it as rewarding as I did.


