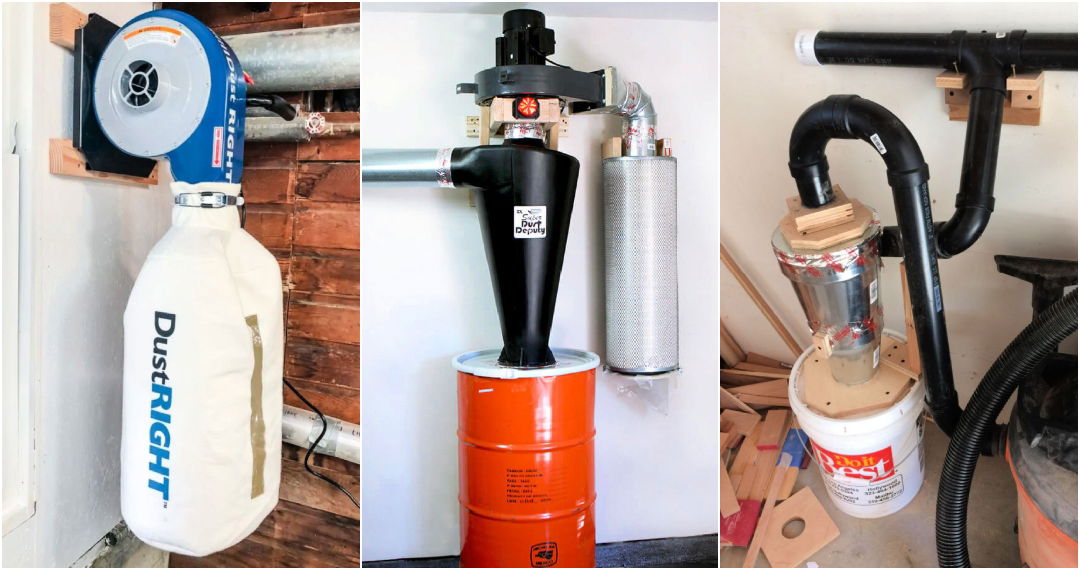
Building a safe and efficient woodshop was important to me. Dust collection needed to be a priority for health and cleanliness. I started by looking into different methods to set up a DIY dust collector. This gave me a way to keep my wood shop clean without spending a lot of money.

Building my own dust collection system was simpler than I expected. I used affordable materials and followed easy plans I found online. Setting up my wood shop vacuum system felt satisfying and helped me enjoy my woodworking projects more. If you are looking to improve your woodshop, this guide will help you start.
Materials Needed and Their Purpose
- A Powerful Shop Vacuum: Serves as the heart of the dust collector, providing suction.
- A Cyclone Dust Separator: This separates the dust from the air before it hits the vacuum, protecting its filter and preserving suction.
- Buckets with Lids: One for the cyclone dust separator and another for additional dust collection if needed.
- PVC Pipes and Fittings: These are used to build a network that transports dust from the tools to the cyclone separator.
- Flexible Hose: Connects the tools to the PVC pipe network.
- Blast Gates: Installed in the PVC network to control airflow from different machines.
- Mounting Brackets and Screws: For securing the system components in place.
- Silicone Caulk: To ensure all connections are air-tight.
Each material was chosen for its role in making an efficient, effective, and budget-friendly dust collection system.
Step by Step Instructions
Learn how to build your own dust collection system with our step-by-step guide. From planning to final testing, build an efficient DIY dust collection setup.
Step 1: Planning and Design
I started by assessing my workshop's layout and the machines needing dust collection. I sketched a rough draft of where each component would go, ensuring the cyclone dust separator was centrally located for easy access and balanced suction across the workshop.
Step 2: Assembling the Cyclone Separator
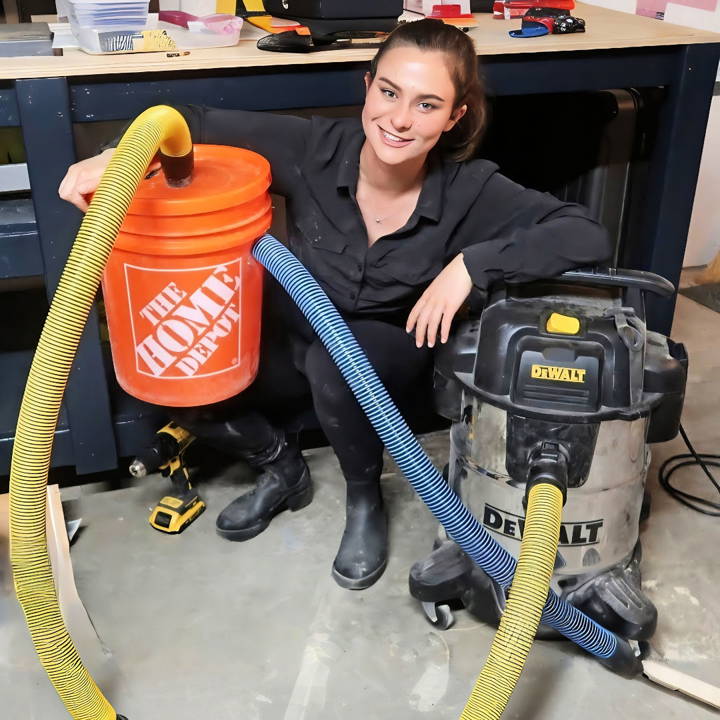
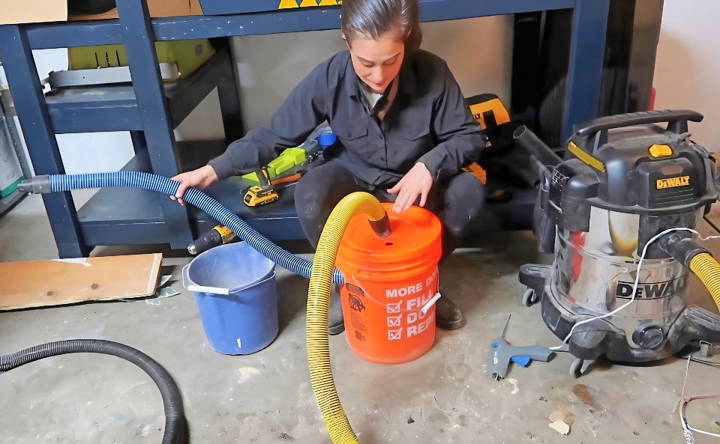
I attached the cyclone dust separator to the lid of one of the buckets using screws, making sure the seal was air-tight with silicone caulk. This bucket would collect the majority of the dust, minimizing the load on the shop vacuum.
Step 3: Building the Network
Using PVC pipes and fittings, I constructed a network from each machine back to the cyclone separator. This step required precise measurements and cuts to ensure a secure fit and maintain suction. At each machine's connection point, I installed a blast gate to control the dust collection as needed.
Step 4: Connecting the Shop Vacuum
The output of the cyclone separator was connected to the shop vacuum. Here, the flexible hose plays a crucial role, as it allows for some movement and adjustments without compromising the system's integrity.
Step 5: Final Touches and Testing
Once everything was mounted and secured, I went around each connection, reinforcing them with silicone caulk for an air-tight seal. Then came the moment of truth: testing. I was thrilled to see the system worked beautifully, drawing dust away from my tools and into the collection bucket.
Tips for Success
- Measure Twice, Cut Once: This age-old adage applies perfectly here. Precise measurements are crucial for an efficient system.
- Seal Every Connection: Ensuring all connections are air-tight is vital for maintaining suction and efficiency.
- Test as You Go: Don't wait until the very end to test. Check the suction at each tool connection after installing it to catch any issues early.
Customization Tips for Different Workspaces
Building a dust collection system that fits your workspace is crucial for efficiency and effectiveness. Here are some tips to customize your DIY dust collection system for various workspaces:
Understand Your Space
Start by assessing the size of your workspace and the layout. Measure the area and note the location of tools that generate dust. This will help you determine the size and design of your dust collection system.
Plan for Flexibility
Design your system with flexibility in mind. Use components that can be easily adjusted or moved. For example, flexible hoses can be repositioned as you change the layout of your workspace or add new tools.
Optimize for Tool Requirements
Each tool has different dust collection needs. Some produce larger chips, while others build fine dust. Customize the system with fittings and hoses that match the dust ports of your tools for optimal dust extraction.
Consider Portability
If you work in a multi-use space or need to move tools regularly, consider adding wheels to your dust collector. This will allow you to move the system to where it's needed most.
Use Clear Pipes
Installing clear pipes for your system can be very helpful. It allows you to see if there's a blockage and where it is, making it easier to maintain and troubleshoot the system.
Seal Leaks
Ensure all connections are airtight. Use clamps and seals to prevent air leaks, which can reduce the efficiency of your dust collection system.
Noise Reduction
Dust collectors can be loud. To reduce noise, you can build or buy a soundproof enclosure for your dust collector or choose a quieter model.
Regular Maintenance
Build a maintenance schedule to check and clean filters, hoses, and other parts of your system. This will keep it running smoothly and extend its lifespan.
Safety First
Always prioritize safety. Ensure that your system does not obstruct walkways and that all components are securely attached to prevent accidents.
By following these tips, you can build a dust collection system that not only keeps your workspace clean but also adapts to your specific needs.

Latest Trends in Dust Collection Technology
The field of dust collection technology is rapidly evolving, with new advancements making systems more efficient, user-friendly, and environmentally responsible. Here's a look at the latest trends that are shaping the industry:
Integrated Systems
Modern dust collectors are now being designed with integrated systems that combine several functions into one unit. This not only saves space but also improves the efficiency of dust collection. For example, the Dustopper PRO is a new product that has received acclaim for its low-profile design and integrated vacuum and bagging technology.
Portability and Flexibility
The demand for portable dust collectors is on the rise, especially for workspaces that change frequently or are multi-purpose. These systems are designed to be easily moved and adjusted to suit the needs of different tools and environments.
Smart Technology
Incorporating smart technology into dust collection systems is a significant trend. Sensors and Internet of Things (IoT) technology allow for real-time monitoring and control, ensuring optimal performance and enabling predictive maintenance. This reduces downtime and extends the lifespan of the equipment.
Enhanced Filtration
There's a shift from traditional bag filters to pleated bags, which offer more surface area and durability. This results in longer filter life and better performance, as they can handle more dust and require less frequent maintenance.
Eco-Friendly Solutions
With a growing emphasis on sustainability, the latest dust collection systems are designed to minimize environmental impact. This includes using materials that are recyclable and designing systems that are energy-efficient.
Noise Reduction
As workshops are often in shared spaces or residential areas, there's a focus on reducing the noise produced by dust collection systems. New models come with sound-dampening materials and designs that keep operation noise to a minimum.
Stay updated on trends to keep your dust collection system effective, modern, and sustainable. It's an investment in your health, productivity, and the environment.
Maintenance and Troubleshooting
Keeping your DIY dust collection system in top condition is essential for its longevity and performance. Here's a straightforward guide to maintaining and troubleshooting common issues:
Regular Checks
- Inspect Filters: Check for any clogs or damage. Clean or replace filters regularly to ensure efficient airflow.
- Examine Hoses: Look for cracks or wear in the hoses. Replace them if they are damaged to prevent leaks.
- Check Seals: Ensure that all connections are tight and sealed properly to maintain suction power.
Cleaning Routine
- Empty the Dust Bin: Don't let the dust bin get too full. Regularly empty it to prevent overflow and maintain suction.
- Clean the Vents: Dust can accumulate on vents, reducing airflow. Clean them with a brush or compressed air.
Troubleshooting Tips
- Loss of Suction: This could be due to a full dust bin, clogged filter, or leak in the system. Check these areas first.
- Unusual Noise: If the system is louder than usual, it might indicate a blockage or a problem with the motor. Inspect for obstructions and listen for any strange sounds from the motor.
- Dust Escaping: If dust is escaping from the system, check for holes in the hoses or poor seals at connection points.
Preventive Measures
- Regular Maintenance Schedule: Set a schedule for routine maintenance tasks. This can prevent issues before they arise.
- Keep Spare Parts: Have spare hoses, clamps, and filters on hand. This makes repairs quick and easy, minimizing downtime.
By following these simple steps, you can ensure that your DIY dust collection system works effectively and lasts longer.
FAQs About DIY Dust Collection System
Discover the key FAQs about DIY dust collection systems, including setup, efficiency, and cost-saving tips for a cleaner workspace.
A DIY dust collection system is a setup that you can construct to manage and remove dust from your workspace. It’s beneficial because it helps maintain a clean environment, protects your health by reducing airborne particles, and can be cost-effective compared to commercial systems.
The key components include a dust collector, such as a shop vac or a more sophisticated cyclone system, ductwork or hoses to transport the dust, and fittings to connect everything. You’ll also need a filtration system to trap fine particles and a disposal method for collected dust.
Start by sketching your workspace and noting the location of each tool that generates dust. Plan the ductwork path with the least amount of turns and bends to ensure efficient airflow. Remember to consider the size of your space and the volume of dust produced when choosing your system's capacity.
Yes, you can build a dust collection system without breaking the bank. Many DIYers use affordable materials and repurpose items like buckets and hoses. The key is to ensure that your system has enough power to handle the dust output from your tools.
Safety is paramount. Always wear protective gear when constructing your system. Ensure all electrical connections are safe and up to code. Regularly check for clogs or buildup in the system to prevent fire hazards. And always turn off the system before performing maintenance.
Reflections and Conclusion
By making your own dust collection system, you take control of your workspace's cleanliness. This can make your woodworking projects safer and more pleasant. Start building your own DIY dust collector today and see the difference it makes.


