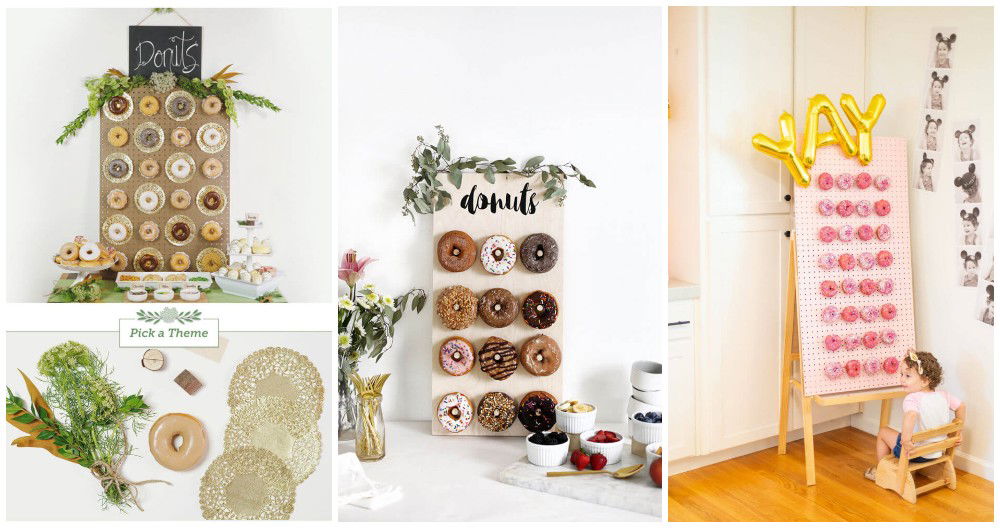
I recently hosted a fun birthday party for my best friend. I wanted to do something special and unique, so I decided to make a DIY Donut Wall. It was a big hit! All our friends loved the idea. It added a colorful touch to the party and was so simple to make. I'm sharing this to help you add something unique to your next event.
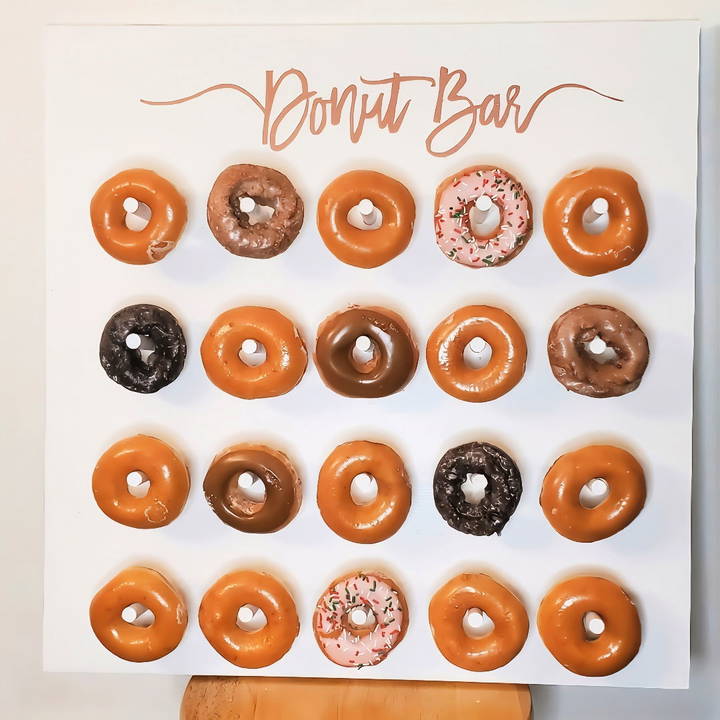
Building the donut wall didn't take long. I just needed a plywood board, some hooks, and of course, lots of donuts. I found all the materials at my local hardware store and bakery. By following some easy steps, you can make your own donut wall too. Trust me, this fun project will impress your guests and make your party unforgettable.
Get started with these steps to make your donut wall. It's easier than you think and will surely be the highlight of your party. I'm helping with this because everyone deserves to have a little extra fun at their events.
Materials Needed and Their Purpose
- Wooden Board: This will be the base of your donut wall. I opted for a 4x4 plywood, cut down to the size I needed. The thickness (about three-quarters of an inch) is crucial for sturdiness.
- Dowels (Half-Inch Diameter): These act as pegs for hanging the donuts. Their size is perfect for most donut sizes, providing a secure fit without taking up too much space through the donut hole.
- Drill and Half-Inch Drill Bit: Needed for making peg holes in the wooden board.
- Sandpaper (60 to 220 Grit): Used for smoothing out the board and dowels for a polished look.
- Paint and Polyurethane: I chose white paint for a clean, classic look and a polyurethane top coat for protection and food safety.
- Miter Saw or Handsaw: For cutting the dowels to the desired peg length. I measured out three and three-quarter inches for each dowel to hold two donuts comfortably.
Step by Step Instructions
Learn how to make a donut wall with our step-by-step guide! From cutting your board to assembling, get all the instructions you need.
1. Cutting Your Board to Size
First, I visited my local hardware store to select a piece of plywood. They were kind enough to cut it down to my desired size right in the store, making transportation much easier.
2. Measuring and Marking for Peg Holes
Next, I measured and marked where I wanted the pegs to go. I decided to leave about four inches at the top for decorative lettering and started the first row of pegs three inches down from there. This spacing continues for each row.
3. Drilling the Peg Holes
Using my half-inch drill bit and drill, I carefully maked holes at the marked spots. A piece of tape on the drill bit acted as my guide to not drill through the entire board.
4. Sanding Everything Smooth
After drilling, the board and dowels needed a thorough sanding. Starting with a coarse 60 grit and working my way up to a fine 220 grit gave the plywood and dowels a smooth finish, ensuring no splinters or rough edges.
5. Painting and Protecting
I applied two coats of white paint, allowing ample drying time between each. After the paint dried, I added three coats of polyurethane for protection, ensuring a food-safe surface after a 30-day curing period.
6. Cutting the Dowels to Length
Using a miter saw (though a handsaw works, too), I cut the dowels to my previously measured lengths. Remember, measure twice and cut once!
7. Making and Applying the Lettering
For the "Donut Bar" sign, I used a straightforward and budget-friendly method: blue painter's tape and an X-Acto knife. I printed my template, laid the tape over it, and carefully cut out the letters. Then, I transferred this makeshift stencil onto the board and spray-painted over it.
8. Assembling the Donut Wall
Finally, it was time to insert the dowels into their respective holes. It required a bit of effort since the fit was snug, but a gentle tap with a hammer helped secure them in place.
The Big Reveal
After all the painting, cutting, and assembling, the donut wall was ready for the big day. It became a focal point of our wedding, offering guests a fun and interactive dessert option.
Customization Ideas for Your Donut Wall
Making a donut wall is not just about displaying treats; it's an opportunity to express creativity and add a personal touch to your event. Here are some ideas to help you customize your donut wall and make it a unique centerpiece:
Choose a Theme
Start by selecting a theme that resonates with your event. Whether it's a wedding, birthday, or corporate gathering, your theme could range from elegant and classic to fun and whimsical. For example:
- Wedding: Opt for pastel colors and floral decorations.
- Birthday: Go bold with bright colors and characters from the celebrant's favorite show.
- Corporate Event: Incorporate company colors and logos.
Color Coordination
Match the colors of your donuts to your event's color scheme. Use icing and sprinkles to make a cohesive look. If your event has a blue and white theme, consider donuts with blue icing and white sprinkles.
Interactive Elements
Add interactive elements to your donut wall. Set up a ‘decorate your own donut' station with various toppings like nuts, chocolates, and fruit pieces. This not only adds fun but also caters to different taste preferences.
Seasonal Touches
If your event coincides with a holiday or season, incorporate elements that reflect the time of year. For a fall event, use autumnal colors and flavors like pumpkin spice or apple cinnamon.
Personalized Donuts
Offer personalized donuts with initials or short messages. This works great for smaller gatherings where you can add a special touch for each guest.
Dietary Considerations
Be inclusive by providing options for guests with dietary restrictions. Have a section of your donut wall dedicated to gluten-free, vegan, or nut-free options, clearly labeled for convenience.
Backdrop and Lighting
Enhance your donut wall with a striking backdrop and lighting. Fairy lights, for instance, can add a magical touch to evening events, while a custom backdrop can serve as a photo op for guests.
Donut Toppers
Use toppers to add an extra dimension to your donuts. Toppers can be anything from small flags with messages to edible flowers or themed edible images.
The key to a successful donut wall is not just in the taste but also in the presentation. By incorporating these customization ideas, you'll make a memorable experience that reflects the spirit of your event and delights your guests.
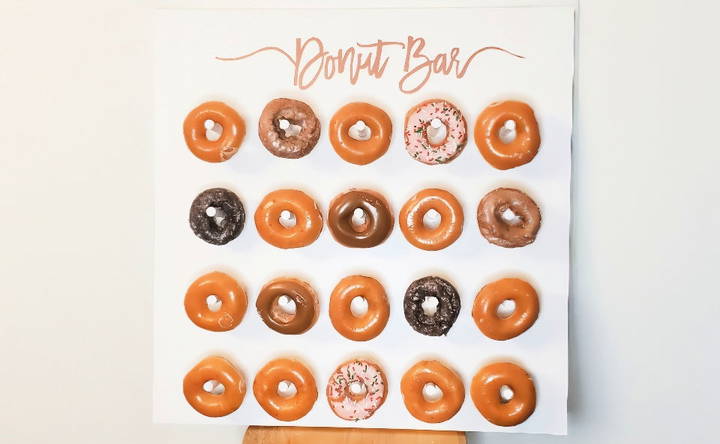
Donut Selection and Presentation
When it comes to making a donut wall, the selection and presentation of the donuts are as important as the wall itself. Here's how to ensure your donut display is as delightful to look at as it is to taste:
- Variety is Key Offer a range of donut types to cater to all tastes. Include classic flavors like chocolate, vanilla, and strawberry, and also feature some unique options such as matcha, salted caramel, or lavender. A mix of filled, glazed, and topped donuts can add visual interest and appeal to different preferences.
- Consider Dietary Needs It's thoughtful to include options for guests with dietary restrictions. Have a section for gluten-free, dairy-free, and nut-free donuts, and label them clearly. This ensures everyone has something to enjoy without worry.
- Presentation Matters Arrange your donuts in a visually pleasing manner. Alternate colors and toppings to make patterns or shapes. For example, you could arrange the donuts in color gradients or in the shape of a heart for a romantic touch.
- Freshness is Essential Ensure the donuts are fresh on the day of the event. Fresh donuts not only taste better but also look more appetizing. If possible, collaborate with a local bakery to provide freshly made donuts on the day of your event.
- Accessorize Your Donuts Use accessories like edible glitter or gold leaf to add a touch of elegance. Small flags or tags can be used to denote flavors or to add a personal message.
- Lighting Can Enhance Your Display Good lighting will make your donut wall pop. Soft, warm lights can make the colors of the donuts vibrant and inviting. If the event is outdoors, consider using natural light to your advantage.
- Keep It Neat Maintain a clean and tidy display. Have napkins and plates nearby, and consider having an attendant to help guests and keep the area tidy.
Focus on donut selection and presentation to make your donut wall both tasty and visually appealing. Build a memorable and delicious experience.
Troubleshooting Your Donut Wall
Even with the best planning, you might encounter some hiccups when making your donut wall. Here's a troubleshooting guide to help you solve common problems quickly and efficiently:
Donuts Sliding Off Pegs
- Solution: Ensure that the pegs are slightly angled upwards and that they're long enough to support the donut without it sliding off. If the problem persists, consider adding a small collar or stopper at the end of each peg.
Wall Stability
- Solution: If your donut wall seems unstable, check to make sure the base is wide and heavy enough to counterbalance the weight of the donuts. You can add weight to the base or secure the wall to a sturdy backdrop.
Uneven Hanging
- Solution: Use a level tool when installing your pegs to ensure they're evenly spaced and straight. If the wall is already set up, adjust the pegs where necessary or add additional support where the wall may be leaning.
Insufficient Quantity
- Solution: It's important to estimate the number of donuts needed based on your guest count. As a general rule, plan for 1.5 donuts per person. If you're running low, have a backup plan with a local bakery for a quick refill.
Donut Freshness
- Solution: To keep donuts fresh, especially in warm weather, consider having a cool storage area nearby. Rotate donuts from the storage to the wall throughout the event.
Dietary Restrictions
- Solution: Clearly label donuts that are gluten-free, vegan, or nut-free. If there's any confusion, provide a small booklet or sign with detailed ingredient lists for each donut type.
Cleanliness
- Solution: Keep the area around the donut wall clean by providing ample napkins, plates, and trash bins. Assign someone to periodically check and tidy up the space.
By preparing for these common issues, you can ensure that your donut wall will be a hit with your guests.
Safety and Maintenance Tips
When setting up a donut wall, safety is paramount, not just for the guests but also for the longevity of the wall itself. Here are some tips to ensure both safety and maintenance:
Safety First
- Stability: Make sure your donut wall is stable. A sturdy base will prevent it from tipping over.
- Material Safety: Use food-safe materials, especially for the pegs that will hold the donuts.
- Cleanliness: Keep the donut wall clean to avoid any health issues. Use a gentle cleaner that is safe for food contact surfaces.
Maintenance for Longevity
- Regular Checks: Before each use, check for any loose parts or damage to the wall.
- Storage: Store the wall in a cool, dry place to prevent warping or other damage.
- Cleaning: After each event, clean the wall thoroughly. Remove any leftover donuts or residue from the pegs.
For the Donuts
- Freshness: Serve donuts that are fresh. This not only tastes better but is also safer to eat.
- Temperature Control: If your event is outdoors, be mindful of the temperature. Heat can spoil cream-filled donuts quickly.
Guest Considerations
- Allergies: Label donuts that contain common allergens like nuts or dairy.
- Accessibility: Ensure the donut wall is accessible to all guests, including children and those with disabilities.
By following these tips, you can ensure that your donut wall is both safe and well-maintained for everyone to enjoy.
FAQs About How to Make a Donut Wall
Discover the FAQs about making a donut wall, from the materials needed to step-by-step instructions, and make a stunning display for any event!
First, decide on the size of your board based on the number of donuts you want to display. Paint it with a color that matches your event's theme. If it's not pre-drilled, use a drill to make holes for the hooks or dowels.
Use pegboard hooks or dowels that are strong enough to hold the weight of the donuts. If you’re using a wooden board, ensure the dowels are securely attached and the board is supported from behind to prevent tipping.
Absolutely! Use stencils, stickers, or paint to add designs or messages. You can also frame your board with decorative trim to give it a polished look.
Hang the donuts on the hooks or dowels with enough space between each so they're easy to grab. Arrange them in a pattern or randomly for a fun look. Make sure the donuts are fresh and placed shortly before the event to maintain their quality.
To ensure your donut wall is clean and safe for guests, use a food-safe polyurethane top coat on the board and dowels. Before the event, wipe down the surface with a damp cloth and let it dry completely. Use gloves when placing the donuts on the wall, and consider providing serving tongs for guests to use.
Closing Thoughts
Making a DIY donut wall brought so much joy to my event and made me feel like a creative hero. I know it will do the same for you!


