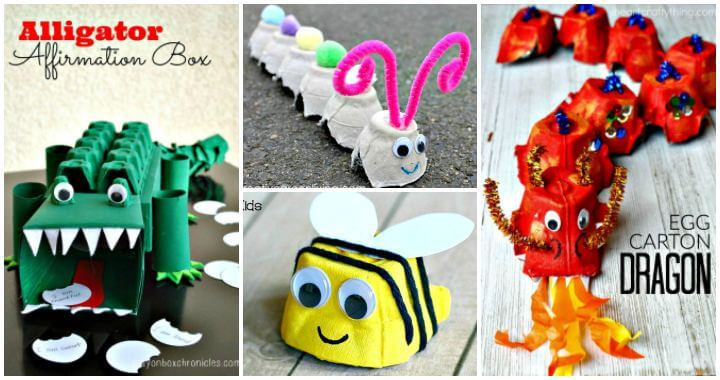
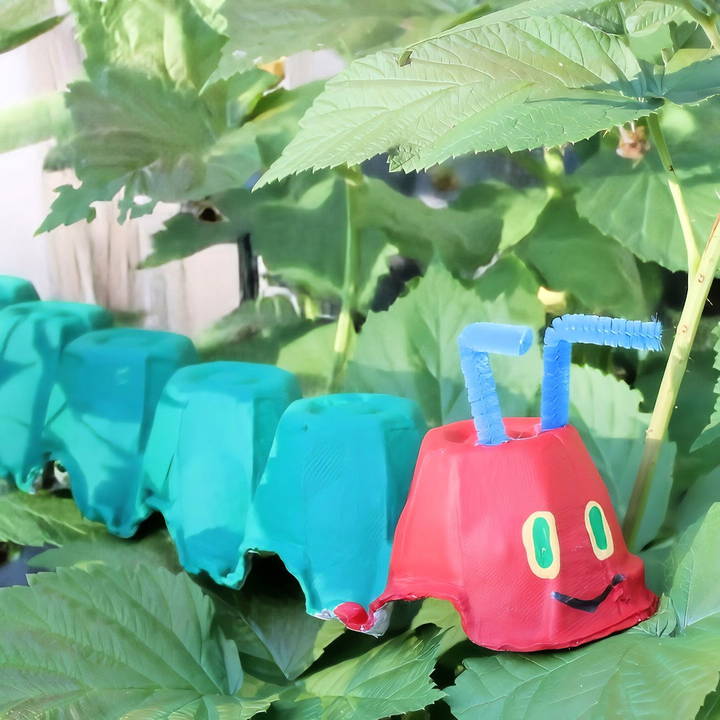
Crafting is a fantastic way to develop kids' creativity, fine motor skills, and imagination. An egg carton caterpillar is a classic project that brings joy and excitement to any learning environment or home. This project is inspired by "The Very Hungry Caterpillar" by Eric Carle, making it an educational and creative activity that kids will love. In this article, you will find a step-by-step guide to making your very own caterpillar from an egg carton. You'll find helpful tips, variations, and fun ways to extend the craft into a learning adventure.
Materials Needed for an Egg Carton Caterpillar
Before starting, gather the necessary materials. These are affordable, simple items that you might already have around the house:
- Empty egg carton (preferably cardboard)
- Large and small scissors
- Paint (white for the base and various colors for the body)
- Paintbrushes
- Googly eyes (or paint for eyes if googly eyes aren't available)
- Pipe cleaners (preferably blue to mimic Eric Carle's caterpillar, but any color can be used)
- Glue (hot glue or any craft glue safe for kids)
- Marker or pen (for the caterpillar's mouth)
These items are accessible but feel free to substitute them based on availability or personal preference. For example, if you don't have googly eyes, painted eyes work just as well, and any colors can be used for the pipe cleaner antennas.
Step by Step Instructions
Learn how to make a fun egg carton caterpillar with step-by-step instructions. Perfect for crafting with kids and linking to the very hungry caterpillar.
Prepare the Egg Carton Base
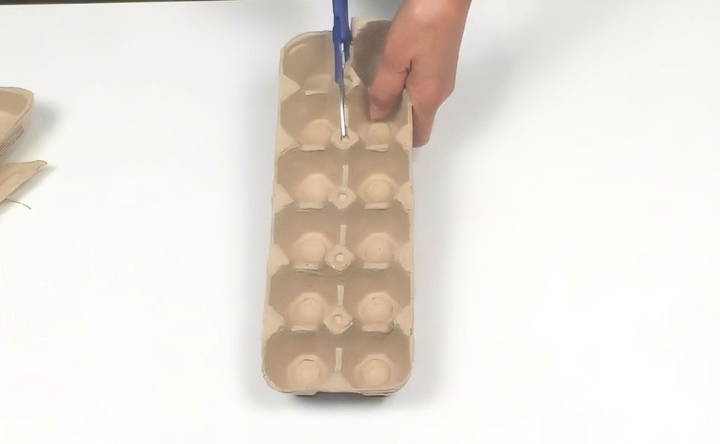
Start by cutting the egg carton lengthwise with a pair of large scissors. You'll want to obtain a row of six adjacent egg carton cells, which will form the caterpillar's segmented body. Cut the carton carefully so the shape is even on both sides. Once the row is cut, trim the edges with small scissors, giving the caterpillar a smooth, symmetrical shape.
Paint a White Base Coat
Apply a coat of white paint over the entire egg carton row. This base layer will help the other colors stand out, especially if the carton is a darker color. The white base coat also provides a more consistent texture for the next layers of paint. Allow it to dry completely before moving on to the next step.
Choose and Apply Body Colors
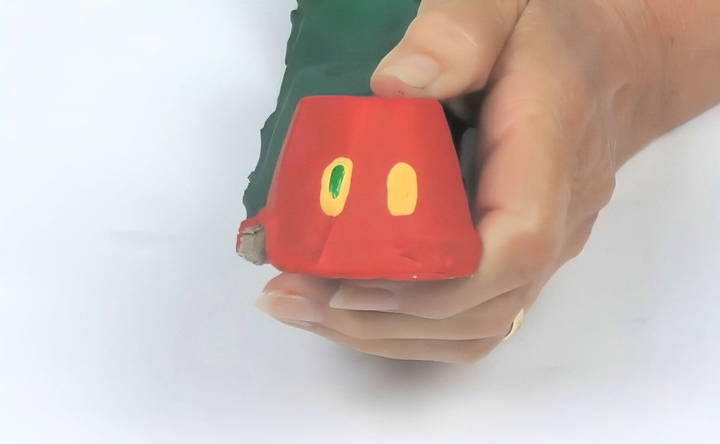
Caterpillars come in many colors, so let children express their creativity by choosing their favorite colors for each body segment. For a classic look, paint the head in red and the body in green, inspired by Eric Carle's caterpillar from The Very Hungry Caterpillar. This color scheme is bright, familiar, and perfect for introducing children to color mixing and matching.
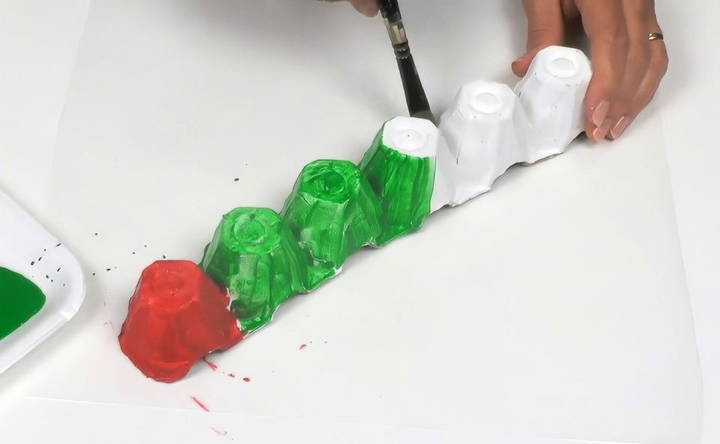
Apply the colors as desired, whether it's a solid color for each segment or a mix. After painting, set the caterpillar aside to dry completely.
Add Eyes and Antennas
Once the paint is dry, it's time to bring the caterpillar to life with some facial features and antennas. Follow these steps:
- Eyes: Glue on googly eyes or paint eyes directly onto the caterpillar's “head” segment. The size and placement of the eyes add character, so experiment with different looks.
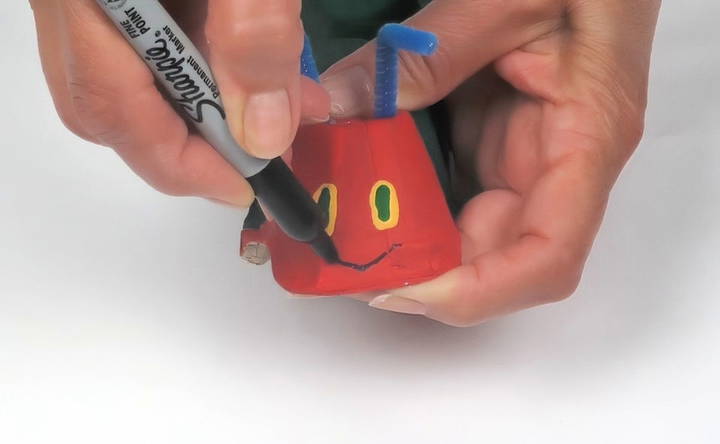
- Antennas: Use a pair of sharp scissors to carefully punch two holes at the top of the head. Insert two pieces of pipe cleaner (blue is a nod to the original story) into the holes and glue them in place if needed. Pipe cleaners can be bent into different shapes, making them fun to style.
Draw a Mouth and Add Finishing Touches
With a marker or paint, draw a small mouth on the front of the caterpillar's head. If you'd like, add a small painted dot for the nose or use other decorative items like sequins or beads to enhance the caterpillar's face.
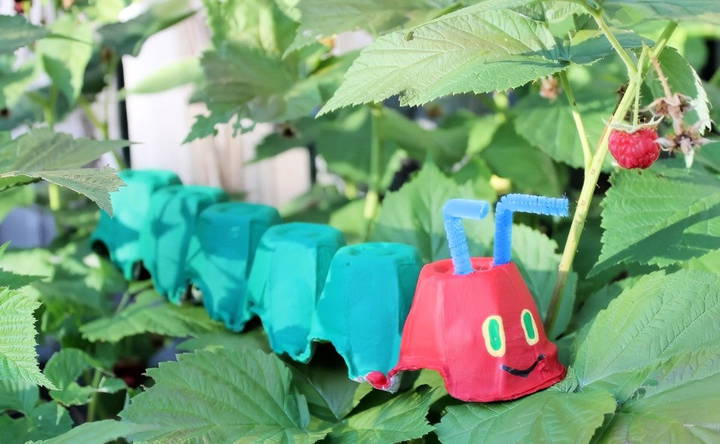
The caterpillar is now complete! This part is especially fun because it brings the caterpillar's personality to life, letting kids take pride in their creation.
Educational Extension: Linking the Craft to "The Very Hungry Caterpillar"
Crafting this caterpillar can be part of an educational unit centered around the story The Very Hungry Caterpillar. Here are some ways to extend the lesson:
- Storytime Connection: After creating the caterpillar, read The Very Hungry Caterpillar together. Discuss how the caterpillar in the book changes over time, introducing kids to concepts of growth, change, and metamorphosis.
- Color Identification and Mixing: Use this project to teach color recognition and mixing. For example, ask questions like “What color do we get if we mix red and blue?” or “Can you find the color green in your craft?”
- Counting and Sequencing: Use the segments of the caterpillar to count numbers. Children can also practice sequences by painting each segment in different colors or discussing the caterpillar's life stages.
- Science of Caterpillars and Butterflies: Explore the science of caterpillars, discussing how they transform into butterflies. This can be furthered with images or videos of real caterpillars turning into butterflies, helping children understand biology in a fun, interactive way.
- Fine Motor Skill Development: Working with small items like pipe cleaners, scissors, and paintbrushes helps children develop fine motor skills. Crafting is especially beneficial for preschoolers, who can strengthen their grip and coordination through activities like this.
Tips for Crafting with Young Kids
Crafting with kids can be a joyful, albeit sometimes messy, experience. Here are some tips to ensure a fun and stress-free craft time:
- Prepare Ahead: Have all materials ready before starting the craft, and cover your workspace with newspapers or a disposable tablecloth to protect surfaces.
- Demonstrate Each Step: Show kids each step before they attempt it on their own, especially when using tools like scissors.
- Encourage Creativity: Let kids make their own choices for colors and decoration. This promotes independence and allows them to express themselves through their artwork.
- Plan for Drying Time: Paint needs time to dry, so it's helpful to have another activity lined up while the caterpillar dries.
- Celebrate the Final Product: Once completed, display the caterpillar proudly or use it for storytelling. Recognition boosts kids' confidence and motivates them to continue creating.
Wrapping Up: A Fun, Educational Craft for All Ages
Making an egg carton caterpillar is more than just a craft; it's a multi-faceted learning activity. From motor skill development to early science education, this craft taps into various skills and makes learning engaging and fun. Kids get to express themselves artistically, make a character, and learn about the life of a caterpillar all in one project. Whether you're a teacher, parent, or caregiver, this project can be easily adapted to fit a wide range of ages and abilities.
FAQs About Egg Carton Caterpillar
Discover answers to common questions about making an egg carton caterpillar in this helpful FAQ guide for crafting enthusiasts.
Use a row of six adjacent egg carton cells to make a well-sized caterpillar with defined segments. This length is manageable for children to paint and decorate while resembling the body of a caterpillar.
Acrylic or poster paints work well on egg cartons, as they provide vibrant color and cover the surface well. Applying a white base coat first helps any additional colors stand out, especially if your egg carton is a darker color.
While cardboard cartons are easier to paint and cut, you can use plastic ones. However, ensure the paint you choose adheres to plastic surfaces and apply a primer first. Also, plastic may need more drying time and careful handling when cutting.
You can use small pieces of flexible wire, toothpicks, or even strips of paper for antennas. Paint or color them to add more detail, and carefully glue them onto the caterpillar’s head.
For younger children, pre-cut the egg carton and help with any steps requiring sharp tools. You can also use washable paints and larger paintbrushes, making the process more manageable and safe for smaller hands.
Let children explore their own color choices! This craft encourages creativity, and kids can make their caterpillar any color they choose. Allowing unique colors or designs can add a personal touch and enhance their engagement in the activity.
If the pipe cleaners or other antenna materials are not secure, use a stronger glue like hot glue or twist them around each other at the base before inserting them. This will help them stay in place while the caterpillar is handled.
To preserve the caterpillar, place it in a safe, dry area out of direct sunlight to prevent fading. If made from cardboard, keeping it in a container will protect it from moisture and damage.


