When renovating a bathroom or other areas with a concrete floor, you might come across unexpected challenges—like a large, unusual hole in the slab that needs to be filled. If you’re tackling a project like replacing a tub with a tiled shower using a Schluter foam pan, this guide will walk you through the process of filling that hole properly. I’ll share practical insights from my own experience and lessons learned from the DIY community to help you get it done right the first time.
Understanding the Situation
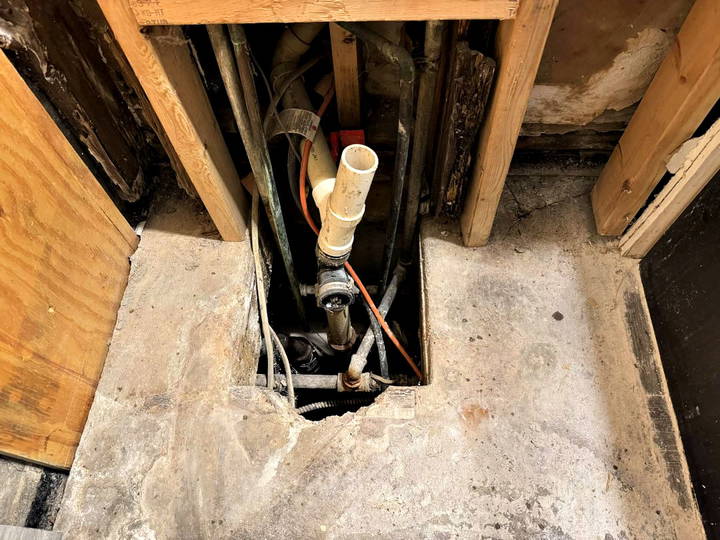
Imagine you're working in a bathroom where an old tub once stood, and there's now a gaping hole in the concrete slab. The hole might have been created to provide access to plumbing or as a structural opening, and now, with plans to install a new tiled shower, it needs to be filled for stability and aesthetic reasons. The slab around the hole is around 6-8 inches thick, and there’s a small basement or crawl space beneath it.
You might be wondering, “What’s the best way to fill this hole and ensure it’s strong and secure?” Let’s dive into some effective methods to approach this challenge.
Step 1: Assess the Hole and Surroundings
Before you start filling the hole, take a good look at the space:
- Measure the Dimensions: Get the length, width, and depth of the hole. Knowing these dimensions will help you plan how much material you’ll need.
- Inspect for Hazards: Look for any wires, pipes, or other obstructions in the area. For safety, you’ll want to move any exposed wires into conduits and ensure they’re properly secured away from the hole. If there are pipes, make sure they are insulated or protected from any future concrete work.
- Determine the Type of Slab: Understand whether the hole is within a straight slab or if there’s a crawl space underneath. This affects your approach to reinforcing the fill.
Step 2: Plan the Framework
To fill the hole, you’ll need a solid framework that supports the new concrete while it cures and sets.
Option 1: Wooden Frame with Rebar Reinforcement
One common suggestion from the DIY community involves using a wooden frame along with rebar for reinforcement:
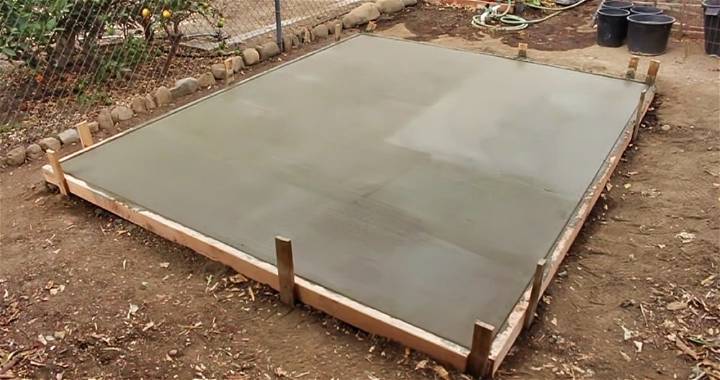
- Build a Wooden Frame: Cut 2x4s or similar lumber to fit the perimeter of the hole. This frame will act as a mold to hold the new concrete in place.
- Drill Holes for Rebar: Drill lateral holes into the existing slab around the hole's edges. These will hold pieces of rebar that tie the new concrete to the old, preventing future cracks or separations.
- Install Rebar: Insert rebar rods horizontally into the holes, ensuring they extend into the hole's space. You may also place vertical rebar for added strength, particularly if the hole is deep.
- Secure the Wooden Frame: Fit the wooden frame snugly into the hole. The frame should be flush with the existing slab surface, or slightly below if you plan to add a layer of self-leveling compound later.
- Pour the Concrete: Once the frame and rebar are in place, mix your concrete and pour it into the hole. Use a trowel or float to level the surface and ensure it’s smooth.
Tips:
- Use High-Strength Concrete: Opt for a mix designed for structural repairs to ensure durability.
- Vibrate the Concrete: Use a mallet or a concrete vibrator to remove air bubbles, which can weaken the slab over time.
Step 3: Alternative Methods for Quick Fixes
Sometimes, you need a faster or less labor-intensive solution, especially if it’s late in the day or you’re limited on tools. Here’s an alternative shared by a DIY enthusiast:
- Use Treated Lumber and Plywood: Cut treated 2x4 pieces to the length of the hole's longer side. Place them ¾ inch below flush in the hole and wedge them against the outer edges.
- Add a Friction Fit with Plywood: Screw a piece of plywood on top of the 2x4s. This method uses a friction fit rather than concrete, making it a quicker, more flexible option.
- Reinforce with Adhesive: For extra stability, add a construction adhesive like PL400 to secure the wood in place.
This method skips the need for hammer drilling or concrete mixing but may not provide the same long-term durability as a full concrete patch.
Step 4: Finishing Touches
After filling the hole and allowing time for the concrete or other material to set:
- Smooth the Surface: If necessary, use a layer of self-leveling compound to create a perfectly smooth finish that matches the surrounding floor.
- Prepare for the Shower Pan: Ensure the newly filled hole is level and ready for the installation of the Schluter foam pan or any other underlayment.
- Check for Any Gaps: Make sure there are no gaps between the new and old concrete that could allow water penetration.
Step 5: Safety and Inspection
Before moving on with the rest of the renovation:
- Inspect for Stability: Check that the filled area is stable, and there’s no noticeable movement or settling.
- Recheck Electrical and Plumbing Work: Ensure all wires are in conduits and that any plumbing work done around the hole is still secure and leak-free.
Lessons Learned and Tips from the Community
- Double-Check the Level: Several DIYers stressed the importance of ensuring the shower pan sits level. Uneven surfaces can cause water pooling and lead to problems later.
- Account for Access Needs: If you need future access to plumbing or electrical components under the slab, consider building a removable access panel or hatch instead of permanently sealing the hole.
- Be Ready for Unexpected Issues: The area around the hole might reveal hidden problems like dry rot in surrounding wood or corroded pipes. Be prepared to address these as part of the project.
Conclusion
Filling an unusual hole in a concrete slab can be daunting, but with the right plan and materials, it’s a manageable DIY project. Whether you opt for a robust concrete fill with rebar or a quicker wood and plywood solution, the key is to ensure stability, safety, and durability. Don’t rush—take your time to plan, prepare, and execute the steps carefully. With these tips, you can confidently tackle that hole and move forward with your renovation project.
FAQs for Filling an Unusual Hole in a Concrete Slab
Here’s a compilation of frequently asked questions based on the discussions and suggestions shared by DIY enthusiasts on handling an unusual hole in a concrete slab, particularly when renovating a bathroom and replacing a tub with a tiled shower.
The most recommended method involves creating a wooden frame around the hole and reinforcing it with rebar. The rebar is drilled into the existing slab to help tie the new concrete to the old, preventing cracks and providing structural stability. After setting up the frame and rebar, high-strength concrete is poured into the hole and leveled.
Yes, you can use a wooden frame and plywood for a quicker solution. This involves cutting treated 2x4s to fit the hole, wedging them into place, and covering them with plywood. This method provides a friction fit and can be reinforced with construction adhesive for added security. However, this may not offer the same long-term durability as a concrete fill.
To ensure the shower pan sits level, use a self-leveling compound on top of the filled hole after the concrete has set. This creates a smooth, even surface, which is crucial for proper drainage and avoiding water pooling in the shower.
Yes, safety is a priority. Make sure any exposed wires are moved into conduits and secured properly away from the hole. Pipes should also be checked for insulation or protection to avoid damage during the concrete work or future leaks.
Rebar is not always necessary, but it is highly recommended when filling a hole in a concrete slab. Rebar provides additional strength and prevents future settling or cracks, especially in areas that bear weight or have frequent use.
You will need a few essential tools, such as a saw to cut wood for the frame, a drill with masonry bits for installing rebar, a concrete mixer or bucket for mixing concrete, a trowel or float for leveling the concrete, and potentially a concrete vibrator to remove air pockets.
Yes, leaving an access panel can be a smart choice if there’s plumbing or electrical work that might require future access. You can frame a removable hatch that blends in with the surrounding floor, making maintenance more manageable down the line.
The concrete should be allowed to cure for at least 24 to 48 hours before walking on it and about a week before installing heavy items like a shower pan. Full curing for maximum strength typically takes about 28 days.
If you encounter dry rot in surrounding wood or corroded pipes, address these issues before filling the hole. Remove any rotted wood and replace it with treated lumber, and repair or replace damaged pipes to prevent future leaks or structural problems.
A self-leveler can be used for small holes or minor surface-level repairs. However, for larger holes or where the slab is a critical structural component, a more robust solution involving concrete and possibly rebar reinforcement is advised.


