Water leaks can be a nightmare for homeowners, especially when they happen underground. These leaks not only waste water but can also cause serious damage to your property if left unchecked. Finding the location of an underground water leak might seem like a daunting task, but with a DIY water leak detector, you can save time and money by locating the leak before calling in professional help. In this guide, we'll show you how to make your own underground water leak detector using simple tools and basic techniques.
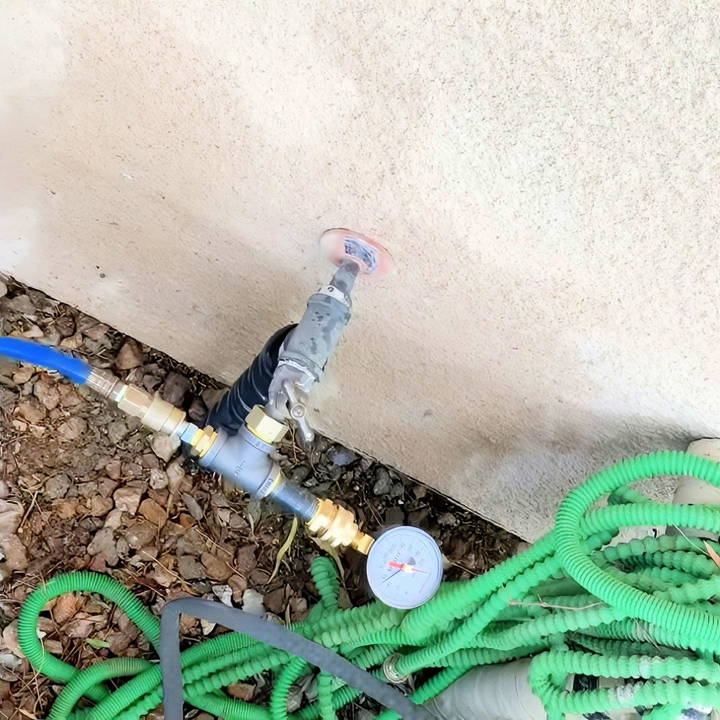
Why You Need an Underground Leak Detector
Water leaks can cause unseen damage that worsens over time. In many cases, the water loss may not be immediately visible, but a spike in your water bill or a drop in water pressure could be indicators that something is wrong. Without proper tools, identifying the exact location of an underground leak can be nearly impossible, especially if it's beneath concrete slabs or deep within your yard. This DIY leak detector can help you find leaks faster by making air pressure inside the water line, allowing you to detect the leak through sounds, bubbles, or ground movement.
Tools and Materials You'll Need
Before we dive into the step-by-step process of building the leak detector, let's go over the essential materials and tools you'll need for this DIY project. Most of these items can be purchased at any local hardware store, such as Home Depot or Lowe's.
- Air compressor (for injecting air into the line)
- Air nozzle (for connecting the air compressor to the water line)
- Hose bib (connection point for the water main)
- T-fitting (to allow air to flow into the line)
- Pressure gauge (to monitor pressure levels)
- Basic plumbing tools (wrench, pipe cutter)
- Safety gloves and eye protection
Now that you have your materials, let's go step-by-step through how to use these to detect the leak.
Step by Step Instructions
Learn to make a DIY underground water leak detector with step-by-step instructions. Identify and isolate leaks effectively before calling a professional.
Step 1: Isolate the Leak Area
Before making pressure in your water system, it's important to isolate the section where you suspect the leak is located. If you've already determined that the leak is between the water meter and the main shutoff valve, you'll want to close off other water outlets to focus the pressure in that area.
If you're not sure which part of your plumbing system is leaking, consider following this basic isolation process:
- Turn off all water outlets: Close all taps, faucets, and water-using appliances.
- Shut off valves to appliances and sprinklers: This will prevent water from flowing into other systems and help you focus on the main water line.
- Check your water meter: If the meter is still running despite all water outlets being closed, it confirms a leak in your main water line.
Step 2: Assemble Your DIY Leak Detection Tool
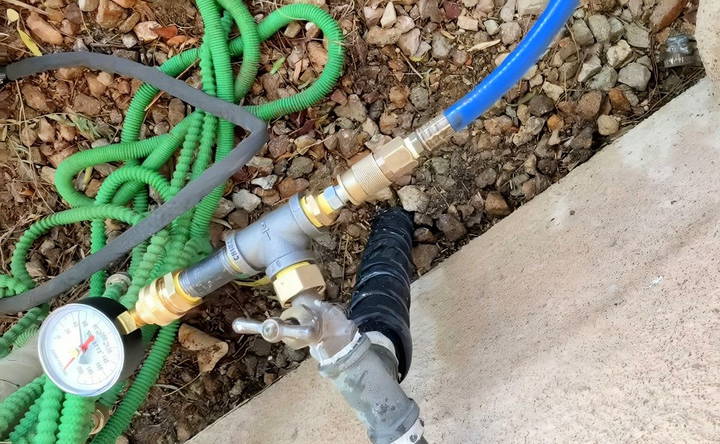
The core of this DIY leak detector involves making a device that can inject compressed air into your water line. The pressurized air will help to force water out of the leaking section, producing noise, bubbles, or visible disturbances where the leak is occurring. Here's how to put together your tool:
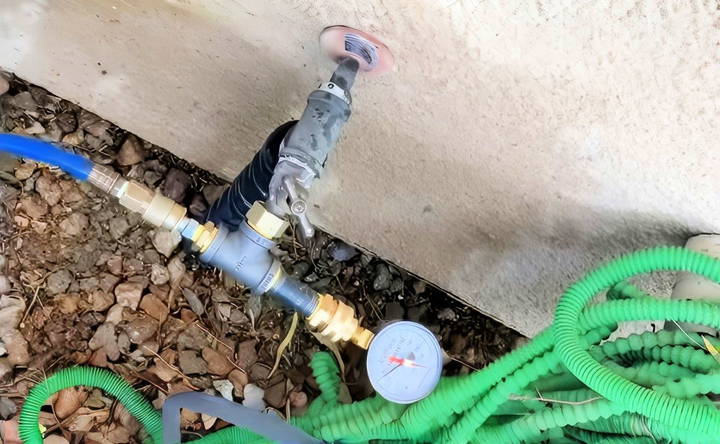
- Connect the T-fitting: Attach a T-fitting to your hose bib, which serves as the point where you'll inject the air. This fitting allows both water and air to flow through the line.
- Attach the air nozzle: Connect the air nozzle to the T-fitting. This nozzle will be connected to the air compressor.
- Install a pressure gauge: To monitor how much pressure you're injecting into the line, install a pressure gauge on the other side of the T-fitting. The gauge will help you avoid putting too much pressure into the line, which could cause more damage.
- Set up the air compressor: Attach the air compressor to the air nozzle and set the pressure to around 60–80 PSI to start with. It's crucial not to over-pressurize the line, as this could lead to bursts or further leaks.
Step 3: Inject Air Into the Water Line
Once your tool is assembled and attached to the hose bib, you can begin injecting air into the water line. Here's how to do it safely and effectively:
- Turn off the water supply: Make sure the water supply to the main line is shut off at the meter. This prevents water from flooding the line while you're injecting air.
- Open the air valve slowly: Gradually open the air valve on your compressor. As the air begins to flow into the water line, it will push the water through the system. Listen carefully for any unusual sounds.
- Monitor the pressure gauge: Keep an eye on the pressure gauge. A significant drop in pressure could indicate that air is escaping from the leak, while steady pressure could mean the leak is small or hard to detect.
Step 4: Listen for Signs of a Leak
Now that you've introduced air into the system, you'll want to listen for any signs of a leak. Depending on the location and severity of the leak, you may hear:
- Hissing or whistling sounds: This is caused by air escaping through the leak point.
- Gurgling or bubbling noises: If water is still present, air passing through it may cause bubbling sounds.
- Bubbling water or mud above ground: In some cases, the air pressure may push water or mud up to the surface, especially if the leak is near the surface or in soft ground.
If you don't hear anything immediately, it's a good idea to walk around the area where you suspect the leak. Be mindful of changes in ground texture or any visible disturbances on the surface.
Step 5: Identify the Exact Leak Location
Once you've pinpointed an area where the sound of leaking air or bubbling water is strongest, it's time to narrow down the exact location. Keep the air pressure flowing and carefully check the following:
- Soil or grass: Look for spots where the soil is noticeably wetter than other areas, or where grass appears to be greener or more lush.
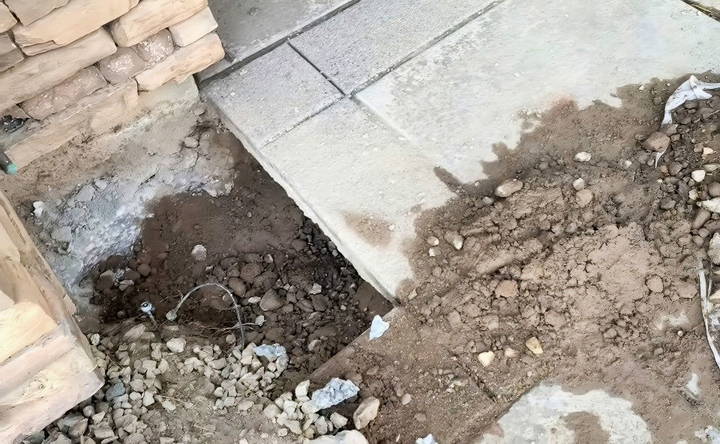
- Concrete or paved surfaces: If the leak is under a driveway or concrete slab, you may need to use additional tools, such as a professional-grade leak detection device, to get a more accurate reading.
- Air bubbles in puddles: If water has pooled on the surface, you might see bubbles forming as the air escapes from the leak.
Troubleshooting Common Issues
Although this DIY method can help you locate many leaks, there are instances where it might not work as effectively. Here are some common issues you might encounter:
- Leak under concrete: If the leak is located under a concrete slab or driveway, it can be much harder to detect using just air pressure. In these cases, specialized leak detection tools or professional services may be required.
- Too much pressure: If you inject too much air pressure into the line, you risk causing further damage to your pipes. Always start with a low PSI and work your way up slowly.
- Deep underground leaks: If the leak is deep below the surface, sound may travel long distances, making it harder to pinpoint the exact location.
When to Call a Professional
While this DIY method can help you locate many underground water leaks, there are situations where professional leak detection services may be necessary. If you're unable to detect the leak using air pressure or the leak is located in a hard-to-reach area (such as under concrete), a professional plumber with advanced tools like thermal imaging or acoustic leak detection equipment might be your best option.
Conclusion
Building your own underground water leak detector is a cost-effective way to locate leaks before resorting to professional services. By following the steps outlined above, you can inject compressed air into your water line to make telltale signs of a leak, such as bubbling water, hissing sounds, or ground disturbances. While this method may not work for every situation, it's a great first step in diagnosing potential underground leaks and can save you both time and money.
If you have any questions or run into issues, don't hesitate to leave a comment or reach out to a professional leak detection service. Happy leak hunting!
FAQs About DIY Underground Water Leak Detector
Discover all you need to know about DIY underground water leak detectors in our comprehensive FAQs. Learn to detect leaks efficiently today!
It's recommended to start with 60 to 80 PSI when injecting air into the water line. Avoid exceeding 80 PSI to prevent further damage to your pipes. Monitoring the pressure carefully with a gauge can help ensure safe operation.
Yes, you can still use this method with 60 PSI water pressure. It may take a bit longer to detect the leak, but it should work effectively. Keep the air pressure below 80 PSI to avoid damaging the pipes.
Yes, leaving the water on while injecting air can improve the chances of finding the leak. The water helps carry the air through the leak, making it easier to detect by sound or surface bubbling. This combination produces better acoustics, making the leak easier to locate.
If sound is hard to detect, consider using a laser thermometer to check for temperature changes above the suspected leak area. The ground above a leak is often cooler due to water surrounding the leak site. You can also use a mechanic’s stethoscope or PVC pipe to amplify any sounds from the leak.
Leaks under concrete are more challenging to detect with DIY methods. In such cases, you may need professional leak detection equipment or services. These tools can pinpoint leaks under concrete without requiring destructive testing, such as cutting through the slab.
Yes, rerouting the water line is a possible alternative to cutting through a concrete slab. This method involves bypassing the damaged section by running a new pipe, reducing the need for expensive and disruptive concrete work.
If the DIY method doesn't work, you may need to call in professional help. Leak detection services typically use advanced equipment like acoustic microphones or thermal imaging. Prices for these services range from $250 to $400, depending on your location and the complexity of the leak.
Sometimes, leaks may be too deep or too small to make visible signs on the surface. In such cases, keep monitoring for changes in soil moisture or use alternative detection tools, like the "rod-in-ground" method, where you test for wet soil with a thin probe.
Yes, tree roots are a common cause of underground leaks, as they can grow around or through pipes, making pressure and cracks. If you have trees near your water line, you may want to check for leaks around these areas, as root intrusion can exacerbate plumbing issues.
While patching may seem cost-effective in the short term, replacing the entire line is often a better long-term solution. A new, continuous pipe reduces the risk of future leaks at connection points and fittings. This is especially important if your line has multiple weak spots or is very old.


