Transforming a fireplace can dramatically change the ambiance of your home. One popular technique that adds character, light, and a touch of rustic-modern charm is the German Schmear. This method, inspired by centuries-old European techniques, is versatile, cost-effective, and easy to achieve. Whether your fireplace is brick or stone, this process can breathe new life into your living space.
In this comprehensive guide, we'll cover the steps, materials, and tips for making a stunning German Schmear fireplace.
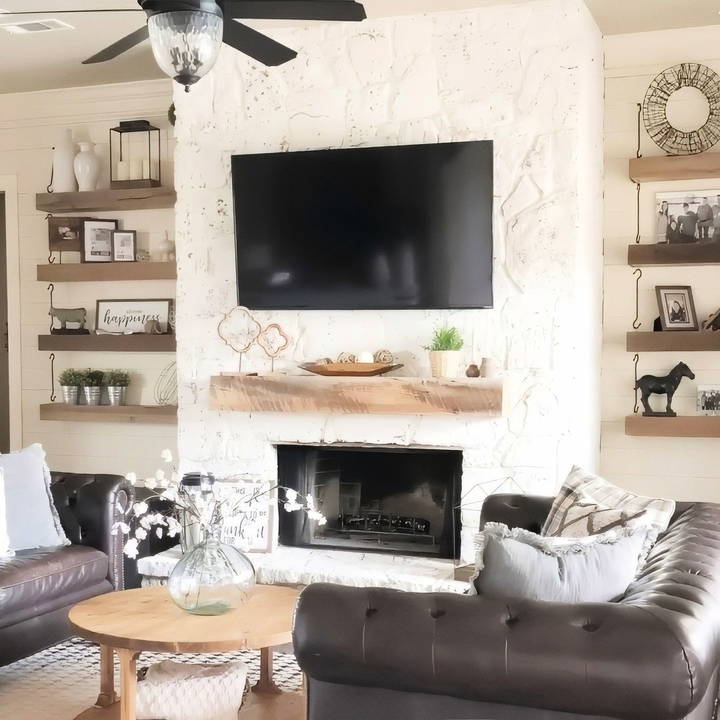
What Is a German Schmear?
The German Schmear is a finishing technique that uses mortar to build a textured, aged appearance on brick or stone surfaces. Unlike paint, the mortar partially covers the original surface, allowing some of the underlying texture to show through. This builds a unique, one-of-a-kind effect that balances rustic and modern styles beautifully.
Benefits of a German Schmear Fireplace
- Brightens the Space: Light-colored mortar reflects light, making your room feel more spacious and airy.
- Adds Character: The technique builds a timeworn look that adds depth and charm.
- Cost-Effective: With a small budget and some DIY enthusiasm, you can achieve a high-impact transformation.
- Customizable: The amount of mortar applied can be adjusted to match your desired look—heavy for more coverage, or light for a subtle effect.
Supplies You'll Need
Before starting your project, gather the following materials:
- White Mortar Mix: Essential for achieving the right texture and color.
- Paintbrushes: Use inexpensive ones for application.
- Mixing Tools: A 2-gallon bucket for mixing mortar.
- A mixing rod attachment for your drill.
- Builder's Paper: To protect your floors.
- Painter's Tape: For clean edges and to safeguard surrounding walls and floors.
- Gloves: To protect your hands.
- Sponge: For touch-ups and adjustments.
- Measuring Tools: A cup or scoop to achieve the right mortar consistency.
Step by Step Instructions
Make a German Schmear fireplace on a budget with our step-by-step guide. Includes tips, cost insights, and transformative results.
1. Prepare the Workspace
Preparation is key for a smooth project.
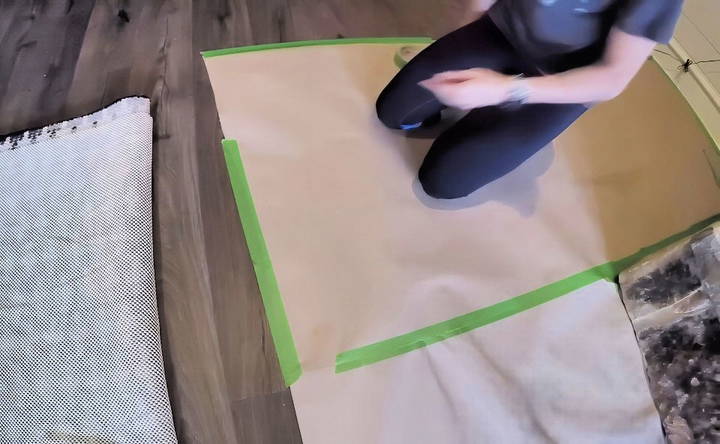
- Lay builder's paper around the fireplace and tape it securely with painter's tape to protect floors.
- Use painter's tape to mask off the walls and ceiling adjacent to the fireplace.
- Ensure you have all supplies ready to avoid interruptions during the process.
2. Mix the Mortar
- Use a white tile mortar for the best results.
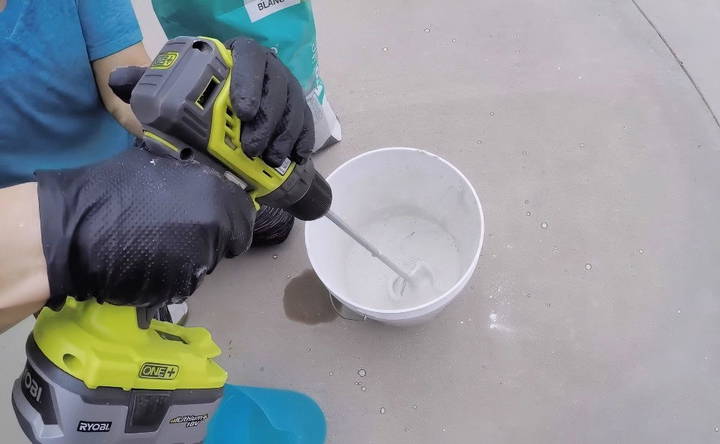
- In your mixing bucket, combine the mortar with water gradually. Aim for a consistency similar to peanut butter—thick enough to stick but thin enough to spread easily.
- Use a mixing rod attached to a drill to ensure a smooth mixture. Adjust water levels to reach your preferred thickness.
Tip: Test the mortar on a small area to check the consistency before proceeding.
3. Start Applying the Mortar
- Begin with areas that are less visible to get a feel for the application process.
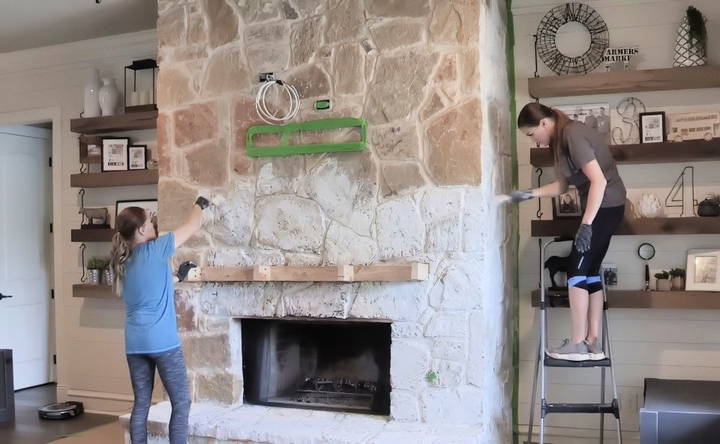
- Use a paintbrush to apply the mortar. Brush it on in thin layers, allowing the underlying stone or brick texture to peek through.
- Work methodically, covering one section at a time. Adjust the amount of mortar to highlight or obscure specific areas based on your design preference.
4. Blend and Adjust
As the mortar dries, you'll notice its color lightening. This is normal, and the final result will appear brighter than when first applied.
- For a more textured look, avoid pressing the mortar into every crevice.
- To correct any heavy application, lightly dab the area with a damp sponge to remove excess mortar or smooth out the surface.
- Step back frequently to assess your progress and ensure a balanced look.
5. Let It Dry
- Allow the mortar to set for about 45 minutes.
- Once it begins to harden, you can revisit areas to add or remove mortar as needed. Use a damp sponge for adjustments.
- If necessary, apply a second coat in areas where the natural color of the brick or stone still shows through undesirably.
6. Clean Up
After achieving your desired look:
- Carefully remove painter's tape and builder's paper.
- Clean your tools immediately before the mortar hardens.
Tips for Success
- Test Before Committing: Apply the German Schmear technique on a small, inconspicuous area to see how the mortar interacts with your fireplace material.
- Work in Sections: Focusing on small areas at a time ensures consistency and prevents the mortar from drying too quickly.
- Customize to Your Taste: The level of coverage is entirely up to you. For a heavier Schmear, apply more mortar and cover the surface more thoroughly. For a lighter touch, apply sparingly and let more of the original surface show through.
- Stay Calm: The initial results may look uneven or too gray, but remember that the drying process will significantly alter the final appearance.
Cost and Time Investment
One of the best aspects of the German Schmear is its affordability. Here's a breakdown:
- Supplies Cost: Approximately $65 for all materials, including mortar, brushes, and protective paper.
- Time Required: For a standard-sized fireplace, expect to spend about 2–3 hours on application and finishing.
Transformative Results on a Budget
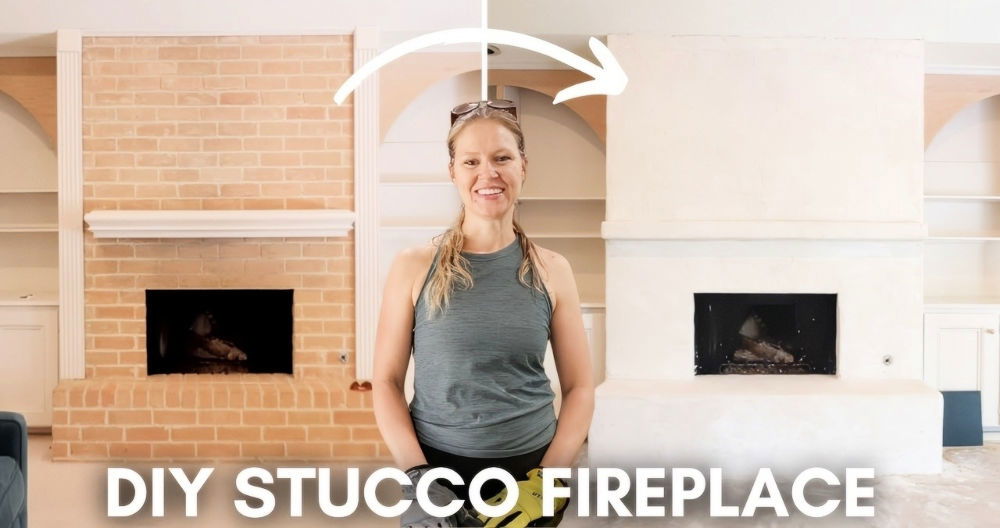
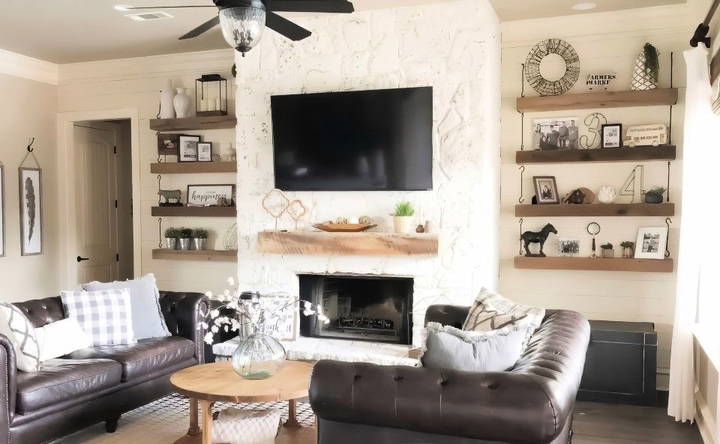
The transformation achieved with the German Schmear technique is remarkable. By investing just a few hours and minimal expense, you can modernize your fireplace and elevate the entire room. The result is a bright, cozy centerpiece that blends seamlessly with rustic, modern, or farmhouse decor.
Final Thoughts
The German Schmear technique is a simple and affordable way to refresh your fireplace and enhance your living space. With just a few tools and some creativity, you can achieve a custom look that suits your style. Whether you prefer a heavy, rustic finish or a subtle, modern touch, this DIY project puts the power of transformation in your hands.
So, gather your supplies, roll up your sleeves, and get ready to transform your fireplace into the charming focal point your home deserves!
FAQs About German Schmear Fireplace
Learn all about the german schmear fireplace technique, including tips, benefits, and how to achieve this stylish look in your home.
Yes, but the mortar may not adhere as well to painted surfaces. Consider lightly sanding the paint to create texture before applying the Schmear.
Once dried, the mortar is durable and long-lasting. However, it can be removed with some effort if you decide to revert to the original look.
The technique is forgiving during application. Use a damp sponge to adjust or remove excess mortar while it’s still wet.
The technique is designed for porous materials like brick or stone. It may not adhere well to smooth surfaces like tile.
Mortar adds texture, allowing for a customizable, rustic look with varying thickness. Paint, on the other hand, provides a flat, uniform finish without the same aged charm. Mortar achieves the authentic German Schmear effect, while paint resembles whitewashing.
Yes, mortar can be used outdoors, but it’s essential to confirm it’s weather-resistant. For added durability, consider sealing the surface after application. Alternatively, lime wash may be suitable for breathable brick.
Use hot, soapy water to clean soot stains gently. For heavy use fireplaces, sealing the surface can make cleaning easier and prevent discoloration over time.
Yes, but sand the paint lightly to build texture for better adhesion. Mortar needs a porous surface to bond effectively. Testing on a small area first is recommended.
It may work on stucco, but results vary depending on surface texture. For tile, the mortar might not adhere well unless it is porous. Always test a small section first to ensure compatibility.
While the mortar is still wet, use a damp sponge to smooth or remove excess. Once dry, it’s harder to adjust, so take care during application.
Sealing is optional but recommended for fireplaces exposed to soot or heavy use. A sealant can enhance durability and ease cleaning.
The technique is forgiving during application. If adjustments are needed, you can scrape off some mortar before it fully cures or reapply for a different look.
A paint roller is less effective, as it may pick up the mortar rather than spreading it. A brush allows for precise control, which is essential for achieving the desired texture.
One bag of mortar is typically sufficient for a standard fireplace, depending on the desired thickness of the Schmear.


