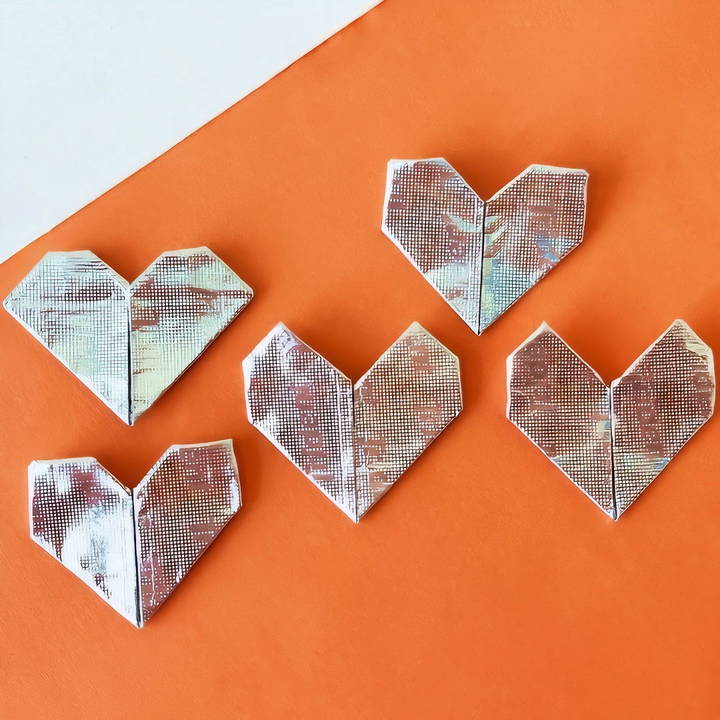
In this tutorial, we'll walk you through the process of turning an ordinary gum wrapper into a cute and creative heart. This simple but elegant craft is a great way to add a personal, handmade touch to gifts, cards, or decorations. Not only is it easy to learn, but it also gives you the opportunity to repurpose items that would normally be discarded. Let's get started with everything you need to know to make your own gum wrapper heart.
Why Make a Gum Wrapper Heart?
Before diving into the steps, let's explore some reasons why you might want to make a heart from a gum wrapper.
- Upcycling and Recycling: Turning trash into treasure is a growing trend. Repurposing gum wrappers helps you cut down on waste while making something meaningful.
- Sentimental Gesture: A handmade heart from a gum wrapper can be a thoughtful gesture when added to a love note, gift, or scrapbook. It's a unique way to show affection, especially in casual or spontaneous settings.
- Quick Crafting: Unlike larger craft projects, making a gum wrapper heart is fast and doesn't require special tools or materials. This is a craft you can easily complete in just a few minutes.
- Creative Outlet: Sometimes, the best crafts are simple. Making a heart out of a gum wrapper gives you a chance to channel your creativity with minimal supplies.
Now that you know why making a gum wrapper heart can be so fun and rewarding, let's look at the steps involved.
Materials You'll Need
You don't need many materials to make your gum wrapper heart. In fact, this is a very accessible craft because all you need are the following:
- Gum Wrapper: You can use any standard gum wrapper, but wrappers with a foil lining tend to work best because they hold their shape better.
- Flat Surface: While you won't need much space, having a clean and flat surface will make the folding process easier.
That's it! Unlike other crafting projects that may require glue, scissors, or decorative items, this one relies solely on the gum wrapper and your ability to fold it into shape.
Preparing the Gum Wrapper
Before you start folding, you need to prepare the gum wrapper. The wrapper should be flat and clean. If you're working with a wrapper that's been crumpled, try to flatten it as much as possible by gently smoothing it with your fingers.
If the gum wrapper has a paper and foil side, it's important to note that the shiny foil side will often end up being more visible in the finished heart. However, the paper side can also give the heart a more textured look, depending on your preference.
Step by Step Instructions
Learn how to make a heart out of a gum wrapper with step-by-step instructions. Perfect for creative fun and personalized gifts!
Step 1: Fold the Gum Wrapper in Half
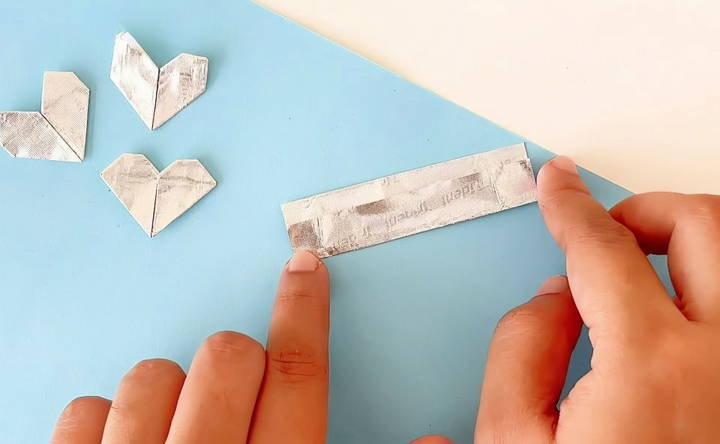
First, fold the gum wrapper in half lengthwise. Ensure that the edges are aligned neatly to make a crease in the center. This fold will help make symmetry as you move forward with the next steps.
Step 2: Unfold and Crease the Middle
Once you've folded the wrapper in half, unfold it so that you're left with a crease down the middle. This crease will serve as a reference point for the next set of folds.
Step 3: Fold Each Side into the Center
Next, take each edge of the wrapper and fold them inward toward the center crease. Both the left and right sides should meet at the middle, resembling the shape of a door. After doing this, you will have a narrow, vertical rectangle.
Step 4: Fold the Wrapper in Half Again
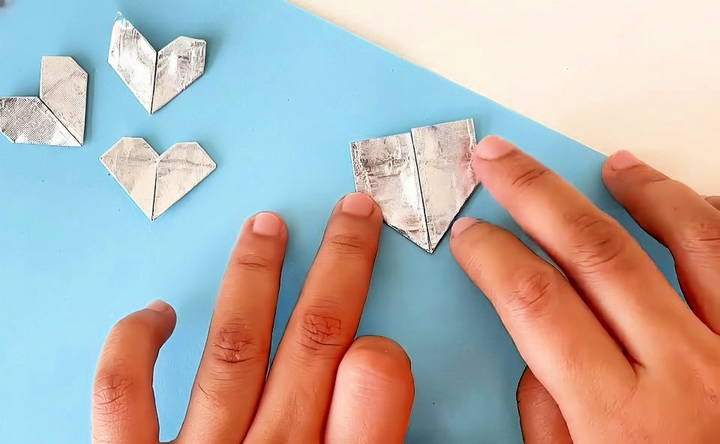
With the wrapper now shaped into a narrow rectangle, fold it in half horizontally, bringing the top edge down to meet the bottom edge. Press down on the fold to make a sharp crease. You'll now have a shorter, thicker rectangle to work with.
Step 5: Make the Triangle Points for the Heart
Now, this step is where the heart shape begins to take form.
- Take the top left corner of the folded wrapper and fold it diagonally downward so that the edge aligns with the middle crease.
- Repeat this step for the top right corner.
These two folds will make a triangular shape at the top of your rectangle, which will eventually become the top of the heart.
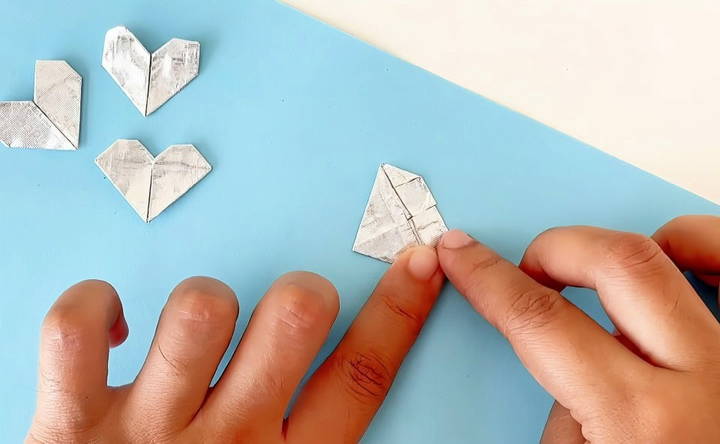
Step 6: Fold the Bottom Corners
Once the top corners have been folded, move to the bottom corners.
- Fold the bottom left and right corners inward at a slight angle, aligning the edges with the center crease.
- This will make the bottom point of your heart shape.
Step 7: Tuck in Loose Edges
To help the heart hold its shape, carefully tuck any loose edges or extra bits of wrapper under the folds. This step ensures that the heart stays together without any additional adhesives.
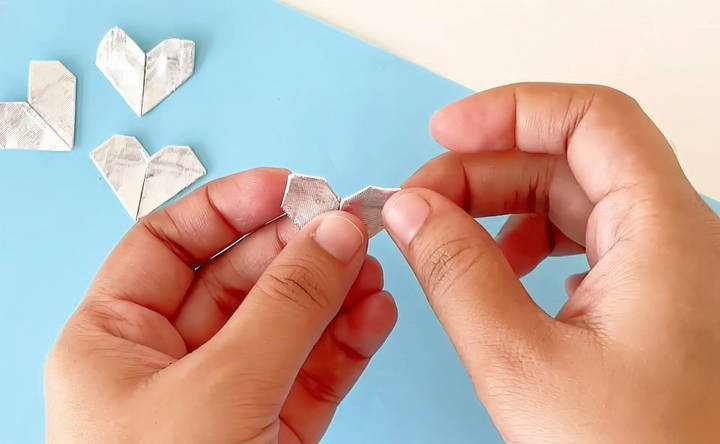
Step 8: Shape the Top of the Heart
To give your heart a more rounded appearance at the top, gently curve the triangular tips you maked in Step 5. You can either fold the sharp points inward or use your fingers to smooth them out into a more rounded shape. This step is optional, but it helps to make a more realistic heart shape.
Step 9: Finishing Touches
Once you've completed the basic folding, take a moment to adjust the folds and smooth out any creases. Your gum wrapper heart is now ready!
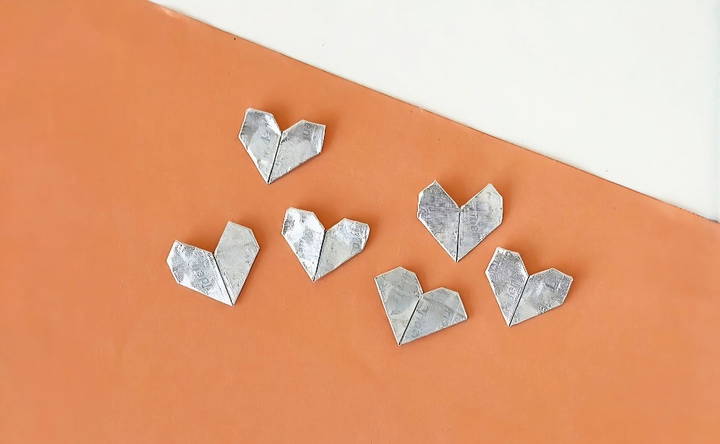
Displaying and Using Your Gum Wrapper Heart
Now that you've crafted a heart out of a gum wrapper, you might be wondering how to use or display it. Here are a few creative ideas:
- Attach to a Greeting Card: Glue or tape your gum wrapper heart to a card for a handmade, personalized touch. It's a great addition to birthday, anniversary, or Valentine's Day cards.
- Incorporate into a Gift: Tuck the heart into a gift box or attach it to a wrapped present for a small but meaningful detail.
- Make Multiple Hearts: If you have multiple gum wrappers, try making several hearts and stringing them together to make a garland or mobile. This would make a cute room decoration or party favor.
- Scrapbooking: Add your gum wrapper heart to a scrapbook as a fun and creative embellishment.
- Sentimental Keepsakes: Make a heart from the wrapper of a piece of gum you shared with someone special as a way to preserve the memory.
Tips for Making the Perfect Gum Wrapper Heart
While the steps outlined above are straightforward, here are a few extra tips to make sure your heart turns out just the way you want:
- Use Wrappers with a Foil Lining: Gum wrappers with a foil side tend to hold their shape better and look shinier when folded, giving the heart a bit more sparkle.
- Be Patient with the Folds: Some gum wrappers are more delicate than others, so take your time when making each fold to avoid tearing the paper.
- Practice with Scrap Paper First: If you're new to origami or paper folding, it might be helpful to practice the folds on scrap paper before using your gum wrapper. This will help you become familiar with the process and ensure that your final product looks neat.
- Try Different Wrapper Sizes: Not all gum wrappers are the same size, and experimenting with different brands or types of wrappers can result in various heart shapes and sizes. Don't be afraid to get creative!
Conclusion
Making a heart out of a gum wrapper is a simple yet meaningful craft that anyone can do with just a few minutes and minimal supplies. Whether you're looking to add a personal touch to a gift, preserve a special memory, or simply enjoy a creative project, this little heart craft is a perfect way to do it.
The next time you finish a piece of gum, instead of tossing the wrapper, try turning it into a tiny work of art. With just a few folds, you'll have a heart that's not only cute but also carries the sentimental value of something handmade. Happy folding!
FAQs About How to Make a Heart out Of a Gum Wrapper
If the top of your heart is too pointy, gently unfold the corners and refold them with less sharp angles. You can also smooth the tips with your fingers to create a rounder shape. Take your time adjusting until the heart looks more balanced.
Gum wrappers can be delicate. If a tear occurs, use another wrapper and fold more carefully, applying gentle pressure to avoid damage. Practicing with regular paper first can help build confidence and avoid mistakes.
If your heart is uneven, check that all your folds are aligned correctly, especially during the early steps. When folding, make sure the edges meet precisely at the center crease for a symmetrical result. Flatten the folds firmly to ensure uniformity.
To help the heart stay intact, press down on each fold firmly, especially where the edges meet. Tucking in any loose edges carefully can also help. If necessary, a small dot of glue can be used to secure the heart.
While foil-lined wrappers hold their shape better, you can still use paper-only wrappers. Be extra gentle when folding to prevent tearing, and make sure to press the folds firmly to maintain the heart’s structure.
Yes! Using wrappers of different sizes can make various heart shapes. Larger wrappers will produce bigger hearts, while smaller wrappers will give you more petite designs. Experiment with different sizes to achieve the desired effect.
If your heart looks a bit odd, don't worry—it's all part of the fun! Take a moment to adjust any folds and smooth out the creases. Remember, handmade crafts often have a unique charm, even if they aren't perfect.
To make your heart more decorative, consider using wrappers with bright colors or patterns. You can also try adding a personal touch, like drawing small designs or writing a message on the wrapper before folding.


