Crawfish, also known as crawdads or freshwater lobsters, are a delicious treat, and catching them yourself can be both rewarding and fun. One of the most effective ways to catch crawfish is by using a trap. While commercial crawfish traps can be expensive, you can easily make one yourself using common household materials. This DIY method is not only affordable but also quick and easy. In this guide, we'll show you how to make your own homemade DIY crawfish trap using plastic bottles, zip ties, and a few basic tools.
Materials You'll Need
Before you start, gather the following materials:
- Two large plastic bottles (2-liter soda bottles work well)
- Zip ties (at least 4-5)
- A sharp utility knife or razor blade
- Bait (dead fish, fish guts, raw meat, or even cat food)
- Rocks (to weigh down the trap)
These simple materials will allow you to make a functional and effective trap in about 10 minutes!
Step by Step Instructions
Learn how to make a DIY crawfish trap with our step-by-step instructions, from choosing the right bottle to setting and retrieving the trap efficiently.
Step 1: Choosing the Right Bottle
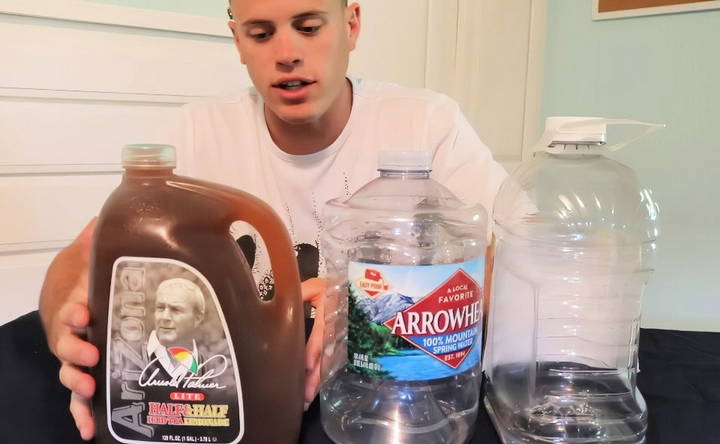
Not all bottles are maked equal when it comes to making a crawfish trap. The bottle you choose should have a cone-like shape leading up to the cap. Bottles with handles are not ideal, as they make the cutting and assembly process more difficult. Opt for a bottle that has enough space between the straight portion and the curved neck, as this will form the entrance to your trap.
- Pro tip: If you have multiple bottle options, pick the one with the widest opening at the neck. This will make it easier for crawfish to enter the trap.
Step 2: Preparing the Bottle
Once you've chosen the right bottle, follow these steps to prepare it for assembly:
- Remove the cap and handle – Discard the cap and cut off any handles that might be attached to the bottle.
- Cut the bottle – About half an inch below where the bottle starts to curve into the neck, make a clean horizontal cut all the way around the bottle. You'll now have two parts: the bottom of the bottle and the top portion (the neck).
Tip: If you don't have a utility knife, you can use a steak knife or scissors to make the cut. Just be careful, as plastic can be slippery when cutting.
Step 3: Inverting the Neck
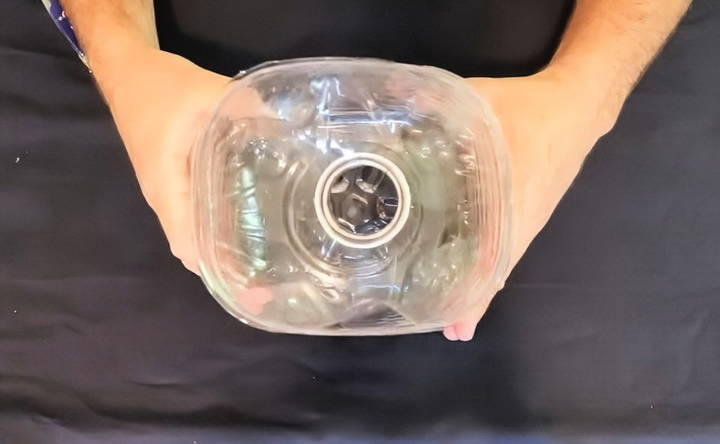
Now that you have two parts, it's time to assemble the basic structure of the trap. Take the top portion (the neck) and invert it so that it fits snugly inside the bottom part of the bottle. This will form a funnel that allows crawfish to enter the trap but makes it difficult for them to escape.
Step 4: Securing the Funnel with Zip Ties
Although the neck might fit securely inside the bottom of the bottle, it's essential to reinforce this connection with zip ties to prevent it from coming apart underwater.
- Use the utility knife to make two small holes – one on each side of the bottle, where the neck and the body meet.
- Thread a zip tie through the holes and tighten it to hold the neck in place.
- Repeat this process on the opposite side to ensure the funnel is secure.
If your bottle has any gaps or uneven edges, add extra zip ties to make sure no crawfish can escape.
Step 5: Making a Trap Door
You'll need a way to add bait and remove the crawfish once you've caught them, so the next step is to make a simple trap door.
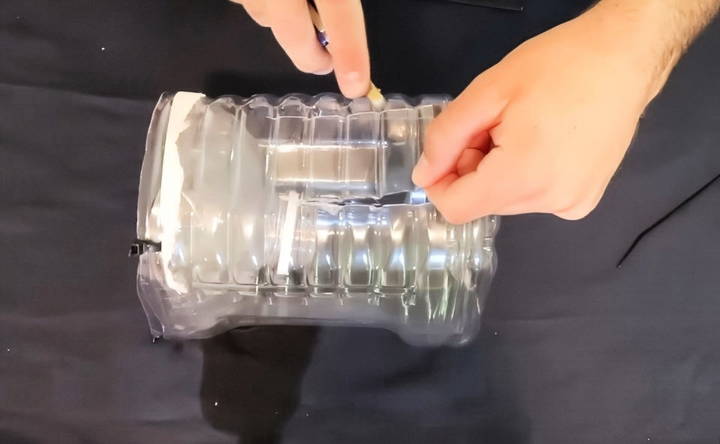
- Choose a spot on the side of the bottle, preferably on the bottom section, and cut a small flap about 2-3 inches long. This flap will act as your door.
- Secure the door with a zip tie, just like you did with the funnel. When you're ready to add bait or remove crawfish, simply cut the zip tie and open the door. You can easily reseal it with a new zip tie after each use.
Step 6: Adding Holes for Water Flow
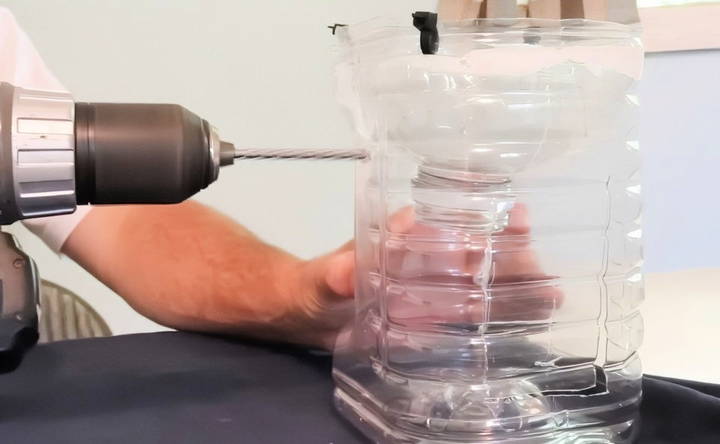
To help attract crawfish to the trap, you'll want to ensure that the scent of your bait spreads through the water. Poke a few small holes around the body of the trap using your utility knife or a drill. This will allow water to flow through, carrying the scent of the bait to nearby crawfish.
You don't need to go overboard with holes—just a few well-placed ones will do the trick. Too many holes might weaken the structure of the trap or allow crawfish to escape.
Step 7: Baiting the Trap
Choosing the right bait is crucial for a successful crawfish trap. Crawfish are scavengers and are attracted to strong-smelling, decaying food. Here are some excellent bait options:
- Dead fish or fish guts
- Raw meat (chicken liver works well)
- Cat food (especially fish-flavored varieties)
If you're short on time, cat food is a convenient and effective bait option. Simply scoop out a portion of the cat food and place it inside the trap through the door you maked earlier. The scent of the bait will spread through the water, luring crawfish into the funnel.
Step 8: Weighing Down the Trap
To keep the trap from floating away in the current, you'll need to weigh it down with a few rocks or small stones. Add just enough weight to ensure the trap sits firmly on the river or pond bed without compromising space for the crawfish to enter.
Step 9: Setting the Trap
Now that your trap is ready, it's time to place it in the water. If possible, choose a location with a gentle current where crawfish are likely to be found. Crawfish typically prefer shallow, slow-moving waters with plenty of rocks and vegetation.
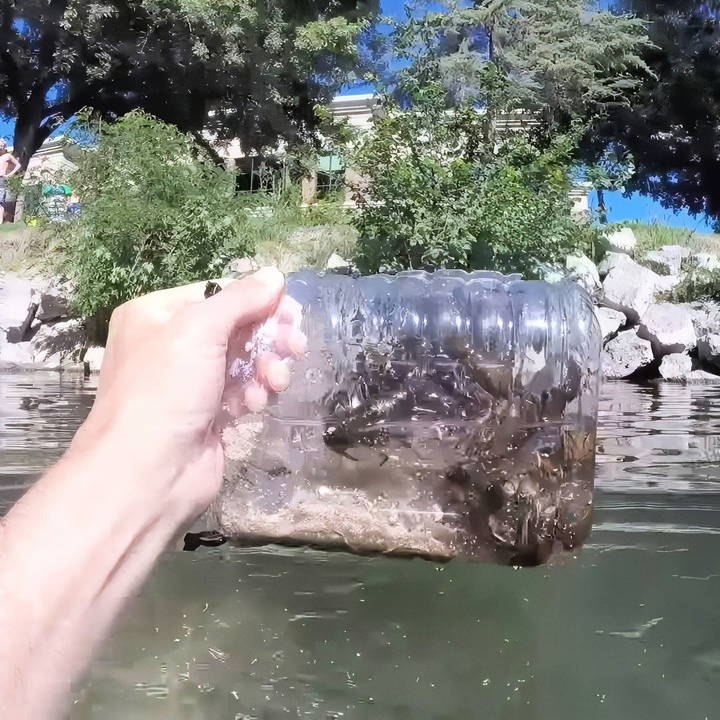
If you're able to snorkel or wade into the water, you can carefully place the trap on the riverbed, ensuring that the entrance is clear for crawfish to walk inside. For those who prefer not to get in the water, you can tie a length of string to the trap and toss it into the water. Just make sure to secure the other end of the string to a tree or a sturdy object on the shore.
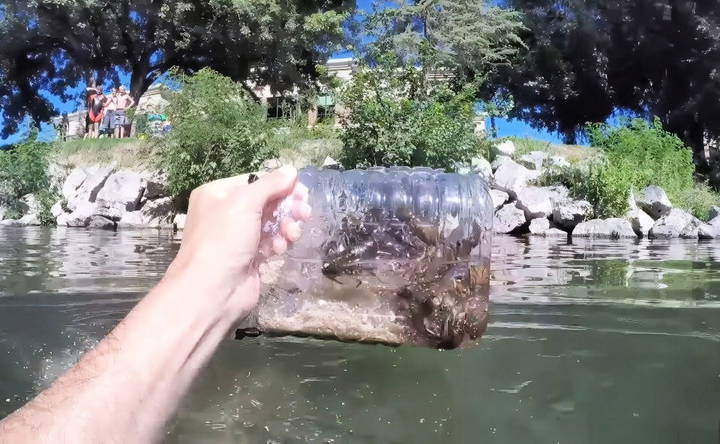
Step 10: Checking and Retrieving the Trap
Crawfish are most active at night, so it's a good idea to set your trap in the evening and check it the following morning. Depending on the location and the amount of crawfish in the area, you may need to leave the trap in place for several hours or even overnight.
To check the trap, simply pull it up using the string (if you threw it into the water) or retrieve it from the bottom if you placed it by hand. Carefully open the trap door, cut the zip tie, and dump out the crawfish.
Step 11: Cleaning and Reusing the Trap
After you've emptied your trap, give it a quick rinse to remove any dirt or debris. You can then rebait it and set it again for another round of crawfishing.
Additional Tips and Tricks
- Multiple Traps: For a more successful catch, consider setting multiple traps in different locations. This increases your chances of finding an area with more crawfish.
- Season and Location: Crawfish are typically more abundant in warmer months, especially in spring and summer. Check local regulations to ensure you're fishing during the right season.
- Safety Note: If you're younger or working with sharp tools, make sure to ask for help from an adult. Utility knives and razors can be dangerous, especially when cutting plastic.
Conclusion
Making your own DIY crawfish trap from plastic bottles is not only simple but also an environmentally friendly way to repurpose materials. With just a few tools and some bait, you can catch a delicious batch of crawfish to enjoy with friends and family. Whether you're new to crawfishing or an experienced pro, this DIY project is a fun and rewarding way to enjoy the outdoors.
So, grab your materials, head to the river, and try your hand at catching crawfish with your very own homemade trap!
FAQs About DIY Crawfish Trap
Discover the essentials of DIY crawfish trap with expert answers to common questions, ensuring your trapping success.
It takes about 10 minutes to make a crawfish trap using plastic bottles, zip ties, and a utility knife. The process is simple, requiring just a few basic cuts and assembly steps.
Crawfish are attracted to strong-smelling bait such as dead fish, fish guts, raw meat, or even cat food. Canned cat food is a quick and convenient option that works well in small traps.
No, bottles with handles do not work well for this project. The ideal bottle should have a cone-shaped neck and enough space between the straight and curved areas to form the trap’s entrance. A standard 2-liter bottle is perfect.
A sharp utility knife or razor blade is the main tool needed. If you don’t have one, a sturdy steak knife can also work, but caution is advised when cutting plastic. Zip ties are used to secure the structure.
Yes, you can attach string or twine to your trap, allowing you to throw it into a river or pond. Be sure to secure the string to a tree or fixed object to easily retrieve it later.
To prevent your trap from drifting in the current, add a few rocks or gravel inside for weight. This will help it stay on the riverbed where crawfish are more likely to find it.
Crawfish are most active at night, so it's best to check your trap early in the morning after setting it overnight. If you're catching a lot of crawfish, you can check more frequently.
Ensure the bottle is properly placed on the riverbed with the entrance unobstructed. You may also want to try a different bait or place the trap in a more crawfish-populated area, like near rocks or vegetation.
Kids should only make these traps with adult supervision, as cutting tools like utility knives and razors can be dangerous. It's essential to get help from a parent or guardian.


