Making easy DIY rings was one of the most fun experiences of my life. I decided to try making my own homemade rings after seeing some amazing designs online. I gathered some basic materials like wire, beads, and pliers. It was amazing to see how quickly I could make something beautiful.
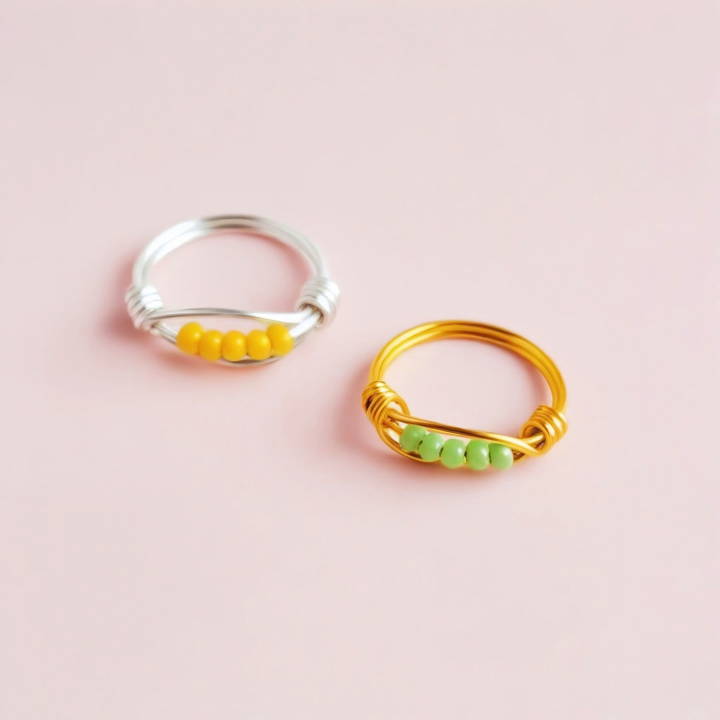
Making my own DIY rings felt so rewarding. It became a relaxing hobby that I enjoyed at home. I loved seeing my progress and getting better each time. If you are interested in crafting or want to try something new, I'd recommend starting your own ring-making project. I'm helping with this to give you the push you need.
Gathering the Essentials
The first step, as with any great endeavor, was to gather my materials. The essential items included:
- 20 Gauge Brass Wire: The backbone of the ring, chosen for its sturdiness yet malleability.
- 26 Gauge Wire: For securing the beads or crystals firmly to the ring.
- Beads and Crystals: The stars of the show. I opted for tiny gemstone beads and some crystal chains, mesmerized by their brilliance and charm.
- Tools: Round nose pliers, chain nose pliers, wire cutters, a wooden ring mandrel, and a cuticle stick (for the initial shaping).
My choice in materials was deliberate. The brass wire ensured durability, while the gemstones and crystals promised uniqueness in each piece. As for the tools, they were indispensable allies in manipulating the wire with precision.
Step by Step Instructions
Learn how to make beautiful DIY rings with our easy step by step instructions, including shaping, forming, adding beads, and adding the final touches.
Step 1: Shaping the Base
I took a 24-centimeter piece of 20 gauge wire and wrapped it around a cuticle stick, impatiently itching to see my creation take shape. After twisting and securing the base, it dawned on me that precision was key; a lesson I'd carry throughout this journey.
Step 2: Forming the Ring
Using a wooden ring mandrel, I crafted the wire into a perfect ring silhouette. This step was a dance of balance and form, a testament to the patience required in the art of jewelry making.
Step 3: Adding the Beads
Initially, I gravitated towards a beautiful blue gemstone bead. Yet, as creativity would have it, I found myself captivated by the sparkle of a crystal chain. Carefully, I chose a crystal and secured it with the thinner 26 gauge wire, sewing it into place with gentle precision.
Step 4: Final Touches
The ring, though beautiful, needed finishing touches. Following the detailed instructions, I hammered the band for texture and polished the final product until it gleamed. The act of hammering not only solidified the ring's form but also embedded part of my spirit within it.
Challenges Along the Way
The journey wasn't without its hurdles. Mastering the tension in the wire, ensuring the beads were securely fastened, and achieving the perfect ring size required practice and patience. Each failed attempt was a lesson, teaching me the importance of persistence and precision.
The Reward: A Collection of Beauty
Over time, my collection grew. I ventured further, adding Swarovski pearl beads and experimenting with different textures and sizes. Each ring was a narrative, a piece of art that spoke of my journey from novice to adept.
Among my creations, a ring with a pearl nestled within its curls sat as a testament to simplicity and elegance. This piece, in particular, resonated with my initial vision - to make something dainty, delicate, and utterly captivating.
Customization Tips for DIY Rings
Making a DIY ring is a wonderful way to express your personal style and creativity. Here are some tips to help you customize your rings and make them truly unique:
- Choose Your Base Material: Start by selecting a base material that resonates with you. Common options include metals like silver or copper, but don't be afraid to think outside the box with materials like wood, resin, or even recycled items.
- Select a Design Theme: Decide on a theme that reflects your personality. It could be nature-inspired, geometric shapes, or even a mix of cultural motifs. This will guide your design process and give your ring a cohesive look.
- Add Personal Touches: Incorporate elements that have personal significance, such as birthstones, initials, or symbols that hold special meaning to you. These touches make your ring not just a piece of jewelry but a story on your finger.
- Experiment with Textures: Textures can add depth and interest to your ring. Techniques like hammering, engraving, or adding a patina can transform the look and feel of your ring.
- Consider Functionality: If you're making a ring for everyday wear, think about comfort and practicality. Ensure the ring fits well and won't catch on clothing or interfere with daily tasks.
- Play with Color: Use colored wires, beads, or stones to add a splash of color to your ring. This can be a subtle accent or a bold statement, depending on your preference.
- Finish with a Sealant: Protect your ring and keep it looking great with a suitable sealant. This is especially important for rings made from non-traditional materials.
The beauty of DIY is that there are no rules. Feel free to experiment and change things up until you make something that you love. Your ring is a reflection of you, so have fun with it!
Advanced Techniques in DIY Ring Making
When you're ready to take your DIY ring-making skills to the next level, exploring advanced techniques can add sophistication and professional flair to your creations. Here's a guide to some intricate methods that can elevate your ring designs:
- Soldering: Soldering is a process of joining two metal pieces together using a filler metal. It's a fundamental skill for making metal rings and allows for more complex designs. Practice with scrap metal first to perfect your technique.
- Stone Setting: Adding gemstones to your rings can make them stand out. Learn about different setting styles like prong, bezel, and pave. Each method requires precision and patience, but the result is truly rewarding.
- Metal Stamping: Personalize your rings with metal stamping. You can imprint letters, numbers, or patterns onto the metal surface. It's a great way to add a message or a unique texture to your rings.
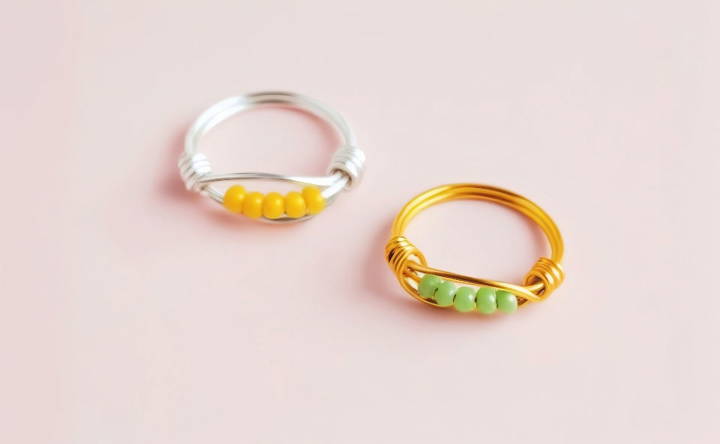
- Wire Wrapping: This technique involves wrapping wire around itself or stones to make intricate patterns. It's a versatile method that doesn't require soldering and can be used with a variety of materials.
- Forging: Forging metal involves heating and hammering it into shape. This ancient technique can be used to make thick, durable rings with a rustic, handcrafted look.
- Enameling: Enameling is the process of fusing powdered glass to metal to make a colorful, glossy surface. It requires a kiln and careful temperature control but offers a beautiful way to add color to your metal rings.
- Etching: Etching metal makes detailed designs through a chemical process that removes parts of the metal surface. It's a way to add intricate patterns and depth to your rings.
- Filigree Work: Filigree involves making delicate, lace-like designs from thin metal wires. It's a meticulous process that results in elegant and sophisticated rings.
Mastering these techniques requires practice and sometimes special tools. Don't be disheartened; with patience, you'll make stunning, professional-quality rings.
Troubleshooting Common Issues in DIY Ring Making
When crafting DIY rings, you might encounter a few hiccups along the way. Here's a straightforward guide to solving some of the most common issues you may face:
Ring Size Misfit
- Solution: Measure your finger size at different times of the day, as it can change slightly. Use a ring sizer or a piece of string and a ruler. If the ring is too big, add a ring guard inside the band. If it's too small, gently stretch the ring if the material allows, or resize it by cutting and soldering.
Material Hardness
- Solution: If the material is too hard to work with, anneal it by heating and then slowly cooling it to increase malleability. Always wear protective gear when doing so.
Uneven Surfaces
- Solution: Use files and sandpaper to smooth out any rough edges or uneven surfaces. Start with a coarse grit and move to a finer grit for a polished finish.
Soldering Difficulties
- Solution: Ensure the metal surfaces are clean before soldering. Use flux to prevent oxidation and ensure a strong join. Heat the metal evenly and apply the solder; if it doesn't flow, reheat and try again.
Discoloration
- Solution: Discoloration can occur due to oxidation or reaction with skin. Use a polishing cloth to restore shine. For prevention, apply a clear lacquer or wax to the ring.
Stone Setting Challenges
- Solution: Make sure the setting fits the stone exactly. Secure the stone with a bezel pusher or prongs. If the stone is loose, gently tighten the setting, but be careful not to crack the stone.
Allergic Reactions
- Solution: Use hypoallergenic materials like titanium or stainless steel to avoid allergic reactions. If a reaction occurs, coat the ring with a jewelry sealant or clear nail polish.
By addressing these common issues, you'll improve your ring-making process and end up with a beautiful, comfortable piece that you can wear with pride. Remember, patience and practice are key to mastering DIY jewelry making.
FAQs About DIY Rings
Discover answers to common questions about DIY rings. Learn tips, materials, and techniques for making your unique handmade jewelry.
You can use a ring mandrel to determine the correct size. If you don’t have one, wrapping the wire or material around a cylindrical object, like a marker or lipstick tube, that matches your finger size can work as a temporary solution.
Absolutely! There are many simple designs, like beaded or wire-wrapped rings, that are perfect for beginners. Step-by-step tutorials are available online that can guide you through the process.
There are numerous creative ideas ranging from mini beaded rings, glitter rings, elastic rings with crystals, to more intricate designs like beaded flower statement rings or leather heart rings. You can find inspiration and tutorials for these designs online.
Yes, you can opt for upcycled materials such as old wires, beads from unused jewelry, or even natural elements like stones and wood. This not only gives a unique touch to your rings but also helps reduce waste.
To ensure durability, select high-quality materials and use proper techniques. For wire rings, use a thicker gauge wire for strength. If you're working with resin, make sure it's fully cured. Additionally, test the ring by wearing it around the house to ensure it withstands daily activities.
Conclusion:
Wrapping up, making easy DIY rings for beginners is a fun and rewarding project. By using basic materials and a bit of creativity, you can craft unique homemade rings that showcase your personal style. Not only is it an enjoyable way to spend your time, but it's also a great way to make personalized gifts for friends and family.


