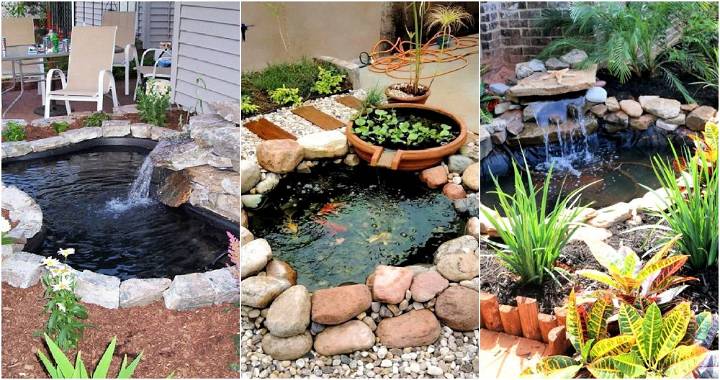
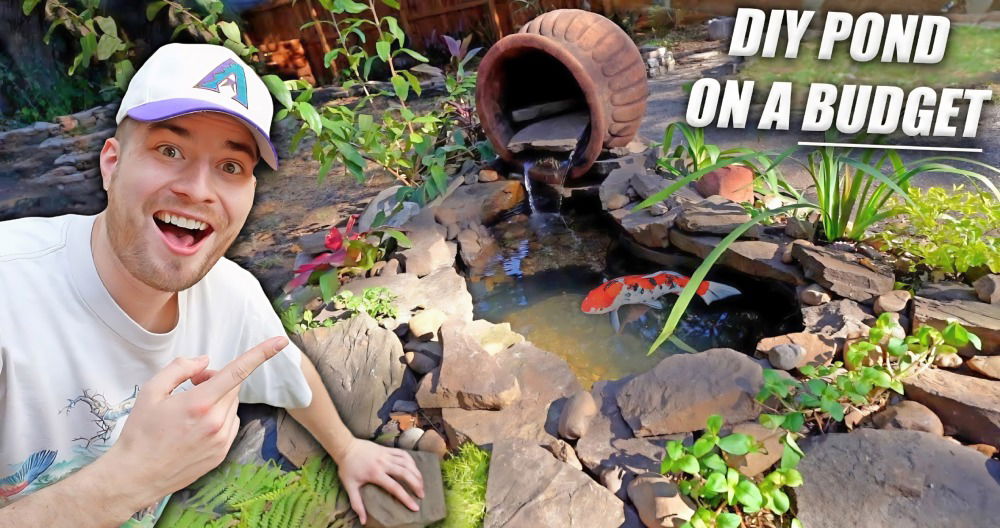
Building a homemade DIY turtle pond is a beautiful experience. I decided to build one in my backyard. I started gathering materials like pond liners, stones, and plants. It took a bit of time, but I was excited to see how happy my turtles would be in their new environment. The process was straightforward and fun for the whole family.
Adding a DIY turtle pond to your backyard can be very rewarding. Seeing my turtles swimming happily each day brings joy. I made sure to add a filter for clean water and some shaded areas for them to rest. The pond isn't just for the turtles; it's a great addition to our garden, making it feel lively and serene. Trust me, following these steps will help you build a beautiful spot right at home.
Step by Step Instructions
Learn how to build a DIY turtle pond with step-by-step instructions, from choosing the location to making a habitat. Perfect for turtle enthusiasts!
Planning and Preparation
Planning and Preparation: Step-by-step guide to choosing a location, measuring, gathering materials, digging, installing a liner, filling, and making a pond habitat.
1. Choosing the Location
The first step was identifying the perfect spot in my backyard. Initially, the place chosen was cluttered with rose bushes that my parents were not fond of, making the decision to clear them out easy. Removing the bushes not only provided ample space for my turtle pond but also cleared out an area that didn't add aesthetic value to our garden.
2. Measuring and Marking the Area
Once the space was cleared, the next step was to measure and mark the area for the pond. I aimed for a roughly 7x7 feet area, giving my turtles plenty of room to swim and explore. I used stakes and strings to mark the pond's boundaries, ensuring I left enough space around the edges for maintenance and aesthetic purposes.
3. Materials Needed
For the DIY turtle pond, the materials I gathered included a pond liner, landscaping fabric, a shovel, a wheelbarrow, cinder blocks, and garden soil. The pond liner was essential for holding the water, while the landscaping fabric would prevent weeds from growing into the pond. Cinder blocks were used to outline the pond's shape and provide a sturdy edge.
4. Digging the Pond
Digging was both the most challenging and rewarding part of the project. The soil in my backyard was a mix of sand and clay, making some areas easy to dig and others a workout. I dug about a foot deep, finding that the clay layer beneath provided a good structural base for the pond. It's crucial to maintain a level depth and even walls for the aesthetics and health of the pond ecosystem.
5. Installing the Liner
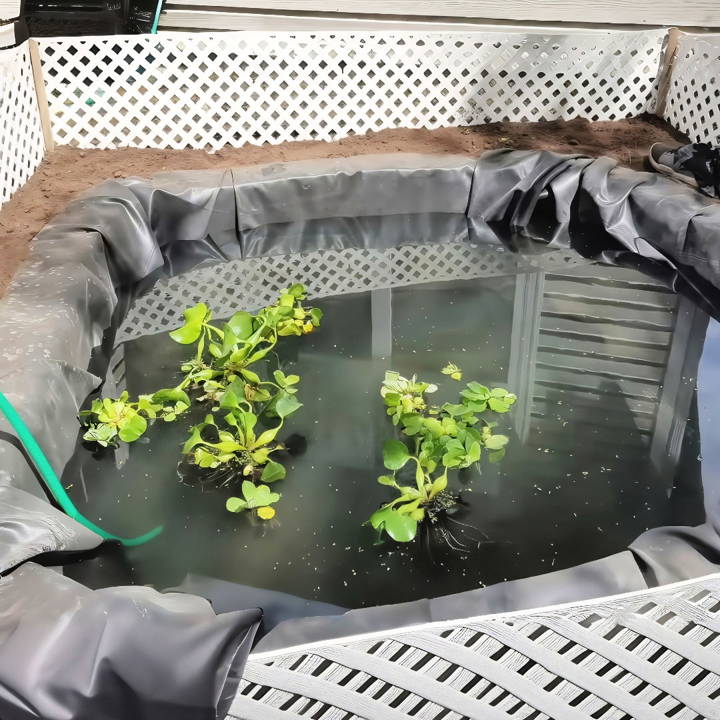
After the hole was dug, installing the pond liner was the next big step. First, I placed the landscaping fabric at the bottom to prevent any roots or weeds from poking through. Then, I laid the pond liner across the hole, ensuring it was smooth and without wrinkles. This step required patience and attention to detail, as any folds could lead to uneven water distribution or potential leaks.
6. Filling and Finishing Touches
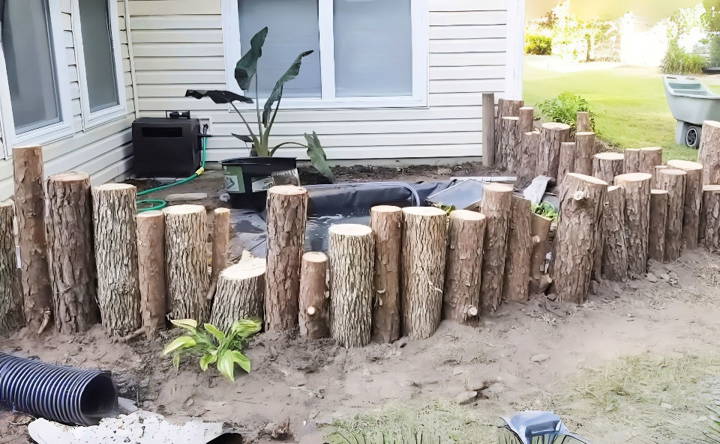
Filling the pond with water was an exciting moment, seeing the area transform from a hole in the ground to a potential aquatic sanctuary. I took this time to adjust the liner as needed, making sure it sat perfectly as the water level rose. Finally, I used the cinder blocks and garden soil to secure the liner's edges and give the pond a natural, earthy border.
7. Making a Habitat
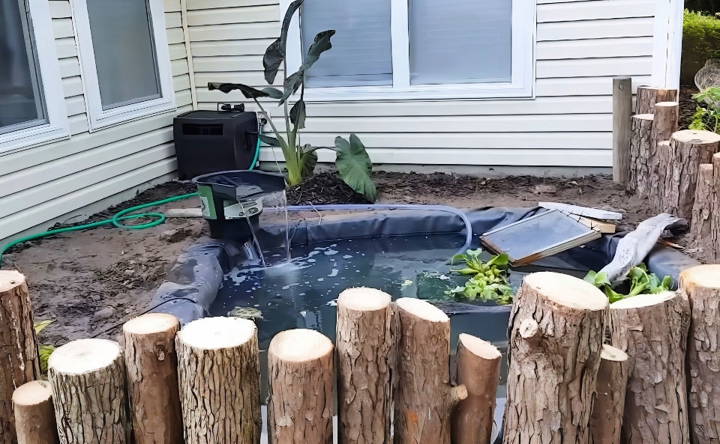
The last step was turning this pond into a habitat. I added aquatic plants, a basking area, and a DIY filtration system to keep the water clean. The plants not only provide oxygen but also hide spots for my turtles, making the pond feel like a natural environment. The basking area was crucial for their well-being, offering a spot for my turtles to sunbathe and regulate their body temperature.
Ongoing Maintenance and Care
Maintaining the turtle pond has been an ongoing process. Regular checks are necessary to ensure the water is clean and the filtration system is working correctly. I also make it a habit to inspect the pond liner and edges for any signs of wear or damage.
Designing Your Turtle Pond
Making a turtle pond is a fun project, adding nature to your yard. It's more than just a hole with water; it's building a habitat for happy, thriving turtles.
- Start with the Basics. First, consider the size of your pond. It should be large enough for your turtles to swim and dive but also shallow enough for them to easily reach the surface. A good rule of thumb is to provide at least 10 gallons of water for every inch of turtle shell length.
- Location Matters: Choose a spot in your yard that gets both sunlight and shade throughout the day. Turtles need the sun to regulate their body temperature, but they also need a cool place to retreat when it gets too hot.
- Design for Comfort and Safety: Your pond should have a gentle slope so turtles can easily enter and exit the water. Include a basking area where they can dry off and absorb essential UV rays. This can be a stack of rocks, a floating platform, or a specially designed turtle dock.
- Think About Filtration Clean water is crucial for the health of your turtles. Invest in a good filtration system that can handle the bioload of your pond. This will keep the water clear and reduce the buildup of harmful bacteria and algae.
- Plant Wisely Aquatic plants can provide natural filtration and offer hiding spots for your turtles. Choose species that are non-toxic and easy to maintain, like water lettuce or duckweed. Avoid plants that could potentially harm your turtles if ingested.
- Safety First: Ensure the pond is escape-proof and safe from predators. A fence or mesh cover can help protect your turtles from birds, raccoons, and other animals that might see them as a snack.
- Final Touches: Add some personal touches to make your pond unique. Decorative stones, water features, and appropriate lighting can enhance the beauty of your turtle habitat.
Follow these guidelines to build a beautiful turtle pond that mimics their natural habitat and ensures their safety and health.
Landscaping and Plant Selection
Selecting the right plants for your turtle pond is key to a healthy and attractive environment. Here's how to choose and arrange plants for the benefit of your turtles and the pond ecosystem.
- Choosing the Right Plants Selecting the right plants for your turtle pond can make all the difference. Opt for native species that are adapted to your local climate and non-toxic to turtles. Aquatic plants like anacharis, water hyacinth, and water lettuce provide oxygen to the water and help keep it clean. Marginal plants such as cattails and iris can add height and structure to your pond's edges.
- Benefits of Plants Plants are not just decorative; they play a vital role in the pond's health. They absorb excess nutrients, reducing algae growth, and provide hiding spots for your turtles. Plants also attract beneficial insects and build a more natural-looking habitat.
- Designing Your Pond's Landscape When arranging plants, consider both aesthetics and function. Make a balanced look by placing taller plants at the back and shorter ones in front. Allow space for your turtles to swim and bask without obstruction. Use a variety of textures and colors to build visual interest.
- Planting Tips
- Submerge aquatic plants in pots to control growth and make maintenance easier.
- Anchor floating plants with weights or ties to prevent them from covering the entire surface.
- Use rocks and logs to build natural barriers and planting beds.
- Maintenance Regular maintenance is key to keeping your pond looking its best. Trim back overgrown plants, remove dead foliage, and divide plants that become too large. This will keep your pond tidy and prevent any one plant from dominating the space.
Make a beautiful, thriving turtle pond by choosing safe plants for your climate. Enjoy watching your pond come alive.
Troubleshooting Common Issues
When you're caring for a turtle pond, you might encounter a few hiccups along the way. It's perfectly normal, and most issues have simple solutions. Here's a guide to troubleshooting some common problems you may face with your turtle pond.
Murky Water
If your pond water is looking a bit cloudy, it could be due to overfeeding, a lack of filtration, or decaying plants. To clear it up:
- Check your filter to make sure it's working properly and clean it if necessary.
- Reduce feeding to prevent excess food from decaying in the water.
- Remove dead plants and debris regularly.
Algae Overgrowth
Algae can quickly take over a pond, especially in warm, sunny weather. To combat algae:
- Add more plants to outcompete the algae for nutrients.
- Use a UV clarifier to kill floating algae spores.
- Regularly clean the sides of the pond and any decorative elements.
Turtle Health Concerns
If your turtles are acting lethargic or not eating well, they may be sick. To help them:
- Check the water temperature and make sure it's within a safe range for your turtle species.
- Inspect your turtles for any visible signs of illness and consult a vet if necessary.
- Ensure a balanced diet with the right amount of vitamins and minerals.
Predators
Predators like raccoons, birds, or cats can pose a threat to your turtles. To protect them:
- Install a pond net to keep predators out.
- Make hiding spots in the water where turtles can escape.
- Use motion-activated sprinklers to deter animals from approaching the pond.
Leaking Pond
A leaking pond can be a serious issue. To fix it:
- Check for cracks in the pond liner or concrete.
- Look for wet spots around the pond's perimeter to locate the leak.
- Patch up any holes with a pond liner repair kit or concrete sealant.
Basking Area Issues
Turtles need a dry place to bask. If they're not using the basking area:
- Adjust the temperature of the basking spot to make it more appealing.
- Make sure it's easily accessible with a gentle slope or steps.
- Provide a secure platform that doesn't wobble or sink.
Monitor for issues and know how to fix them to keep your turtle pond healthy. Regular checks and maintenance are crucial for prevention.
FAQs About Homemade DIY Turtle Pond
Discover everything you need to know about homemade DIY turtle ponds with our comprehensive FAQs. Enhance your pond-building skills today!
Safety is crucial for your turtle’s home. Make sure the pond sides are high enough to prevent escapes and consider a fence or netting to protect from predators. The water should be deep enough for swimming but have shallow areas for resting. Always include a basking area with easy access in and out of the water. Check that all plants and decorations are non-toxic and safe for turtles.
Yes, you can! There are many designs suitable for small spaces. A mini backyard turtle pond is a great option, which can be created using a container base and UV filter. You can use bamboo fencing for aesthetics and cable ties to secure the structure. This type of pond is perfect for smaller turtles or as a temporary habitat as they grow.
Regular maintenance is key to a healthy turtle pond. This includes cleaning the filter, changing part of the water regularly, and monitoring water quality for the right pH and temperature. Remove any debris like fallen leaves promptly. In winter, ensure the pond doesn't freeze over completely if your turtles are staying outdoors.
To give your turtle pond a natural look, use live plants both in and around the pond. Choose native species that can thrive in your climate. Natural rocks and wood can build hiding spots and add to the aesthetic. Consider adding a waterfall feature for a soothing sound and to improve water circulation. The key is to mimic a natural environment as closely as possible.
Selecting the right spot is crucial for the health of your turtles and the longevity of the pond. Look for an area that receives partial sunlight—too much sun can overheat the water, while too little can prevent basking. Ensure the location is away from trees whose roots can damage the pond liner. Also, consider proximity to an electrical source for the pump and filter, and make sure the area is easily accessible for maintenance.
Final Thoughts
I encourage you to begin this thoughtful homemade DIY turtle pond project today. By using these simple steps, you can make a fantastic space for your turtles. It's simpler than you think. Dive in and transform your backyard into a beautiful retreat.


