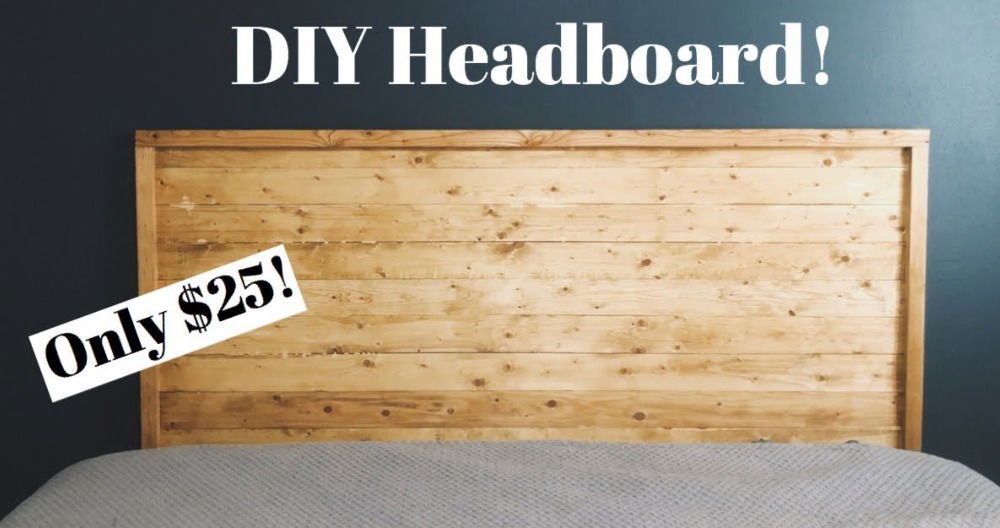
Building a DIY wood headboard was a project I'd always wanted to try. I started by gathering simple materials: wooden planks, nails, and a hammer. I cut the wood to the right size, sanded it smooth, and arranged the planks to form a beautiful pattern. It felt satisfying to see it take shape bit by bit.
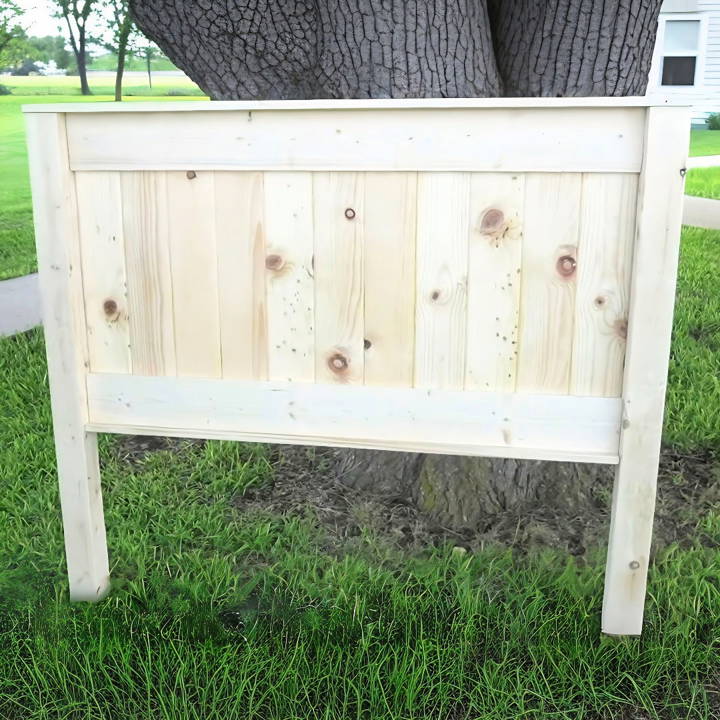
In just a weekend, my bedroom got a fresh look with the new homemade DIY wood headboard. The project was easier than I thought, and it didn't cost much. The sense of pride from making something useful with my own hands was incredible. If you also enjoy hands-on projects, this might be just the task for you.
Make this your next fun weekend project. It will add a personal touch to your space and give you a sense of accomplishment. You'll find step-by-step instructions below. Start now, and see how DIY wooden headboard can transform your room.
Materials Needed and Why
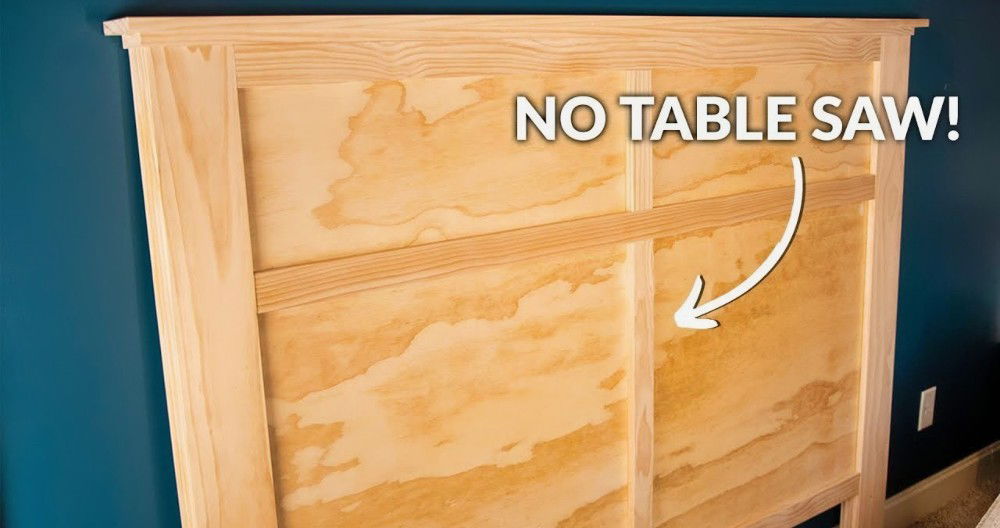
- 1x6 Tongue and Groove Boards: These build the main structure of the headboard, giving it that classic farmhouse look.
- Standard 1x6 Boards: Used for the front slats and back supports, they add stability and aesthetic appeal.
- Wood Glue & Paintbrush: Essential for bonding the boards together securely.
- Circular Saw: Needed for precisely cutting boards to size.
- Brad Nails & Nail Gun: Allows for quick and secure assembly without visible screws.
- 1x3 Board: Acts as the bottom lip of the headboard, providing support and a finishing touch.
- Countersink Bit: Ensures screws sit flush with the wood, preventing any splitting and maintaining a smooth finish.
- Sandpaper (120 grit and 240 grit): For smoothing down the wood pre- and post-assembly.
- Polyurethane: Optional for sealing and protecting the wood.
Step by Step Instructions
Build a stunning DIY wood headboard with our easy step-by-step instructions. Upgrade your bedroom decor with this fun and rewarding project!
Step 1: Cutting Your Boards
Following the measurements based on a full-size bed frame cut the tongue and groove and standard 1x6 boards to size. Make sure to adjust your measurements if you're working with a different bed frame size.
Step 2: Gluing the Tongue and Groove
Lay out your tongue and groove boards on a long table. Apply wood glue on every tongue and groove, ensuring full coverage for a strong bond. This builds the solid main panel of your headboard.
Step 3: Trimming and Attaching Front Slats
After the glue has dried, use your circular saw to cut off the end tongue of the last board, allowing it to sit flush against the rest. Attach your standard 1x6 boards to the front with wood glue and brad nails for a seamless look.
Step 4: Adding the Bottom Lip
Attach the 1x3 board at the bottom of your headboard. This step might require screws for additional strength, especially since this part won't be visible. Remember to use a countersink bit to avoid splitting the wood.
Step 5: Attaching the Back Supports
Place the standard 1x6 boards at the back, leaving space on each side for the headboard legs. These supports are crucial for overall structure and should be securely screwed into place, using a countersink bit for a smooth finish.
Step 6: Constructing the Legs
For the legs, glue and screw four 2x4 boards for each leg. Sanding these beforehand makes the process much smoother. Sandwiching 2x4 boards instead of using a thick post offers a balanced look and solid support.
Step 7: Final Assembly
With the headboard upright, attach the legs, ensuring they are flush with the top. Cap the top with a 1x4 board, extending slightly on each side for a refined appearance.
Sanding and Finishing
Start with 120 grit sandpaper and finish with 240 grit to achieve a smooth surface. Though optional, applying a coat of polyurethane can protect and seal the wood, making your DIY farmhouse headboard durable and long-lasting.
Customization Ideas for Your DIY Wood Headboard
Building a DIY wood headboard gives you the freedom to tailor it to your personal style and bedroom decor. Here are some customization ideas that can help you make a headboard that's uniquely yours:
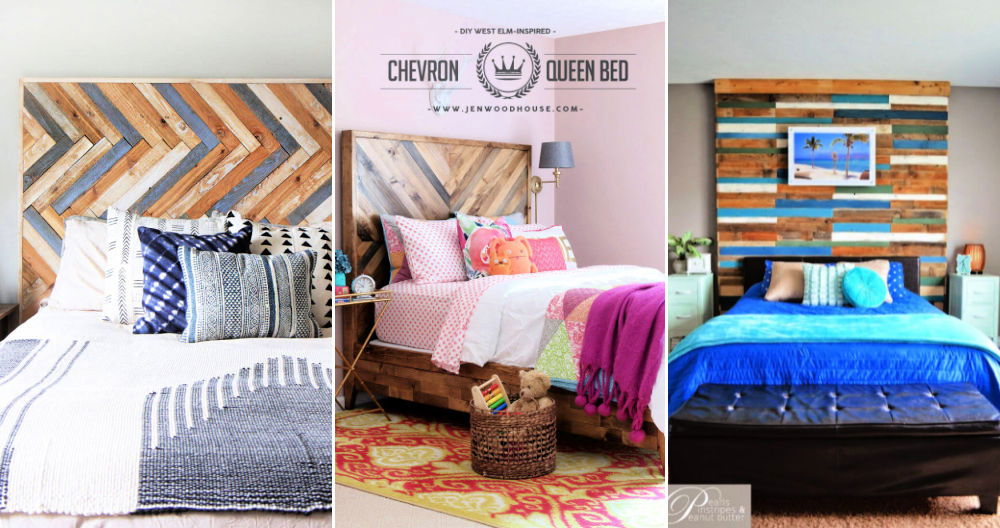
- Choose Your Wood Wisely Different types of wood can dramatically change the look and feel of your headboard. For a warm, rustic charm, consider using reclaimed barn wood or pine. If you prefer a sleek, modern aesthetic, opt for woods like maple or walnut. Remember, the type of wood will also affect the weight and durability of your headboard.
- Stain or Paint? Staining your wood can enhance its natural beauty, bringing out the unique grain patterns. There's a wide range of stain colors available, from light oak to dark mahogany. Alternatively, painting your headboard can add a pop of color or a clean, crisp finish. You can even get creative with patterns or designs.
- Add Texture Consider adding texture to your headboard for a tactile and visual effect. This can be achieved by using techniques like wood burning, carving, or even attaching fabric or leather panels. Textured headboards can add depth and interest to your bedroom.
- Incorporate Art Personalize your headboard by incorporating elements of art. This could be anything from stenciled quotes to hand-painted scenes. If you're not confident in your artistic skills, you can use decals or wallpaper to build a statement piece.
- Functional Customizations Your headboard can be more than just decorative. Think about adding shelves for books, built-in lights for reading, or even hidden compartments for extra storage. These functional customizations can make your headboard a multipurpose addition to your bedroom.
- Finishing Touches The final touches can make a big difference. Consider adding molding or trim to frame your headboard, or use upholstery tacks for a sophisticated edge. Even something as simple as changing the hardware to attach the headboard to your bed can add a custom flair.
Make your DIY project unique. Embrace creativity and experimentation. Your headboard expresses your style. Enjoy the process and love the result.
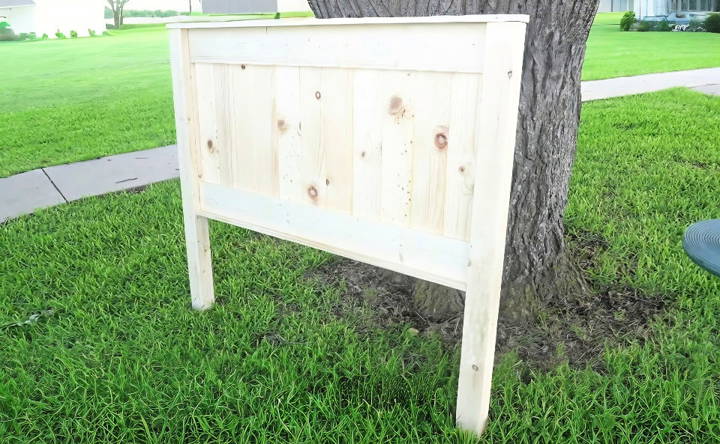
Advanced Projects for Your DIY Wood Headboard
Taking on advanced projects for your DIY wood headboard can transform a simple piece of furniture into a functional work of art. Here are some ideas to elevate your headboard:
- Integrated Lighting Adding built-in lighting can build ambiance and add functionality to your headboard. Consider installing LED strip lights along the edges or incorporating reading lamps that can be adjusted. Ensure you follow electrical safety guidelines and, if necessary, consult with a professional.
- Hidden Storage: Maximize the utility of your headboard by making hidden storage compartments. This could be a slide-out panel or a secret latch that opens to reveal space for books, electronics, or personal items. It's a great way to keep your bedroom clutter-free.
- Tech-Friendly Features In our digital age, having charging ports and speakers built into your headboard can be incredibly convenient. Plan for USB or power outlets within reach, and if you're tech-savvy, you could even integrate Bluetooth speakers for a surround sound experience.
- Adjustable Design: For those who love to update their space regularly, an adjustable headboard is perfect. Design panels that can be rearranged or a headboard that can be expanded or reduced in size. This allows you to change the look and feel of your bedroom without starting from scratch.
- Upholstery and Fabric If you're skilled with a sewing machine, consider adding fabric elements to your wood headboard. Upholstered panels can add comfort and a touch of luxury. Choose durable fabrics that complement your bedroom's color scheme.
- Eco-Friendly Materials For the environmentally conscious, explore using sustainable materials. Bamboo, cork, or responsibly sourced wood are excellent choices. You can also use non-toxic adhesives and finishes to minimize environmental impact.
- Artistic Carvings: If you have the tools and skills, intricate carvings can make your headboard stand out. From geometric patterns to nature-inspired motifs, the possibilities are endless. Carving requires patience and precision, but the result can be a stunning centerpiece for your room.
- Multi-Purpose Use: Think beyond the bedroom. Design a headboard that doubles as a room divider or a bookshelf. This kind of versatility is especially useful in small spaces or studio apartments.
For advanced DIY projects, prioritize safety and ensure you have the right tools and skills. These can be challenging but rewarding. Enjoy and take pride in your craftsmanship.
Troubleshooting Common Issues
When crafting a DIY wood headboard, you might encounter a few hiccups along the way. Here's a straightforward guide to solving some common problems:
- Uneven Cuts: If your wood pieces aren't cut evenly, it can throw off your entire project. To avoid this, always measure twice before cutting. Use a square to ensure the angles are correct. If you've already made a cut and it's not even, sanding down the edges can help. For future cuts, consider using a guided saw or having your wood cut at a hardware store.
- Wood Splitting Wood splitting can occur if you're not careful, especially near the ends of your boards. To prevent this, pre-drill holes before inserting any screws. Choose the correct size drill bit for your screws, and be gentle when drilling.
- Attaching to the Bed Frame Securing the headboard to the bed frame can be tricky. If you're having trouble, check that you're using the right brackets and hardware. Make sure the holes are aligned properly. If they're not, you may need to drill new holes or adjust the position of your headboard.
- Stain or Paint Not Adhering If your stain or paint isn't sticking, it could be due to a lack of surface preparation. Ensure the wood is clean and sanded before applying any finish. Use a primer for paint, and for stain, apply a pre-stain conditioner to help the wood absorb the stain evenly.
- Finish Looks Uneven An uneven finish can often be fixed with additional coats. Apply thin, even layers and sand lightly between coats for paint. For stain, wipe off excess stain with a cloth and apply more coats until you reach the desired color.
- Headboard Feels Unstable An unstable headboard can usually be reinforced. Check all connections and tighten any loose screws. You may also need to add additional support brackets or a leg in the center for extra stability.
Patience is crucial for DIY projects. Take your time and ask for help at hardware stores. These tips will help you build a beautiful, sturdy headboard.
FAQs About DIY Wood Headboard
Discover answers to faqs about DIY wood headboard projects, including tips, materials, and step-by-step guidance for a stunning bedroom upgrade.
The best type of wood for a DIY headboard is pine or another softwood. This is because it’s easier to cut, making it suitable for all DIYers, even if you’re using a manual saw.
Yes, this freestanding DIY project is designed to attach to a standard metal bed frame for support. Metal bed frames have stanchions with holes for attaching headboards. Alternatively, you can mount it directly to the wall behind the bed for extra support.
When building your headboard, always use caution with power tools. Do not use pressure-treated lumber for indoor furniture like headboards. After cutting the wood, sand it down thoroughly to avoid splinters.
The width of the DIY wood headboard can be scaled to fit your bed size. Here are the standard widths for different bed sizes:
Twin: 38 inches
Full: 54 inches
Queen: 60 inches
King: 76 inches Measure your bed and adjust the width of your headboard accordingly.
Once you have assembled your wood headboard, finishing it properly can protect the wood and enhance its appearance. Here are the steps to finish your headboard:
Sand the wood thoroughly, starting with a coarse grit and moving to a finer grit for a smooth finish.
Clean the wood with a tack cloth to remove all dust.
Apply a wood conditioner if you're using a softwood like pine to ensure an even stain application.
Choose a stain or paint that complements your bedroom decor and apply it according to the product's instructions.
After the stain or paint has dried, apply a clear polyurethane coating to protect the wood from scratches and moisture. Use a brush to apply a thin, even coat and allow it to dry completely.
If desired, lightly sand between coats of polyurethane with a fine-grit sandpaper for an ultra-smooth finish.
Apply additional coats of polyurethane, allowing each coat to dry thoroughly before applying the next.
Final Thoughts
In conclusion, building a DIY wood headboard is a rewarding and enjoyable project. It adds a personal touch to your bedroom while showcasing your craftsmanship.


