When I first decided to build a cabinet, I didn't have much experience with woodworking. I knew it would be a challenge, but I was eager to learn and improve my skills. I started by researching different methods and materials, which helped me understand the basics of cabinet construction. This initial step was crucial for setting a solid foundation for my project.
In the process, I made several mistakes but also learned a lot. Choosing the right wood, measuring accurately, and being patient were key lessons. As I progressed, I felt more confident with each piece I put together. Completing the cabinet gave me a great sense of achievement and motivated me to tackle more woodworking projects.
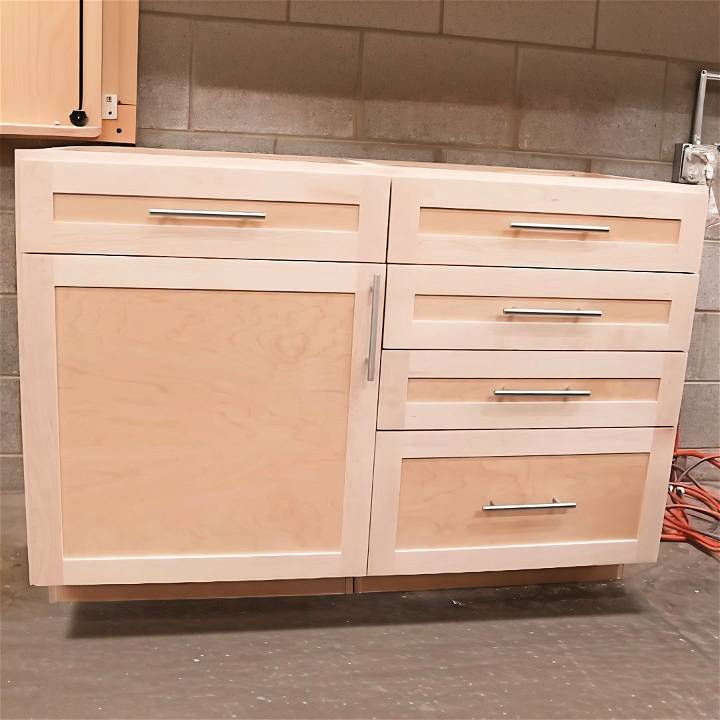
I'm sharing this because I believe anyone can learn how to build a cabinet. This experience taught me the importance of patience, research, and practice. If I can do it, so can you. Start your own project today, and you'll see just how rewarding building something by hand can be.
Materials Needed and Their Purpose
- 3/4 inch Plywood: For the main structure of the carcasses.
- 1/4 inch Plywood: For the cabinet backs and drawer bottoms.
- Hard Maple/Polar (optional): Depending on your finish—paint or natural—for face frames and drawer fronts.
- Pocket Screws: For securing the structure without the need for extensive woodworking experience or clamps.
- Glue: A crucial component for ensuring parts are permanently bonded together.
- Tools: Various saws (track saw or circular saw, band saw or jigsaw, table saw), drill, router (optional), pocket hole jig, sandpaper.
Each material and tool plays a crucial role in ensuring the final product is both aesthetically pleasing and structurally sound. I highly recommend gathering all materials before beginning to streamline the process.
Step-by-Step Process
Learn the step-by-step process for building a cabinet with this comprehensive guide. Perfect for DIY enthusiasts looking to tackle a new project.
Building the Carcass
- Cutting Plywood: First, break down the plywood into manageable sizes using a track saw (or circular saw). Safety and precision are paramount during this step.
- Building the Toekicks: Toekicks were made by notching out the bottom corners of the side pieces, a technique achievable with a jigsaw or bandsaw.
- Cutting Grooves for Bottom and Back Panels: Utilizing a router or table saw, I buildd grooves on the carcass sides to fit the bottom and back panels snugly.
- Adding Shelf Pin Holes: This is optional but recommended if you desire adjustable shelves.
- Assembly with Pocket Screws: Employing a pocket hole jig made this process straightforward and quick.
Making the Face Frame
- Preparing the Material: Cutting hard maple or poplar to size and then refining the edges on a table saw ensures a perfect fit.
- Assembly: The face frame assembly involves meticulous cutting and joining, with pocket screws once again making this a manageable task.
Drawer and Door Construction
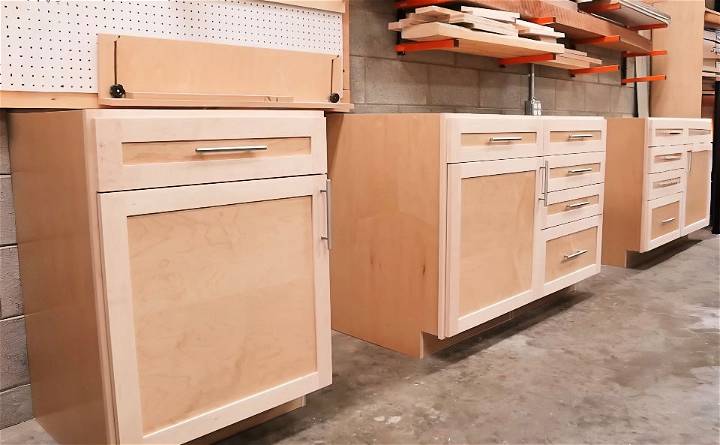
- Building Drawers: Using 5/8 inch Baltic birch plywood, I constructed the drawer boxes before introducing a simple yet effective method to incorporate drawer bottoms seamlessly.
- Installing Drawer Slides: Precision is key to ensuring smooth operation. Spacer and reference blocks aided in consistent placement.
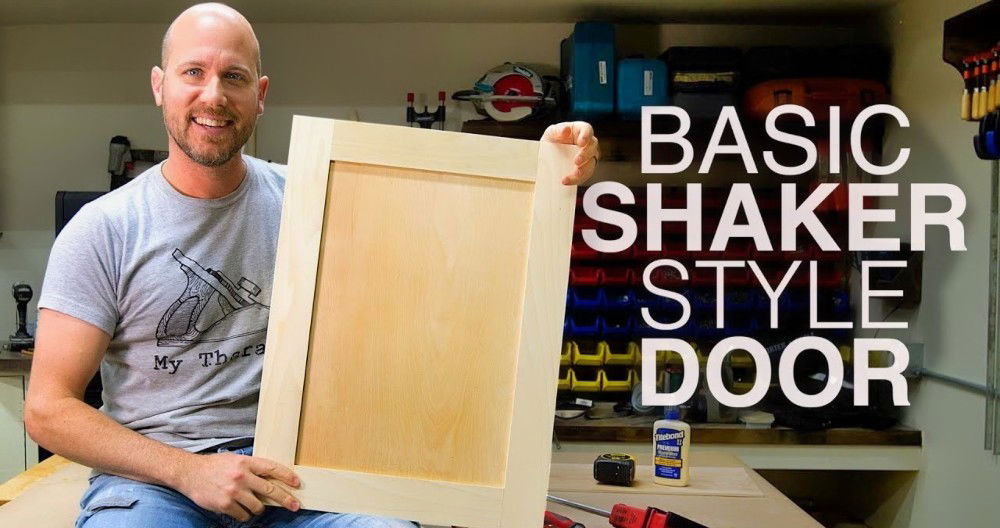
- Door Frames: Similar to drawers, constructing doors involved making frame parts and using hard maple or a material of choice for a custom look.
- Finishing Touches: Sanding, applying stain or paint, and installing hardware were the final steps in this comprehensive process.
Useful Tips
- Measuring Twice, Cutting Once: This age-old adage holds especially true in cabinet making. Ensuring accuracy in your measurements can prevent material waste and frustration.
- Clamping: When gluing parts, clamps are invaluable to hold pieces together securely while the glue dries.
- Adjustment and Tweaks: Post-assembly, doors and drawers may need minor adjustments for perfect alignment and smooth operation.
Customization Options for Your Cabinet
When building a cabinet, customization is key to ensuring that the final product fits your personal style and functional needs. Here are some ways you can tailor your cabinet to your preferences:
Choose Your Style
Decide on the cabinet's design before you start. Do you prefer a modern look or a classic feel? Would you like open shelving, glass doors, or solid doors? Think about the room where the cabinet will be placed and make sure the style complements the space.
Select the Wood
Different types of wood have unique characteristics. Pine is affordable and has a rustic appearance, while oak is durable and has a prominent grain pattern. For a darker finish, consider walnut or mahogany. Choose the wood that best matches your aesthetic and budget.
Hardware Choices
The hardware on your cabinet – handles, knobs, and hinges – can significantly affect its look. Brushed nickel gives a contemporary feel, brass can add warmth, and black matte handles build a modern edge. Pick hardware that you find appealing and that enhances the cabinet's design.
Functional Additions
Think about what you'll store in the cabinet. If you need to organize smaller items, consider adding drawers or dividers. For electronics, you might want to include cable management systems or ventilation to prevent overheating.
Finishing Touches
The finish on your cabinet not only protects the wood but also contributes to the overall look. A clear varnish will showcase the natural beauty of the wood, while paint can be used for a pop of color or to blend with the room's decor. Stains can enhance the wood's grain and give it a richer tone.
By customizing your cabinet, you can make it functional and reflect your style, aiming for something you'll enjoy and be proud of with quality.
Troubleshooting Common Issues
When building a cabinet, you might encounter a few common issues that can be frustrating. Here's a helpful guide to troubleshoot and resolve these problems:
Problem: Wood Splitting
- Cause: Often occurs when screws are too large or the wood is not pre-drilled.
- Solution: Use finer screws and always pre-drill holes, especially near the ends of the boards.
Problem: Doors Not Aligning
- Cause: Hinges may not be installed evenly.
- Solution: Measure and mark hinge placements carefully. If the doors are already hung, adjust the hinges accordingly.
Problem: Uneven Shelves
- Cause: Shelves may not be level due to uneven placement or the cabinet not being square.
- Solution: Use a level to ensure shelves are horizontal before securing them. Check the cabinet's squareness with a carpenter's square and adjust if necessary.
Problem: Sticky Drawers
- Cause: Drawers can stick due to high humidity or tight fits.
- Solution: Ensure there's enough space for the drawer to slide smoothly. Sand down the edges if they're too tight. For humidity, use a dehumidifier in the room.
Problem: Weak Joints
- Cause: Insufficient glue, incorrect joint types, or not enough clamping pressure during assembly.
- Solution: Use the right amount of wood glue, select appropriate joint techniques for the project, and clamp joints securely while the glue dries.
Problem: Finish Flaws
- Cause: Dust or debris in the finish, or application issues.
- Solution: Apply finish in a clean, dust-free environment. Sand between coats if necessary, and follow the product instructions for the best results.
Remember, attention and patience prevent many issues. If problems arise, step back, find the cause, and apply a calm solution. Your cabinet-building will benefit.
FAQs About How to Build a Cabinet
Learn everything about building a cabinet with these FAQs: tools needed, materials, steps, and more. Your ultimate guide to cabinet-making!
How do I ensure my cabinet is sturdy?
A sturdy cabinet relies on proper assembly and the right materials. Use strong, durable wood and ensure all joints are securely glued and screwed together. Additionally, back braces can add stability to the structure.
Can I customize my cabinet design?
Absolutely! You can customize your cabinet by altering dimensions to fit your space, choosing different wood types for aesthetic preferences, and adding unique hardware or finishes to match your personal style.
How do I install cabinet doors evenly?
To install cabinet doors evenly, measure and mark where the hinges will go on both the door and the cabinet frame. Use a level to ensure they're straight. After attaching the hinges, make any necessary adjustments to align the doors properly.
What's the best way to finish my cabinet?
The best way to finish your cabinet is to start with a thorough sanding to smooth out the surface. Then, apply your chosen finish, whether it's paint, stain, or sealant, in even coats. Allow adequate drying time between coats for a professional-looking finish.
Conclusion
Wrapping up this guide to building a cabinet, you now have the knowledge and tools to tackle this DIY project confidently. Remember to follow the steps carefully, use the right materials, and take your time to build a sturdy cabinet. Happy building!


