Starting my DIY container home project felt exciting from the start. I had heard about using shipping containers to create unique living spaces, and I wanted to give it a try. The process was surprisingly straightforward once I had the right plan in place. I enjoyed learning how to convert something as simple as a container into a cozy, functional home, with each step bringing me closer to my goal.
With each task, from insulating the walls to adding plumbing and electricity, I could see the transformation happening. It wasn't always easy, but I’m here to share what I learned. If you’ve been considering building your own DIY container home, this guide will help you get started. I’m helping with practical advice, tools, and tips that will make the process simpler and achievable.
Step by Step Instructions
Learn to build your own container home with our step-by-step DIY guide, covering everything from choosing the right container to budgeting effectively.
Choosing the Right Shipping Container: The Foundation of Your Tiny Home
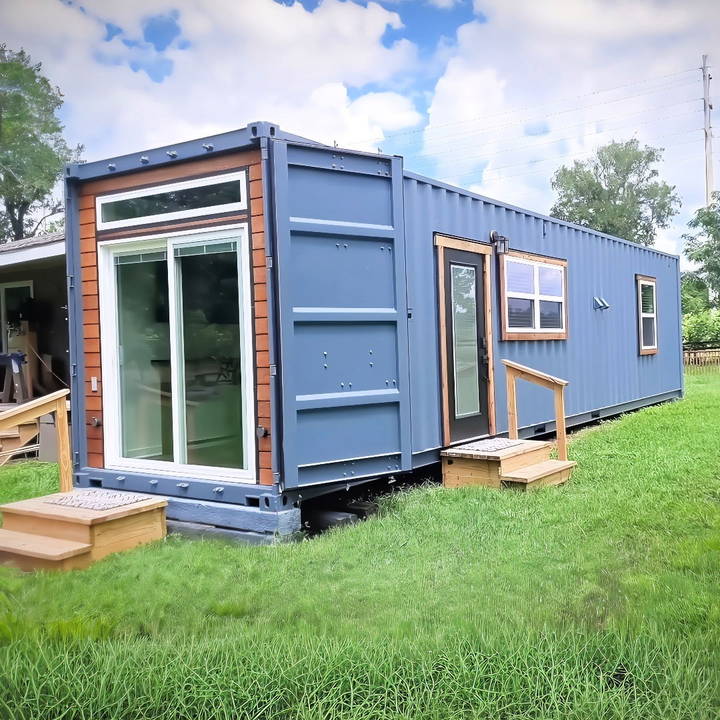
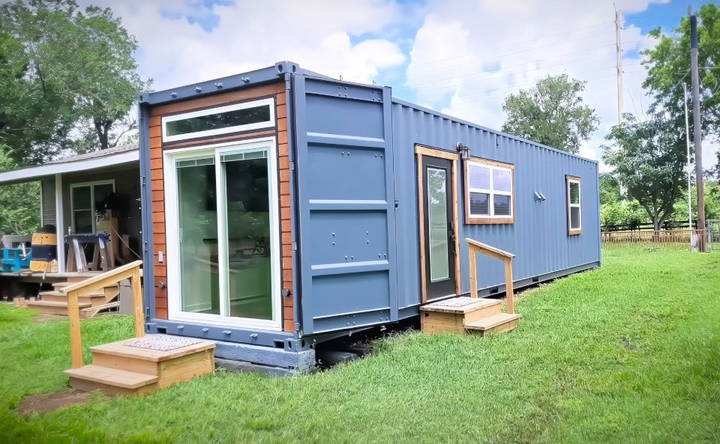
I started with a 40-foot-long, high-cube shipping container, which gives extra headroom inside—a critical feature when maximizing a smaller space. The choice of a high-cube container was intentional, as it allows for a true eight-foot ceiling height, making the interior feel more open and less claustrophobic.
In my experience, choosing the right container is the first essential step. The extra headspace provided by high-cube containers made the home more comfortable without significantly increasing the cost. For anyone considering a DIY build, I highly recommend opting for this type of container.

Exterior Design: Balancing Aesthetics and Functionality
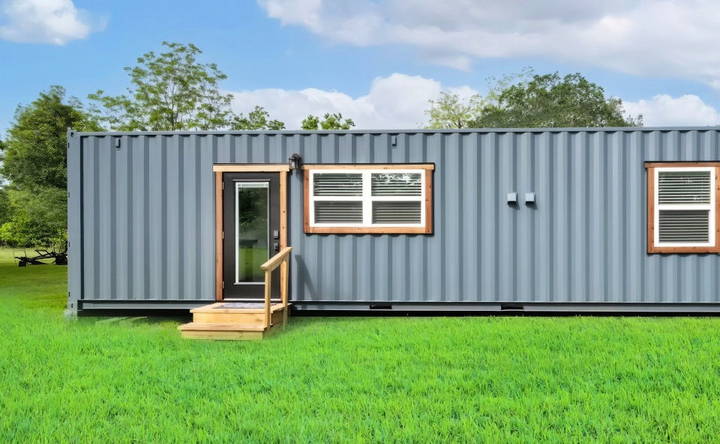
The exterior of the Rising Sun has a minimalist yet striking look. I used black fiberglass doors for their weather resistance and framed them with cedar trim, which brings warmth and a natural aesthetic to the design. One of the most satisfying design features was mimicking the traditional Japanese “Shou Sugi Ban” technique. The black accents give the container an elegant, timeless feel while also serving practical purposes, such as protecting the wood from the elements.
If you're designing your own shipping container home, it's crucial to think not only about appearance but also how your choices will hold up over time. Weather-resistant materials and sustainable design choices can make all the difference in a home that stands the test of time.
Smart Windows and Ventilation: The Key to Comfort
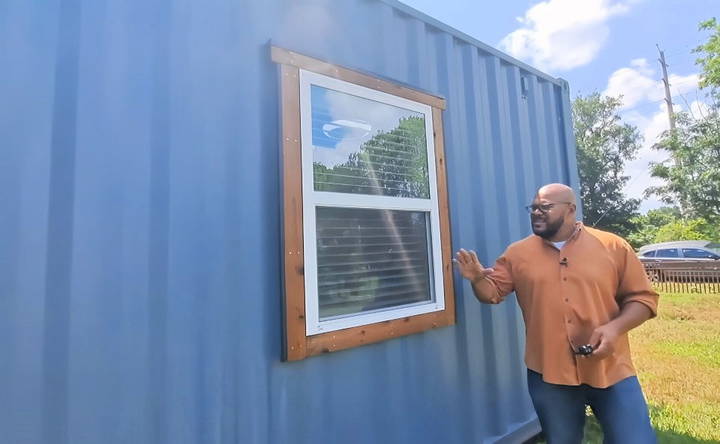
Light is a huge deal when dealing with such a compact space. One of my top priorities was to maximize natural light to create a more open and airy feeling inside. Large picture windows strategically placed throughout the home, especially in the kitchen and bedroom, do wonders for making the space feel bigger.
Ventilation was another critical consideration. Since a shipping container can be nearly airtight, I installed vents for the bathroom and kitchen, along with a powerful 9000 BTU mini-split air conditioning unit to handle both cooling and heating. This way, I made sure the home stays comfortable, no matter the season.
Interior Layout: Making Every Inch Count
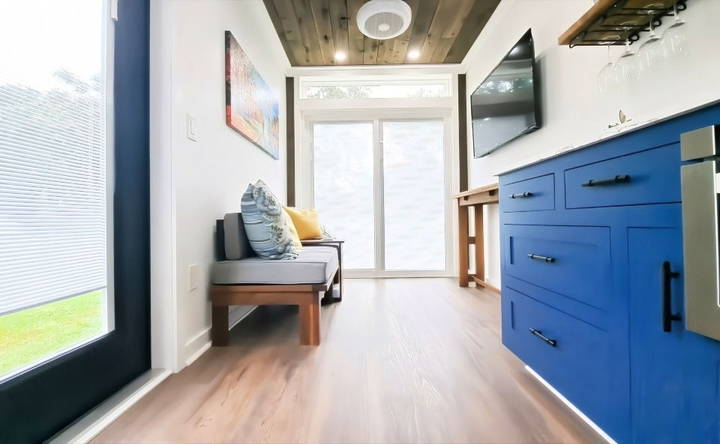
When designing a tiny home, the goal is to make each element serve multiple functions. I approached the layout with a strong emphasis on flexibility and comfort. Starting in the living area, the windows flood the room with light, while the centerpiece, a custom-built walnut futon, doubles as both a sofa and bed. The walnut table also has dual purposes—it extends from a small side table to a full dining table capable of seating three to four people.
I learned that adaptability is key in tiny living. Furniture needs to be multipurpose to maximize space. For example, the futon and table are custom-made to fit perfectly within the space without overwhelming the room. Customizing furniture to fit your exact needs is a game changer when living in small quarters.
The Kitchen: A Full-Size Experience in a Tiny Space
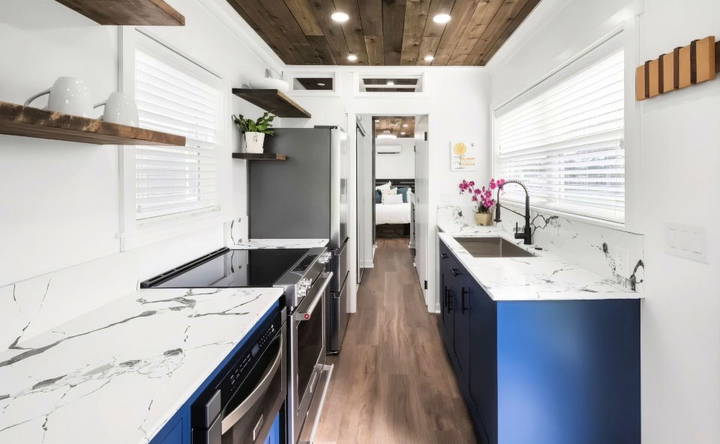
One of my favorite parts of this home is the kitchen. I didn’t want to sacrifice functionality just because of the limited space. So, I installed a full-size stove, refrigerator, and a deep stainless steel sink. I also opted for inset, custom-made blue cabinets, which added a pop of color and kept the space clean and clutter-free.
Clutter is your enemy in tiny living, so I was meticulous in keeping countertops clear. One clever solution I used was a drawer-style microwave, which saves counter space and adds to the overall sleek look of the kitchen. The quartz countertops provide a beautiful contrast to the blue cabinets and also serve a practical purpose by being easy to clean.
If you love cooking, don't feel you have to compromise on having a proper kitchen just because you're working with a small space. A well-thought-out design can provide everything you need.
Storage: Hidden Gems of the Home
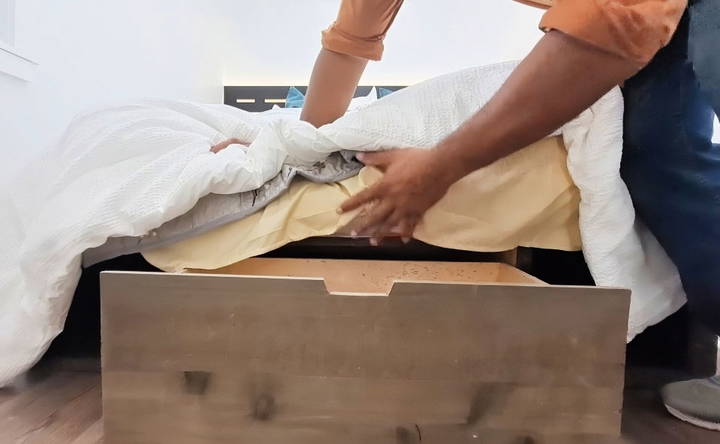
Storage can be a major challenge in a small home, but with a little creativity, I managed to fit in more than enough space. The bed in the bedroom has a "ninja-like" hidden storage system, with compartments and drawers underneath that provide 40 cubic feet of extra storage.
In the kitchen, I designed custom pantry cabinets to store everything from canned goods to dry foods, keeping the kitchen clutter-free. Even the coffee table in the living room serves as a storage solution, holding remotes, electronics, and even my favorite snack—popcorn!
Maximizing storage is essential in any tiny home. Think creatively about how to use every nook and cranny, whether it’s under furniture or behind walls. Every space can serve a purpose, and the more storage you can integrate seamlessly, the more livable your space becomes.
The Bathroom: Combining Style and Function
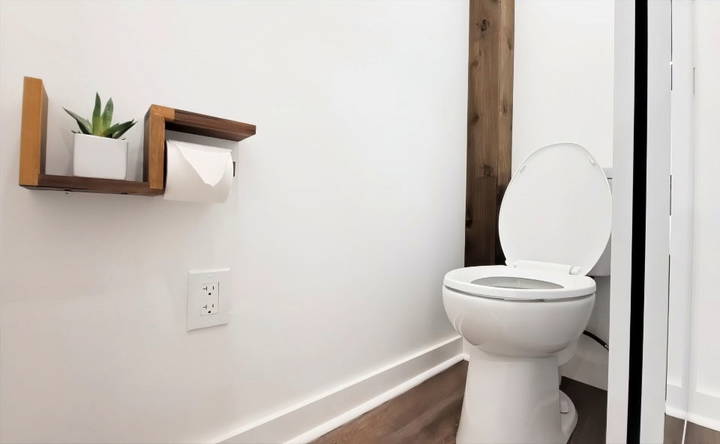
The bathroom in this shipping container home is not just functional; it's stylish, too. I installed a continuous hot water heater to ensure endless hot showers, and the shower itself features a rain shower head and glass sliding doors. The bathroom vanity also has extra storage drawers, which double as a dresser.
The floating vanity and floor-to-ceiling mirrors help make the space feel bigger and more luxurious. It’s small touches like this that can elevate a tiny home from feeling cramped to feeling cozy and sophisticated.
The Bedroom: Creating a Sanctuary
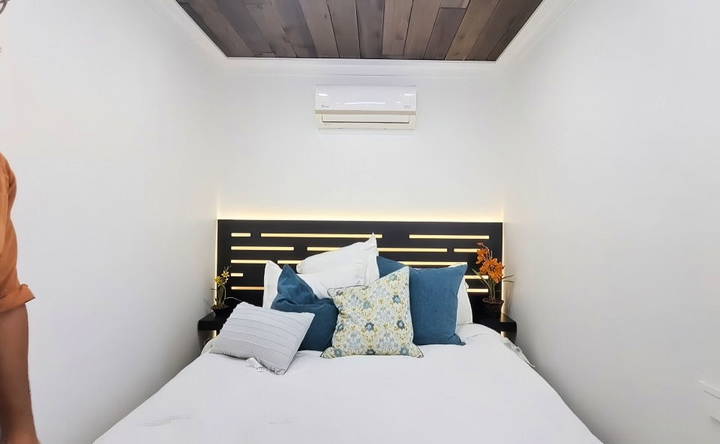
The bedroom is designed as a sanctuary. A queen-size bed with a custom-built headboard and LED backlighting creates a calming atmosphere. Despite the small space, I made sure the room feels like a true retreat by keeping it simple and functional. The bed offers even more hidden storage beneath it, perfect for extra clothes, blankets, or other belongings.
Adding personal touches like the LED lighting behind the headboard not only looks great but also creates a relaxing vibe. When designing a tiny home, it’s important to create spaces that feel restful, especially in the bedroom.
Cost Breakdown: Building on a Budget
Now, let's talk numbers. The total cost of the Rising Sun project was a little over $60,000, which includes everything—the architectural plans, structural engineering, materials, appliances, and furniture. I made mistakes along the way that added to the cost, like having to redo certain parts to meet code, but each of those challenges taught me valuable lessons for future builds.
If you're considering a similar project, be prepared for unexpected costs. DIY builds, while budget-friendly, often come with trial and error, especially when experimenting with new techniques. But the payoff is a custom, one-of-a-kind home that reflects your style and needs.
Common Challenges and How to Overcome Them
Building a container home can be an exciting project, but it comes with its own set of challenges. Here are some common issues you might face and practical solutions to help you overcome them.
1. Insulation
- Challenge: Container homes can get very hot in the summer and very cold in the winter due to the metal structure.
- Solution: Use high-quality insulation materials like spray foam, rigid foam, or fiberglass. Insulate both the interior and exterior walls to maintain a comfortable temperature year-round. Adding a vapor barrier can also help prevent moisture buildup.
2. Ventilation
- Challenge: Proper ventilation is crucial to avoid condensation and ensure good air quality.
- Solution: Install windows and vents strategically to promote airflow. Consider using mechanical ventilation systems like exhaust fans or heat recovery ventilators (HRVs) to keep the air fresh and reduce humidity.
3. Structural Modifications
- Challenge: Cutting and welding the container can weaken its structural integrity.
- Solution: Consult with a structural engineer before making any modifications. Reinforce cut-out sections with steel beams or frames to maintain the container’s strength. Always follow safety guidelines when making structural changes.
4. Rust and Corrosion
- Challenge: Metal containers are prone to rust, especially in humid or coastal areas.
- Solution: Treat the container with rust-resistant paint or coatings. Regularly inspect and maintain the exterior to catch and address any signs of rust early. Using weatherproofing materials can also help protect against corrosion.
5. Permits and Zoning
- Challenge: Navigating local building codes and obtaining the necessary permits can be complicated.
- Solution: Research local regulations thoroughly before starting your project. Contact your local building authority to understand the requirements and ensure compliance. Hiring a professional who is familiar with local codes can also simplify the process.
6. Plumbing and Electrical Systems
- Challenge: Installing plumbing and electrical systems in a container home can be tricky due to the limited space.
- Solution: Plan the layout carefully to optimize space for these systems. Use compact and efficient fixtures and appliances. Hiring experienced professionals for installation can ensure everything is up to code and functions properly.
7. Interior Space Optimization
- Challenge: Maximizing the limited interior space can be challenging.
- Solution: Use multi-functional furniture and built-in storage solutions to make the most of the available space. Consider open floor plans and minimalistic designs to create a sense of openness. Mirrors and light colors can also make small spaces feel larger.
Practical solutions and expert advice can help you navigate challenges to make your container home project successful and enjoyable.
Maintenance and Upkeep Tips
Maintaining a container home is essential to ensure its longevity and comfort. Here are some practical tips to help you keep your container home in top shape.
1. Regular Inspections
Perform regular inspections of your container home. Check for any signs of wear and tear, rust, or structural issues. Early detection can prevent minor problems from becoming major repairs.
2. Rust Prevention
Metal containers are prone to rust, especially in humid environments. Apply a rust-resistant paint or coating to the exterior. Inspect the container regularly and touch up any areas where the coating has worn off.
3. Seal Gaps and Cracks
Inspect and seal any gaps or cracks in the container. This helps to prevent drafts, moisture, and pests from entering your home. Use high-quality sealants that are suitable for metal surfaces.
4. Roof Maintenance
The roof of your container home is particularly vulnerable to weather damage. Clean the roof regularly to remove debris and check for any signs of leaks or rust. Apply a waterproof sealant to protect against water damage.
5. Ventilation and Air Quality
Ensure your container home has proper ventilation to maintain good air quality. Clean and replace air filters regularly. Consider using dehumidifiers in humid climates to prevent mold and mildew.
6. Plumbing and Electrical Systems
Regularly check your plumbing and electrical systems for any issues. Look for leaks, drips, or signs of water damage around plumbing fixtures. Ensure all electrical outlets and switches are functioning properly and have no signs of wear.
7. Foundation and Structural Integrity
Inspect the foundation and structural elements of your container home. Look for any signs of shifting, settling, or damage. Address any issues promptly to maintain the stability of your home.
8. Interior Maintenance
Keep the interior of your container home clean and well-maintained. Regularly clean floors, walls, and surfaces to prevent dirt and grime buildup. Use furniture and fixtures that are easy to clean and maintain.
9. Pest Control
Implement pest control measures to keep insects and rodents out of your container home. Seal any entry points and use pest repellents as needed. Regularly inspect for signs of pests and address any issues immediately.
10. Seasonal Maintenance
Perform seasonal maintenance tasks to prepare your container home for different weather conditions. In the winter, check insulation and heating systems. In the summer, ensure cooling systems are working efficiently.
Follow these tips to keep your container home safe and comfortable, avoiding expensive repairs and extending its lifespan.
FAQs About DIY Container Homes
Discover answers to common questions about DIY container homes, including costs, building tips, and design ideas, in our comprehensive FAQ guide.
A DIY container home is a house built using shipping containers. These containers are repurposed to create living spaces. They are popular for their affordability, durability, and eco-friendliness. You can customize them to fit your needs and style.
Container homes have several benefits:
Cost-effective: They are cheaper than traditional homes.
Quick construction: They can be built in a few months.
Durable: Made from strong steel, they withstand harsh weather.
Eco-friendly: They recycle unused shipping containers.
Modular: Easy to expand by adding more containers.
Insulating a container home is crucial for comfort and energy efficiency. Common methods include:
Spray foam insulation: Provides excellent coverage and seals gaps.
Rigid foam boards: Easy to install and effective.
Blanket insulation: Traditional fiberglass or mineral wool. Proper insulation helps maintain a comfortable temperature and reduces energy costs.
Container homes are versatile and can be built in various locations. Ideal spots include:
Rural areas: More space and fewer zoning restrictions.
Urban areas: Utilize small plots of land efficiently.
Off-grid locations: Perfect for sustainable living. Always check local zoning laws and building codes before choosing a location.
The time to build a container home depends on the complexity of the design and the level of customization. A basic container home can be completed in a few months, while more elaborate designs may take longer. Planning and preparation can significantly speed up the construction process.
Final Thoughts: The Rising Sun and Beyond
Building the Rising Sun shipping container home has been an incredibly rewarding journey. It’s a space that’s not only functional but also beautiful, modern, and designed with everyday living in mind. Whether you’re looking to downsize, live more sustainably, or simply enjoy the freedom of a tiny home, a shipping container might be just what you’re looking for.
While this was my first build, I’m already thinking about future projects and how I can continue to push the boundaries of what’s possible in tiny living.


