Building a gaming PC might seem intimidating, especially if it's your first time, but it's a rewarding process that lets you customize a machine that fits your needs. This guide will take you through each stage of building your gaming PC, from selecting the components to putting them together. By the end, you'll be ready to play your favorite games with a custom-built rig!
Why Build Your Own Gaming PC?
Before diving into the components and assembly, let's quickly discuss why building your own gaming PC is better than buying a pre-built one:
- Customization: You get to pick exactly what goes into your system, optimizing it for your specific needs.
- Cost Efficiency: Building your own PC often saves money, especially when you take advantage of discounts and bundle deals.
- Upgrade Potential: Building your own PC makes future upgrades easier, as you know the ins and outs of your system.
- Satisfaction: There's nothing like the feeling of powering up a machine that you built yourself!
Step by Step Instructions
Learn how to build a gaming pc with easy, step-by-step instructions. From picking components to the first boot, build your ultimate gaming rig today!
Step 1: Picking Your Components
Before assembling your PC, you'll need to pick the right components. Each part has a specific function and needs to be compatible with the rest of the build. Let's break down the main components you need.
CPU (Processor): The Brain of Your PC
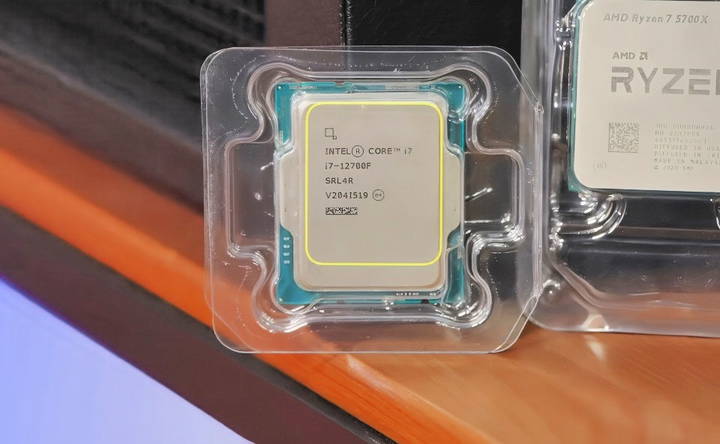
The CPU is responsible for carrying out tasks and operations. In 2024, you have two main choices: AMD Ryzen and Intel Core processors. Both brands offer excellent performance, so your choice largely depends on personal preference, budget, and specific needs.
- AMD Ryzen: Ryzen CPUs, particularly the Ryzen 7 7700X, provide strong gaming and productivity performance.
- Intel Core: Intel's 13th-gen Core processors are also highly capable and offer strong single-core performance.
When choosing your CPU, pay attention to the socket type. AMD uses AM4 or AM5 sockets, while Intel uses the LGA1700 socket. Your CPU and motherboard must be compatible with the same socket type.
Motherboard: The Backbone of Your Build
The motherboard connects all the parts of your PC together. It determines the kind of CPU, RAM, and storage your build can use. Popular options include ATX, Micro-ATX, and Mini-ITX form factors, with ATX being the most common.
Key considerations:
- Socket Compatibility: Ensure the motherboard matches your CPU socket (e.g., AM5 for AMD Ryzen 7000 or LGA1700 for Intel).
- RAM Compatibility: Choose between DDR4 or DDR5 memory, based on what the motherboard supports.
- Expansion Slots: Ensure the motherboard has enough PCIe slots for your GPU and any other expansion cards you may want to add.
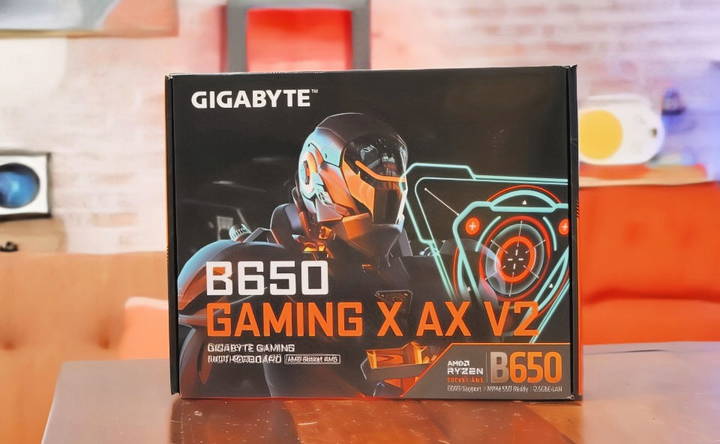
A popular option for 2024 is the Gigabyte B650 Gaming X AX V2, which is designed for AMD Ryzen processors and supports DDR5 RAM.
GPU (Graphics Card): The Heart of Gaming Performance
The graphics card is the most important component for a gaming PC. It handles all graphical processing and directly affects your gaming performance, including the resolution and frame rates you can achieve.
In 2024, the leading choices come from three brands:
- NVIDIA: Known for high-end GPUs like the RTX 4070 Super and RTX 4080, which offer excellent 4K gaming performance.
- AMD: Known for offering great value with cards like the RX 7900 XTX, excellent for high-end 1440p gaming.
- Intel: A newer player in the GPU market, with its Arc series offering strong performance for mid-tier systems.
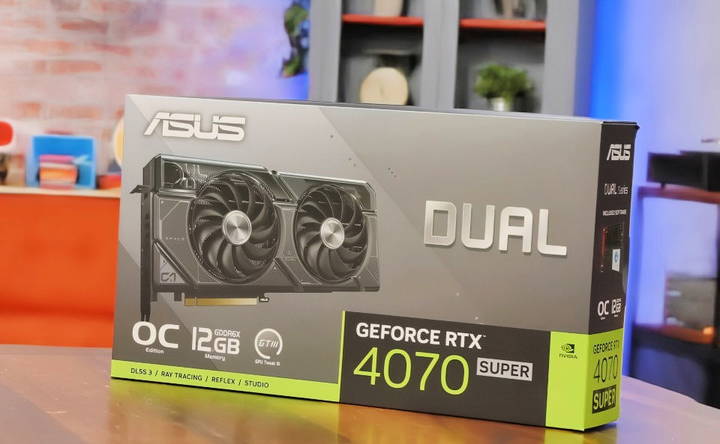
For 2024, the RTX 4070 Super is a great choice for most gamers, offering excellent performance at 1440p with 12 GB of VRAM, ensuring longevity for future games.
RAM (Memory): Multitasking Power
RAM (Random Access Memory) is essential for smooth multitasking and performance in games and applications. For 2024, DDR5 is the standard, offering faster speeds than DDR4.
- Aim for at least 16 GB of RAM for gaming, though 32 GB is recommended for those running resource-intensive tasks like streaming or video editing.
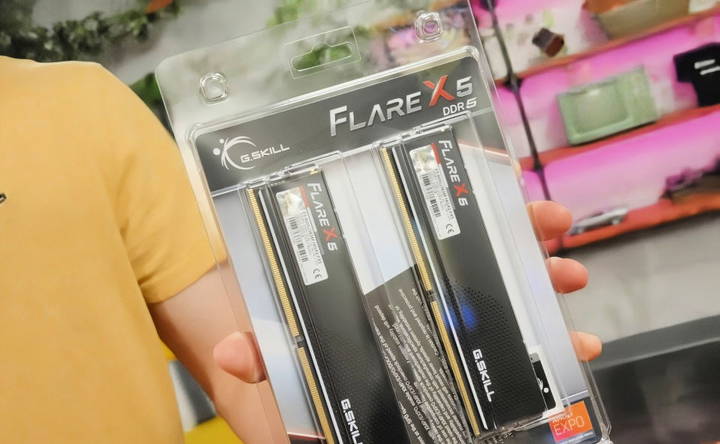
- Popular RAM kits, like the G.Skill Flare X5 DDR5 32GB, offer speeds of 6000 MT/s, ensuring fast and smooth performance.
Storage: SSD vs. HDD
There are two main types of storage: SSD (Solid-State Drive) and HDD (Hard Disk Drive). SSDs are much faster than HDDs, and the best option for gaming PCs. Your games and system files will load faster, and you'll have shorter boot times.
- NVMe SSDs are recommended for their incredible speed (up to 7,000 MB/s in read speeds). The Samsung 990 Pro is a high-end choice for fast load times and large capacity (up to 2 TB).
- HDDs are still useful for bulk storage (e.g., for media files), but shouldn't be relied on for speed-sensitive tasks like gaming. A 4TB HDD is a great secondary storage option.
Power Supply (PSU): Powering Your System
Your PSU provides power to your system. You'll need one that supplies enough power for all of your components. A PSU rated at 80 Plus Gold is recommended for efficiency.
- Calculate your system's power consumption using online PSU calculators and choose a PSU that exceeds that by 20% to 30%.
- For most builds, a 750W to 850W PSU, like the MSI MAG A850G PCIe 5, will be plenty.
PC Case: Protection and Aesthetics
Your case determines the size of your build, airflow, and Aesthetics. Choose one that fits your motherboard (ATX, Micro-ATX, or Mini-ITX) and provides enough room for your GPU and cooling system.
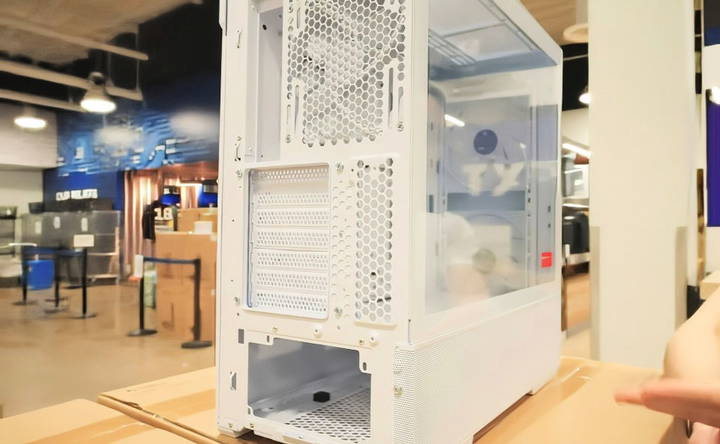
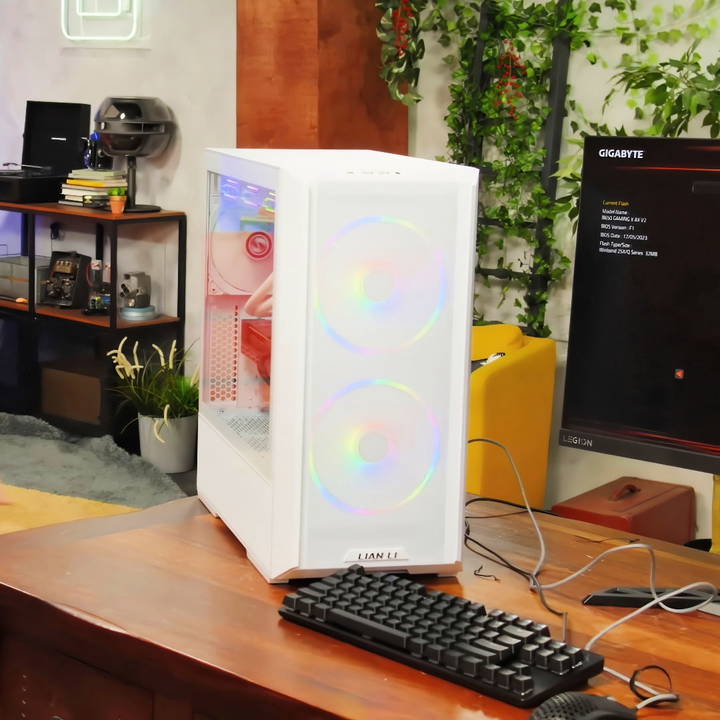
- Lian Li Lancool 216 is a popular option, with excellent airflow and RGB lighting for those who want a flashy build.
Cooling: Keeping Temperatures in Check
Keeping your PC cool is vital for performance and longevity. There are two main options: air cooling and liquid cooling.
- Air Coolers: Easy to install and effective for mid-range builds. A good example is the be quiet! Dark Rock 4.
- Liquid Coolers (AIOs): These offer better performance for high-end systems. The Lian Li Galahad II 360mm AIO is a premium choice for enthusiasts.
Operating System: Windows 11
Finally, don't forget to get a copy of Windows 11. This is the latest operating system, offering full support for the latest games and features like DirectStorage.
Step 2: Preparing for the Build
Now that you have your components, it's time to start assembling your gaming PC. Before you begin, ensure you have the following tools:
- Phillips head screwdriver: The primary tool you'll need for most of the build.
- Anti-static wristband: Optional but recommended to prevent static discharge from damaging sensitive components.
- Workspace: Clear off a table or desk where you can comfortably build your PC.
Step 3: Assembling Your Gaming PC
Learn how to assemble your gaming pc. start by preparing the case and installing the power supply (psu) for the ultimate gaming experience!
1. Prepare the Case
Start by removing the side panels of your case and laying it flat. Make sure to keep all screws and accessories in a safe place.
2. Install the Power Supply (PSU)
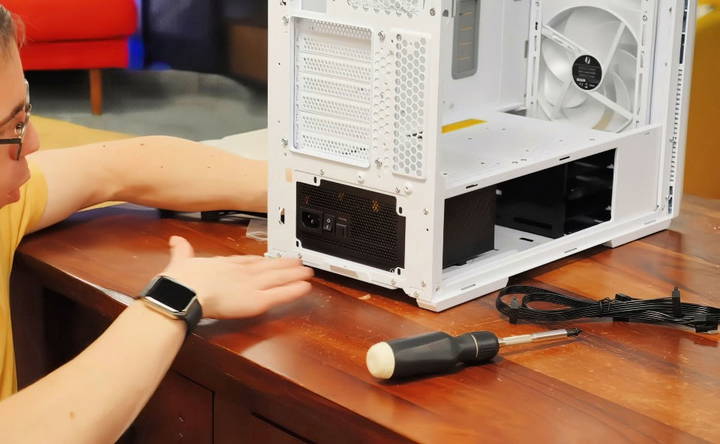
Begin by installing the PSU into the bottom compartment of the case. Most cases have a dedicated section at the bottom. Secure it with the provided screws.
- Modular PSUs come with detachable cables, which helps with cable management. Only attach the cables you need (such as the 24-pin motherboard cable, CPU power cable, and PCIe cables for the GPU).
Step 4: Installing the Motherboard, CPU, and RAM
Learn step-by-step how to install the motherboard, CPU, CPU cooler (air or audio liquid), and RAM in your pc build with this comprehensive guide.
Install the Motherboard
Your motherboard is one of the first components you should install in the case after the PSU. Follow these steps:
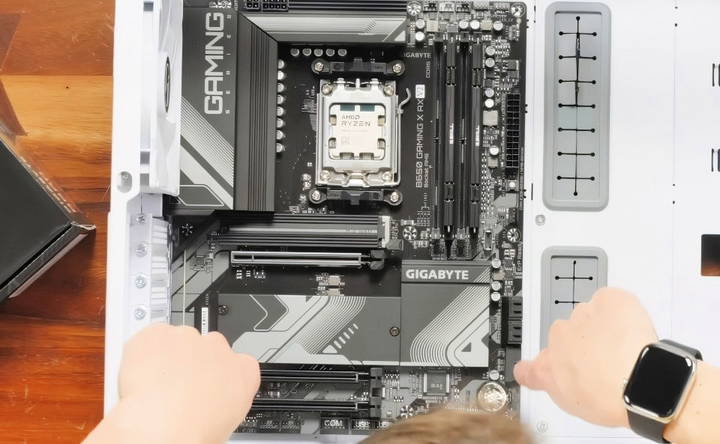
- Check Standoffs: Most cases come with pre-installed standoffs that elevate the motherboard. Ensure these are aligned with the mounting holes on your motherboard. If they are not installed, you'll need to screw them into the case manually.
- Align the Motherboard: Gently place the motherboard into the case, ensuring that it aligns with the rear I/O shield (if it's pre-installed) and the standoffs in the case.
- Screw the Motherboard in Place: Use the screws provided with your case to secure the motherboard into the standoffs. Avoid overtightening, as this could damage the board.
Install the CPU (Processor)
The CPU installation process varies slightly between AMD and Intel, but the general process is similar. Let's take a look at the steps:
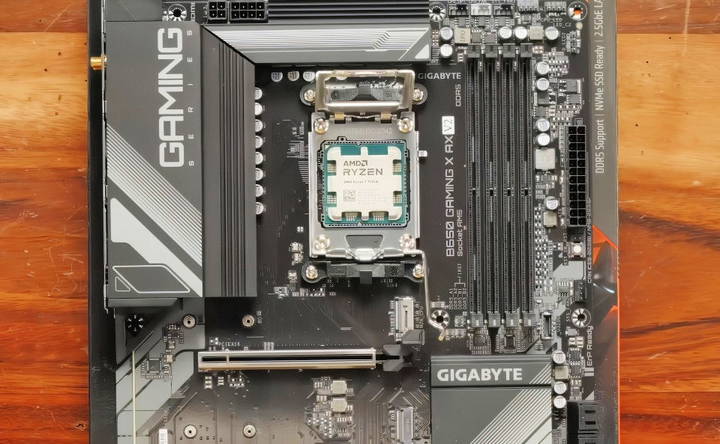
- Locate the CPU Socket: The CPU socket is located near the center of the motherboard. You'll notice a lever or retention arm.
- Open the Socket: Lift the lever to open the CPU socket. Be gentle, as this part is delicate.
- Align the CPU: The CPU has small notches or a gold triangle in one corner. Align this triangle with the corresponding marker on the socket and carefully place the CPU into the socket.
- Secure the CPU: Gently lower the socket lever, securing the CPU in place.
Install the CPU Cooler
Once your CPU is installed, you need to install the cooler to prevent overheating. There are two main types of coolers: air coolers and liquid coolers (AIOs).
For an Air Cooler:
- Apply Thermal Paste: If the cooler doesn't have pre-applied thermal paste, apply a small pea-sized amount of paste to the center of the CPU.
- Mount the Cooler: Line up the cooler with the mounting holes around the CPU socket. Secure it using the screws or brackets provided.
- Connect the Fan: Plug the cooler's fan cable into the CPU_FAN header on the motherboard.
For an AIO Liquid Cooler:
- Mount the Radiator: If you're using an AIO cooler with a radiator, mount the radiator and fans either at the top or front of the case, depending on your case layout.
- Install the Pump: Apply thermal paste (or use the pre-applied paste) and carefully install the pump block on top of the CPU. Secure it with the mounting hardware provided.
- Connect the Pump: Plug the pump and fan cables into the motherboard's CPU_FAN and PUMP_FAN headers.
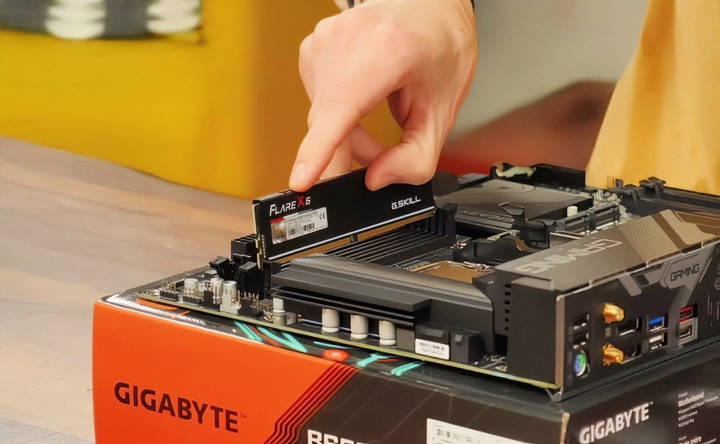
Install RAM (Memory)
RAM installation is one of the simplest steps. Here's how to do it:
- Locate the RAM Slots: Most motherboards have two or four DIMM slots. If you're using two sticks of RAM, install them in the appropriate slots (usually slots 2 and 4, but check your motherboard manual for dual-channel configuration).
- Open the Slots: Push down on the small tabs at the ends of the RAM slots to open them.
- Install the RAM: Align the notch on the RAM stick with the notch in the slot. Push down firmly until the tabs click back into place.
Step 5: Installing the GPU (Graphics Card)
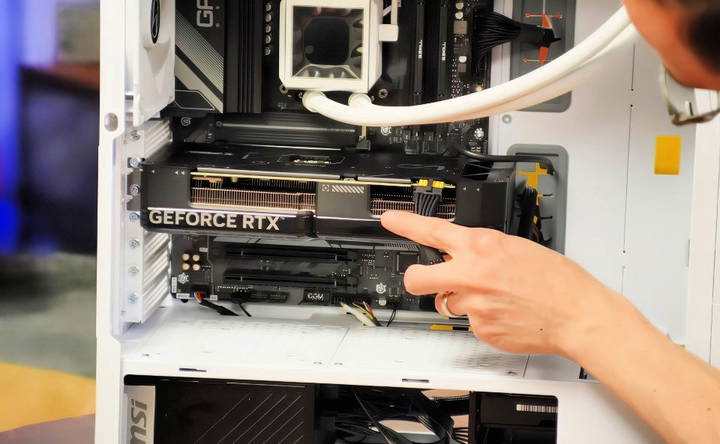
The graphics card is one of the largest and most crucial components in a gaming PC. Installing it correctly ensures optimal performance and stability.
Prepare the PCIe Slot
- Locate the PCIe Slot: The GPU goes into the PCIe x16 slot, which is usually the topmost slot on the motherboard.
- Remove Expansion Slot Covers: Depending on the size of your GPU, you may need to remove one or two expansion slot covers from the back of the case. Unscrew and remove them to make room for your GPU's ports.
Install the Graphics Card
- Align the GPU: Carefully line up the GPU's PCIe connector with the PCIe slot. Once aligned, press down gently until the GPU clicks into place.
- Secure the GPU: Use the screws you removed from the expansion slot covers to secure the GPU to the back of the case.
- Connect Power Cables: Modern GPUs require additional power. Locate the 6-pin, 8-pin, or 12-pin PCIe power connectors on the GPU and plug in the appropriate cables from your PSU.
Step 6: Connecting Storage Devices
Now, it's time to install your SSDs or hard drives. There are two main types: M.2 NVMe SSDs and SATA SSDs/HDDs.
Installing an M.2 NVMe SSD
- Locate the M.2 Slot: Most modern motherboards have at least one M.2 slot, usually near the PCIe slots.
- Install the SSD: Align the M.2 SSD with the slot at a slight angle (around 30 degrees). Insert it and then secure it using the small screw provided with the motherboard.
- Secure the SSD: Tighten the screw gently, ensuring the SSD is firmly in place.
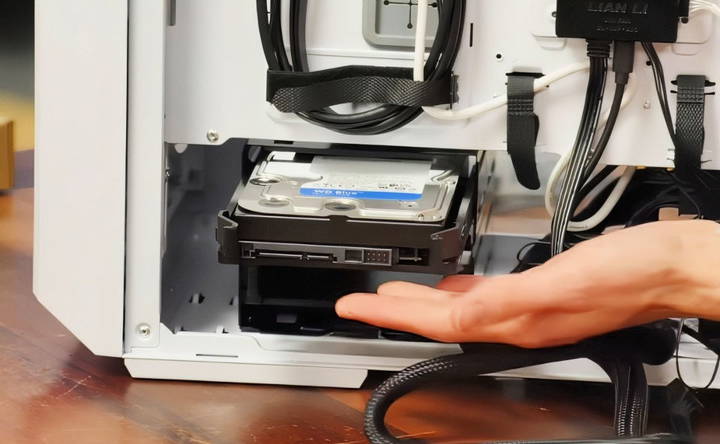
Installing a 2.5" SATA SSD or 3.5" HDD
- Mount the Drive: Use the provided drive bays or trays in your case to mount the drive. Most cases have tool-less trays that let you slide the drive into place.
- Connect SATA Cables: Connect one end of a SATA data cable to the drive and the other end to the SATA port on the motherboard. Then, connect the SATA power cable from the PSU to the drive.
Step 7: Cable Management
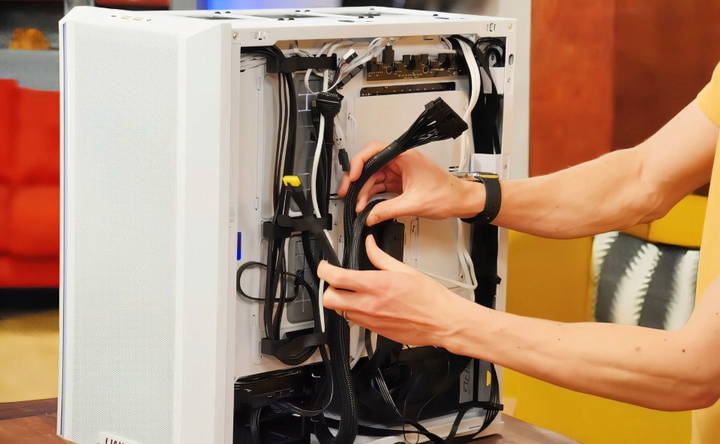
Good cable management not only makes your build look clean but also improves airflow, helping keep your system cool.
- Use Cable Cutouts: Most modern cases come with cutouts and grommets that allow you to route cables behind the motherboard tray.
- Group Cables Together: Use zip ties or Velcro straps to bundle cables together, especially behind the motherboard tray.
- Avoid Blocking Airflow: Make sure no cables obstruct fans or airflow paths, especially around the GPU and CPU cooler.
Step 8: Final Connections
Now that all components are installed, it's time to connect everything.
Connect the 24-pin Motherboard Power Cable
- Locate the 24-pin Connector: This is the largest power connector, typically on the right side of the motherboard.
- Connect the Cable: Plug the 24-pin power cable from the PSU into the motherboard.
Connect the 8-pin CPU Power Cable
- Locate the CPU Power Header: This is near the top of the motherboard.
- Connect the Cable: Plug the 8-pin (or 4+4 pin) CPU power cable from the PSU into the header.
Connect Front Panel Cables
- USB Ports: Plug the case's front USB cables into the USB 3.0 or USB 2.0 headers on the motherboard.
- Power Button and LEDs: Connect the small front panel connectors (power button, reset button, HDD LED) to the appropriate headers on the motherboard, usually located at the bottom right.
- Audio: Plug the front panel audio cable into the HD_AUDIO header on the motherboard.
Step 9: First Boot
Now for the exciting part: powering on your new gaming PC!
- Double-Check All Connections: Before you hit the power button, ensure all components and cables are properly connected.
- Power On: Connect your monitor, keyboard, and mouse. Then, plug your PC into a power source and press the power button.
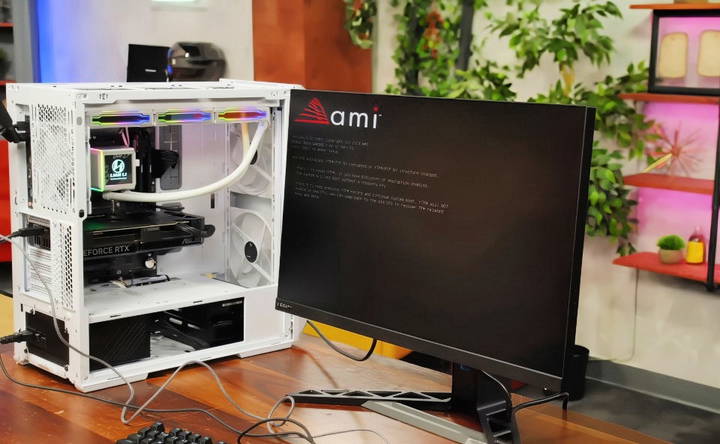
- Enter BIOS: If everything is connected correctly, your system should boot into the BIOS. Here, you can check that all components (CPU, RAM, GPU, SSD, etc.) are recognized.
- Enable XMP/EXPO Profiles: If you have high-performance RAM, enable the XMP (Intel) or EXPO (AMD) profile in the BIOS to ensure your RAM runs at its rated speed.
Step 10: Installing Windows and Drivers
The final step is installing the operating system and drivers.
Install Windows 11
- Insert your Windows 11 USB drive and follow the on-screen instructions to install the OS.
- Once installed, activate your copy of Windows with a valid license key.
Install Drivers
- Motherboard Drivers: Download and install the latest motherboard drivers from the manufacturer's website (audio, LAN, chipset).
- GPU Drivers: Install the latest drivers from NVIDIA, AMD, or Intel for your graphics card.
Final Thoughts
Congratulations! You've successfully built your own gaming PC. Now it's time to enjoy the benefits of a custom-built machine tailored to your gaming and productivity needs. Whether you plan on diving into AAA games at ultra settings or streaming, your new PC is ready to handle it all!
Don't forget to periodically check for updates, clean your PC to avoid dust buildup, and consider future upgrades as new hardware becomes available.
FAQs About How to Build a Gaming Pc
Discover answers to top FAQs about building a gaming pc. learn the basics, essentials, and expert tips for assembling your own performance powerhouse.
Ensure all components are properly connected. Check power cables, especially the 24-pin motherboard and 8-pin CPU power cables. Also, verify the RAM and GPU are seated correctly. If still unresponsive, reset the BIOS by clearing the CMOS using the jumper on your motherboard or by removing and reinserting the battery.
Yes, the Ryzen 9 can be used in place of the Ryzen 7 if the motherboard supports the AM5 socket and has a compatible BIOS update. Ensure your cooling solution can handle the increased heat output of the Ryzen 9.
Thermal paste is essential for proper heat transfer between the CPU and the cooler. Many coolers come with pre-applied thermal paste, but if not, you must apply a pea-sized amount to the center of the CPU before installing the cooler. Remember to remove any plastic films on the cooler before installation.
You can adjust fan speeds in the BIOS. Look for fan control settings where you can switch from "Full Speed" to "PWM" or build a custom fan curve. This helps reduce fan noise while maintaining efficient cooling.
Make sure the GPU is firmly seated in the PCIe slot. Check if the PCIe power cables are connected correctly from the power supply to the GPU. If the issue persists, update the motherboard BIOS or try a different PCIe slot if available.
Yes, if your motherboard has built-in Wi-Fi or you're connected via Ethernet, you can download drivers directly. However, having drivers on a USB beforehand ensures that network drivers are available in case your system can’t connect to the internet.
Use the cable management cutouts in your case and group cables together with zip ties. Route cables behind the motherboard tray where possible to keep the main chamber clear for optimal airflow.
For moderate use, the stock cooler is sufficient for the Ryzen 7, but the Ryzen 9 benefits from a more powerful cooling solution. An AIO liquid cooler or a high-end air cooler is recommended to maintain stable temperatures during intensive tasks.
NVMe SSDs offer significantly faster read/write speeds compared to SATA SSDs, making them the preferred choice for gamers. Use NVMe for your operating system and games, and consider a SATA SSD or HDD for storing larger files like videos or music.
DDR5 is faster, offering higher bandwidth and improved power efficiency compared to DDR4. If your motherboard supports DDR5, it's a future-proof option, though it's more expensive than DDR4. Always check motherboard compatibility before purchasing.
While it's not strictly necessary, an anti-static wristband helps prevent electrostatic discharge (ESD) from damaging sensitive components. Alternatively, frequently touch a metal part of the case to discharge any static buildup.


