Learn how to build a garage step-by-step with expert tips on planning, materials, and construction for a successful project. Whether you're looking to house your vehicles or expand your workspace, a well-built garage is a valuable addition to any property. This guide will walk you through the entire process—from laying the foundation to framing the walls and installing the roof. We'll go over key materials, tools, and techniques to help you construct a durable and functional garage.
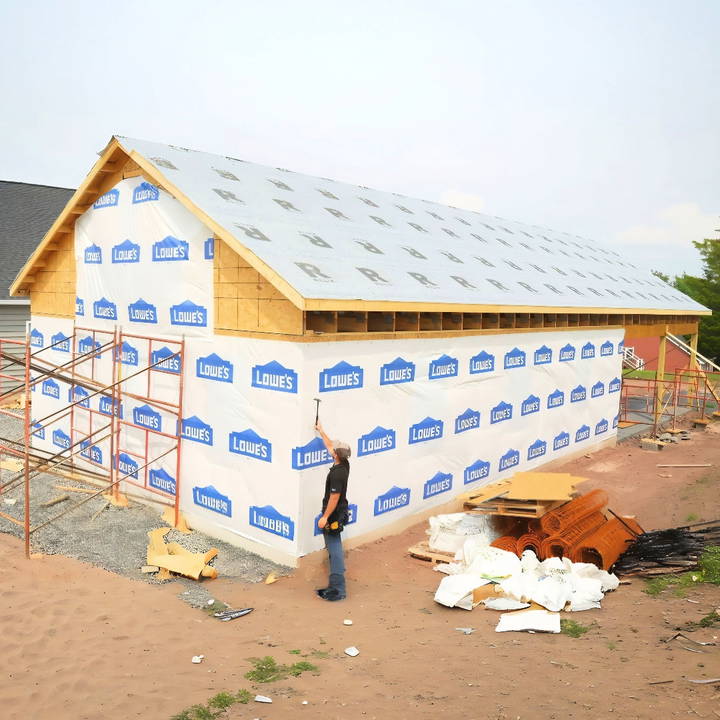
In this article, we will focus on the steps related to wall framing, truss installation, and more. Let's get started!
Step by Step Instructions
Learn how to build a garage with our thorough step-by-step instructions, from laying the foundation to final inspections. Build your dream garage today!
Laying the Foundation
Before you can begin building your garage, you'll need to ensure the foundation is properly prepared. The foundation provides the support necessary to hold the weight of the structure and maintain stability. If the foundation isn't done correctly, you could experience problems later on, such as cracks in the walls or uneven flooring.
Steps for Laying the Foundation:
- Excavation: The first step involves clearing the area where the garage will be built. You may need to excavate the site to build a level surface for the foundation.
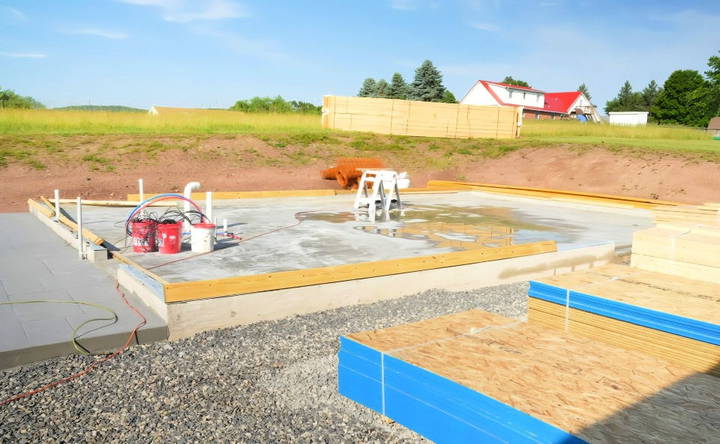
- Footings and Concrete Slab: Pour footings around the perimeter to support the weight of the walls. Once this is done, pour the concrete slab that will act as the floor.
- Curing the Concrete: Allow the concrete to cure properly to ensure it hardens and can bear the load of the garage structure. This could take several days, depending on the weather and the concrete mix used.
If you're working on your own, consider renting a concrete mixer to help with the process. Once your foundation is set, you can start transitioning to the wood framing phase of the build.
Preparing for Wall Framing
Wall framing is one of the key parts of garage construction, providing the support for the roof, doors, and windows. Before framing, you'll need to install sealers and plates to transition from the foundation to the wood structure.
Step 1: Installing Sill Sealers and Plates
- Sill Sealer: The first step is to install a sill sealer, which is also called a bug guard. This helps to seal the area between the foundation and the wood framing, preventing drafts and pests from entering. The sealer rolls out across the top of the foundation.
- Sill Plates: Next, install pressure-treated 2x6 sill plates. These will be secured to the foundation using anchor bolts. Ensure the sill plates are flush with the outside of the foundation, building a straight and sturdy base.

Key Tips:
- Drill out the holes in the sill plates where the anchor bolts come through.
- Tighten the sill plates with galvanized nuts and washers to secure them in place.
Framing the Walls
With the sill plates in place, you're ready to start building the walls of the garage. This step requires careful planning, as you'll need to account for doors, windows, and structural reinforcements.
Step 2: Selecting Materials for Framing
Most garages use either 2x4 or 2x6 lumber for wall framing. In this guide, we will be using 2x6s, as they provide additional strength and insulation. The first task is to select straight lumber for the top and bottom plates.
Step 3: Cutting and Preparing Wall Plates
- Measure and Cut: Cut the top and bottom plates to the length required for your garage walls. It's crucial that these are cut accurately to ensure the walls are straight.
- Mark the Layout: Lay out where each stud, window, and door will go. Use your plans to ensure that everything is correctly spaced, typically 16 inches on center for the studs.
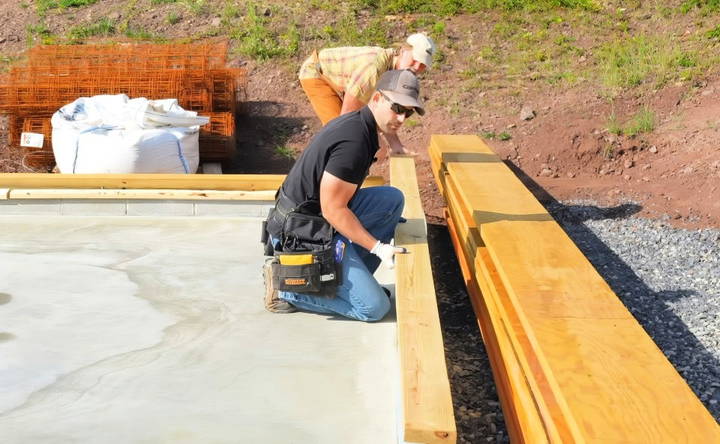
Step 4: Marking and Drilling for Bolts
Just as with the sill plates, you'll need to mark and drill out spaces for the bolts to fit through the bottom plates. These bolts secure the wall framing to the foundation, ensuring that the structure remains anchored.
Step 5: Assembling the Wall Frames
Once the bottom and top plates are ready, start assembling the wall frames. Here's how:
- Stud Layout: Begin by laying the 2x6 studs between the plates, ensuring they align with your layout marks. Attach each stud to the top and bottom plates using framing nails.
- Windows and Doors: Ensure you frame the openings for windows and doors as specified in your design. Use jack studs to support the window or door headers.
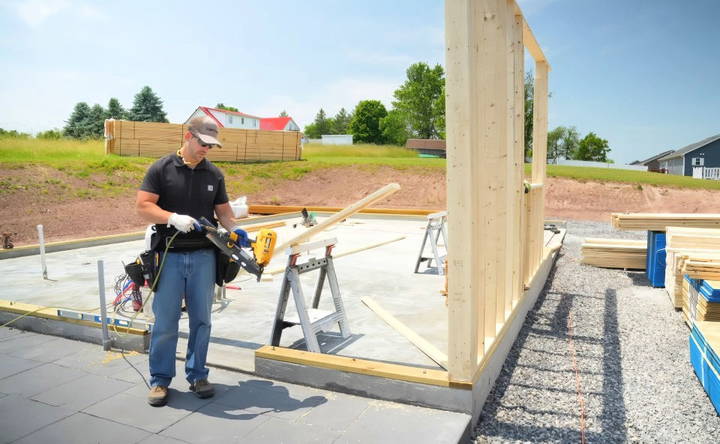
Step 6: Building Headers for Windows and Doors
Headers provide structural support above doors and windows, distributing the weight of the roof and walls. For example, a window that is 6 feet wide requires a header that is slightly wider than the window opening. This is typically built using laminated veneer lumber (LVL) or multiple layers of 2x12 boards.
- Measure and cut the LVL to the correct length.
- Use framing nails to secure the layers together and then install the header above the window or door opening.
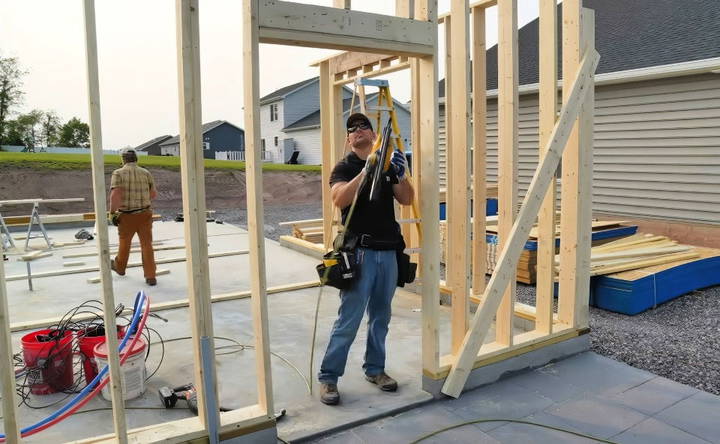
Step 7: Standing and Securing the Walls
After assembling each wall frame, it's time to stand them up:
- With the help of at least one other person, lift the wall frame into place.
- Secure the bottom of the wall to the foundation using the anchor bolts.
- Brace the walls temporarily to keep them plumb and straight.
Step 8: Sheathing the Walls
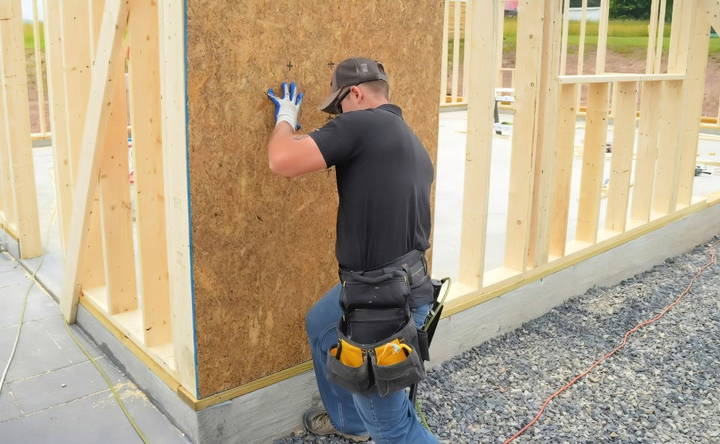
Sheathing adds rigidity to the structure and prepares the walls for siding. Use oriented strand board (OSB) or plywood to sheathe the exterior walls.
- Allow for a ½-inch overhang at the bottom to cover the foundation.
- Nail the sheathing to the studs, ensuring nails are placed every 6-8 inches to provide adequate support.
- After nailing off the sheathing, the garage walls will be ready for the next step.
Preparing for Roof Trusses
With the walls standing, the next step is to prepare for installing the roof trusses. These will support the roof and distribute the weight evenly across the structure.
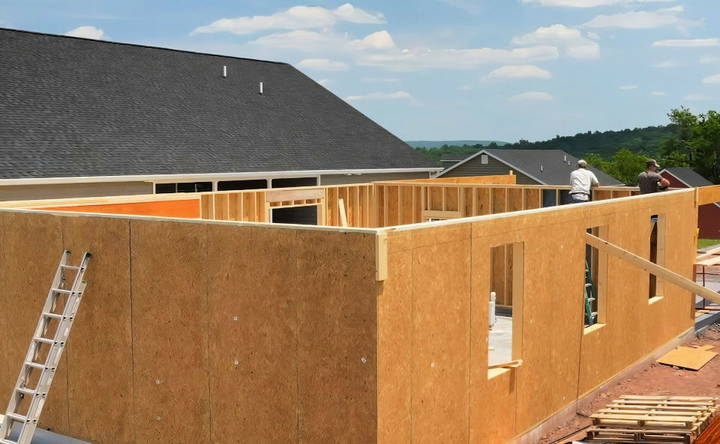
Step 9: Installing the Double Top Plate
To reinforce the walls, you'll install a double top plate. This involves adding a second layer of 2x6s on top of the walls. The double top plate helps tie the walls together, building a more stable structure.
- Lay the second plate over the top plate and ensure it overlaps at the corners for added strength.
- Nail the double top plate every 12 inches along the length of the walls.
Step 10: Preparing for Truss Installation
Before the roof trusses can be installed, you'll need to mark the layout on the top plates where each truss will sit. Trusses are typically installed 2 feet apart.
- Use a chalk line or marker to build 2-foot on-center marks across the top plates of the walls.
- Attach hurricane ties (metal brackets) at each mark. These will be used to secure the trusses to the wall.
Installing Roof Trusses
Once the walls are framed and braced, it's time to install the roof trusses. The trusses serve as the framework for the roof, providing structural support and stability. Depending on the size of the garage, installing roof trusses can be a challenging task, and it may be necessary to rent a crane or enlist extra help for larger garages.
Step 11: Lifting and Placing the Roof Trusses
- Preparation: Before lifting the trusses, make sure they are laid out on the ground in the correct order. Start with the gable trusses, which will be installed at the ends of the garage.
- Use a Crane: For larger garages, a crane can be used to lift the trusses onto the top of the walls. The first truss to be installed should be the gable truss.
- Manually Lifting Smaller Trusses: For smaller trusses, you can lift them manually with the help of a team. Align the first truss with the layout marks you made earlier on the top plates.
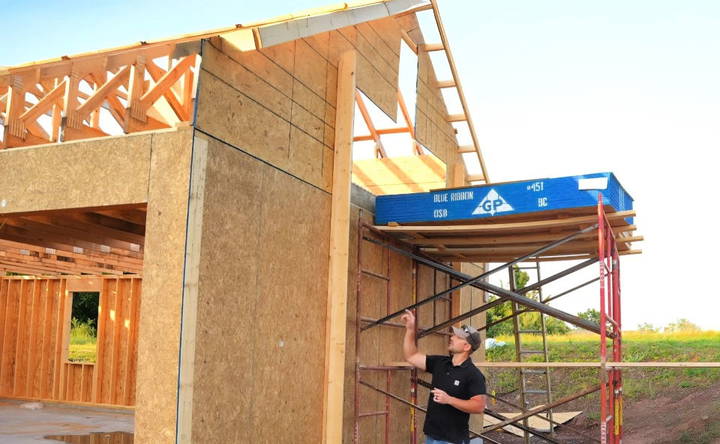
Step 12: Securing the First Truss
The first truss is crucial to ensuring that the rest of the roof is installed straight and level. Follow these steps:
- Place the gable truss at the end of the garage, aligning it with the wall.
- Use temporary braces to hold the truss in place while you secure it.
- Nail the truss to the hurricane ties that were installed in the previous step. These ties ensure that the truss is securely attached to the structure.
Step 13: Installing the Remaining Trusses
Once the first truss is secure, you can begin installing the remaining trusses. Make sure to follow the layout marks on the top plates, placing each truss 2 feet apart.
- Nail the Trusses: As each truss is lifted into place, nail it into the hurricane ties. Use a framing nail gun to secure the trusses quickly and efficiently.
- Check for Alignment: As you install each truss, make sure it is aligned with the previous truss. This will ensure that the roof is level and straight once all the trusses are in place.

Step 14: Bracing the Trusses
To prevent the trusses from shifting as you continue the installation process, it's essential to install bracing. These braces help maintain the spacing between trusses and provide additional support:
- Lateral Bracing: Install 2x4s horizontally between the trusses, spaced evenly across the roof. These braces prevent the trusses from moving sideways.
- Diagonal Bracing: For additional stability, add diagonal braces from the top of one truss to the bottom of the next.
Sheathing the Roof
With the trusses installed and braced, the next step is to add roof sheathing. The sheathing provides a solid surface for the roof covering and adds strength to the structure.
Step 15: Installing Roof Sheathing
Roof sheathing is typically made of OSB or plywood and should be installed starting at the bottom edge of the roof.
- Start at the Bottom: Begin sheathing the roof by placing the first row of OSB or plywood along the bottom edge of the trusses. This row should overhang the walls by about ½ inch to provide drip protection.
- Nail Down the Sheathing: Use framing nails or a nail gun to secure the sheathing to the trusses. Nails should be placed every 6-8 inches along the edges of the sheathing and every 12 inches in the middle.
- Sheathing Clips: Install sheathing clips between the sheets of OSB or plywood. These clips help maintain consistent spacing between the panels and prevent buckling due to expansion.
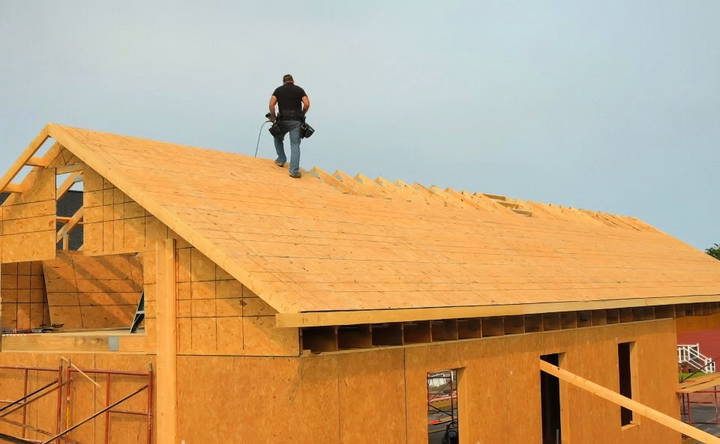
Step 16: Completing the Roof Sheathing
Once the first row is installed, continue adding rows of sheathing, working your way up the roof. Make sure each panel is staggered so that the seams do not line up vertically. This builds a stronger roof.
- Align with the Trusses: Ensure that the edges of the sheathing align with the trusses for proper support. If necessary, use a chalk line to keep your panels straight.
- Cut Openings for Roof Vents: If your garage design includes roof vents, be sure to cut out the openings before nailing down the panels.
Installing Roof Underlayment and Shingles
Now that the roof sheathing is complete, the next step is to install a water-resistant underlayment, followed by shingles or other roofing materials.
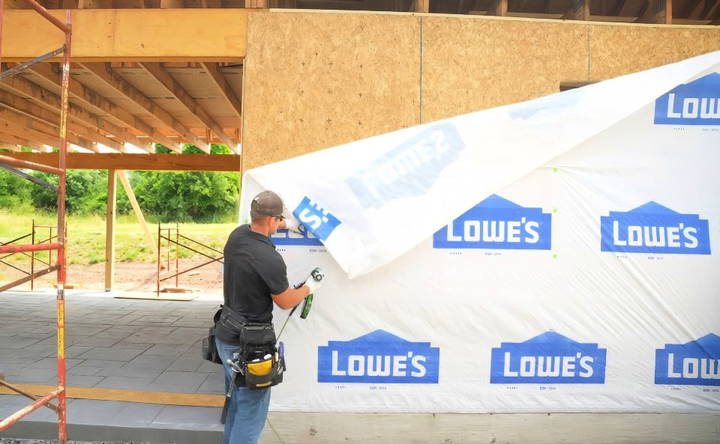
Step 17: Installing Roof Underlayment
Roof underlayment provides an extra layer of protection from moisture. You have several options, including felt paper or synthetic underlayment, with synthetic being more durable and easier to work with.
- Start at the Eaves: Lay the underlayment at the eaves (the lower edge of the roof) and work your way upward. This prevents water from seeping under the layers.
- Overlap Each Row: Overlap each row of underlayment by about 6 inches to ensure proper coverage.
- Cap Staples: Use cap staples or cap nails to secure the underlayment to the sheathing. These staples have a plastic cap that helps hold the material in place.
Step 18: Installing Shingles
Once the underlayment is in place, you can begin installing shingles or another roofing material of your choice.
- Start at the Bottom: Begin with the starter strip of shingles at the bottom edge of the roof. This layer helps protect the roof from wind damage.
- Install the Shingles: Working your way up, install the shingles in overlapping rows. Use roofing nails to secure each shingle, placing nails in the designated areas.
- Cut the Shingles to Fit: When you reach the peak of the roof, you may need to cut shingles to fit. Use a utility knife to make clean cuts and ensure a proper fit.
Installing Garage Doors and Windows
With the roof complete, it's time to install the garage doors and windows. These elements not only add functionality but also enhance the aesthetic appeal of your garage.
Step 19: Installing Garage Doors
Installing a garage door requires precision, as it must fit perfectly within the framed opening.
- Measure the Opening: Ensure the garage door opening is the correct size based on the door specifications.
- Install the Tracks: Attach the vertical tracks to the sides of the garage opening, making sure they are level and plumb.
- Attach the Door Panels: Starting at the bottom, install the door panels one at a time, attaching them to the tracks with hinges.
- Add the Springs and Hardware: Garage doors require tension springs to help lift the door. These springs are under high tension, so it's recommended to have a professional install them to ensure safety.
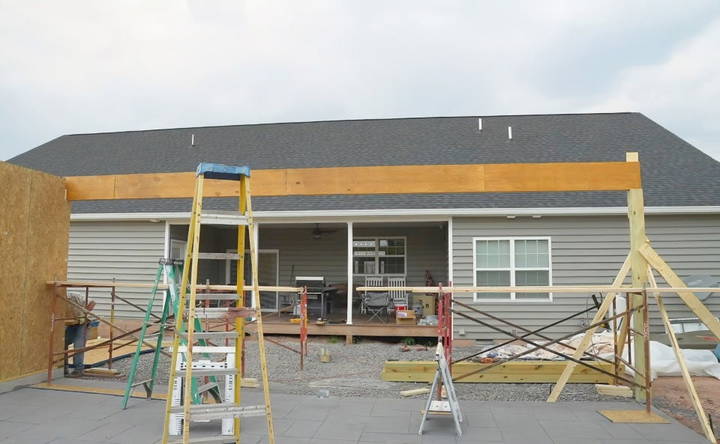
Step 20: Installing Windows
To let natural light into your garage, install windows in the framed openings.
- Place the Window: Set the window into the opening, ensuring it fits snugly.
- Level and Secure: Use a level to make sure the window is even, then secure it in place with nails or screws.
- Add Flashing: To prevent water from seeping in, install flashing around the window, overlapping it with the house wrap.
Adding Exterior Finishes
Once the structure of the garage is complete, you can focus on adding exterior finishes to improve the look and functionality of the space.
Step 21: Installing Siding
Siding is an important part of your garage's exterior, providing weather protection and enhancing curb appeal. Common siding options include vinyl, wood, and fiber cement.
- Start at the Bottom: Begin installing the siding at the bottom of the garage walls, using a level to ensure each row is straight.
- Work Your Way Up: Attach the siding panels or boards to the wall studs, overlapping each row as you go up.
- Trim: Add trim around windows, doors, and corners to give the siding a finished look.
Step 22: Painting or Staining
If you've chosen wood siding, you may want to paint or stain it to protect it from the elements.
- Priming: Apply a primer to the wood to prepare it for paint or stain.
- Paint or Stain: Once the primer is dry, apply your chosen color of paint or stain. Make sure to use weather-resistant products for long-lasting protection.
Final Touches and Inspections
Learn about the crucial final steps in home construction, from installing gutters to thorough inspections and final adjustments, ensuring quality and durability.
Step 23: Installing Gutters
To protect your garage from water damage, it's essential to install gutters along the roofline. Gutters direct rainwater away from the foundation, preventing erosion and water buildup.
- Install Gutter Hangers: Attach gutter hangers to the roof, spacing them about 2 feet apart.
- Add the Gutters: Snap the gutters into the hangers, making sure they slope slightly to direct water toward the downspouts.
- Install Downspouts: Attach downspouts to the gutters to carry water away from the foundation.
Step 24: Inspections and Final Adjustments
Before considering the project complete, have the garage inspected by a building professional to ensure it meets local building codes and safety standards. Make any necessary adjustments to meet these requirements.
Conclusion
Building a garage is a complex but rewarding project that adds both value and functionality to your property. By following these steps—from laying the foundation to installing the roof and finishing the exterior—you can successfully construct a garage that meets your needs.
Keep in mind that safety and precision are paramount throughout the process. If at any point you're unsure or uncomfortable with a particular step, don't hesitate to seek help from a professional.
Now that your garage is complete, you can enjoy the extra space for storage, projects, or simply keeping your vehicles protected from the elements!
FAQs About Building a Garage
Discover the essential FAQs about building a garage. Find expert answers on costs, permits, materials, and more to guide your project effortlessly.
You’ll need basic carpentry tools such as a circular saw, speed square, framing nailer, drill, and hammer. Specialized tools like a pneumatic nailer for framing and a cap stapler for roof underlayment are also helpful. For setting trusses, consider renting a crane for larger projects.
The rough opening for a garage door should be the exact width and height of the door. For example, if you’re installing a 16x8 foot door, the rough opening should be 16 feet wide and 8 feet high. Verify measurements with the garage door manufacturer.
One common mistake is failing to ensure that walls are perfectly straight and plumb before sheathing. Use braces and a string line to correct any bowing. Also, make sure to place studs on the correct side of the layout marks to avoid misalignments.
Sheathing should be installed after ensuring the walls are perfectly straight. Bracing and checking with a level will help guarantee that the sheathing is applied correctly, preventing structural issues down the road.
Yes, the foundation is typically concrete, while the framing is done using pressure-treated wood (e.g., 2x6 or 2x4s). The sill plate, which transitions between these materials, is usually pressure-treated to resist moisture.
Roof trusses should be secured using hurricane ties. These metal brackets are attached to the top plates of the walls and nailed to the trusses to prevent upward movement during storms or heavy winds.
Yes, applying a bead of caulk under the sill sealer and again on top before placing the bottom plate can provide additional protection against drafts and pests.
Visit your local county code enforcement office. They can provide zoning regulations, inspection requirements, and permit fees. It's important to consult them early in the planning phase to avoid compliance issues.
On average, a garage can take around six days to build, depending on the size and complexity of the project. This includes time for framing, trusses, and roofing. Delays for inspections and material availability may add time.
Yes, roof pitch can be customized based on your aesthetic preferences and storage needs. However, local building codes may restrict you from going below a certain pitch (e.g., 4/12).


