Mousetrap cars are a fun and educational project, often featured in school competitions and physics classes. These cars, powered solely by a mousetrap, challenge students and hobbyists alike to design vehicles that either travel the farthest or move the fastest. While they may seem simple at first glance, building a winning DIY mousetrap car requires a solid understanding of physics, engineering, and creativity.
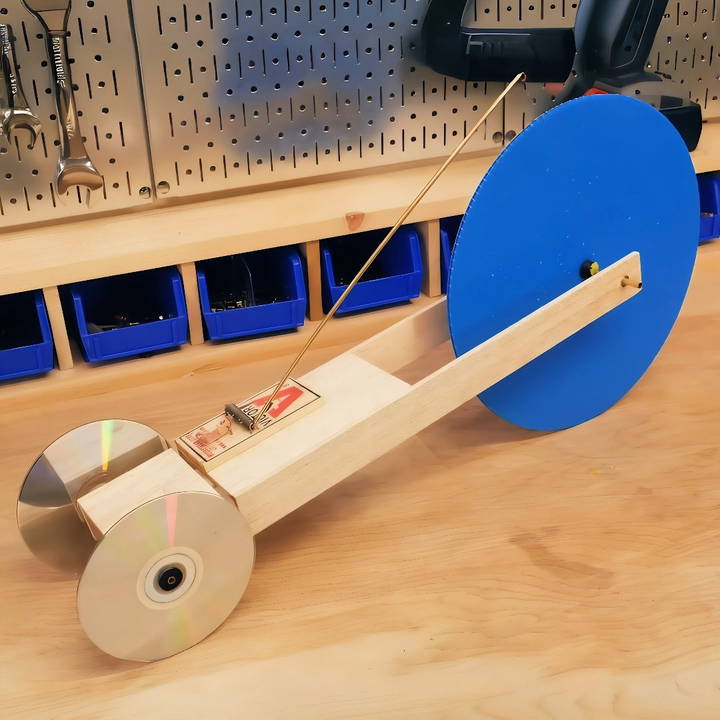
In this comprehensive guide, we'll cover everything you need to know to build a DIY mousetrap car that can potentially win first place in your competition. From materials and design principles to common challenges and pro tips, we've got you covered.
What Is a Mousetrap Car?
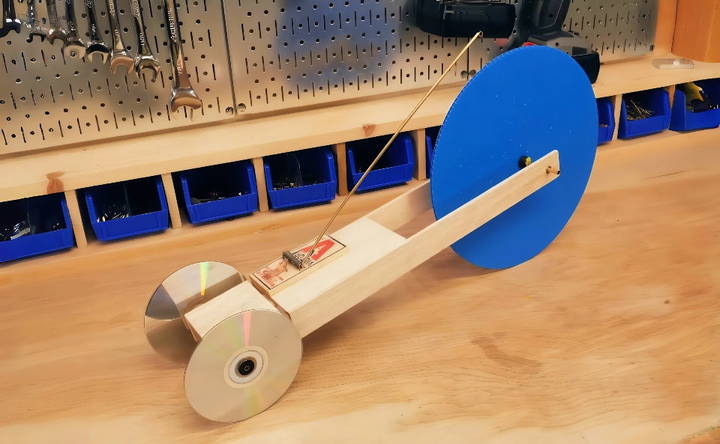
A mousetrap car is a small vehicle that uses the potential energy stored in the spring of a mousetrap to move. The mousetrap's spring powers the car, typically through a lever arm attached to the spring, which pulls a string wound around the car's axle, causing the wheels to turn and the car to move forward. The goal is to harness this energy efficiently to either make the car travel the longest distance or the fastest speed, depending on the competition's requirements.
Why Build a Mousetrap Car?
Mousetrap cars offer a hands-on way to learn about physics concepts like mechanical advantage, friction, energy transfer, and rotational inertia. They are popular in high school physics projects and engineering challenges, and building one can sharpen problem-solving and engineering skills.
The Physics Behind Mousetrap Cars
Before diving into the actual building process, it's essential to understand the key physics principles that govern the performance of a mousetrap car. The most important principle is mechanical advantage, which determines how efficiently the mousetrap's energy is used to move the car.
Mechanical advantage is the ratio of output force to input force, and in mousetrap cars, it's all about balancing force and distance. A longer lever arm on the mousetrap will reduce the force but increase the distance the car can travel, while a shorter lever arm will increase the force but limit the distance.
Understanding these principles will help you make informed decisions when designing and optimizing your car.
Materials You'll Need
To build a basic mousetrap car, you don't need a lot of complex or expensive materials. Here's a list of what you'll need to get started:
- Mousetrap: The standard spring-loaded mousetrap is the core of your vehicle's propulsion system.
- Wheels: You can use anything from DVDs to lightweight plastic wheels or foam wheels. Wheel choice impacts speed, friction, and distance.
- Axles: Thin metal rods or dowels work best for the car's axles. They should be lightweight yet sturdy.
- Lever arm: This is typically a wooden or metal rod that attaches to the mousetrap's spring to extend its reach.
- String: Used to connect the lever arm to the axle.
- Chassis: The car body can be made from lightweight materials like balsa wood or aluminum.
Optional materials include ball bearings, lubricants like graphite powder to reduce friction, and glue or tape for assembly.
Tool List
- Pliers or wire cutters (to modify the mousetrap)
- Scissors
- Glue or hot glue gun
- Tape (optional)
- Sandpaper (for smoothing rough edges)
Step by Step Instructions
Learn how to build a mousetrap car with our step-by-step instructions. From preparation to testing, optimize for performance and win the race!
Step 1: Prepare the Mousetrap
Begin by removing any extra pieces from the mousetrap, such as the metal bar used to catch mice. All you need is the spring-loaded arm.
Step 2: Attach the Lever Arm
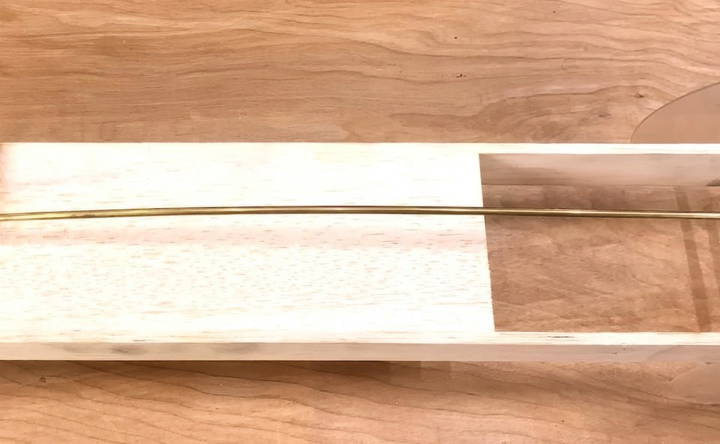
The lever arm is a critical part of the car's design because it allows the mousetrap's energy to transfer over a greater distance, making the car travel farther. Attach a lightweight rod (such as a wooden dowel or metal rod) to the spring arm of the mousetrap. This lever arm should be securely fastened to ensure it doesn't slip or break during use.
Step 3: Build the Chassis
The chassis is the frame of the car that holds everything together. Use a lightweight material such as balsa wood to minimize the car's overall weight. Cut the chassis to the desired size, ensuring it's large enough to support the wheels and axles while keeping the design as lightweight as possible.
Step 4: Install the Axles
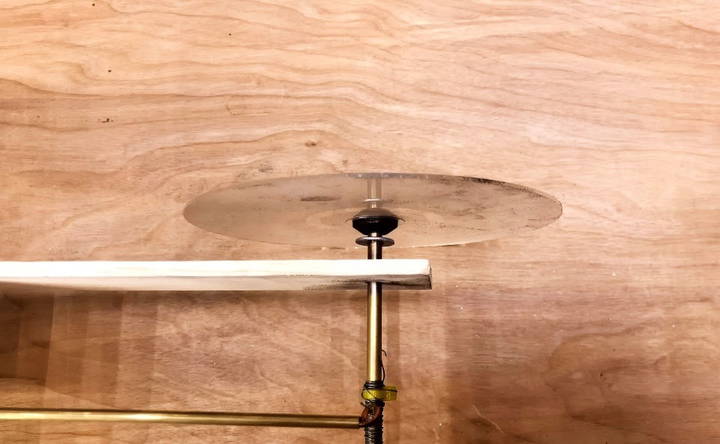
Attach the axles to the chassis, making sure they are parallel to each other and aligned properly. The axles should be long enough to extend beyond the chassis and attach the wheels on both sides. Make sure the axles can rotate freely without friction, which will greatly affect the car's performance.
Step 5: Attach the Wheels
Now it's time to attach the wheels to the axles. You can use CD wheels, foam wheels, or plastic wheels depending on your design preference. Larger wheels generally help with distance, while smaller wheels are better for speed. Ensure that the wheels are mounted securely and spin freely.
Step 6: Attach the String
Tie one end of the string to the end of the lever arm, and then wind the string around the rear axle. The winding of the string is what will transfer the energy from the mousetrap to the wheels, causing the car to move forward when the lever arm is released.
Step 7: Lubricate the Axles (Optional but Recommended)
To reduce friction and improve the performance of your car, apply graphite powder or ball bearings to the axles. Reducing friction is critical in a mousetrap car, especially when trying to maximize distance.
Step 8: Test and Tweak
Once your mousetrap car is assembled, it's time to test it! Place the car on a flat surface, pull the lever arm back, and release it. Observe how far the car travels and how efficiently it moves. Based on your observations, you can make adjustments such as:
- Adjusting the length of the lever arm to optimize distance.
- Changing the wheels for better traction or lower rotational inertia.
- Reducing friction by sanding the axles or adding more lubricant.
Tips for Winning Design
To truly make a first-place mousetrap car, you'll need to focus on a few key areas:
1. Mechanical Advantage
The length of the lever arm is crucial. A longer arm reduces the force but increases the distance the car will travel. According to the physics principles described earlier, the best long-distance cars have very long lever arms that allow for a gradual release of energy.
2. Friction Reduction
Friction is your car's biggest enemy. The two main sources of friction in a mousetrap car are the wheels' contact with the ground and the axles' contact with the chassis. Using ball bearings or lubricating the axles with graphite powder can significantly reduce friction and improve performance.
3. Lightweight Design
A lightweight car will travel farther than a heavier one. Use light materials like balsa wood for the chassis and plastic or foam wheels. Keep the design minimal to reduce weight without sacrificing stability.
4. Rotational Inertia
The size and weight of the wheels matter. Larger wheels provide more mechanical advantage, but they also have higher rotational inertia, which can slow the car down. Finding the right balance between wheel size and weight is key to maximizing performance.
5. Testing and Optimization
Even with a great design, you'll need to test your car and make adjustments. Trial and error will help you fine-tune your car's performance. Testing different lever arm lengths, wheel sizes, and axle lubricants will help you find the optimal setup.
Common Challenges and Solutions
Discover common challenges with mousetrap cars and find practical solutions to improve performance and efficiency.
- Problem: Wheels Spinning Out
- Solution: This occurs when too much force is applied too quickly. You can solve this by using a longer lever arm, which will spread the force out over a greater distance, reducing the chance of wheel spin.
- Problem: Car Stops Too Soon
- Solution: If your car isn't traveling as far as expected, check for friction issues. Make sure the axles are lubricated and the wheels spin freely. Also, ensure the chassis is lightweight.
- Problem: Car Veers Off Course
- Solution: If your car isn't traveling in a straight line, check that your axles are aligned correctly. Misaligned axles will cause the car to veer to one side.
Conclusion
Building a mousetrap car is an exciting project that combines creativity with engineering principles. By understanding the physics behind mechanical advantage, reducing friction, and optimizing your design through testing, you can make a mousetrap car that has a strong chance of winning a competition. Whether you're aiming for the longest distance or the fastest speed, following these tips will help you on your way to building a first-place mousetrap car! Happy building!
FAQs About DIY Mousetrap Car
Explore common questions and answers about DIY mousetrap car construction, materials, and troubleshooting for your next science project.
The biggest mistake is using materials that generate too much friction, such as poorly lubricated axles or heavy wheels. Friction between the wheels and the car's body slows the vehicle down significantly. Graphite powder or ball bearings on the axles can help reduce friction and improve the car’s performance.
Wheel size and material greatly affect your car’s efficiency. Larger wheels provide better mechanical advantage for distance, but heavier or wider wheels increase friction and rotational inertia. Using lightweight materials like CDs or foam wheels helps optimize both speed and distance.
A longer lever arm reduces the force applied but increases the distance your car can travel. This helps avoid energy waste from the spring acting too quickly. However, the arm should be long enough to maximize distance but not too long that it adds unnecessary weight to your car.
Wheel spin-out occurs when too much force is applied too quickly, especially on a smooth surface. The key is balancing the force with a long lever arm or thicker rear axles to gradually transfer the energy. Applying traction-enhancing materials to the wheels also helps.
Friction mainly comes from two places: between the wheels and the ground, and between the axles and the car's body. To reduce it, lubricate the axles with graphite powder or use ball bearings. Keeping the car lightweight and ensuring axles spin freely will also help.
Rotational inertia refers to how difficult it is to start rotating a wheel. Large, heavy wheels store more energy and may coast longer, but they are harder to accelerate initially, wasting valuable energy. Using lightweight wheels helps reduce rotational inertia.
For speed competitions, shorten the lever arm and increase axle thickness for more direct energy transfer. Ensure the car is lightweight and reduce friction by using small, smooth wheels and lubricating the axles. Thickening the rear axle with tape can also boost acceleration.
If your car veers off in one direction, it may be due to misaligned axles or uneven weight distribution. Ensure that the axles are perfectly parallel and that the wheels are properly attached. Balancing the weight of the car also helps it move straight.
While a catapult method (launching the car instead of rolling it) can win short-distance speed competitions, it is generally unreliable for longer distances, as noted by one builder who successfully used it but admitted it rarely landed upright, limiting its use over long distances.


