As someone who has always been passionate about woodworking and building things by hand, tackling the project of building my own pool table from scratch has been a challenging yet rewarding journey. This project was inspired by a visit to Blatt's Billiards, a company with over 100 years of experience crafting pool tables. The knowledge and passion they shared with me were invaluable and ultimately pushed me to take on this project.
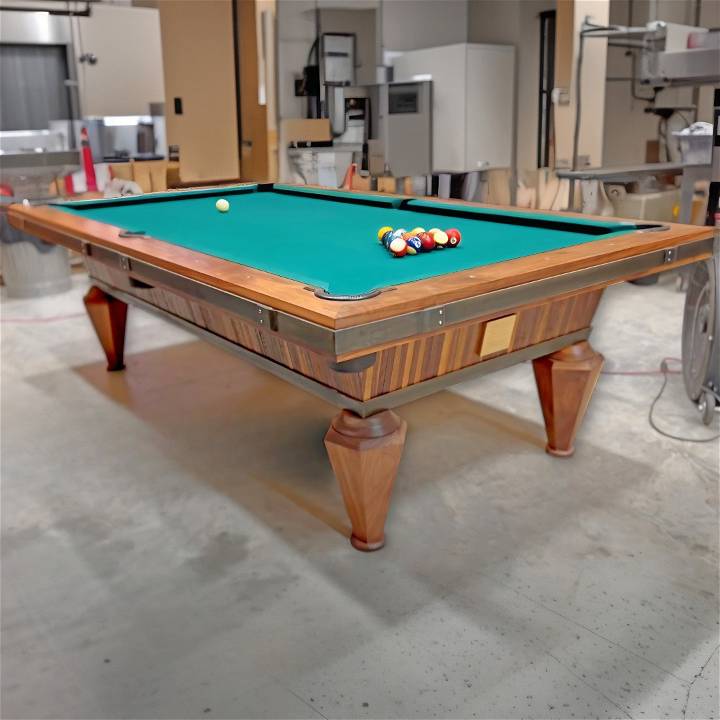
Gathering Materials
Why Each Material was Needed:
- Slate: The heart of any pool table, providing a flat, level surface for play. Each piece weighs around 200 pounds and there are three slates per table.
- Wood (Walnut, Maple, Poplar): Selected for both the frame and legs of the table. Walnut and Maple for their strength and aesthetic appeal, Poplar for its flexibility and cost-effectiveness.
- Type on Glue: Essential for laminating and joining wood pieces securely.
- Festool Saw: For making precise and long cuts on wood boards.
- Clamps: To hold the wood in place while the glue dries.
- Domino Joiner: For building strong, precise joints.
- Beeswax and Torch: For filling in screw holes and seams on the slate.
- Felt: To cover the playing surface and rails, providing a smooth and consistent play area.
- Rubber Bumpers: For the sides of the pool table, affecting ball bounce and playability.
- Metal Bands: To add both structural strength and a rustic aesthetic appeal to the table design.
Building the Frame and Legs
- Initial Cuts: Starting with 12-foot pieces of Walnut and Maple, I needed a clean, straight edge which I achieved using my Festool saw.
- Ripping and Laminating: I split the wood into manageable pieces, laminated them together with Type on glue, and let them dry overnight. This patience was key to ensuring a sturdy, long-lasting build.
- Constructing the Legs: Using a dimensional lumber piece like Poplar, I crafted six-sided tapered legs by slicing, gluing, and then fine-tuning them on the lathe to get the desired shape and fit.
- Framework Assembly: The frame was put together using hard Maple from the local hardware store. Each joint was meticulously measured, cut, and glued, constantly checking for squareness and stability.
- Adding the Slate: Transporting and placing the 200-pound slates required assistance. The slates were secured to the wood frame using a combination of positioning and adhesive. The key was ensuring that they laid perfectly flat and aligned.
The Finishing Touches
- Sanding and Staining: After constructing the base frame and attaching the legs, I focused on the pool table's aesthetic appeal. Sanding was done meticulously to ensure a smooth finish.
- Staining: I selected a stain that complemented the wood's natural beauty and applied several coats, sanding lightly between each to build a deep, rich color.
Installation of Felt and Rails
- Stretching the Felt: This was one of the most nerve-wracking steps. Stretching the felt without tearing it or leaving it too loose required a delicate balance. I used a staple gun to secure the felt, starting from the center and working my way out to ensure it was evenly stretched.
- Attaching the Rails and Pockets: Using Type on glue and screws, I attached the rails, ensuring they were perfectly aligned with the pockets. Attention to detail here was crucial for a professional playing experience.
The Final Assembly
- Attaching Metal Bands: As an homage to my love for rustic designs, I incorporated metal bands around the table's perimeter. These were not just decorative but also added to the table's structural integrity.
- Wax and Level: I used beeswax to fill any remaining imperfections and a high-quality carpenter's level to ensure the playing surface was perfectly flat. This step was essential for the gameplay to be accurate and true.
Reflections on the Project
Building my pool table was a journey that tested and grew my woodworking skills. The satisfaction of playing on a table I built with my hands is unparalleled. Throughout the project, consulting with experts, using quality materials, and not rushing the process were key to achieving a pool table that will last for generations.
This project is a testament to the beauty of building something tangible and functional with your hands, a journey I encourage others to embark on, whether it's building a pool table or any other woodworking project.
Troubleshooting Common Issues
When embarking on a DIY pool table project, you might encounter a few hurdles along the way. Here's a helpful guide to identify and solve some common issues you may face.
Uneven Playing Surface
- Problem: The balls don't roll straight.
- Solution: Ensure the playing surface is level. Use a carpenter's level and adjust the legs or base until the surface is perfectly horizontal.
Felt Issues
- Problem: The felt is wrinkled or loose.
- Solution: Stretch the felt tight across the surface and secure it with staples. If wrinkles persist, use a felt stretcher or gently iron on a low heat setting.
Pocket Alignment
- Problem: Pockets are not correctly aligned.
- Solution: Measure the distances carefully and reposition the pockets. They should be symmetrical and evenly spaced.
Bounce Off the Rails
- Problem: The ball's bounce off the rails is inconsistent.
- Solution: Check the cushion rubber's quality and attachment. Replace if necessary and ensure it's glued evenly along the rail.
Stability Issues
- Problem: The table wobbles or feels unstable.
- Solution: Strengthen the frame with additional supports. Check all joints and connections, and tighten any loose bolts or screws.
Cue Ball Control
- Problem: Difficulty in controlling the cue ball.
- Solution: Practice is key, but also ensure your cue stick is straight and the tip is properly chalked.
Noise Reduction
- Problem: The table makes too much noise during play.
- Solution: Add padding or insulation beneath the table and around the pockets to absorb sound.
Remember, patience and precision are key when building a DIY pool table. Take time to address each issue methodically for a smooth game. Seek advice when needed.
DIY Pool Table FAQs
Get answers to all your DIY Pool Table FAQs in one place! Learn how to build, maintain, and customize your own pool table at home.
What is a DIY pool table?
A DIY pool table is one that you build yourself, including both the design and construction. It's a personalized version of a pool table, made to fit your space and preferences. You'll need various materials like rail cushions, pockets, playfield, cloth, and legs, and tools such as a saw, drill, and staple gun.
How do I choose the right size for my DIY pool table?
The size of your DIY pool table should be based on the available space in your room. Standard sizes range from 6-foot to 9-foot long. An 8-foot table, which is 8 feet long by 4 feet wide, is commonly recommended for home use. Ensure your room is at least 7 feet longer and wider than the table's dimensions.
Can I use materials other than slate for the surface?
Yes, you can use MDF (Medium Density Fiberboard) as an alternative to slate for your pool table surface. MDF is lighter and less expensive but may need to be replaced every few years, especially in humid environments.
What are the steps to build a DIY pool table?
To build a DIY pool table, start by preparing materials and tools. Make a design plan, determine the table and room dimensions, construct the legs, build the frame, install the surface, build railings, felt the surface, and add finishing touches like pockets and cushions.
Is building a DIY pool table difficult?
Building a DIY pool table is a challenging project that requires advanced woodworking skills, specialized tools, and a good understanding of the game's dimensions and specifications. It's a rewarding task for those with the necessary skills and patience.
Conclusion:
In conclusion, building a pool table from scratch can be a rewarding and satisfying DIY project. By following the steps outlined in this guide, you can build a custom pool table that fits your space and style perfectly. So, why not try making your own pool table today?


