Building a DIY shed can be a rewarding and practical DIY project, whether you're looking for additional storage space or a backyard workshop. This guide will walk you through the process of constructing a shed, from laying the foundation to installing the roof, doors, and windows. With proper planning and the right materials, you can build a sturdy, functional, and aesthetically pleasing shed in your backyard.
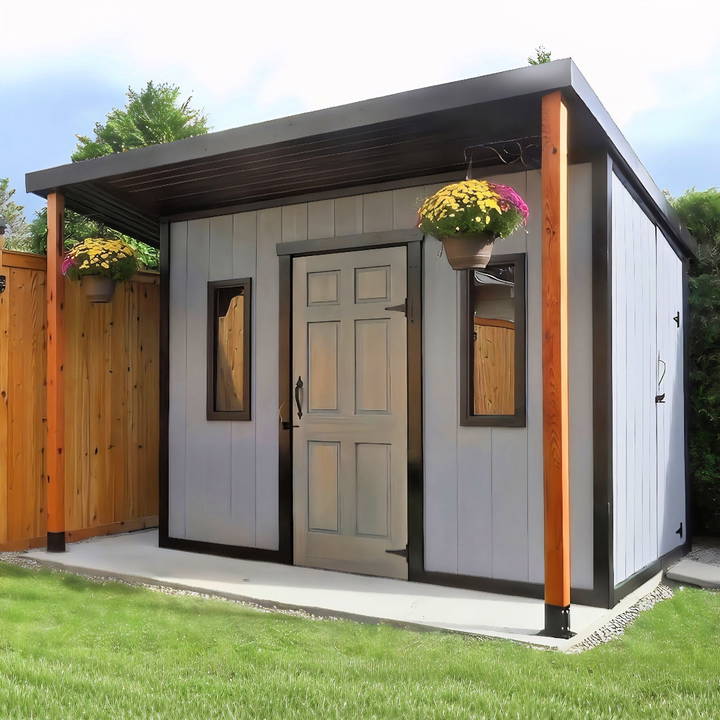
Step by Step Instructions
Learn how to build a shed with our detailed step-by-step instructions. From planning and design to final details, we've got you covered. Perfect for DIYers!
Step 1 - Plan and Design Your Shed
Before you begin building, it's essential to have a clear design and layout for your shed. Consider what you'll be using the shed for and how much space you'll need.
- Size and Space Considerations: Think about the size of your shed based on the available space in your yard and its intended use. Common shed sizes range from small 6x8 ft structures to larger 10x12 ft options, with varying heights.
- Functionality: A well-designed shed should meet your storage needs. For instance, if you need to store gardening tools, lawnmowers, or bicycles, consider building a shed with multiple access points, such as a side door or larger double doors.
- Design Preferences: Decide on the type of roof (flat, gable, or sloped), window placements, and door types. You might prefer sliding barn doors for easy access or small windows for natural light.
Consider factors such as drainage, wind exposure, sound insulation, and any unsightly views you want to block. Proper planning ensures that your shed fits your needs while enhancing the look of your backyard.
Step 2 - Laying the Foundation
A solid foundation is key to ensuring the longevity of your shed. Concrete is a common foundation choice, as it provides a durable and level surface that can withstand weather changes.
Preparing the Ground
- Clear the Area: Remove any vegetation, rocks, or debris from the area where you'll place your shed.
- Mark the Layout: Use stakes and string to outline the size of your shed on the ground. Ensure the layout is square by measuring diagonally across the corners—both measurements should be equal.
- Dig Out the Grass: Once the layout is marked, dig out about 6-8 inches of soil to prepare for the concrete slab.
Building the Frame and Adding Gravel
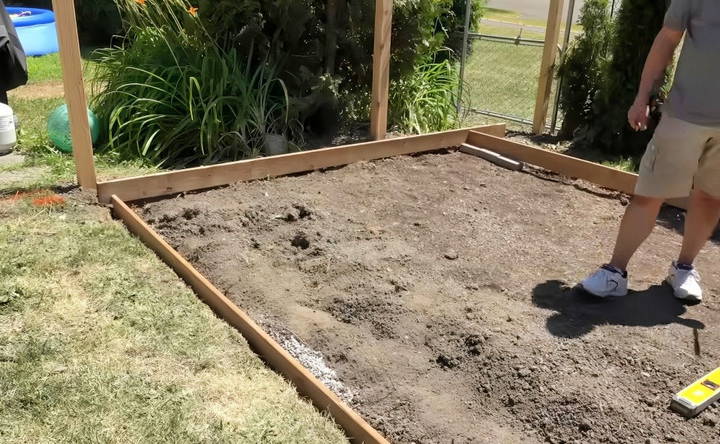
- Build a Frame: Use treated lumber (2x4s or 2x6s) to build a rectangular frame around the outline of your shed.
- Level the Frame: Ensure the frame is level. You can use a long level or a laser level to check this.
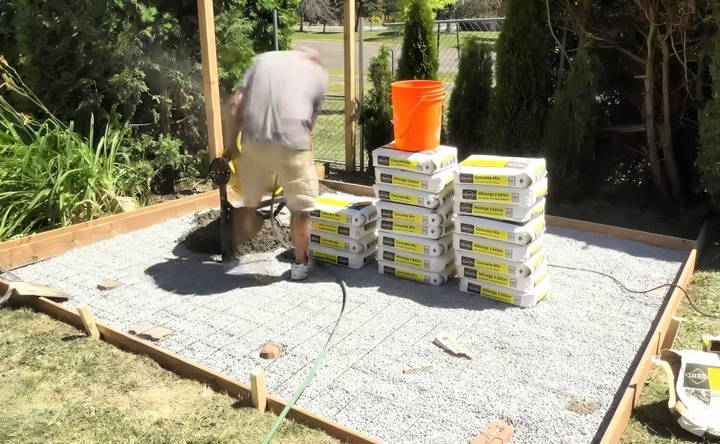
- Add Gravel for Drainage: Fill the dug-out area with gravel. This provides good drainage and prevents water from pooling under your shed. Spread the gravel evenly and tamp it down to build a solid base.
Pouring the Concrete Slab
- Prepare for the Concrete: Mix the concrete according to the manufacturer's instructions. A concrete mixer can make the job easier, but you can also mix by hand.
- Pour the Concrete: Pour the concrete into the frame, spreading it evenly across the entire area.
- Smooth and Level: Use a long, straight 2x4 to screed the surface, ensuring the concrete is level. Once the concrete is spread, use a trowel to smooth the surface and give it a finished look.
- Let it Cure: Allow the concrete to set for at least 24-48 hours before proceeding with construction.
Step 3 - Framing the Shed Walls
With the foundation ready, it's time to start building the shed's frame.
Gathering Materials
- Pressure-treated lumber for the bottom plate (to prevent moisture damage).
- Standard 2x4 lumber for wall framing.
- Nails or screws for fastening the frame together.
Wall Construction
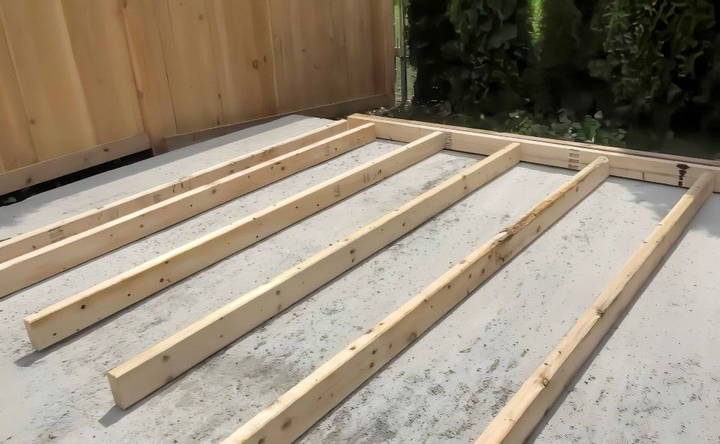
- Build the Bottom and Top Plates: Cut the bottom and top plates for each wall. Mark where the wall studs will be placed—typically every 16 inches.
- Cut and Attach Wall Studs: Cut the wall studs to the appropriate height (e.g., 8 feet for an 8-foot wall). Attach them to the top and bottom plates using screws or nails, ensuring they are spaced evenly.
- Assemble the Wall Frames: After attaching the studs, your wall frames are ready to be stood up. Begin with one wall, and use braces to hold it upright while you attach the remaining walls.
- Square the Corners: Ensure each wall is square by checking the diagonal measurements. Adjust as necessary before securing the walls together.
Adding the Shed Skin
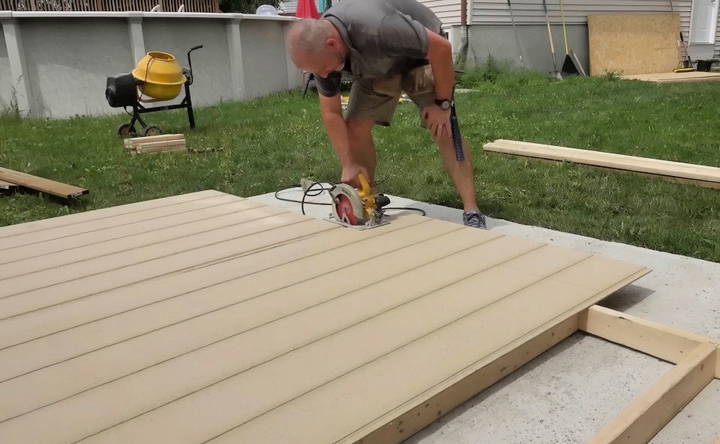
Once your walls are framed, it's time to attach the exterior sheathing or “skin” to give the shed structure its form. You can use plywood or oriented strand board (OSB) for this.
- Cut the Sheathing: Measure and cut the sheathing panels to fit the dimensions of your walls.
- Attach the Panels: Nail or screw the sheathing to the frame, starting from the bottom and working your way up. Make sure the panels are flush with the edges of the frame.
Step 4 - Framing the Roof
Roof construction is a crucial part of your shed, as it protects the structure from weather elements.
Simple Sloped Roof Design
- Frame the Roof Trusses: Depending on the design, you can build simple trusses using 2x4 lumber. For a sloped roof, the back wall is typically shorter than the front wall to allow for water runoff.
- Attach the Trusses: Once your trusses are ready, attach them to the top of the walls. Space them evenly, about 16 inches apart.
- Add Roof Sheathing: Just like the walls, use plywood or OSB for the roof sheathing. Attach it to the roof trusses with nails or screws.
Step 5 - Installing Roofing
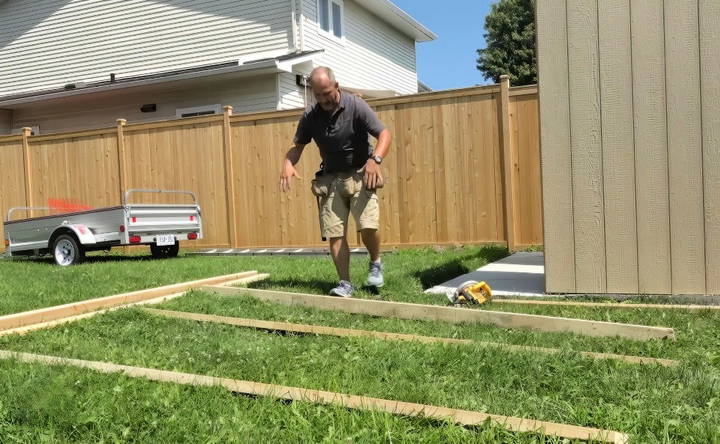
After the roof structure is framed and the sheathing is installed, the next step is to make it weatherproof.
Applying Roof Underlayment
- Install Drip Edge: Place a metal drip edge around the edges of the roof to prevent water from seeping under the shingles.
- Add Underlayment: Apply a water-resistant underlayment, such as roofing felt or a self-adhesive membrane, over the roof sheathing. Start at the bottom and overlap each layer as you work your way up to ensure water runs off.
Installing the Roofing Material
- Add Shingles: Start at the bottom edge and work your way up, nailing shingles in place as you go. Be sure to overlap each row to prevent leaks.
- Install Ridge Cap Shingles: After covering the roof with shingles, install ridge cap shingles along the peak of the roof.
Step 6 - Installing Doors and Windows
Finally, it's time to install your doors and windows, giving your shed both function and character.
Measuring and Cutting Openings
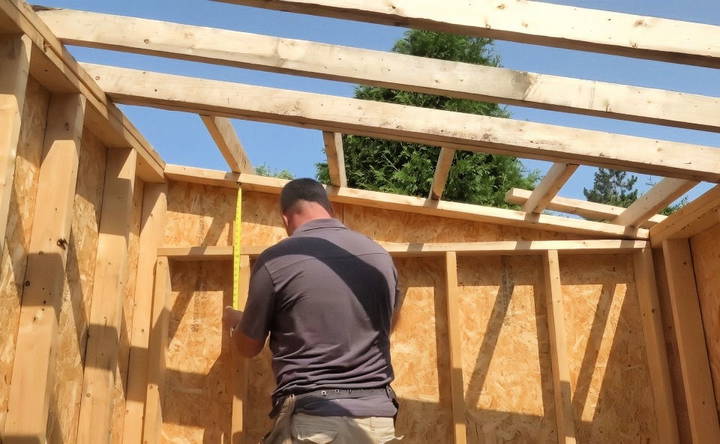
- Cut Door and Window Openings: Measure and cut the openings for the doors and windows in your shed. If you've framed for windows and doors, this should be straightforward.
Installing the Windows
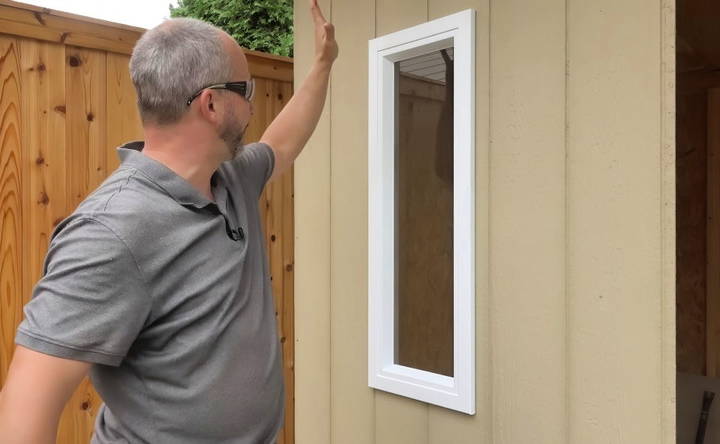
- Set the Windows in Place: Insert the window into the cut opening. Use shims to ensure the window is level and plumb before securing it with screws or nails.
- Seal the Edges: Apply exterior caulk around the edges of the window frame to prevent water from seeping in.
Installing the Doors
- Attach the Door: Align the door with the opening and attach the hinges to the door frame. Ensure the door swings open and closes smoothly.
- Install Handles and Latches: Attach the handles and latches according to the manufacturer's instructions. This adds the finishing touch to your shed door.
Step 7 - Adding Trim and Exterior Finishing
Now that your shed structure is complete, it's time to add some finishing touches. Trim and exterior finishes not only enhance the appearance of the shed but also protect it from the elements by sealing gaps and adding strength to joints.
Installing Trim Around the Doors and Windows
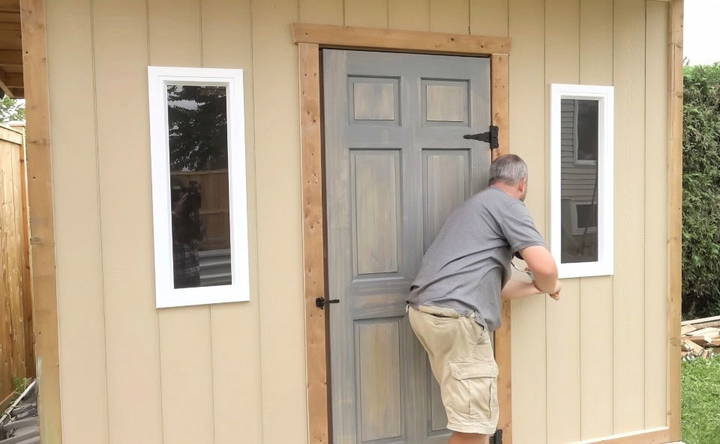
Trim around doors and windows gives the shed a polished and clean look. For added protection and aesthetic appeal, using weather-resistant materials like pressure-treated wood is recommended.
- Measure and Cut the Trim Pieces: Using pressure-treated or rot-resistant wood, cut your trim pieces to size. Typically, trim boards are placed around all edges of the door and windows. Be sure to cut the trim pieces longer than needed and miter the corners for a clean, seamless look.
- Install Vertical Trim First: Start by attaching the vertical side trim pieces around the door and windows. Use exterior screws or nails to fasten the trim securely to the shed's framing.
- Add Top and Bottom Trim: Next, attach the top and bottom pieces of trim. The top piece, or "header trim," should extend beyond the sides to build an overhang, which helps divert rainwater away from the door or window.
- Seal the Edges: Once the trim is installed, apply exterior-grade caulk along the seams to seal any gaps and prevent moisture from seeping in.
Installing Corner Trim
Adding trim to the shed's corners will help cover up any exposed edges of the siding and give your shed a finished, professional look.
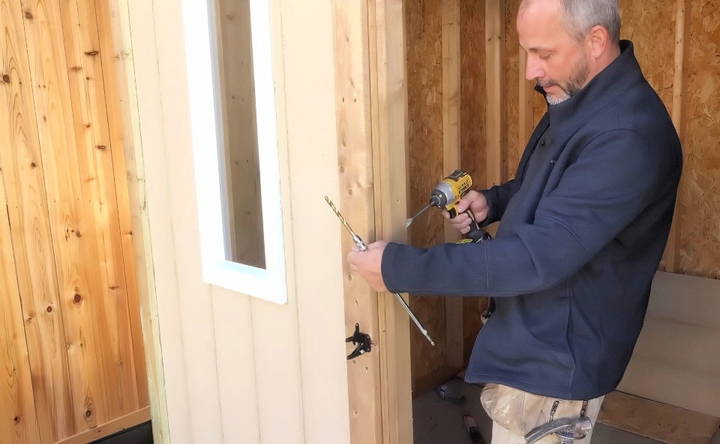
- Measure and Cut Corner Boards: Use pressure-treated 1x4 or 1x6 boards for the corner trim. Cut two boards for each corner—one for each side.
- Attach the Trim: Align one board on one side of the corner and fasten it with screws or nails. Attach the second board on the adjacent side, overlapping the first board at the corner.
- Check for Level: Make sure the trim boards are level and straight before securing them fully.
- Seal the Joints: Apply exterior caulk to seal the joints where the two boards meet to ensure no water gets behind the siding.
Soffits and Fascia Boards
Soffits and fascia boards not only provide a finished appearance to the roofline but also offer protection from weather and pests.
- Install the Soffit Panels: Soffits are installed under the roof overhang. You can use vinyl, aluminum, or wood soffit panels. Attach them to the underside of the roof overhang using screws or nails.
- Attach Fascia Boards: Fascia boards run along the edge of the roof, covering the ends of the roof rafters. Use pressure-treated 1x6 or 1x8 boards for the fascia. Align them with the edge of the roof and attach them securely with nails or screws.
- Seal and Paint: After installing the soffits and fascia, apply caulk along the joints to seal any gaps. You can now paint the trim and fascia to match the rest of the shed.
Step 8 - Painting and Staining
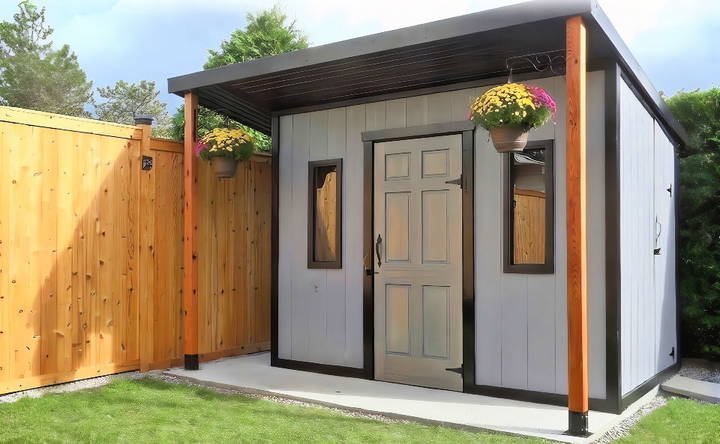
Once your shed is built and trimmed, the final step is to apply paint or stain to protect the wood and give the shed a finished look. This not only enhances the visual appeal but also provides a protective barrier against moisture, UV rays, and other weather conditions.
Choosing the Right Paint or Stain
- Paint: If you prefer a solid, opaque finish, choose high-quality exterior paint. Paint provides a durable and weatherproof finish that protects the wood from the elements.
- Stain: If you prefer a more natural wood look, choose a semi-transparent or solid-color stain. Stain penetrates the wood and offers UV protection while preserving the wood grain.
Prepping the Surface
- Clean the Surface: Before applying paint or stain, ensure that the surface is clean and free of dirt, dust, and any loose particles. You can use a brush or a pressure washer to clean the shed's exterior.
- Sand Rough Areas: If there are any rough spots or splinters on the wood, lightly sand them down to ensure a smooth surface for the paint or stain.
Applying Paint or Stain
- Prime the Wood (Optional): If you are using paint, you may want to apply a primer first, especially if the wood is untreated. Primer helps the paint adhere better and provides an additional layer of protection.
- Apply the Paint or Stain: Use a roller for large areas and a brush for edges and tight spots. Start from the top and work your way down to prevent drips and runs.
- Apply Multiple Coats: For best results, apply two coats of paint or stain, allowing ample drying time between each coat. This ensures even coverage and a durable finish.
Step 9 - Adding Final Details
With the shed structure complete and painted, you can now focus on the final touches. These details will improve both the functionality and aesthetics of your shed.
Installing Gutters (Optional)
If you live in an area with heavy rainfall, installing gutters along the roof can help direct water away from the foundation and prevent erosion around the base of your shed.
- Measure and Cut Gutter Sections: Purchase vinyl or aluminum gutters and cut them to the length of the shed roof.
- Attach the Gutters: Install the gutters along the fascia boards at the edge of the roof. Ensure they are sloped slightly toward the downspouts for proper drainage.
- Install Downspouts: Attach downspouts to the gutters to channel water away from the shed.
Organizing the Interior
Now that the shed is complete, you can begin organizing the interior for optimal use.
- Shelving: Install sturdy shelves along the walls for tools, gardening supplies, and other items.
- Hooks and Pegboards: Use hooks and pegboards to hang tools, hoses, and other equipment to keep the floor space clear.
- Workbench: If you plan to use the shed as a workshop, consider adding a simple workbench for projects and repairs.
Landscaping Around the Shed
To complete the look of your new shed, add some landscaping elements around it.
- Add Mulch or Gravel: Place a border of mulch, gravel, or stone around the shed to prevent weeds from growing near the foundation.
- Install Flower Boxes: Attach flower boxes to the windows or place potted plants around the shed to add a touch of greenery.
- Lighting: Consider installing outdoor lighting near the shed for added visibility and security.
Step 10 - Maintaining Your Shed
Regular maintenance will help extend the life of your shed and keep it looking great for years to come.
Annual Inspections
- Check for Damage: Inspect the exterior of the shed once a year for any signs of damage, such as cracks in the siding, loose shingles, or gaps in the trim. Make any necessary repairs to prevent water damage or pest infestations.
- Reapply Paint or Stain: Depending on your climate, you may need to reapply paint or stain every few years to maintain the protective finish.
Keep the Shed Clean
- Sweep and Clean: Keep the interior of the shed clean by sweeping it out regularly. Remove any clutter to prevent pests from making a home inside.
- Organize: Ensure that all tools and equipment are stored properly on shelves, hooks, or racks to keep the shed neat and organized.
Step by Step Video Tutorial
Conclusion
Building a shed from scratch is a satisfying project that adds both functionality and aesthetic value to your property. By following this comprehensive guide, you'll be able to plan, construct, and finish a shed that meets your storage needs and withstands the elements for years to come. From laying the foundation and framing the walls to installing the roof and adding the finishing touches, each step brings you closer to having a custom-built shed that you can be proud of.
With a little time, effort, and attention to detail, your shed will become a valuable addition to your backyard, providing storage space, a workshop, or even a cozy hideaway for years to come!
FAQs About Building a Shed
Building a shed can raise several questions. Here's a helpful FAQ section to address common concerns and provide additional insights to enhance your project.
A concrete slab is the most durable option, providing a stable base and preventing water damage. However, if you prefer flexibility, consider concrete piers or a gravel foundation, especially for smaller sheds or uneven terrain.
While 2x4 lumber is standard for framing, you can use metal studs for increased durability. Just ensure that your framing material can withstand the local climate and weight of the structure.
If your shed is on uneven ground, use concrete footings or piers to level the foundation. Adjustable deck blocks can also help, allowing you to raise one side of the shed for a stable base.
Seal the edges where the shed meets the foundation using silicone caulk or a weatherproof sealant. Ensure proper drainage around the foundation, and install gutters to divert rainwater away from the base.
If you plan to use the shed as a workspace or for temperature-sensitive storage, insulation is crucial. Use foam board or fiberglass insulation for walls and roof. Also, consider adding a vapor barrier to prevent moisture buildup.
Ensure your window and door openings are properly reinforced with headers to support the weight above. Use king studs on either side of the opening, and install the doors and windows level and plumb.
For a durable and easy-to-install option, use asphalt shingles or corrugated metal roofing. Ensure your roof has sufficient slope for water drainage, and use roofing underlayment for added waterproofing.
Building codes vary by location. Check with your local municipality to determine if you need a permit for your shed, especially if it's larger than 120 square feet or includes electrical wiring.
At a minimum, you'll need a circular saw, drill, hammer, level, tape measure, and a framing square. Power tools like a miter saw and nail gun can speed up construction significantly.
Perform an annual inspection to check for damage, clean the gutters, and repaint or restain the exterior every 3-5 years to protect it from weathering. Ensure that doors and windows remain functional and watertight.


