Building a durable and stylish DIY wood awning frame can enhance the look and functionality of your outdoor spaces. This guide provides DIY wood awning frame instructions that are easy to follow. You will learn about the materials needed, including wood, screws, and tools like saws and drills. Assemble the pieces with care to ensure a sturdy frame that lasts through different weather conditions.
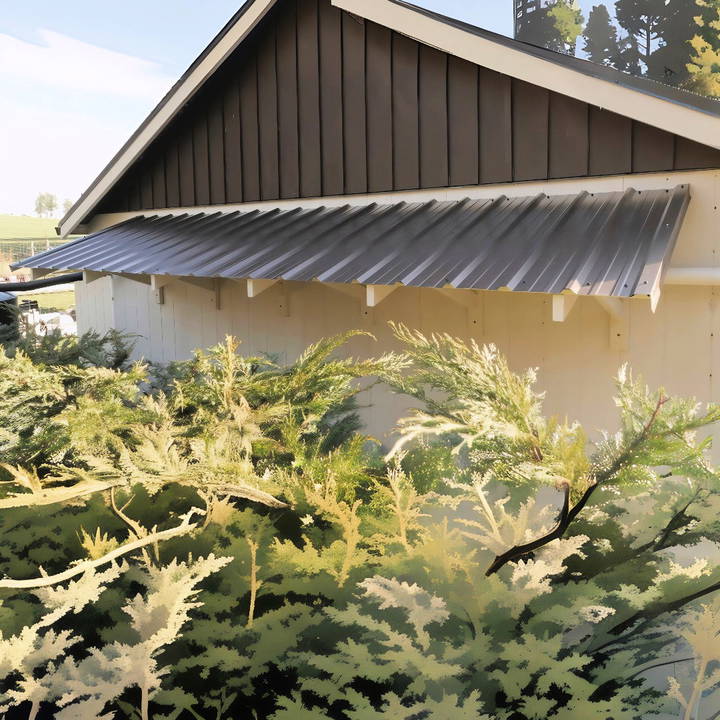
The step-by-step guide covers measuring, cutting, and securing the wood pieces. You'll also find tips on customizing the awning frame to fit your specific space. By following these simple instructions, you'll save money and enjoy the satisfaction of completing a DIY project.
Read on to find out more details on each step and gather useful tips for your wood awning frame project.
Materials Needed
Before we get into the steps, let's discuss the materials you'll need:
Lumber
- 2x4's: These will serve as the primary structure of your awning. You'll need seven 2x4's for the design described here.
- 1x4's: Used for roof strapping, adding minimal additional weight.
Fasteners
- 5/16 by 4-inch GRK screws: These structural washer head screws are strong and high-quality, ideal for this project.
Tools
- Miter saw: For cutting accurate angles.
- Drill press: For drilling pilot holes.
- Impact driver: To drive screws into the wall studs.
- Clamps: Useful during assembly to hold pieces in place.
- Adjustable angle gauge: Useful for drawing precise angles.
- Pencil and ruler: For marking cut lines.
Step by Step Instructions
Learn how to build a wood awning frame with our step-by-step guide, from cutting lumber to final installation. Perfect DIY project for any skill level!
Designing the Awning
The design I settled on for the awning includes:
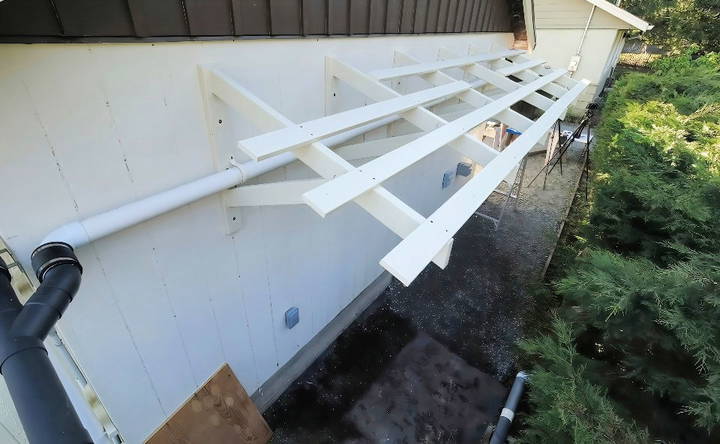
- A metal roof with a 20-degree slope.
- 2x4's on the flat, screwed into the studs behind the sheathing.
- Vertically oriented 2x4 rafters for added support.
- Efficiency in materials to minimize waste.
Cutting the Lumber
Learn how to precisely cut lumber for rafters, braces, and wall attachments in this detailed, step-by-step guide on cutting the lumber.
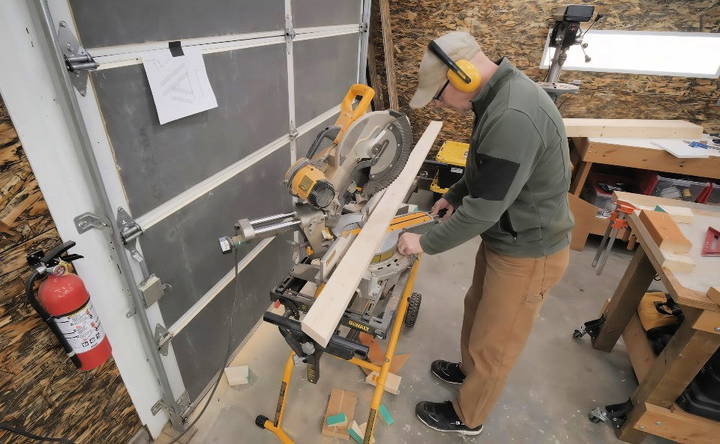
Step 1: Cut Part B (Rafter Component)
- Each 2x4 yields two part B pieces.
- Cut angle: 20 degrees on both ends.
Step 2: Cut Part C (Brace Component)
- Cut three part C pieces from an eight-foot length.
- Cut angles: 20 degrees on one end and 50 degrees on the other.
Step 3: Cut Part A (Wall Attachment)
- Cut three Part A pieces from a 2x4, with 20-degree bevels on both ends.
Assembling the Awning Brackets
Discover how to assemble awning brackets with steps on preparing the drill press, making a jig, and assembling the frames. Expert guide for DIY enthusiasts!
Step 4: Prepare the Drill Press
- Drill three pilot holes in part A using a 3/16-inch bit. This helps ensure your screws go straight into the wall studs.
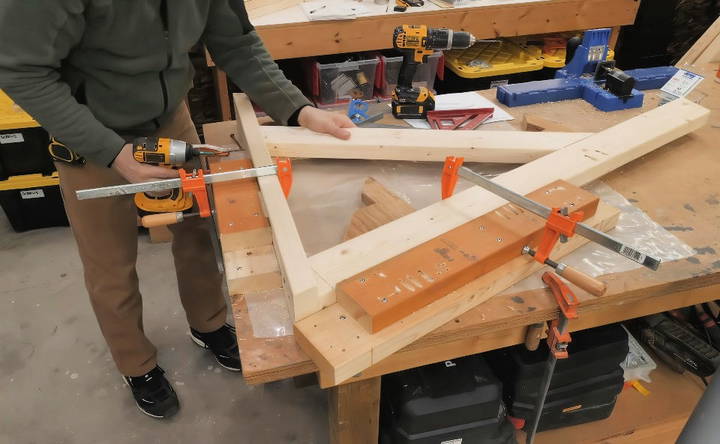
Step 5: Make a Jig
- To make sure all your brackets are identical, build a jig using scrap 2x4's.
- This jig should hold your pieces in place while you attach them.
Step 6: Assemble the Frames
- Align part B to part A, marking where they meet for the pocket holes.
- Use wood glue and screws to secure part B to part A.
- Align and attach part C to the structure using screws and wood glue.
Expert Tip: Using a pocket hole jig allows for strong joints. Place two screws on one side and one on the other for each joint.
Priming and Painting
Master the priming and painting process step-by-step. Learn how to apply primer and paint effectively in steps 7 and 8 for a flawless finish.
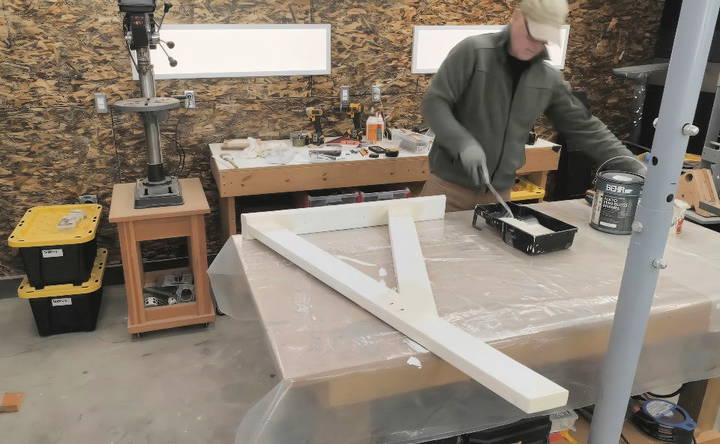
Step 7: Apply Primer
- Use a brush for corners and a roller for flat surfaces.
- Ensure you add an extra coat on the cut ends.
Step 8: Apply Paint
- Once the primer dries, apply two coats of semi-gloss enamel paint. This protects the wood and enhances its longevity.
Installing the Awning
Learn how to install an awning with our step-by-step guide. Remove existing fixtures, find wall studs, and attach the awning brackets easily.
Step 9: Remove Existing Fixtures
- If there's any existing plumbing or fixtures, such as rainwater pipes, remove them temporarily.
Step 10: Find Wall Studs
- Locate the studs in the wall where the awning will be attached. Ensure you mark these correctly.
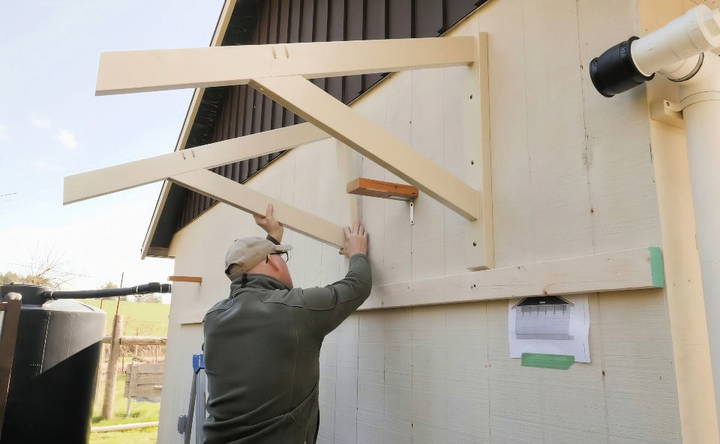
Step 11: Attach the Awning Brackets
- Mark the wall: Measure and mark where the bottom of the awning brackets will land.
- Drill pilot holes: Use previously drilled pilot holes as guides for attaching the brackets to the wall studs.
- Attach brackets: Secure each bracket with three 5/16 by 4-inch GRK screws.
Mounting the Roof
Learn how to mount the roof by installing 1x4 strapping and adding corrugated sheets in simple, step-by-step instructions.
Step 12: Install 1x4 Strapping
- Square the ends: Use plywood blocks to maintain square alignment.
- Attach strapping: Secure the one by fours across the brackets.
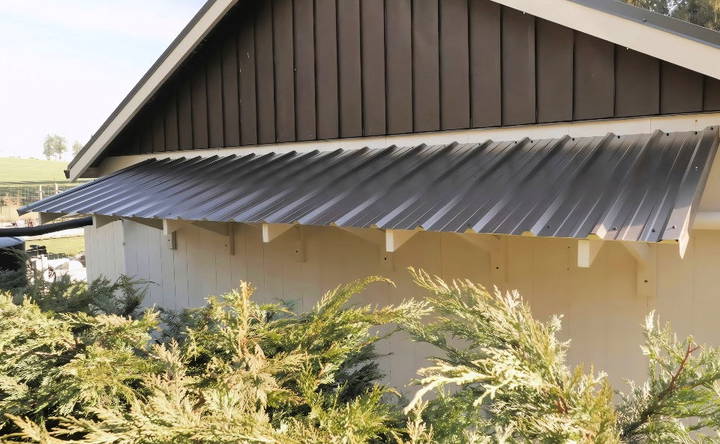
Step 13: Add Corrugated Sheets
- Cut corrugated sheets to the desired length (usually 48 inches for this project).
- Position the panels: Ensure the first panel is square.
- Screw in place: Use ¾-inch roofing screws with rubber gaskets to secure the sheets to the strapping.
Professional Insight: Ensuring the first panel is square is crucial. Any misalignment will carry through the rest of the installation.
Final Touches
Complete your project with ease! Learn how to reinstall fixtures and inspect for final touches in our step-by-step guide.
Step 14: Reinstall Fixtures
- Reattach any plumbing or fixtures that were removed.
- Ensure everything is secure and functional.
Step 15: Inspect and Fine-Tune
- Check for any gaps or misalignments. Make adjustments as needed.
- Fill any holes made by pocket screws with exterior caulk.
Customization Options
Add a personal touch to your wood awning frame to enhance its aesthetic appeal and functionality. Here are some creative ways to make it uniquely yours:
- Choose Your Style: Start by selecting a style that complements your home. Whether you prefer a traditional look or a modern edge, the design of your awning should align with your home's architecture. For a classic feel, consider a slatted design that allows light to filter through. For a sleek, contemporary vibe, opt for a solid panel design.
- Pick the Perfect Stain or Paint: The color of your awning frame can transform the look of your outdoor space. Choose a stain that highlights the natural beauty of the wood, or select a paint color that matches or contrasts with your home's exterior. Remember to use outdoor-grade products to protect your frame from the elements.
- Incorporate Decorative Elements: Add decorative brackets or corbels for an extra flair. These elements not only serve as support for your awning but also add a touch of elegance. You can find various designs at your local hardware store or have them custom-made.
- Functional Add-Ons: Consider integrating features that enhance the usability of your awning. Install hooks for hanging plants or lights to build a cozy atmosphere. If you enjoy outdoor cooking, set up a space to store your grilling tools.
- Adjustable Features: For added versatility, include elements that can be adjusted based on the weather. Removable side panels or retractable shades can provide more or less coverage as needed, allowing you to enjoy your outdoor space in various conditions.
- Personal Touches: Finally, make the space your own with personal touches. Outdoor curtains can add privacy and softness to the area. String lights or lanterns can provide ambient lighting for evening gatherings. Add outdoor furniture that reflects your style and builds a welcoming environment for relaxation or entertainment.
Customize your wood awning frame for both function and style. Plan ahead for a cohesive design that boosts your outdoor space. With added comfort and style, make it an extension of your home.
Troubleshooting Common Issues
Building a wood awning frame can be a rewarding DIY project, but sometimes you might encounter a few hiccups along the way. Here's a guide to help you troubleshoot some of the most common issues you may face, ensuring your project stays on track:
- Warped or Twisted Wood: Wood can sometimes warp or twist, especially if it's been stored improperly or exposed to moisture. To avoid this, select straight, dry lumber from the store and store it flat until you're ready to use it. If you do find a warped piece, you can try to straighten it by wetting it and applying weight or clamps as it dries.
- Weak Joints: Joints are crucial to the stability of your awning frame. If they're weak, your structure won't be secure. Make sure to use the right type of joints for your design, and reinforce them with metal brackets or plates if necessary. Always pre-drill holes to prevent the wood from splitting when inserting screws.
- Leaking Roof: If your awning includes a roof, it's essential to ensure it's watertight. Use quality roofing materials and sealants, and make sure to overlap the roofing panels correctly. If you notice a leak, inspect the seals and overlaps for any gaps that need to be filled or covered.
- Inadequate Support: An awning frame needs to be well-supported to handle weight and wind. If your frame is sagging or feels unstable, check that you have enough support beams in place. You may need to add more or use thicker lumber for better strength.
- Peeling Paint or Stain: Exposure to the elements can cause paint or stain to peel. To prevent this, use products designed for outdoor use and prepare the wood surface properly before applying them. If peeling occurs, sand the area down to the bare wood and reapply the finish.
- Difficulty in Assembly: Sometimes, assembling the awning frame can be more challenging than expected. To make assembly easier, label all your pieces before you start building and follow the instructions carefully. If a piece doesn't fit, don't force it—check if it's the correct piece and if it's oriented the right way.
Stay aware of common issues and how to solve them to better handle any wood awning frame project challenges.
FAQs About How to Build a Wood Awning Frame
Learn how to build a wood awning frame with our FAQs. Get expert tips, materials needed, and step-by-step instructions for your DIY project.
Consider the purpose of your awning—whether it’s for a small patio or a larger deck.
Measure the width and length of the area you want to cover.
Decide on the amount of coverage you want, whether full shade or partial.
Take into account the height off the ground and any obstructions.
Use pressure-treated lumber as it is resistant to rot and insects.
Apply a primer and paint to all wooden parts before assembly to protect against moisture.
Ensure all connections are securely fastened with appropriate hardware.
Yes, you can customize your awning frame by:
Choosing different styles of brackets for aesthetic appeal.
Selecting a roofing material that complements your home’s exterior.
Adding decorative touches such as trim or molding after the main structure is built.
Locate the studs in your house's exterior wall where the awning will be attached.
Use a ledger board as a stable mounting surface for the awning frame.
Secure the ledger board to the studs with long screws that penetrate into the studs.
Mount the awning frame to the ledger board using heavy-duty brackets and screws.
Corrugated metal panels are durable and provide excellent protection from the elements.
Polycarbonate sheets offer a lightweight and transparent option.
Canvas or outdoor fabric can be used for a softer look and is available in various colors and patterns.
Wooden slats or bamboo can build a natural and decorative effect while providing shade.
Conclusion
Building a DIY wooden awning frame might seem daunting, but by breaking it down into manageable steps and using quality materials, it becomes an achievable project. Not only did I build a functional outdoor covered space, but I also learned a great deal along the way.


