Building your own outhouse may seem like a daunting task, but with some planning and basic materials, it's a project that anyone can tackle. Whether you're looking to add one to an off-grid property, a remote campsite, or even just as a backup bathroom for your home, making a functional and even beautiful outhouse is entirely achievable. In this comprehensive guide, you'll learn how to build a DIY outhouse step-by-step, including everything from site preparation to finishing touches that will enhance both its functionality and aesthetics.
What is a DIY Outhouse?
An outhouse is a simple outdoor toilet. Typically, it's a small structure built over a hole in the ground, designed to collect waste and naturally decompose it. Modern DIY outhouses can vary from basic structures to well-designed, efficient, and comfortable facilities. In this guide, we'll focus on constructing a practical, long-lasting, and aesthetically pleasing outhouse, based on the methods shared by experienced builders.
Essential Materials for Building an Outhouse
Before starting your build, gather the necessary materials to ensure a smooth construction process. Here's a list of key materials you'll need:
- Treated Wood: Pressure-treated lumber for the base and framing, to withstand moisture and prolong the structure's life.
- Plywood: For walls and other structural elements.
- Foam Seat: To keep the seat warm and comfortable, especially in colder climates.
- Polycarbonate Roofing: Clear sheets for the roof, allowing natural light to enter.
- Deck Screws: For securing the frame and attaching walls.
- Rubber Gasket Roofing Screws: To attach the polycarbonate roofing.
- Waterproofing Materials: Plastic sheeting or similar to line the interior and prevent moisture absorption.
- Paint or Stain: To weatherproof and finish the exterior. Black is a popular choice for blending into the environment.
Step by Step Instructions
Learn how to build a DIY outhouse with our step-by-step guide. From site prep to finishing touches, ensure comfort and longevity with our tips.
Step 1 - Pre-fabrication in a Controlled Environment
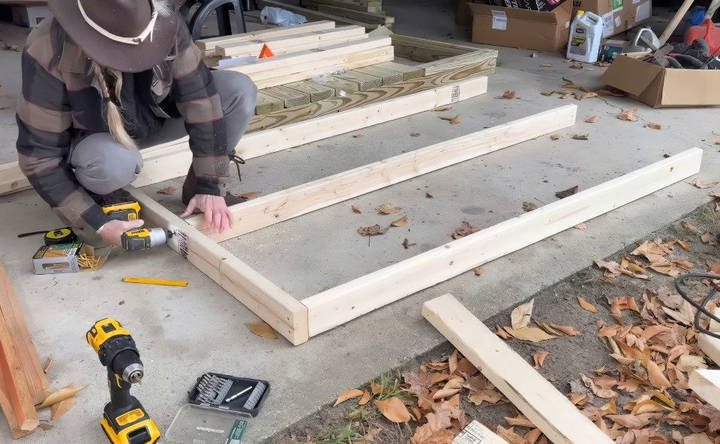
A key tip for building your outhouse efficiently is to pre-fabricate as much as possible at home before transporting it to the site. Having a flat, controlled workspace with access to power tools makes construction faster and easier. You can build the base, walls, and roof components before assembling them on-site.
- Cutting and Assembling the Base: Start by constructing the base with treated wood, which resists rot and water damage. Assemble the decking to allow small gaps for drainage, particularly if the lumber is still green and will shrink over time.
- Walls: Construct the walls separately, bracing them to ensure they are strong. You can pre-install some of the interior plywood walls for quicker assembly later.
- Roof: Cut your polycarbonate roof sheets to size using tin snips and prepare them for installation with gasket roofing screws.
Step 2 - Selecting and Preparing the Site
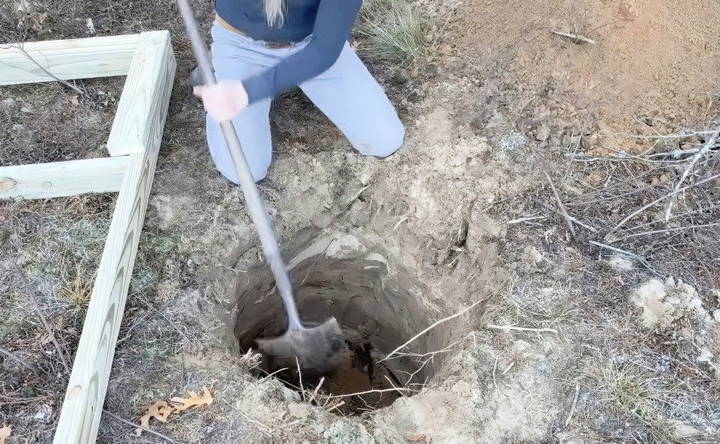
The location of your outhouse is crucial. Choose a spot that's at least 100 feet away from any water sources, such as wells, lakes, or streams, to avoid contamination. It should also be in a spot that's convenient but offers some privacy.
- Digging the Hole: Depending on the size of your outhouse and the soil type, you'll want to dig a hole that's 4 to 5 feet deep. Sandy soil may require extra support to prevent collapse, while clay or rocky soil may make digging more difficult. Always aim for a deep enough hole to allow for prolonged use before needing to relocate or empty the waste.
Step 3 - Assembling the Outhouse On-Site
Once the hole is dug, transport the pre-fabricated parts of your outhouse to the location.
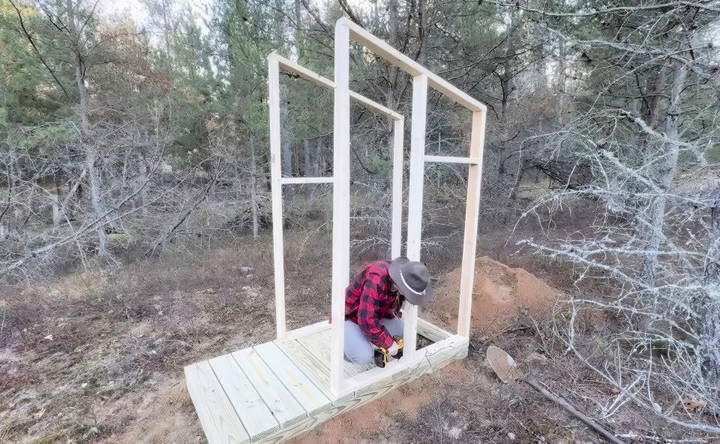
- Placing the Base: Position the base over the hole, making sure it is level. If you forget your level, you can eyeball it, but it's best to use a tool for accuracy. Adjust the base by adding dirt under the sides as needed.
- Attaching the Walls: Set up the walls on top of the base and secure them using deck screws. It's essential to stabilize the structure, so consider adding horizontal braces or a 1x6 board across the front for extra support.
- Installing the Roof: Attach the clear polycarbonate roof to allow natural light to enter, ensuring you install it with rubber gasket roofing screws to prevent leaks.
Step 4 - Finishing Touches for Comfort and Longevity
Your outhouse doesn't have to be an uncomfortable experience. Simple upgrades can make it more pleasant and increase its longevity.
- Foam Seat: One of the most important features is a foam seat. Unlike plastic, foam stays warm in cold weather and is more comfortable for long periods. Make sure to bevel the edges of the foam for smoothness.
- Waterproofing: To prevent urine from absorbing into the wood and making odors, line the interior around the seat with plastic or waterproof materials. This can be easily stapled into place.
- Lighting: Install a motion-activated solar light for nighttime use. This eliminates the need for electrical wiring and ensures the area is illuminated whenever someone approaches the outhouse.
- Ventilation: Though not strictly necessary, adding a small vent or solar-powered fan can help reduce odors. However, regular use of sawdust or wood ashes after each use will keep smells under control without needing ventilation.
Step 5 - Aesthetic Choices
Your outhouse doesn't have to be an eyesore. In fact, it can blend beautifully with the environment.
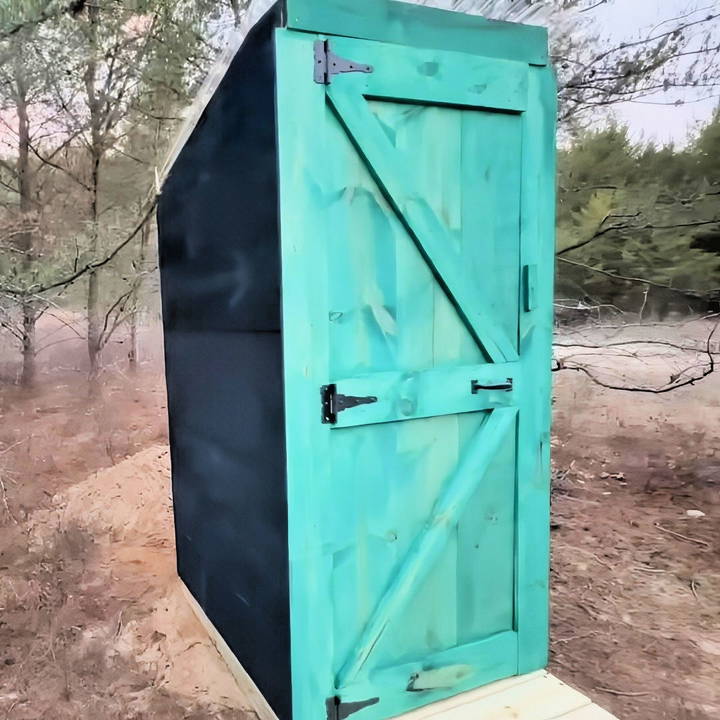
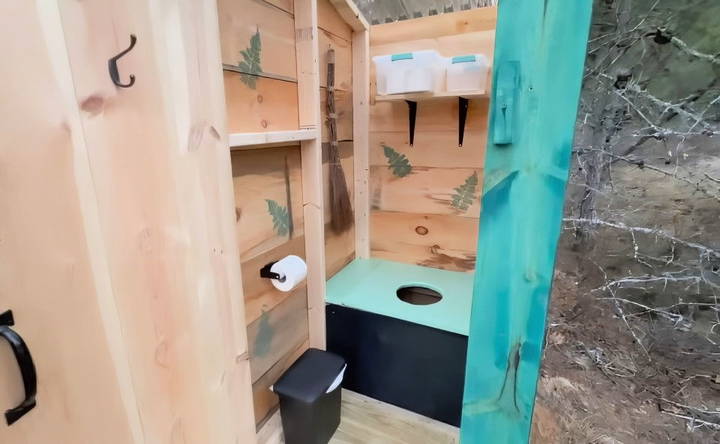
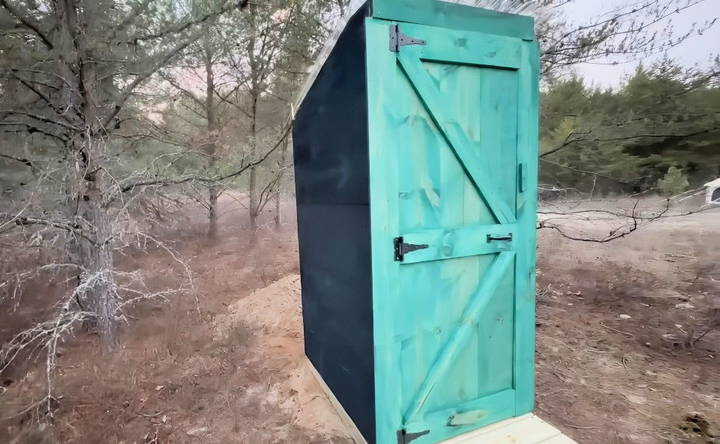
- Painting and Staining: Many builders prefer to paint their outhouse black to blend into the natural landscape. This simple color choice makes the structure visually disappear into the shadows, which is great for off-grid living or remote campsites.
- Green Door: If you want a bit of contrast, a green door can provide a natural pop of color that complements outdoor environments, particularly in wooded areas with lots of foliage.
- Decorative Touches: Even though it's a simple structure, you can add personal touches like rustic wood signs, hanging hooks for coats, and natural scents (like cinnamon-scented brooms or pinecones) to enhance the overall experience.
Maintenance and Relocation
Efficiently manage maintenance and relocating of outhouses. Professional emptying and relocation services ensure smooth operations.
Emptying or Relocating the Outhouse
An important consideration when building your outhouse is planning for its long-term use. Eventually, the hole will fill up, and you'll either need to relocate the outhouse or find a way to empty it.
- Relocating: To make moving easier, construct the outhouse on skids or include provisions like hooks that allow it to be dragged by a vehicle or skid steer. This is particularly useful if you plan to move the outhouse every few years as the hole fills up.
- Emptying the Hole: If you're in an area where digging a new hole isn't possible or practical (such as in permafrost conditions), consider installing a 55-gallon barrel underneath that can be emptied by a septic truck. This system is commonly used in national parks or remote areas where digging deep isn't feasible.
Tips for Reducing Smell and Waste
The key to a good outhouse experience is minimizing unpleasant smells and waste buildup. Here are some proven tips:
- Sawdust or Wood Ashes: After each use, sprinkle a small amount of sawdust or ashes from a wood stove into the hole. This helps cover the waste, reduce odors, and speed up the composting process.
- No Toilet Paper in the Hole: To prolong the life of your outhouse, keep all toilet paper and other paper products out of the hole. Instead, provide a waste bin lined with a plastic bag to dispose of paper separately.
- Natural Air Fresheners: Pinecones or cinnamon-scented items can help keep the outhouse smelling fresh. Avoid chemical air fresheners, as they can overpower the natural smells and potentially harm the composting process.
Conclusion
Building your own outhouse is a rewarding and relatively simple project that provides a valuable amenity for off-grid living, campsites, or remote properties. By following these steps, you'll have a sturdy, functional, and even stylish outhouse that will last for years. With proper planning, the right materials, and a few finishing touches, your DIY outhouse can be both a practical and enjoyable addition to your outdoor space.
This guide provides everything you need to know to build a DIY outhouse, including essential materials, construction steps, and tips for maintenance. Whether you're off-grid or simply looking for an extra facility, your outhouse can be more than just a basic toilet—it can be a comfortable, durable, and beautiful structure.
FAQs About DIY Outhouse Construction and Maintenance
Discover answers to FAQs about DIY outhouse construction and maintenance. Learn tips, materials, and upkeep for hassle-free projects.
The hole should be at least 4-5 feet deep. For sandy or unstable soil, deeper holes may be needed, and some support like barrels or cribbing can prevent collapse. A depth of up to 6 feet is suitable to ensure longevity before needing to relocate the structure.
Sprinkle sawdust or wood ashes after each use to help cover waste and reduce odors. You can also add scented items like cinnamon brooms or pinecones. Ventilation, though optional, can also help.
To waterproof the interior, staple plastic or use rubberized undercoating around the lower parts of the walls and around the seat area. This prevents urine from absorbing into the wood, which can cause long-term odor issues.
If digging a new hole isn't feasible, you can install a 55-gallon drum or vault to collect waste, which can be pumped out by a septic truck. Alternatively, move the outhouse over a new hole when the old one is filled.
Use a foam toilet seat to stay warm in winter, as it quickly reaches body temperature. You can also line the interior walls with insulation or plastic to help retain heat.
Use pressure-treated wood for the base to prevent rot and water damage. This material is essential for long-lasting construction, especially when the base is exposed to the elements.
Regularly add sawdust or wood ashes to reduce waste odors and keep flies away. Empty the waste or relocate the outhouse every few years, depending on usage, to prevent overflowing.
While not essential, adding a vent (or a solar-powered fan) can improve airflow and reduce odors. For colder climates or areas where odor is well-managed with sawdust, a vent may not be needed.
Yes. In sandy or unstable soil, you can use a barrel or reinforced structure to prevent collapse. Another option is to crib the hole with wood to stabilize it. These techniques ensure the hole remains intact over time.
Absolutely! Stain or paint the exterior to blend into the landscape. You can use black paint for a natural look, with contrasting colors like green for the door. Decorative touches such as stamps or artwork can be added inside for a personalized feel.


