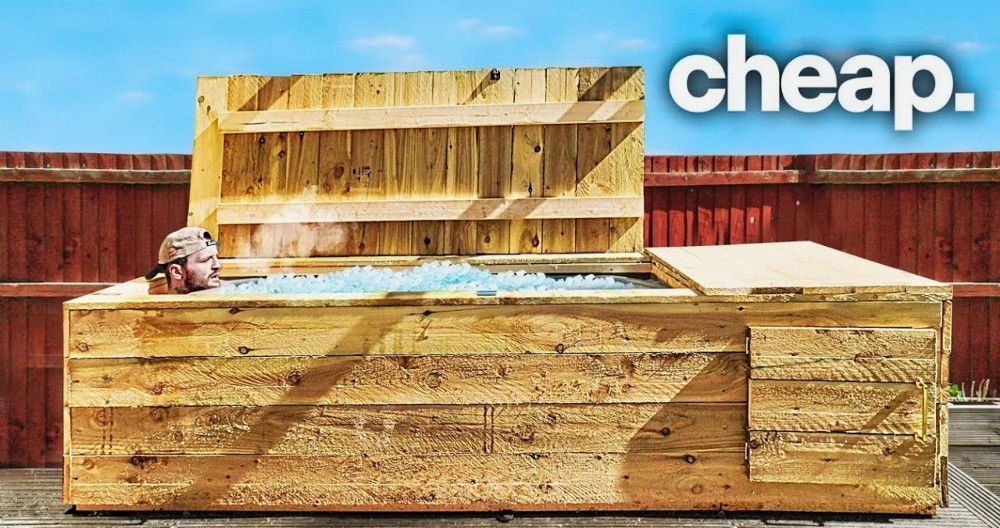
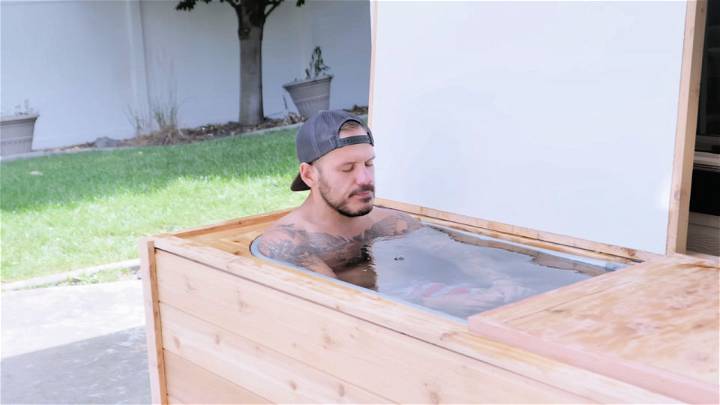
As someone always hunting for the next DIY challenge and a fervent believer in self-care, the idea of building a cold plunge pool struck me as the perfect fusion of the two. With influencers and health enthusiasts singing the praises of cold immersion therapy, I was itching to give it a try without shelling out thousands of dollars. My goal? To build a luxe cold plunge pool on a budget, offering the same refreshing experience for significantly less. Here's how I embarked on making my own cold plunge pool, step by step, for under $1,500.
Step by Step Instructions
Learn how to build a budget-friendly DIY cold plunge with step-by-step instructions for gathering materials, constructing the frame, installing the water chiller, and more.
Step 1: Gathering Materials
To construct a durable, insulated, and aesthetically pleasing cold plunge pool at a minimum cost, careful selection of materials was essential. Each material played a pivotal role in ensuring the plunge pool would not only function effectively but also withstand outdoor conditions.
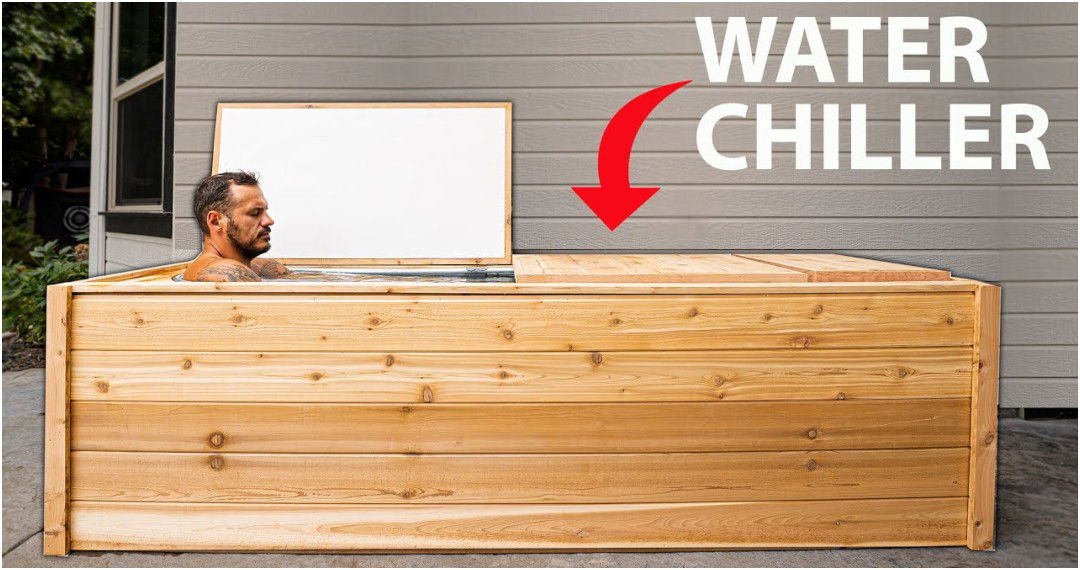
- Lumber and a Horse Trough: I began my project by purchasing lumber ($100) and a horse trough ($165) from the local hardware store. The horse trough served as the base of the plunge pool, while the lumber was necessary for making a supportive frame and aesthetic exterior.
- Pressure-Treated 2x4s: To ensure durability and resistance against moisture, pressure-treated 2x4s were used for the frame.
- Styrofoam Insulation: Opting for thick, moisture-resistant styrofoam insulation ($35) was a no-brainer to maintain water temperature efficiently.
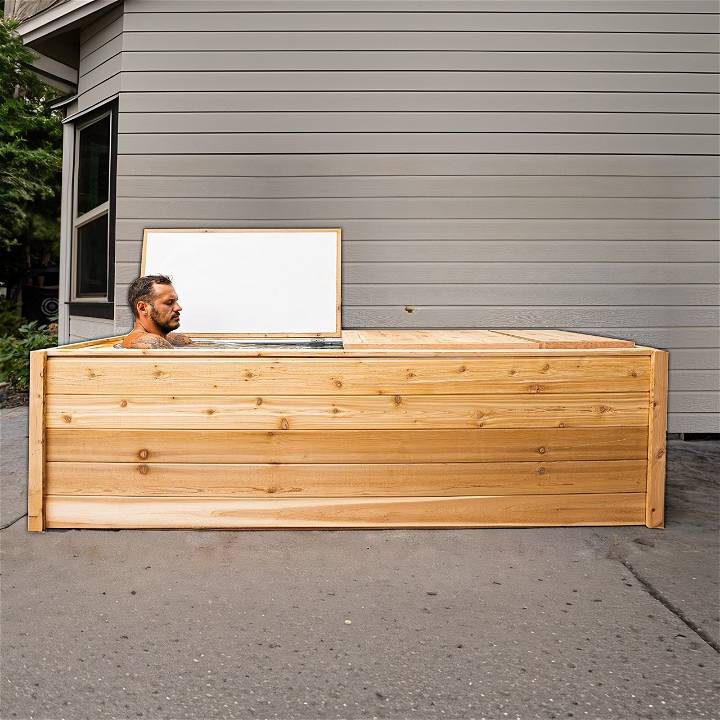
- Cedar Planks: For the exterior finishing, cedar planks ($480) were chosen for their weather resistance and natural beauty.
- A Water Chiller Unit: A crucial component was the water chiller ($340), scored at a discount, which would keep the water at a cold, therapeutic temperature.
Step 2: Constructing the Frame
The frame serves as a skeleton, providing structure and stability to the cold plunge pool. It also needed to accommodate insulation to maintain cold water temperatures.
- Building the Frame: I constructed a frame around the horse trough to support the insulation and exterior cladding. This entailed measuring, cutting, and assembling pressure-treated 2x4s to form a sturdy base and sides around the trough.
- Insulation: I then cut the styrofoam insulation to fit snugly around the horse trough within the framed structure. This would help keep the water cold for longer periods and reduce the chiller's workload.
Step 3: Exterior Aesthetics
A cold plunge pool isn't just about functionality; it should also be a statement piece that enhances the beauty of your outdoor space.
- Cladding with Cedar: I covered the frame with horizontal cedar planks, which not only provided a stunning finish but also weather resistance. To ensure tight seams, I sometimes had to adjust the planks by cutting, especially around the curved parts of the trough. The cedar was affixed with a combination of wood glue and pocket screws for a seamless look.
- Lid Construction: For the lid, more cedar planks were used. The lid was not only an aesthetic finish but also functional, acting as insulation and keeping debris out.
Step 4: Installing the Water Chiller
The water chiller is essential for maintaining cold temperatures in the plunge pool, replicating the cold plunge experience without the need for constant ice addition.
- Placement and Setup: After some contemplation on the design, I integrated the chiller inside the pool's frame for a sleek look. This required modifying the frame to house the chiller effectively.
- Plumbing: I connected the chiller using hoses, ensuring a tight fit to prevent leaks. The water chiller I purchased came with a bit of a scare — it initially seemed like a mismatch from what I ordered, but after some troubleshooting, it worked out.
Step 5: Final Touches
Final touches ensure that the cold plunge pool is not only functional but safe and visually appealing.
- Sealing and Weatherproofing: I wrapped the entire structure in a waterproofing sheet (Tyvek) to protect against moisture damage.
- Safety Measures: To address electrical safety concerns, I made sure the pump could be easily unplugged before use, eliminating the risk of electrocution.
The Result and Reflection
surpassing my initial budget by $440, the total cost came to $1,440 — a fraction of the price of luxury models. The process taught me the importance of improvisation, patience, and meticulous planning. The first dip into my DIY cold plunge was exhilarating; it was a rush of endorphins and an immediate sense of achievement. Despite a few hiccups, like the initial panic with the water chiller, the project was a resounding success.
Final Words of Advice
For anyone looking to embark on a similar DIY journey, here are some nuggets of wisdom:
- Research Thoroughly: Understand every aspect of your project and how each component works together.
- Safety First: Especially when dealing with water and electricity, ensure all precautions are in place.
- Be Prepared for Hiccups: Not everything will go according to plan. Adaptability is key.
Building this cold plunge pool was more than just a cost-saving effort; it showcased my passion for DIY and wellness, serving as a symbol of what can be accomplished with creativity, drive, and hard work. It has greatly enhanced my life.
Quality and Safety Considerations for DIY Cold Plunge
Building a DIY cold plunge can be a refreshing and invigorating experience. However, it's essential to prioritize quality and safety to ensure a beneficial and enjoyable practice. Here's a detailed guide to help you set up your cold plunge with care.
Water Temperature
- Ideal Range: The optimal temperature for a cold plunge is between 50°F to 59°F (10°C to 15°C). This range is cold enough to stimulate the body without causing undue stress.
- Consistency Is Key: Maintaining a consistent temperature is crucial. Sudden changes can shock the system, so aim for gradual adjustments when cooling your water.
- Benefits of Consistency: A stable temperature helps your body adapt over time, enhancing the cold plunge's therapeutic effects, such as reducing inflammation and improving circulation.
Safety Precautions
- Avoid Extreme Cold: Water that's too cold can lead to hypothermia. Always use a thermometer to check the temperature before plunging in.
- Time Matters: Limit your time in the cold plunge to no more than 10 minutes. Prolonged exposure can be harmful, especially for beginners.
- Listen to Your Body: If you feel numbness, excessive shivering, or discomfort, it's time to get out. Your body knows best, so heed its signals.
- Supervision: Never cold plunge alone. Having someone nearby ensures help is at hand if you experience any difficulties.
By following guidelines, you can enjoy cold plunge benefits safely. Remember safety first - prepare well and chill responsibly!
Cold Plunge Techniques
Learn the ultimate cold plunge techniques for gradual adaptation and wellness benefits. Master the art of cold exposure with our expert tips.
Gradual Adaptation
1. Start Slowly: If you're new to cold plunges, don't dive straight into icy water. Begin with shorter exposure times and gradually increase as your body adjusts. For instance, in Week 1, Start with 30 seconds. In Week 2, Extend to 1 minute. In Week 3, Aim for 2 minutes. Continue this gradual progression.
2. Controlled Breathing: As you step into the cold water, focus on your breath: - Inhale deeply through your nose. - Exhale slowly through your mouth. - Controlled breathing helps manage the initial shock and keeps you calm.
3. Wim Hof Method: Inspired by the “Iceman” Wim Hof, this technique combines breathwork and cold exposure. Here's a simplified version: - Take 30 deep breaths. Inhale fully, then exhale without force. - Hold your breath: After the last exhale, hold for as long as you are comfortable. - Repeat for 3 rounds. - Then, step into the cold plunge.
Health Benefits and Recovery
Discover the numerous health benefits of recovery and learn how it can support your overall well-being. Start prioritizing your health today.
1. Muscle Recovery
Cold plunges offer several benefits for muscle recovery:
- Reduced Inflammation: Cold water constricts blood vessels, reducing inflammation and soreness.
- Faster Lactic Acid Removal: Cold exposure helps clear lactic acid buildup, aiding recovery after intense workouts.
- Improved Blood Flow: Alternating between cold and warm water (contrast baths) enhances circulation, promoting healing.
2. Mental Health
Cold plunges aren't just physical; they impact your mind too:
- Stress Reduction: Cold exposure triggers the release of endorphins, reducing stress and anxiety.
- Enhanced Mood: The shock of cold water can boost mood and increase alertness.
- Mindfulness Practice: Being fully present during a cold plunge cultivates mindfulness.
Remember, consistency matters. Regular cold plunges yield better results. Listen to your body, stay safe, and embrace the chill!
Post-Plunge Practices: Nurturing Your Body After the Chill
After a refreshing cold plunge, your body deserves some tender care. Here are essential post-plunge practices to maximize the benefits and ensure a smooth transition back to warmth:
Warm-Up After
- 1. Gentle Movement: Gradually warm up your muscles with light exercises. Consider: - Arm Swings: Swing your arms in circles to increase blood flow. - Leg Lifts: Lift your legs one at a time to activate leg muscles. - Neck Rolls: Slowly roll your neck to relieve tension.
- 2. Dry Off: Towel-dry your skin thoroughly. The friction generates heat and prevents chills.
- 3. Layer Up: Put on warm clothing immediately. Opt for cozy sweaters, socks, and a hat to retain body heat.
Hydration and Nutrition
1. Rehydrate: Cold plunges can be dehydrating. Sip on water or herbal tea to replenish lost fluids.
2. Nutrient-rich Snack: Enjoy a light snack with a balance of protein and carbohydrates. Examples: Greek yogurt with honey, which is protein-rich and soothing. - Banana with Almond Butter: Provides energy and essential nutrients.
Remember, the post-plunge phase is crucial for recovery. Treat your body kindly, and it will reward you with increased vitality and a sense of well-being!
FAQs About DIY Cold Plunge
Get answers to your questions on DIY cold plunges! Discover tips, benefits, and safety precautions in our comprehensive FAQs.
1. What Is a Cold Plunge?
A cold plunge is a practice where you immerse your body in cold water for a short duration. It's often used for its potential health benefits, including muscle recovery, improved circulation, and mental clarity.
2. Why Should I Try Cold Plunges?
- Muscle Recovery: Cold water reduces inflammation and helps muscles recover after intense exercise.
- Stress Reduction: Cold exposure triggers the release of endorphins, promoting relaxation and reducing stress.
- Enhanced Alertness: The shock of cold water wakes up your senses and boosts mental clarity.
3. How Do I Gradually Adapt to Cold Plunges?
- Start Slow: Begin with short exposure times (e.g., 30 seconds) and gradually increase.
- Controlled Breathing: Breathe deeply and calmly during the plunge to manage the shock.
4. What's the Ideal Water Temperature for a Cold Plunge?
The optimal range is 50°F to 59°F (10°C to 15°C). Consistency matters—avoid sudden temperature changes.
5. How Can I Ensure Safety During Cold Plunges?
- Avoid Extreme Cold: Use a thermometer to check water temperature.
- Time Limit: Limit your plunge to 10 minutes or less.
- Listen to Your Body: If discomfort arises, exit promptly.
Remember, cold plunges can invigorate both body and mind, but safety and gradual adaptation are key!
Conclusion:
Wrapping up the DIY cold plunge article, it's clear that making your own cold plunge at home can offer numerous health benefits. With a few simple steps and materials, you can enjoy the refreshing and invigorating experience right in your own backyard.


