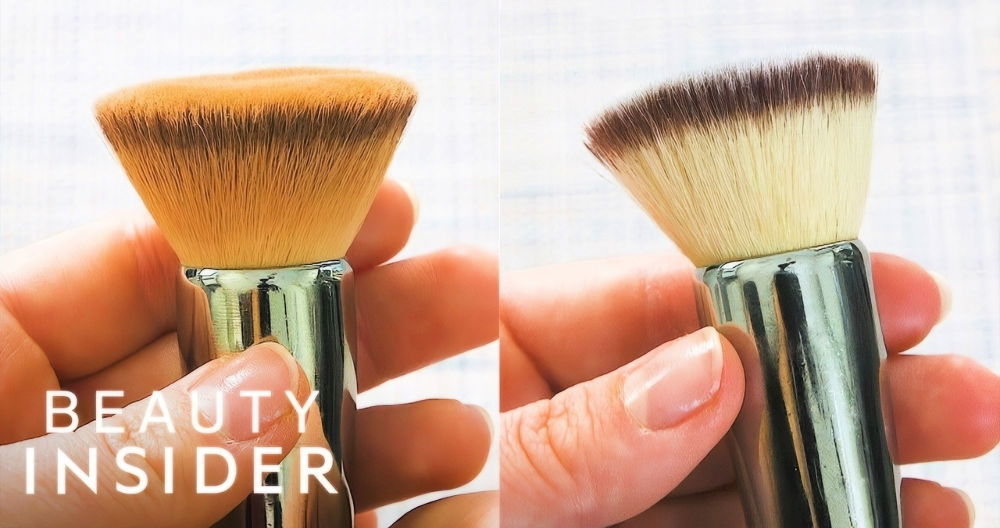
Last week, I noticed that my hair wasn't looking its best, and I suspected my hairbrush might be the culprit. When I took a closer look, I saw it was filled with hair, dust, and product buildup. I realized it was time to clean my hairbrush. This was a simple method I could do at home without any special tools.
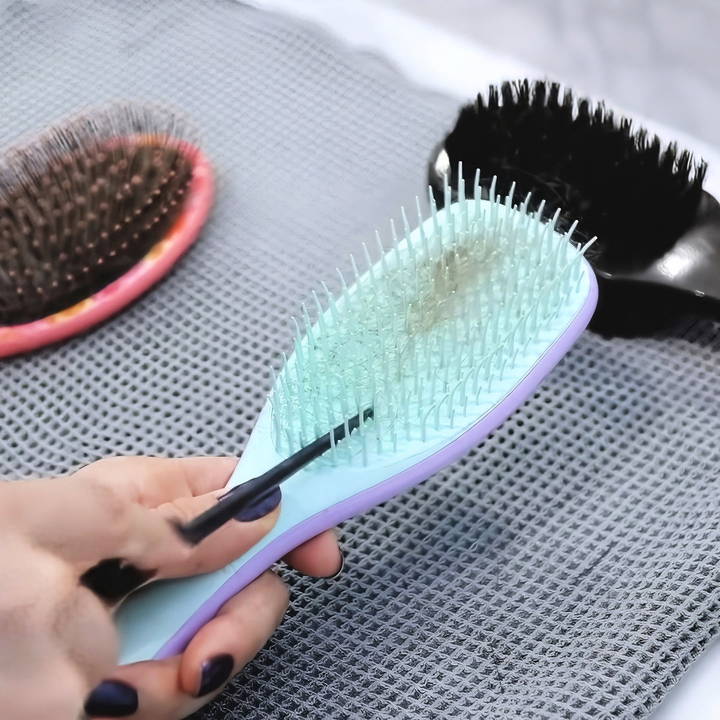
I found an easy way to clean my hairbrush using items I already had. Removing the hair and soaking the brush made a huge difference. Now, my brush is clean, and my hair feels better too. I'm excited to share this simple method with you, so you can keep your hairbrush in top shape as well.
I hope my experience inspires you to clean your hairbrush at home. It's easy, and it can improve your hair's health. Let's get started with this simple method that worked for me.
Understanding Your Hairbrush
Hair brushes are essential for hair care, but not all are the same. Different hair types need different brushes, and the right one improves your hair's health and look. Here's a simple guide to hairbrushes.
Types of Hairbrushes:
- Paddle Brushes: These are large, flat, and usually rectangular brushes. They're great for detangling and smoothing out long straight hair.
- Round Brushes: These cylindrical brushes are perfect for adding volume and curl to your hair. They work well when used with a blow-dryer.
- Vented Brushes: With their open backs, vented brushes allow air to flow through, speeding up drying time. They're ideal for a quick blow-dry.
Bristle Types:
- Synthetic Bristles: Made from materials like nylon, these bristles are sturdier and provide a good grip for detangling.
- Natural Bristles: Often made from boar hair, these bristles are softer and distribute your hair's natural oils, giving you a shiny finish.
- Mixed Bristles: A combination of synthetic and natural, these brushes offer the benefits of both types.
Choosing the Right Brush:
- For Fine Hair: A soft-bristled brush or one with mixed bristles can gently detangle without pulling.
- For Thick Hair: A paddle brush with sturdy synthetic bristles can handle the weight and density of your hair.
- For Curly Hair: A wide-toothed comb or a specially designed detangling brush can help manage curls without disrupting their natural shape.
Caring for Your Brush:
- Remove hair from your brush regularly to prevent buildup.
- Clean your brush periodically with a mild soap and water to remove any residue.
Knowing hairbrush types and uses helps you pick the best one for your hair, keeping it healthy and looking great. A clean, suitable brush is key in your hair care routine.
Materials You'll Need and Why
Before getting started, let's talk about the materials needed for this task and why each is important:
- Old Toothbrush or Clean Spoolie (Mascara Wand): These small tools are great for getting into the base of the brush to scrub away any stubborn gunk or buildup.
- Rat Tail Comb: The pointed end is perfect for lifting and pulling out hair entangled in the bristles.
- Baby Soap and Warm Water: Baby soap is gentle, making it perfect for cleaning without damaging your brush. Warm water helps dissolve oils and product residue.
- Towel: A towel is essential for blotting and drying your brush post-cleaning.
Step by Step Instructions
Learn how to clean hair brushes with our simple step-by-step guide. Follow these easy instructions to keep your brushes pristine and hygienic.
Step 1: Removing Hair
First, I take my rat tail comb and use the pointed end to lift the hair caught in the bristles. This initial step can be surprisingly satisfying as you begin to see the true color of your brush's base again. For brushes with tightly packed bristles, patience is key. Take your time to gently pull out all the hair, ensuring not to damage the base or bristles.
Step 2: Preparing the Cleaning Solution
Next, I prepare a cleaning solution using a couple of pumps of baby soap in a bowl of warm water. The mild properties of baby soap make it safe for different types of brushes, whether they have natural or synthetic bristles.
Step 3: Scrubbing the Bristles and Base
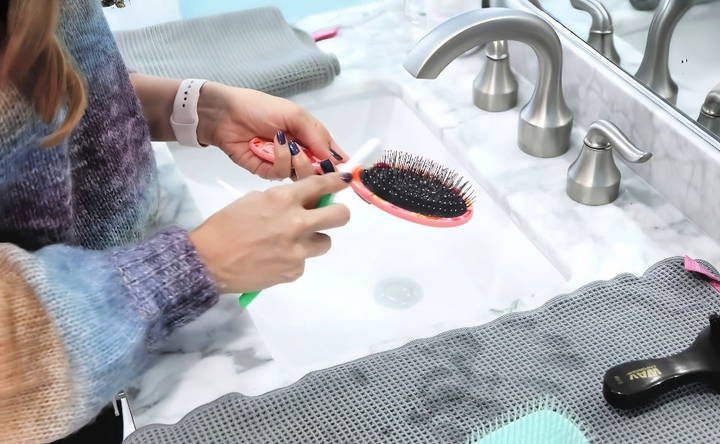
Now, using the old toothbrush or clean spoolie, I dip it into the soapy water and start scrubbing the base and bristles of the brush. This action helps loosen and remove any remaining oils, dead skin cells, and product build-up. For brushes with a padded base or intricate designs, being gentle yet thorough is crucial.
Step 4: Soaking (If Applicable)
For brushes made entirely of plastic and without any fabric or wood parts, a short soak can help further loosen grime. I usually allow my brushes to soak for about 20-30 minutes. However, remember to skip this step for brushes with wooden handles or natural bristles to avoid damage.
Step 5: Rinsing and Drying
After a thorough scrub, I rinse the brushes under running water to wash away all the soap and loosened debris. Then, I shake off excess water and lay them on a towel, allowing them to air dry naturally. Avoiding direct sunlight or heat sources is essential to prevent bristle damage.
Additional Tips for Maintaining Your Hairbrush
- Regular Cleaning: Make hairbrush cleaning a regular part of your routine. Depending on your hairbrush type and how often you use it, a bi-weekly or monthly cleaning can make a significant difference.
- Dealing With Specific Materials: Always check the manufacturer's instructions, especially for brushes with natural bristles or wooden elements, as they may require special care.
- Avoiding Damage: Never soak brushes with wood elements or padded bases, as this can cause warping or mildew growth.
Troubleshooting Common Issues
When cleaning your hairbrush, you might run into a few snags. Don't worry; most of these issues are easy to fix with a little know-how. Here's a guide to solving some common hairbrush cleaning problems using straightforward language and practical tips.
Hair Won't Come Out
- Solution: Use a comb or the end of a tail comb to lift the hair from the base of the brush. Slide the comb under the hair and gently pull upwards. For stubborn strands, snipping the hair with scissors in the middle can make removal easier.
Residue Buildup Is Hard to Clean
- Solution: Soak the brush in a mixture of warm water and shampoo for a few minutes. This will help loosen the buildup. For non-wooden brushes, a gentle scrub with an old toothbrush can remove stubborn gunk.
Brush Is Losing Bristles
- Solution: If bristles are falling out, it's often a sign the brush is nearing the end of its life. However, gentle cleaning without harsh chemicals can prolong its use. Avoid soaking brushes with wooden bases or natural bristles for too long, as this can weaken the glue holding the bristles.
Bad Odor from Brush
- Solution: A smelly brush can be freshened up with baking soda. Sprinkle a small amount onto the bristles and let it sit for a few hours before rinsing thoroughly. Baking soda neutralizes odors without damaging the brush.
Brush Takes Too Long to Dry
- Solution: After cleaning, shake off excess water and lay the brush bristle-side down on a towel. This allows air to circulate and speeds up drying. Avoid using direct heat like a hairdryer, as it can damage the brush.
Unsure How to Disinfect Brushes
- Solution: Mix a solution of water and white vinegar (equal parts) and soak the brush for about 20 minutes. Rinse with cold water and let it dry. Vinegar is a natural disinfectant and is safe for most brush types.
Address these issues to keep your hairbrush and hair in top condition. Regular maintenance and cleaning are key to extending your hairbrush's life.
Maintaining a Clean Brush
Keeping your hairbrush clean is not just about the occasional wash; it's about daily care that extends its life and keeps your hair looking good. Here's how to maintain a clean brush with minimal effort:
Daily Maintenance:
- Remove Hair: Every day, pull out any hair trapped in the bristles. This prevents buildup and keeps the brush effective.
- Quick Wipe: After use, take a moment to wipe the brush with a dry cloth to remove any lingering dust or loose hair.
Weekly Upkeep:
- Spot Cleaning: Once a week, dip a cloth in a mixture of warm water and a drop of shampoo, then gently run it over the bristles to remove oils and product residue.
- Air Out: Let your brush breathe. After cleaning, place it in an area with good airflow to prevent moisture from settling in, which could lead to mold.
Monthly Deep Clean:
- Soak and Scrub: Fill a bowl with warm water and a bit of gentle shampoo or soap. Submerge the brush (if it's waterproof) and gently scrub the bristles and base with an old toothbrush.
- Rinse Thoroughly: Make sure to rinse the brush under running water to wash away all the soap and loosened debris.
- Dry Properly: Pat the brush with a towel and then let it air dry with the bristles facing down to prevent water from pooling in the base.
Extra Tips:
- Avoid Harsh Chemicals: Stick to mild soaps or shampoos for cleaning to avoid damaging the brush.
- Be Gentle: When scrubbing, use light motions to avoid pulling out bristles or damaging the cushion base.
By following these simple steps, you can ensure that your hairbrush remains a clean and hygienic tool in your hair care routine.
FAQs About How to Clean Hair Brushes
Discover the essential FAQs about how to clean hair brushes efficiently. Get tips for maintaining your hair tools and keeping them hygienic.
Cleaning your hairbrush is crucial because it collects oil, dirt, dust, and product residue from your hair. If not cleaned, these can transfer back to your hair, making it look greasy and dull. Regular cleaning helps maintain your hair’s health and keeps your brush effective.
The frequency of cleaning depends on your usage of hair products. If you use products like gels or hairsprays daily, aim to clean your brush weekly. Otherwise, every 2 to 3 weeks is sufficient. Remember to remove trapped hair after each use to make cleaning easier.
Most brushes can be cleaned using the steps above. However, avoid soaking wooden brushes or those with natural bristles for too long, as water can damage them. Instead, quickly dip and scrub these brushes to prevent water damage.
Remove hair: Use a comb or scissors to remove hair from the bristles.
Prepare cleaning solution: Mix warm water with a bit of shampoo or soap. Add baking soda for a deeper clean.
Clean the brush: Dip the brush in the solution and use an old toothbrush to scrub the base and bristles.
Rinse and dry: Rinse the brush with clean water and let it air dry with bristles facing down.
To remove lint and buildup, you don't need any special products. Simply use your regular shampoo. After removing all the hair from between the bristles, wash the brush with a drop of shampoo and warm water. The suds from the shampoo will help remove product buildup, dirt, and oils, leaving your brush clean and ready for use.
Wrapping Up
Cleaning my hairbrush has truly improved my hair's health. I believe this simple method can help you too. Start today to clean your hairbrush and enjoy healthier, happier hair. I'm here to support you every step of the way.


