Last week, I noticed that my shower was barely a trickle, and it was frustrating. I realized that the water pressure had dropped, and the shower wasn't as refreshing as before. I decided to investigate the issue and found that mineral deposits had clogged the shower head. It was time to clean it to restore the water pressure.
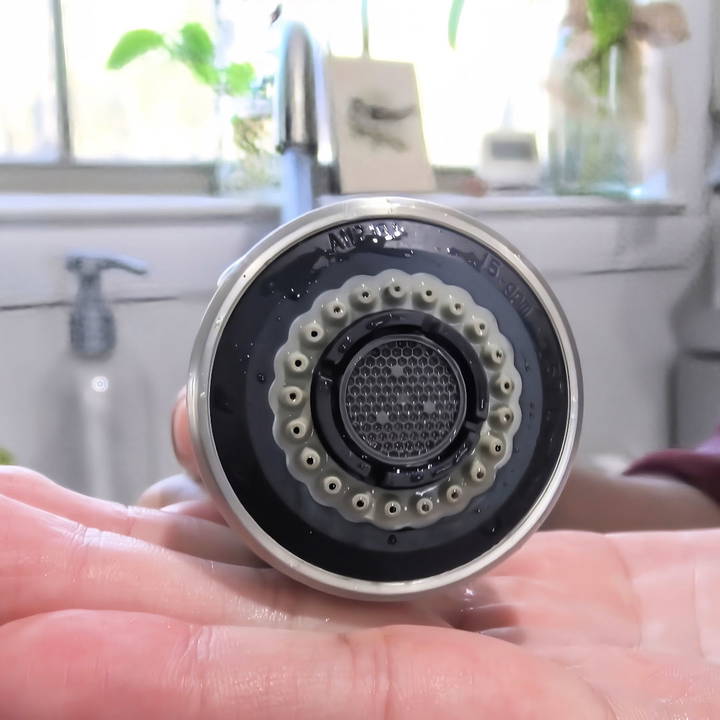
Cleaning the shower head turned out to be easier than I thought. I removed it, soaked it in a mixture of vinegar and water, and scrubbed away the buildup. After reattaching it, the water pressure improved significantly. It felt great to have a strong shower again. Now, I know how simple cleaning a shower head can make a big difference.
Understanding Mineral Buildup
When you enjoy a shower, the last thing you want is a weak water flow due to a clogged shower head. This common annoyance is often caused by mineral buildup. Let's break down what this means in simple terms.
What is Mineral Buildup?
Mineral buildup happens when water, especially hard water, flows through your shower head. Hard water contains high levels of minerals like calcium, magnesium, lime, and silica. Over time, these minerals stick to the inside of your shower head, forming a crust that can block the water flow.
Why Does it Happen?
The water in our homes travels through various paths before reaching us. Along the way, it picks up minerals from the earth and pipes. When this mineral-rich water comes out of your shower head and evaporates, it leaves the minerals behind, creating a buildup.
How Does it Affect Your Shower?
A shower head clogged with minerals can lead to:
- Reduced water pressure
- Uneven water flow
- Spray patterns that feel less refreshing
- Potential growth of bacteria in the crevices
How Can You Spot It?
Look for these signs:
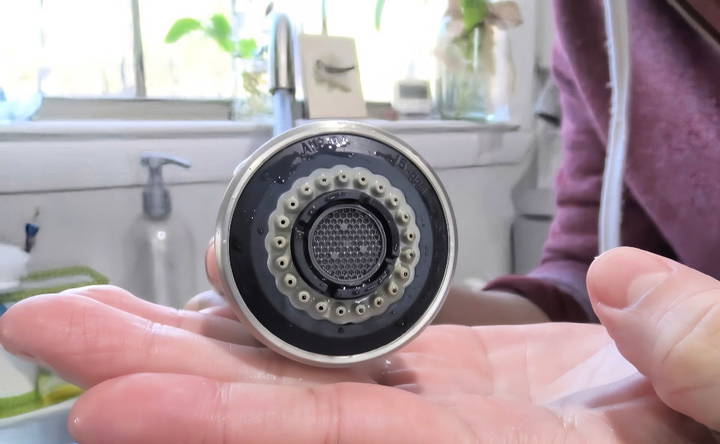
- White or off-white crust around the nozzles
- Water spraying in different directions
- Noticeable decrease in water pressure
What Can You Do About It?
Regular cleaning and maintenance can prevent and remove mineral buildup. Using household items like vinegar can dissolve the minerals and restore your shower head's performance.
A clean shower head enhances your shower and keeps your bathroom safe. Watch for mineral buildup and clean it regularly!
Materials You'll Need:
To kick things off, let's talk about what you'll need. These household items were all I used to get my shower head looking and performing like new:
- A small plastic baggie - This will serve as the soaking chamber for the vinegar solution to work its magic on the shower head.
- Distilled white vinegar - The hero of our cleaning saga, vinegar is a natural descaling agent that will eat away all that stubborn mineral buildup without the harsh chemicals.
- A rubber band - This will secure the baggie in place, ensuring the shower head remains submerged in the vinegar solution.
- A small cleaning brush (optional) - For any stubborn leftovers, this tool will help you scrub them away effortlessly.
The plastic bag is leak-proof and easy to attach/remove. Distilled white vinegar is cheap and effective against limescale. The rubber band holds the bag in place, and the brush is useful for cleaning after soaking.
Step by Step Instructions
Learn how to clean a shower head with vinegar using simple, step-by-step instructions for a sparkling, powerful clean.
Step 1: Prepare the Vinegar Solution
Fill the plastic baggie with enough distilled white vinegar to fully submerge the shower head. This acidic solution is what will dissolve the buildup.
Step 2: Submerge the Shower Head
Carefully place the shower head inside the baggie filled with vinegar. Make sure it's fully submerged for optimal cleaning.
Step 3: Secure the Bag
Using the rubber band, tightly secure the baggie around the shower head or its arm. You want no spillage and ensure the entire head is bathing in vinegar.
Step 4: Wait It Out
Patience plays a key role here. Let the shower head soak in the vinegar for at least two hours. For severe buildup, I recommend leaving it overnight. The vinegar works its magic slowly, dissolving all that unwanted gunk.
Step 5: Remove and Rinse
Once the waiting game is over, remove the baggie and discard the vinegar. Use your small cleaning brush to scrub away any remaining particles gently. Finally, run hot water through the shower head to rinse away the vinegar and any loosened debris.
Step 6: Admire Your Work
You've made it to the final step. Turn on your shower and watch in amazement as water flows smoothly and evenly once again. Your shower head should look as good as new, and the water pressure restored to its former glory.
Troubleshooting Common Issues
Shower head issues can be frustrating, but common problems often have easy fixes. Here's a guide to help you solve them for a better shower experience.
- Clogged Shower Head A clogged shower head is often due to mineral deposits from hard water. If you notice a decrease in water pressure or erratic spray patterns, it's likely a clog. Soak the shower head in white vinegar overnight to dissolve the buildup. For external deposits, gently scrub with an old toothbrush.
- Low Water Pressure If your shower feels more like a trickle than a torrent, you might have low water pressure. This can be caused by a clogged shower head or a closed valve. Check for any blockages and ensure all valves are fully open. If the issue persists, it might be time to consult a plumber.
- Leaky Shower Head A leaky shower head can waste water and increase your bills. Often, this is due to a worn-out washer or a loose connection. Tighten all connections and replace any damaged washers to stop the leak.
- Poor Spray Pattern When your shower doesn't spray evenly, it's usually because of clogged nozzles. Clean them with vinegar or a pin to clear out any debris. Adjusting the shower head settings can also improve the spray pattern.
- Noisy Shower Head A noisy shower head can be caused by a buildup in the pipes or a faulty washer. Flush the system to remove debris and check the washer for wear and tear. Replacing the washer or cleaning the pipes can quiet things down.
- Rusty Shower Head Rust on your shower head is not only unsightly but can also affect water quality. If you spot rust, remove the shower head and soak it in vinegar. If rust persists, it may be time to replace the shower head.
- Cracked Shower Head A cracked shower head can lead to leaks and poor performance. Inspect your shower head regularly for any signs of damage. If you find a crack, it's safest to replace the shower head to prevent water damage and ensure optimal function.
Monitor and address common issues to keep your shower functional. Regular checks and cleaning prevent many problems, saving time and hassle.
Preventive Maintenance
Maintaining a clean shower head means preventing clogs before they start. Here's how to keep it clear with easy daily actions.
- Regular Rinsing Each time you use your shower, give the shower head a quick rinse. This washes away any immediate residue and slows down mineral deposit formation.
- Soft Water Solutions If you have hard water, consider installing a water softener. It reduces the minerals in your water, which means less buildup in your shower head.
- Vinegar Spritz Keep a spray bottle filled with white vinegar in your bathroom. After showering, spritz the shower head. Vinegar is a natural descaler and can prevent mineral deposits from taking hold.
- Gentle Scrubbing Once a week, take a soft-bristled brush or toothbrush to gently scrub the nozzles. This dislodges any beginning stages of buildup without damaging the shower head.
- Monthly Deep Clean Every month, fill a plastic bag with white vinegar and secure it around the shower head. Let it soak overnight to dissolve any stubborn buildup. In the morning, remove the bag and run hot water through the shower head to rinse it out.
- Check for Drips A dripping shower head can indicate a buildup. If you notice drips, it might be time for a cleaning or to check if parts need replacing.
- Avoid Chemicals Steer clear of harsh chemical cleaners that can damage your shower head. Stick to natural cleaners like vinegar or baking soda.
By following these simple steps, you can extend the life of your shower head and enjoy a better shower experience. It's all about regular care and using the right methods to keep everything running smoothly.
FAQs About How to Clean Your Shower Head
Discover the ultimate FAQs about how to clean your shower head for optimal performance and hygiene. Simple tips and tricks inside!
Cleaning your shower head is crucial because it prevents mineral buildup, which can block water flow and reduce water pressure. It also helps to eliminate bacteria and mold growth, ensuring a healthier shower environment.
To clean a fixed shower head:
Fill a plastic bag with white vinegar.
Place the bag over the shower head, ensuring all nozzles are submerged.
Secure the bag with a rubber band or zip tie.
Leave it to soak for at least an hour, or overnight for heavy buildup.
Remove the bag, then gently scrub the nozzles with a brush.
Run hot water through the shower head to rinse away debris.
Yes, for a detachable showerhead:
Detach the shower head from the hose.
Submerge it in a bowl filled with a vinegar and baking soda solution.
Let it soak for an hour or more, depending on the level of buildup.
After soaking, scrub the nozzles with a brush and rinse thoroughly.
It’s best to clean your shower head every one to two months to prevent mineral deposits and maintain optimal performance. If you have hard water, consider cleaning it more frequently to avoid clogs.
If your shower head remains clogged after a vinegar soak, try these steps:
Ensure that you've rinsed out all the vinegar thoroughly.
Use a toothpick or a small needle to gently poke through the nozzle holes to dislodge any remaining mineral deposits.
For persistent clogs, apply a paste of baking soda and water to the affected areas, let it sit for a few minutes, then scrub with a brush.
If the clog is still not cleared, consider using a commercial descaling solution following the manufacturer's instructions.
As a last resort, you may need to replace the shower head if it's old or damaged beyond repair.
Conclusion:
I'm really happy with how much better my showers are now. By simply cleaning my shower head, I improved the water pressure and made my mornings more refreshing. It's surprising how a small task can make such a big difference. I encourage you to try it too; it's easy and definitely worth the effort.


