Air fryers have become an indispensable tool in kitchens across the world, offering a healthier alternative to traditional frying methods. However, like any kitchen appliance, they require regular cleaning to maintain efficiency, hygiene, and longevity. In this guide, we'll cover everything you need to know about cleaning your air fryer, from regular maintenance to deep cleaning techniques. Whether you're dealing with a brand-new unit or an older, greasy one, these tips will ensure your air fryer stays in top condition.
Why Cleaning Your Air Fryer is Important
Cleaning your air fryer isn't just about keeping it looking shiny. A dirty air fryer can impact the flavor of your food, create unpleasant odors, and even reduce the efficiency of the appliance. Grease buildup, leftover food particles, and debris can cause your air fryer to overheat, resulting in reduced cooking performance or even permanent damage. Not to mention, food residue can harbor bacteria, making it a potential health hazard. Regular cleaning helps avoid these issues and prolongs the life of your appliance.
Consequences of a Dirty Air Fryer
- Off flavors: Food remnants from previous meals can transfer unwanted flavors to new dishes.
- Unpleasant odors: Burnt grease or food particles can emit unpleasant smells over time.
- Inefficient cooking: A buildup of grease and crumbs may prevent the air fryer from circulating air efficiently, affecting cooking times and results.
- Potential health hazards: Bacteria thrive on food particles left behind in a warm, moist environment like an air fryer.
Let's dive into the steps to properly clean your air fryer.
Step by Step Instructions
Learn how to clean your air fryer with our step-by-step guide. Regular and deep cleaning tips to keep it in top shape. Say goodbye to stubborn smells!
Regular Cleaning and Maintenance
Discover the best practices for regular cleaning and maintenance: unplug and cool down, use parchment paper, wipe down after every use, and clean the interior.
Step 1: Unplug and Cool Down
Before you begin cleaning, always ensure that your air fryer is unplugged and has completely cooled down. This step is crucial to avoid electric shock or burns. Most air fryers need about 30 minutes to cool down fully after use.
Step 2: Use Parchment Paper to Reduce Mess
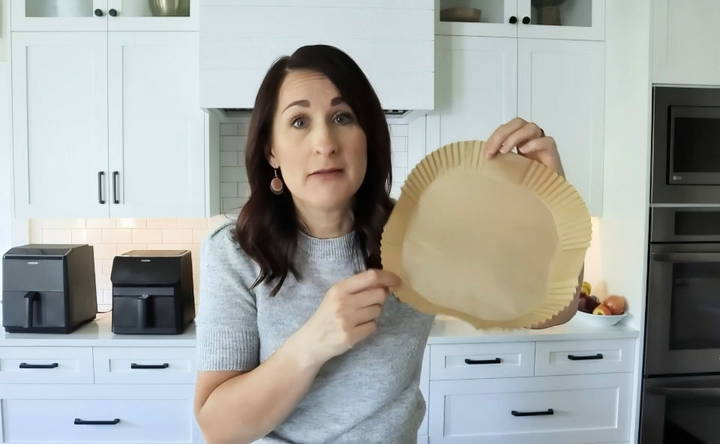
One of the simplest ways to reduce the mess inside your air fryer is to use parchment paper. Parchment paper helps catch crumbs and grease, making it easier to clean up after cooking. However, it's important to avoid using parchment paper with holes when cooking fatty or juicy foods, as these may need proper drainage to avoid fogginess.
Step 3: Wipe Down After Every Use
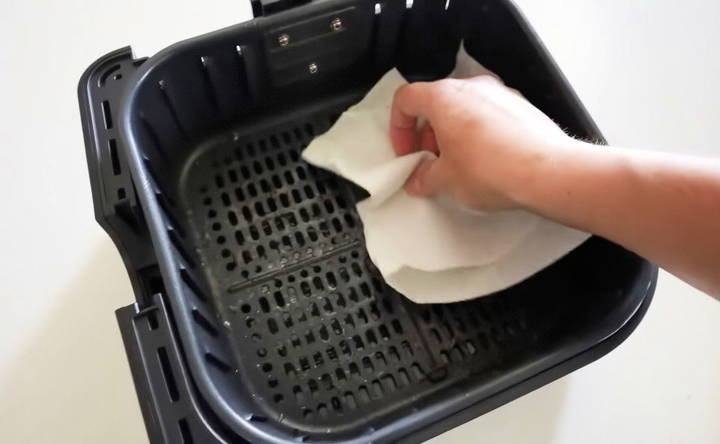
Once you've finished cooking and your air fryer has cooled, use a damp paper towel to wipe out any crumbs or drippings from the basket and tray. For more stubborn residue, use a paper towel dampened with a bit of dish soap. Doing this after each use will prevent the buildup of grease and grime, making deep cleaning less frequent and more manageable.
Step 4: Clean the Interior
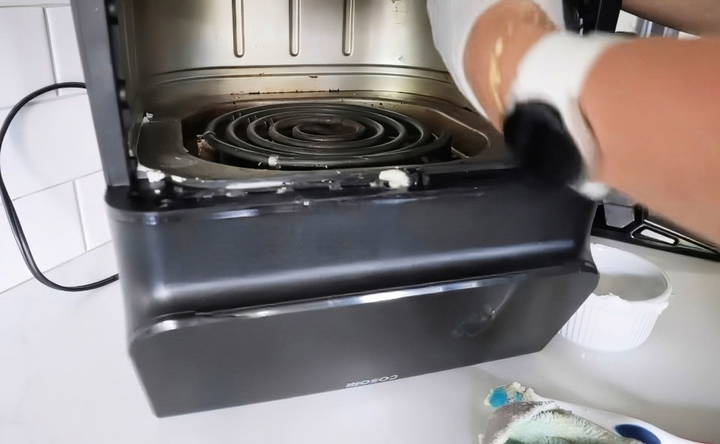
It's easy to forget about the inside of the air fryer, but it can become grimy over time. Using a velvety washcloth (or a similar soft cloth), wipe down the inside of the unit, including the heating element. Be careful not to use abrasive sponges as they can damage the non-stick coating of the air fryer basket.
Deep Cleaning Your Air Fryer
Even with regular maintenance, grease and grime can accumulate over time. Deep cleaning your air fryer every few months will ensure it stays in excellent condition.
Step 1: Disassemble Removable Parts
Start by removing the air fryer basket, tray, and pan (if applicable). These parts are typically dishwasher-safe, but always refer to your air fryer's user manual for specific cleaning instructions.
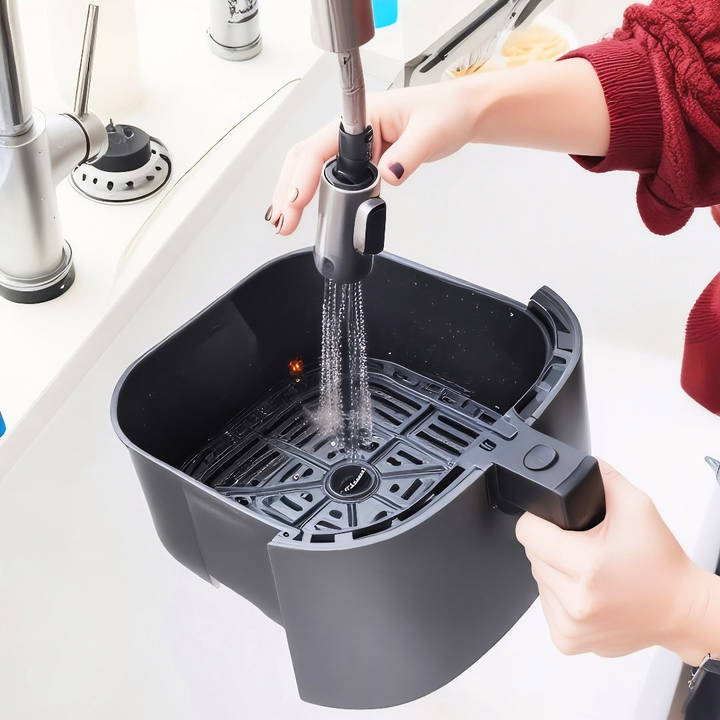
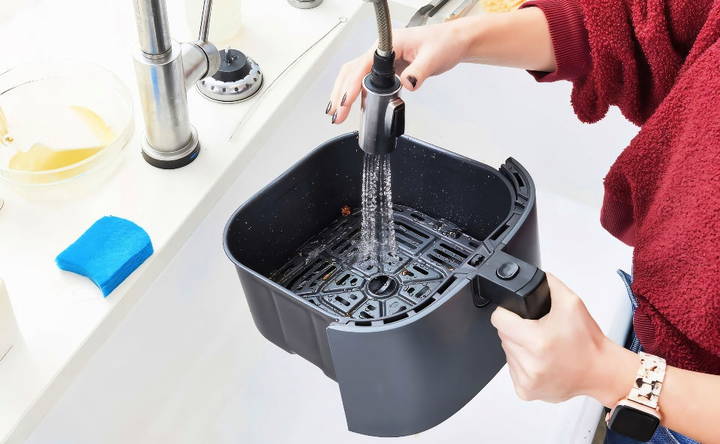
If your air fryer is not dishwasher-safe, wash the parts with warm soapy water. Let them soak for 10-15 minutes to loosen any stuck-on food. Use a soft sponge to scrub away the residue, being cautious with non-stick surfaces to avoid damage.
Step 2: Clean the Heating Element
The heating element is located at the top of the air fryer and can accumulate grease and grime. To clean it, use a soft brush or cloth and a mixture of baking soda and water. Alternatively, you can make a paste with baking soda and hydrogen peroxide for extra cleaning power. Scrub gently, ensuring you remove any burnt-on food particles without damaging the element.
Step 3: Clean the Basket and Tray
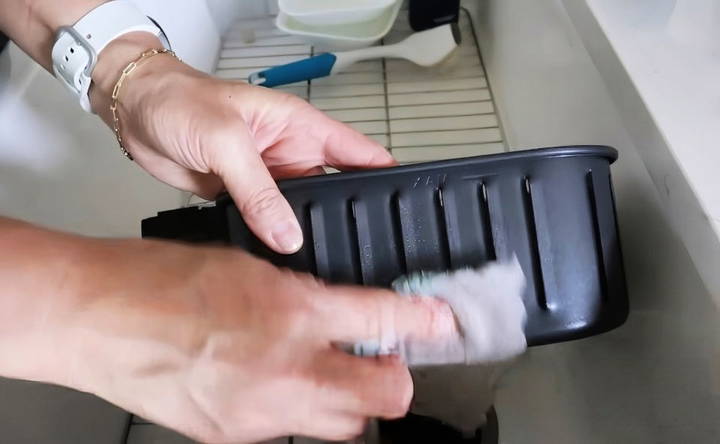
Air fryer baskets often have small grooves that can collect grease and food particles. After soaking them in soapy water, use a soft brush or sponge to scrub these areas thoroughly. If there's heavy grease buildup, use a kitchen degreaser like Dawn Powerwash to help break it down.
Step 4: Rinse and Dry
Once all the parts have been thoroughly cleaned, rinse them with clean water and allow them to air dry. Make sure everything is completely dry before reassembling the air fryer to prevent any moisture from damaging the appliance.
Step 5: Clean the Exterior
Wipe down the exterior of your air fryer with a damp cloth. Avoid using harsh chemicals, as they can damage the finish or get into the unit's vents. A simple solution of warm water and a drop of dish soap should suffice.
Tackling Stubborn Smells in a New Air Fryer
If you've recently purchased an air fryer, you might notice a strong plastic or chemical smell during the first few uses. This is normal, but it can be off-putting. Here's how to get rid of that odor:
Step 1: Vinegar and Lemon Water
Fill an oven-safe dish with equal parts water and vinegar, and add a splash of lemon juice for freshness. Place the dish inside your air fryer and run it at 400°F for 15-20 minutes. This should help eliminate any lingering chemical smells.
Step 2: Air it Out
After the vinegar treatment, leave your air fryer open and let it air out for a few hours. Sometimes, simply letting the unit breathe can help dissipate unpleasant odors.
What to Avoid When Cleaning an Air Fryer
Discover what to avoid when cleaning an air fryer: steer clear of metal tools, immersion in water, and harsh chemicals to keep it in top condition.
1. Avoid Using Metal Tools
Avoid using metal scrubbers, steel wool, or abrasive sponges, as these can damage the non-stick coating on the basket and tray. Instead, opt for soft sponges, washcloths, or brushes designed for non-stick cookware.
2. Don't Immerse the Entire Unit in Water
Never submerge the entire air fryer in water. The air fryer's base contains electrical components, and immersing it in water can damage these parts, rendering your appliance unusable or even dangerous to use.
3. Avoid Harsh Chemicals
Harsh chemicals can corrode or damage the materials used in the air fryer. Stick to mild dish soap, baking soda, or specialized kitchen degreasers to keep your appliance safe.
Extra Tips for Maintaining Your Air Fryer
Discover essential tips for maintaining your air fryer - use wisely, invest in accessories, and inspect for wear and tear to extend its life.
1. Use Your Air Fryer Wisely
Using your air fryer wisely can help prolong its life and minimize the need for frequent deep cleaning. For example, placing fatty or juicy foods on a drip tray can help reduce the amount of grease that accumulates at the bottom of the basket. Also, when cooking frozen foods, you may not need to use parchment paper, as it can restrict proper airflow.
2. Invest in Air Fryer Accessories
Many accessories, like silicone mats or liners, can help prevent food from sticking to the air fryer basket. These are typically easier to clean and can reduce the need for deep cleaning.
3. Inspect Regularly for Wear and Tear
Air fryers, like all appliances, will experience wear and tear over time. Regularly inspect the basket, tray, and any other removable parts for signs of deterioration, such as scratches on the non-stick surface. If you notice any significant wear, it may be time to replace certain parts or even the entire unit.
When Is It Time to Replace Your Air Fryer?
No matter how well you maintain your air fryer, it will eventually reach the end of its life. Signs that it's time to replace your air fryer include:
- Persistent odors: If no amount of cleaning can remove burnt smells, it might be time for a new unit.
- Poor cooking performance: If your air fryer takes longer to cook or doesn't reach the desired level of crispiness, this could indicate internal damage.
- Physical damage: Cracked baskets, peeling non-stick coatings, or damaged electrical components are clear signs it's time for a replacement.
Conclusion
Cleaning your air fryer regularly is essential to keeping it in good working order. By following these tips, you can avoid unpleasant smells, improve the flavor of your food, and extend the life of your air fryer. Remember, a little bit of maintenance goes a long way, and a clean air fryer is a happy air fryer!
Final Tip:
Make sure to clean your air fryer immediately after each use. Regular maintenance can prevent the buildup of grease and grime, ensuring that deep cleaning sessions are quick and easy. Happy air frying!
FAQs About How to Clean Air Fryer
Learn the FAQs about how to clean an air fryer effectively and keep your appliance in top condition. Discover easy maintenance tips here!
Cleaning an air fryer with a non-removable heating element can be tricky. First, unplug the unit and ensure it has cooled. Use a soft brush or toothbrush to clean around the heating element. If grease buildup is present, you can create a paste with baking soda and water, apply it gently, and scrub with a non-abrasive sponge. Avoid using excessive water to prevent damaging the internal components.
A lingering plastic smell in a new air fryer is common. To remove it, place a dish with equal parts water and white vinegar inside the basket, and add some lemon juice. Run the air fryer at 400°F for 15-20 minutes. The vinegar and lemon will help neutralize the odor. If the smell persists, allow the air fryer to air out.
Using a steam cleaner on an air fryer is not generally recommended, as steam can damage the electrical components. Instead, opt for cleaning with a damp cloth and mild cleaners. If the heating element or other internal parts are heavily soiled, follow the manufacturer’s guidelines for safe cleaning.
If your air fryer starts to smoke, it’s likely due to grease buildup, especially near the heating element. Unplug the air fryer and allow it to cool. Clean the heating element with a soft brush or cloth to remove the grease. Using parchment paper or bread under greasy foods can also help prevent excess smoke by absorbing some of the drippings.
For air fryers with mesh or wire baskets, soak the basket in warm, soapy water to loosen any stuck-on food or grease. After soaking, scrub it with a soft brush or sponge. If grease remains, apply a degreaser, such as Dawn Powerwash, and let it sit for a few minutes before scrubbing again.
Oven cleaner should generally be avoided in air fryers, as it can damage the non-stick coating and potentially leave behind harmful residues. Stick to milder cleaning agents like dish soap, baking soda, or vinegar solutions for safe and effective cleaning.
Yes, cleaning your air fryer after each use helps prevent the buildup of grease and food particles. After cooking, let the unit cool, then wipe down the basket and tray with a damp cloth or paper towel. Regular cleaning keeps the air fryer performing well and prevents odors.
Most air fryer baskets and trays are dishwasher-safe, but always check the manufacturer's instructions to confirm. If you're unsure, washing these parts by hand with warm, soapy water is a safe option. Avoid abrasive scrubbing to protect the non-stick coating.
Deep cleaning your air fryer every few months is recommended, especially if you use it frequently or cook greasy foods. A deep clean involves removing the basket and tray, cleaning around the heating element, and wiping down the interior. Regular maintenance prevents the need for excessive scrubbing later.
To minimize grease buildup, line the bottom of the basket with parchment paper or foil (ensuring proper airflow) and clean the air fryer after each use. Additionally, wiping away grease after cooking can reduce buildup and prevent future smoke issues.


