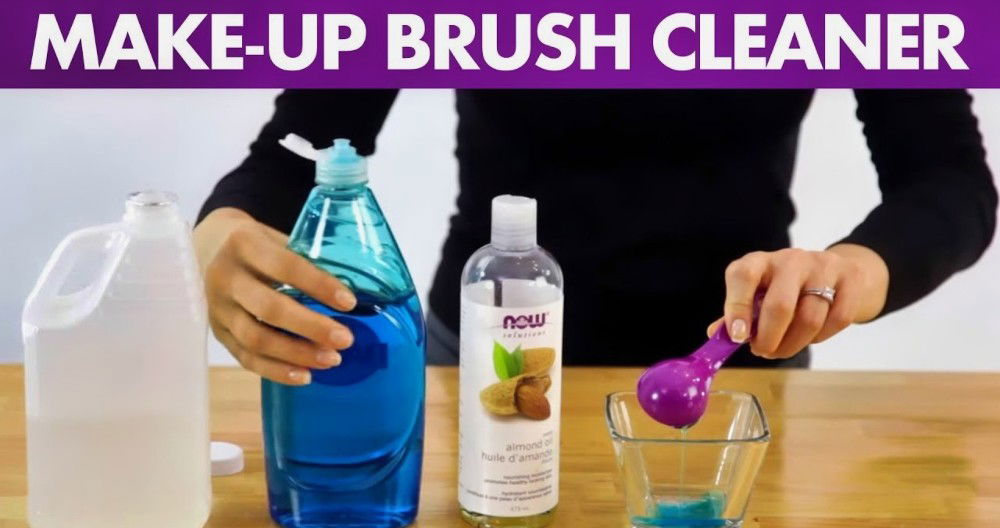
Last weekend, I noticed my makeup brushes were looking a bit grimy, and I realized it was time to give them a good cleaning. I gathered all my brushes and decided to find the best way to clean makeup brushes at home. I wanted to ensure they were not only clean but also well-maintained for future use.
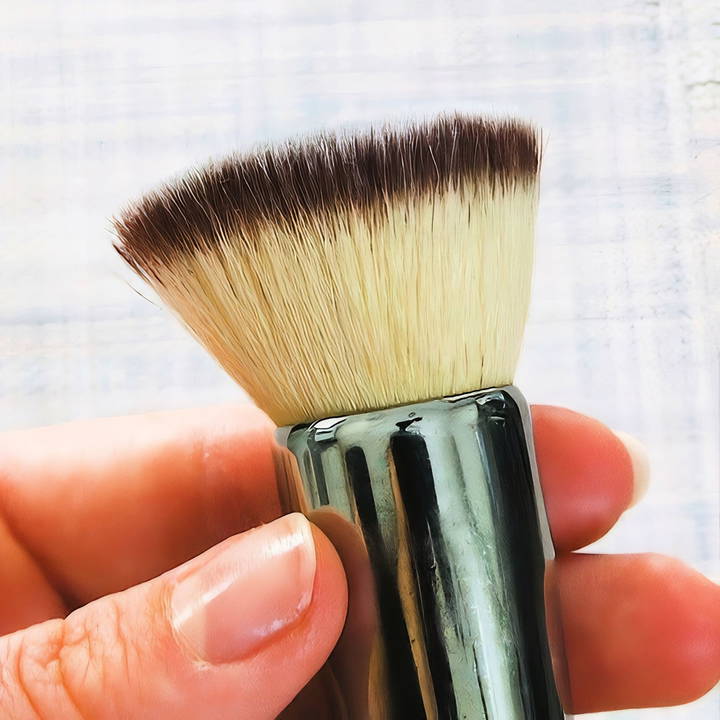
Understanding Makeup Brushes
Makeup brushes are essential for anyone applying makeup. They come in different shapes and sizes, each for a specific use. Here's a basic breakdown.
Types of Brushes:
- Foundation Brushes: These have dense bristles and a flat shape to apply liquid or cream foundation smoothly.
- Powder Brushes: Large and fluffy, these brushes are perfect for applying loose or compact powder evenly.
- Blush Brushes: Typically angled or rounded, they help apply blush on the cheeks for a natural-looking color.
- Eye Brushes: This category includes a range of brushes like flat shader brushes for eyeshadow application, blending brushes for smoothing out colors, and precision brushes for detailed work.
Why Clean Your Brushes?:
- Hygiene: Brushes can harbor bacteria and dirt, which can lead to skin problems.
- Performance: Clean brushes, apply makeup more evenly, and prevent colors from mixing.
- Durability: Regular cleaning extends the life of your brushes.
How Often to Clean:
- Daily Use Brushes: Clean these at least once a week.
- Less Frequently Used Brushes: These can be cleaned once a month.
- Sponges and Blenders: Wash after every use due to their moisture-retaining nature.
Cleaning Process:
- Wet the bristles with lukewarm water.
- Apply a drop of brush cleaner or gentle soap to the bristles.
- Gently massage the bristles to loosen the makeup residue.
- Rinse thoroughly until the water runs clear.
- Gently squeeze out excess water and reshape the brush head.
- Lay flat to dry on a clean towel.
Taking care of your makeup brushes is taking care of your skin. Keep them clean, and they will keep your makeup application flawless and your skin happy.
Step by Step Instructions
Learn how to clean makeup brushes effectively with step-by-step instructions using dish soap, olive oil, vinegar, and more. Keep your tools spotless!
Method 1: Dish Soap & Extra Virgin Olive Oil
Discover Method 1: Dish Soap & Extra Virgin Olive Oil. Learn why it works, the materials needed, and a step-by-step guide, and see the results for yourself.
Why It Works
Dish soap is designed to cut through grease, making it perfect for cleaning products built up on your brushes. The extra virgin olive oil acts as a conditioner, ensuring the bristles don't dry out and become brittle.
Materials Needed
- Dish Soap
- Extra Virgin Olive Oil
- Plate
- Water
Step-by-Step Guide
- Preparation: Mix equal parts dish soap and olive oil on a plate.
- Cleaning: Lightly wet the bristles of your brush under the tap with the brush pointed downwards. This prevents water from weakening the glue in the handle. Dip your brush into the mixture on the plate, then swirl it in the palm of your hand.
- Rinsing: Under running water, rinse the brush until the water runs clear, always keeping the bristles pointed down.
- Drying: Gently squeeze out any excess water, reshape the brush head, and lay it flat on a towel to dry overnight.
Results
My brushes came out clean with the bristles feeling soft, not too different from their original state. The beauty blender, however, required a bit more effort and still held some residue.
Method 2: White Vinegar & Hot Water
Learn how to unclog drains using Method 2: White Vinegar & Hot Water. Discover why it works, the materials needed, the step-by-step guide, and the results.
Why It Works
White vinegar acts as a natural disinfectant and cleaner, capable of breaking down the grime within the bristles without damaging them.
Materials Needed
- White Vinegar
- Dish Soap
- Hot Water
- Glass Jar or Cup
Step-by-Step Guide
- Preparation: Mix a cup of hot water, a tablespoon of dish soap, and a tablespoon of white vinegar in a glass jar.
- Soaking: Submerge your brushes into the mixture and let them sit for about 20 minutes.
- Rinsing: Rinse under lukewarm water, ensuring all residues of the cleaning solution are washed away.
- Drying: Place the brushes flat on a towel to air dry.
Results
This was the most effective and effortless method for me. The brushes came out impeccably clean and dried without any lingering scent of vinegar.
Method 3: Gentle Shampoo & Apple Cider Vinegar
Discover the benefits of Method 3: Gentle Shampoo & Apple Cider Vinegar. Learn why it works and what you'll need, and follow our step-by-step guide for the best results.
Why It Works
Gentle shampoo cleans the brushes without harsh chemicals, and apple cider vinegar serves as a natural disinfectant.
Materials Needed
- Gentle Shampoo (Baby shampoo or Castile soap)
- Apple Cider Vinegar
- Water
Step-by-Step Guide
- Cleaning: Apply a small amount of shampoo directly to the wet bristles, lather and rinse. Repeat this step as necessary until the bristles are clean.
- Disinfecting: Mix one tablespoon of apple cider vinegar with two tablespoons of water in a bowl. Swirl the brush in the mixture, then rinse.
- Drying: Gently squeeze the bristles to remove excess water and lay the brush flat on a towel to dry.
Results
This method required a bit more time and effort but left the brushes smelling great and feeling thoroughly cleaned.
The Science of Dirty Brushes
Clean brushes are crucial for makeup application, affecting both the look and the health of your skin. Let's delve into what happens when they aren't clean.
- Bacteria and Your Skin: Dirty makeup brushes can become a breeding ground for bacteria. When you use these brushes, you're potentially spreading bacteria like staphylococcus, streptococcus, and E. coli onto your skin. These bacteria can cause infections and irritations and exacerbate skin conditions such as acne.
- Clogged Pores and Breakouts: Brushes caked with old makeup, skin oils, and dust can lead to clogged pores. This not only affects your skin's appearance by causing breakouts but also impacts the effectiveness of your makeup application.
- Skin Irritation: The buildup on dirty brushes can make the bristles stiff and abrasive. Using these on your skin can lead to irritation, redness, and sensitivity. For those with already sensitive skin, this can be particularly problematic.
- Premature Aging: Free radicals from the environment can cling to dirty brushes and, when applied to the skin, can cause oxidative stress. This stress can break down collagen and elastin, leading to premature aging and the appearance of fine lines and wrinkles.
- Eye Infections: Eye makeup brushes that aren't cleaned regularly can harbor viruses that lead to infections like conjunctivitis (pink eye). This is especially risky if you share your brushes with others.
- Makeup Quality: Besides the health implications, dirty brushes compromise the quality of your makeup application. Residue from previous applications can mix with new makeup, altering the color and texture, resulting in a less-than-desirable finish.
- Proper Brush Care: To avoid these issues, it's essential to clean your brushes regularly. Use gentle soap or a specialized brush cleaner, rinse thoroughly, and allow them to dry completely before the next use. This simple habit will not only protect your skin but also ensure your makeup looks its best.
Understanding dirty brushes highlights the importance of cleanliness. It's essential for healthy skin and durable makeup tools, not just looks.
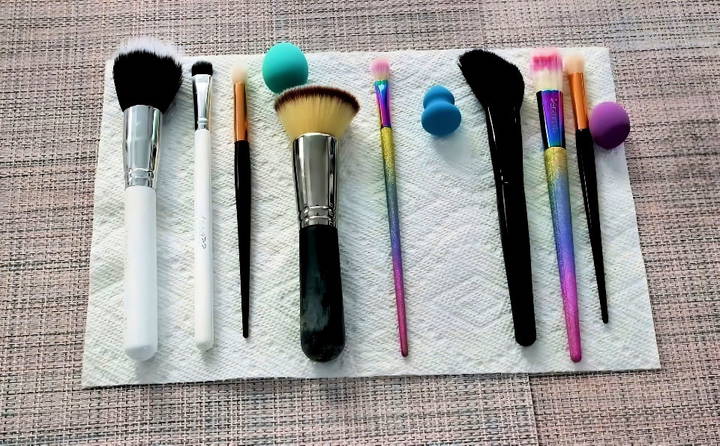
Caring for Your Brushes Post-Cleaning
After cleaning your makeup brushes, they need proper care while drying and storing to ensure longevity. Here's how to care for them after cleaning:
Drying Your Brushes:
- Lay your brushes flat on a clean towel after gently squeezing out excess water. Avoid standing them upright, as water can seep into the handle and loosen the glue, leading to shedding bristles.
- Reshape the brush heads while they're damp to maintain their form.
- Let them air dry completely before using them again. This may take several hours, so cleaning your brushes after you've used them is ideal.
Storing Your Brushes:
- Once dry, store your brushes in a clean, dry place.
- Use a brush holder or a case to keep them organized and prevent dust accumulation.
- Keep them away from direct sunlight and heat sources, as these can damage the bristles over time.
Regular Maintenance:
- Even after cleaning, keep an eye on your brushes for any signs of wear and tear.
- If bristles start to shed or lose their shape, it might be time to replace the brush.
- Regularly inspect the handles and ferrules (the metal part that connects the bristles to the handle) for any damage.
Keep your makeup brushes clean for flawless application. Treating your tools well reflects care for your makeup routine and skin.
DIY Cleaning Solutions
Creating your own makeup brush cleaner is a simple and effective way to ensure your brushes stay in pristine condition. Here's how you can make a gentle yet effective cleaner with ingredients you likely have at home.
Ingredients:
- 1 cup of warm water
- 1 tablespoon of vinegar (to disinfect and break down oils)
- 1 teaspoon of dish soap (to cleanse)
- 1 teaspoon of olive oil (to condition the bristles)
Instructions:
- Mix the Ingredients: In a bowl, combine the warm water, vinegar, dish soap, and olive oil.
- Gentle Cleaning: Dip the brush into the mixture and swirl gently. Avoid soaking the entire brush to prevent damage to the handle.
- Rinse Thoroughly: After swirling the brush, rinse the bristles under lukewarm water until the water runs clear.
- Condition the Bristles: Swirl the brush in a small amount of olive oil to condition the bristles, then rinse again lightly.
- Dry Properly: Reshape the brush head and lay it flat on a clean towel to dry.
Tips:
- Frequency: Clean your brushes every 7 to 10 days to maintain their quality and protect your skin.
- Natural Alternatives: If you prefer, you can substitute dish soap with castile soap for a more natural option.
- Disinfecting: The vinegar in this solution helps to disinfect the brushes, ensuring they are clean and safe to use.
Use these DIY solutions to save money, keep your brushes clean, and extend their lifespan. It's quick, easy, and uses everyday items. Enjoy your fresh brushes and flawless makeup!
Troubleshooting Common Issues
Makeup brushes are crucial in beauty routines but can have issues. This guide helps troubleshoot common problems, keeping them reliable.
Shedding Bristles:
- Cause: Shedding can occur due to poor quality, overuse, or harsh cleaning methods.
- Solution: Be gentle when cleaning and drying brushes. If shedding persists, it may be time to invest in a higher-quality brush.
Stiff Bristles:
- Cause: Build-up of makeup, oils, or using the wrong cleaning products can lead to stiff bristles.
- Solution: Use a gentle brush cleaner and make sure to thoroughly rinse out any soap or cleaner to restore softness.
Lingering Stains:
- Cause: Some pigmented makeup can stain bristles, especially on lighter-colored brushes.
- Solution: For tough stains, use a mixture of dish soap and olive oil to break down the pigment, then rinse well.
Loss of Shape:
- Cause: Improper drying or storage can cause brushes to lose their shape.
- Solution: After cleaning, reshape the brush head and lay flat to dry. Store brushes in a holder that allows them to retain their shape.
Foul Odor:
- Cause: A bad smell can arise from bacteria growth if brushes aren't dried properly.
- Solution: Ensure brushes are completely dry before storing. If the odor persists, clean with a vinegar solution to disinfect.
Scratchy Texture:
- Cause: Over-cleaning or using harsh chemicals can damage bristles, making them scratchy.
- Solution: Stick to mild cleaners and condition the bristles with a small amount of hair conditioner after washing.
When to Replace:
Experts suggest replacing your makeup brushes every two years or immediately if they are beyond repair. If you notice persistent problems that cleaning and care don't fix, it's time for a new set.
Taking care of these issues can make your makeup brushes last longer and stay hygienic.
FAQs About Cleaning Makeup Brushes
Discover essential FAQs about cleaning makeup brushes and keep your tools pristine. Learn the best tips for effective and hygienic brush care.
You should clean your makeup brushes every 7 to 10 days to remove bacteria, dirt, and oil. If you use your brushes more frequently or for heavy makeup application, consider cleaning them more often to maintain skin health and brush performance.
For a gentle and effective clean, use a mixture of lukewarm water and a tablespoon of either gentle shampoo or clarifying shampoo. Avoid using harsh detergents as they can dry out and damage the bristles.
Rinsing brushes under lukewarm, running water is the first step to remove residual makeup. However, it’s important to follow up with a proper cleaning solution to ensure all makeup residue and bacteria are removed.
After squeezing out excess moisture with a clean towel, lay your brushes flat to dry on a towel with the tips hanging off the edge of a counter. This prevents water from loosening the glue in the handle and helps maintain the shape of the bristles.
It's best not to share your makeup brushes. Sharing can spread bacteria and infections. If you must share, clean the brushes thoroughly before and after use to minimize the risk.
Final Thoughts
Since I started following the best way to clean makeup brushes, my makeup looks smoother and my skin feels healthier. Washing them at home is easy and makes a big difference. I hope you'll find these tips on how to wash makeup brushes helpful. Give it a try and see how it improves your makeup routine.


