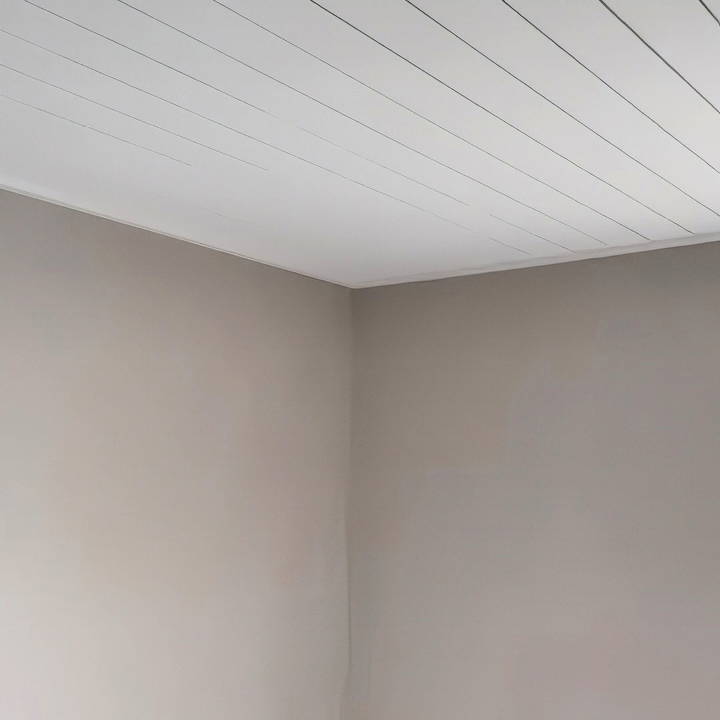
Popcorn ceilings were once a popular design choice, but many homeowners today find them outdated and challenging to maintain. The rough texture tends to accumulate dust and can be difficult to paint or repair. Fortunately, there are several effective ways to cover a popcorn ceiling without undergoing the hassle of scraping it all off. Follow this guide to learn about a stylish shiplap approach and other ways to refresh your ceiling for a clean, modern look.
Why Not Remove the Popcorn Ceiling?
Before diving into methods for covering a popcorn ceiling, it's important to understand why many people choose not to remove it. Scraping off a popcorn ceiling is time-consuming, messy, and can expose hazardous materials such as asbestos in older homes. The process also requires extensive prep work, protective gear, and sometimes professional assistance. Covering the popcorn ceiling can be a more convenient, budget-friendly, and stylish alternative.
Step by Step Instructions
Learn how to cover a popcorn ceiling with shiplap and other methods. The step-by-step guide includes materials, tips, and pros & cons.
Method 1: Covering Popcorn Ceiling with Shiplap
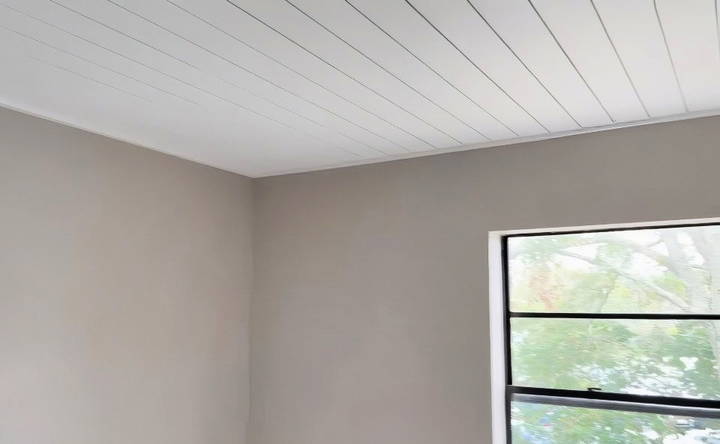
Using shiplap to cover a popcorn ceiling is an increasingly popular choice because it's cost-effective, adds a modern aesthetic, and is relatively easy to install. Here's a step-by-step guide on how to transform your ceiling using shiplap.
Materials Needed:
- Shiplap boards
- Construction adhesive
- Nail gun and nails
- Measuring tape
- Level
- Caulk and caulking gun
- Paint (optional)
- Trim (optional)
Step 1: Prepare the Ceiling
Start by assessing the structural elements in your ceiling. Use a stud finder to locate and mark the positions of ceiling joists, as these will be your anchor points for securing the shiplap. This step ensures that the boards are well-supported, especially for heavier materials like wood.
Step 2: Cut Shiplap Boards to Size
Measure the dimensions of your ceiling and cut the shiplap boards to fit. Many people prefer to stagger the joints for a more rustic, natural look. Cutting the boards in advance makes the installation process smoother and faster.
Step 3: Apply Construction Adhesive
Apply a generous amount of construction adhesive to the back of each shiplap board. This adhesive provides additional support and helps secure the shiplap against the ceiling. Be sure to apply the adhesive in a zigzag pattern to ensure an even bond.
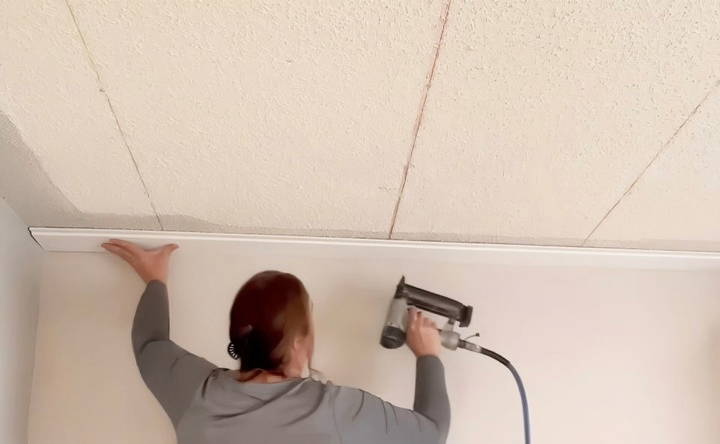
Step 4: Attach Shiplap with a Nail Gun
Using a nail gun, attach each board directly to the ceiling, aligning it with the joists. Drive nails along the edges and across each shiplap piece, ensuring it's flush with the ceiling. Repeat this process until the entire ceiling is covered.
Step 5: Fill Nail Holes and Caulk Seams
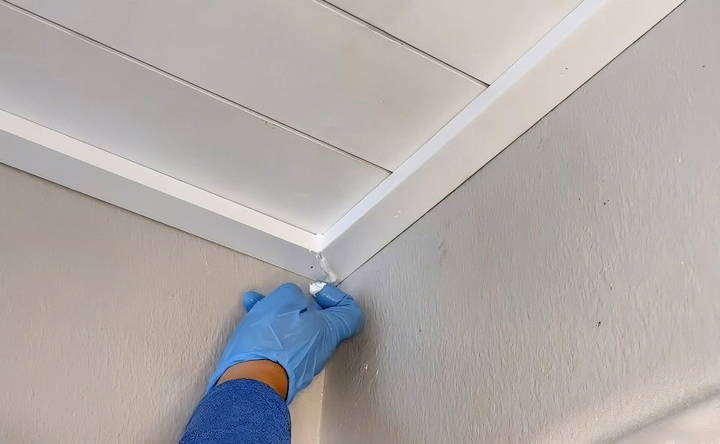
Once all boards are securely in place, fill in any visible nail holes with wood filler. Use caulk along the seams where the shiplap meets the walls to create a seamless, professional finish.
Step 6: Add Trim for a Finished Look
For a polished appearance, consider adding trim along the edges of the ceiling. This helps cover any small gaps between the ceiling and walls and gives the room a completed look.
Step 7: Paint the Ceiling
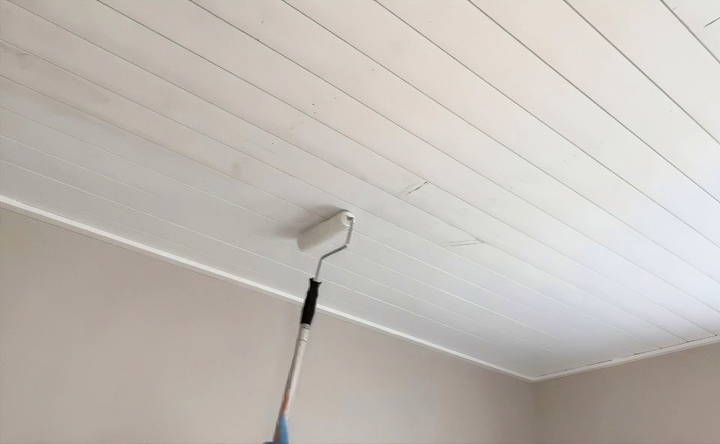
If you want a fresh, cohesive look, paint the shiplap. A light coat of primer followed by ceiling paint can give it a clean, bright finish. Opt for a paint sprayer if possible, as it will apply the paint more evenly over the textured surface.
Alternative Options for Covering a Popcorn Ceiling
While shiplap is an excellent choice, there are other methods to consider based on your style, budget, and ceiling condition.
Method 2: Using Ceiling Tiles
Ceiling tiles are another efficient way to cover popcorn ceilings. They come in a variety of textures and styles, from simple patterns to ornate designs, and can be installed directly over popcorn ceilings.
- Materials Needed: Ceiling tiles, construction adhesive, and a caulking gun.
- Installation Process: Similar to shiplap, measure your ceiling and plan the layout of your tiles. Apply construction adhesive on the back of each tile and press it onto the ceiling, aligning each one precisely to avoid visible gaps.
- Finishing Touches: Once all tiles are in place, caulk around the edges and paint if desired.
Method 3: Drywall Over the Popcorn Ceiling
Covering a popcorn ceiling with drywall is one of the most labor-intensive methods but can provide a completely smooth, modern ceiling.
- Materials Needed: Sheets of drywall, drywall screws, a drill, and joint compound.
- Installation Process: Attach drywall sheets to the ceiling joists, covering the popcorn texture entirely. Be sure to use screws designed for ceiling installations to prevent sagging.
- Finishing Touches: Tape and mud the seams, sand them down, and paint for a flawless finish.
Method 4: Installing a Plank Ceiling
For a rustic, farmhouse look, a plank ceiling offers an attractive alternative. Plank ceilings add warmth and can transform the ambiance of a room.
- Materials Needed: Wooden planks, construction adhesive, nail gun, and nails.
- Installation Process: Start by attaching each plank to the ceiling using construction adhesive and nails. Align the planks in a consistent pattern and check that they're level as you work.
- Finishing Touches: Stain or paint the planks as desired for a polished, customized look.
Method 5: Using Beadboard Panels
Beadboard panels offer a vintage aesthetic that can work beautifully in homes with traditional decor. The textured panels create a subtle pattern and can be painted in any color.
- Materials Needed: Beadboard panels, construction adhesive, nail gun, and nails.
- Installation Process: Measure and cut the beadboard to fit the ceiling. Use construction adhesive and nails to attach each panel. Be sure to align the edges carefully for a seamless look.
- Finishing Touches: Add caulk to cover any gaps and paint for a cohesive finish.
Tips for a Successful Popcorn Ceiling Cover-Up
Regardless of the method you choose, here are some practical tips to keep in mind:
- Check for Asbestos: If your home was built before the 1980s, it's wise to have the popcorn ceiling tested for asbestos. Covering may still be an option, but always consult a professional if asbestos is present.
- Measure Twice, Cut Once: Accuracy is crucial when cutting materials to cover a ceiling. Taking precise measurements can save time and prevent wasted materials.
- Use Quality Adhesive: High-quality construction adhesive will help ensure that boards or tiles stay secure and don't warp over time.
- Consider a Primer: If you plan to paint after covering, applying a primer can improve paint adhesion and ensure an even color.
- Ventilation Matters: Always work in a well-ventilated area, especially when using adhesives or paints that emit fumes.
Pros and Cons of Covering a Popcorn Ceiling
Discover the pros and cons of covering a popcorn ceiling. Find out if it's the right choice for your home renovation project.
Pros:
- Less Mess: Covering a ceiling is significantly less messy than scraping off a popcorn texture.
- Quick Transformation: Covering a popcorn ceiling can be completed in a day or two, depending on the method.
- Improved Aesthetics: Each covering method offers a more contemporary and clean appearance compared to popcorn texture.
Cons:
- Increased Ceiling Height: Adding materials over an existing ceiling may reduce ceiling height slightly.
- Cost of Materials: While still often cheaper than removing, some materials like shiplap or drywall can add up.
- Skill Required: Some methods, like drywall or planking, require more DIY skills than others.
Final Thoughts
Covering a popcorn ceiling is an excellent way to give your room a fresh look without the hassle of removal. From stylish shiplap to classic beadboard, each option has unique benefits that can cater to various tastes and budgets. Whether you're looking for a DIY-friendly method or willing to invest in a more professional finish, covering a popcorn ceiling is a rewarding project that can enhance your home's appeal and add value.
FAQs About Covering a Popcorn Ceiling
Discover the FAQs about covering a popcorn ceiling. Learn effective methods, materials, and tips for a smooth ceiling transformation.
If shiplap isn’t your style, consider thin drywall sheets or ceiling tiles. Drywall offers a smooth, modern finish and can be attached over the popcorn texture, while ceiling tiles provide a range of patterns and add character without the hassle of removing the popcorn.
Homes built before the 1980s may have asbestos in the popcorn texture. To check, send a small sample to a lab for testing. If asbestos is present, covering the ceiling is a safer, cost-effective alternative to professional removal.
Covering an existing ceiling with water damage isn’t recommended, as the underlying problem may worsen. First, identify and repair the leak, then dry the ceiling thoroughly before adding shiplap, drywall, or another covering material.
For the best results, push the caulk gun along the seam instead of pulling it. This technique helps create a smoother, more even bead of caulk, giving a professional finish to your ceiling edges or trim.
Always wear safety glasses when using a nail gun or handling adhesives above your head. Overhead work can be hazardous, so it's wise to use protective equipment to prevent eye injuries or dust inhalation.
Choose a quality primer before applying ceiling paint for optimal adhesion. A paint sprayer can help achieve an even coat, especially over textures like shiplap, and will reduce the effort compared to using a brush or roller.
Covering the ceiling with shiplap or drywall will slightly lower the ceiling height, typically by around half an inch to an inch. If ceiling height is a concern, opt for thinner materials or lighter ceiling tiles to minimize impact.
Costs vary based on room size and materials, but a shiplap project can typically be done for a few hundred dollars. Ceiling tiles are often cheaper, while drywall can be more expensive due to additional materials like joint compound and tape.
Painting faucets or fixtures with black paint may seem appealing, but it often chips quickly, especially in high-use areas. Consider alternatives, like purchasing pre-finished black fixtures, for a long-lasting look.


