Acrylic, also known as plexiglass, is a versatile and durable material popular in DIY projects. However, cutting acrylic by hand can be challenging due to its brittleness and tendency to scratch easily. This guide covers everything you need to effectively cut acrylic sheets using only hand tools. It includes preparation tips, various cutting methods, and edge-finishing techniques to help you achieve a professional appearance.
Introduction to Cutting Acrylic
Acrylic, or poly(methyl methacrylate), is prized for its transparency, durability, and lightweight nature. It's commonly used in place of glass for a variety of projects, from windows to DIY furniture. However, acrylic's glossy and brittle characteristics make it tricky to cut. Mistakes often lead to cracks, scratches, or jagged edges, so having the right techniques and patience is essential.
This guide provides clear steps for those who want to cut acrylic without power tools, using basic hand tools and easy-to-find materials to achieve smooth, clean cuts.
Tools and Materials Needed
Before starting, gather the following tools and materials:
- Straight Edge (e.g., a metal ruler or rectangular tube)
- Clamps (minimum of 2)
- Knife or Scoring Blade (for scoring and snapping method)
- Handsaw or Jigsaw
- Coping Saw (for cutting curves)
- Sacrificial Timber Piece (to prevent damage to your work surface)
- Sandpaper (various grits from rough to fine)
- Sanding Block or small piece of timber
- Polishing Compound (such as cream cleanser or abrasive paste)
- Rag
Step by Step Instructions
Learn how to cut acrylic sheets with step-by-step instructions. Discover three methods and techniques for a smooth, polished finish.
Preparation
Proper preparation is essential when working with acrylic sheets. Start by ensuring that your workspace is clean and flat, as a smooth surface reduces the risk of scratches.
- Protective Layering: New acrylic sheets come with a protective film that helps prevent scratches. Keep this film on while you work. If you're working with recycled or older sheets, apply masking tape along the areas where you'll be cutting. This provides additional protection from scratches.
- Mark Your Cut Line: Use a permanent marker to outline the cut, ensuring precision by measuring twice before marking. Place the sheet on a flat, stable workbench and clamp it down to keep it from moving.
Method 1: Scoring and Snapping
The scoring and snapping method is best for straight cuts on thinner acrylic sheets (up to ¼ inch). This method involves scoring the acrylic with a knife along the intended cut line and then snapping the sheet to break along the score.
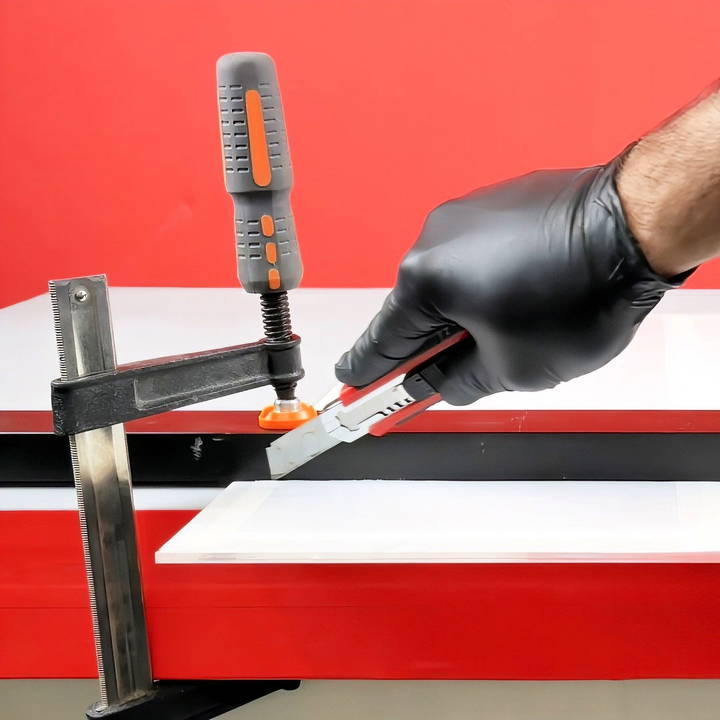
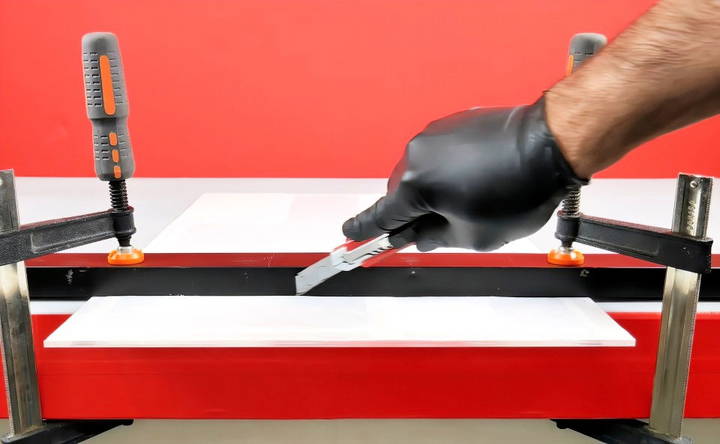
- Mark and Score: Place a straight edge along the line you want to cut. Firmly run a scoring knife along the line several times, applying even pressure but not pressing so hard that the blade veers off course.
- Flip and Score Again: Turn the sheet over and score along the same line on the opposite side to ensure a clean break.
- Snapping the Sheet: Position the acrylic with the scored line aligned along the edge of your workbench. Apply even downward pressure until the sheet snaps along the scored line.
Tips: Use larger portions of the sheet for easier snapping. Smaller pieces can make it difficult to apply the necessary force evenly, leading to uneven or jagged edges.
Method 2: Cutting with a Handsaw
A handsaw is ideal for making straight cuts on thicker acrylic sheets. Although this method requires more effort, it provides greater control over the cut and can be used for both large and small acrylic sheets.
- Set Up: Place a sacrificial piece of timber under the acrylic sheet to protect your work surface. Align the acrylic on the timber, ensuring that the cut line is off the edge of the table.
- Clamp and Measure: Clamp the acrylic, sacrificial timber, and any guide (such as a jig) securely. This will keep the material steady as you cut.
- Sawing Process: Begin cutting gently along the line using long, smooth strokes. Allow the saw's weight to do most of the work, avoiding excessive pressure which can cause chipping or cracking.
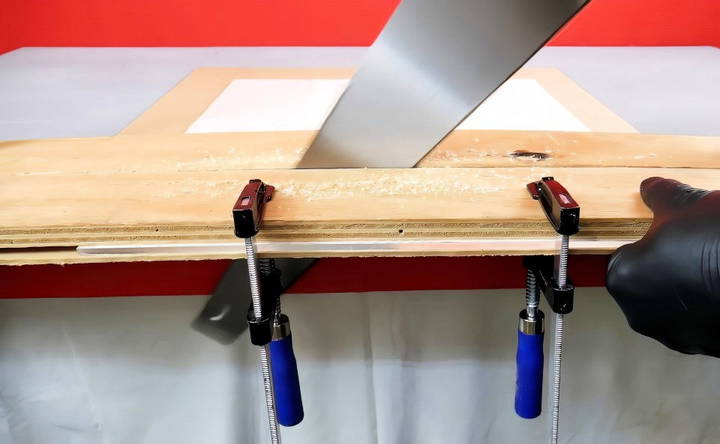
Comparison Tip: Finer-toothed saws leave shallower, less prominent marks, making them preferable when you want to minimize post-cut finishing work.
Method 3: Using a Coping Saw for Curves
For cutting curves or non-linear shapes, a coping saw is the best choice. Its narrow blade allows for greater flexibility, making it suitable for rounded corners and intricate cuts.
- Clamp the Acrylic: Place the acrylic sheet with the cutting line close to the edge of the workbench and secure it with a clamp.
- Cutting with the Coping Saw: Start slightly away from the line to allow for corrections, keeping the blade at a 90-degree angle to the sheet. Slowly follow the line, adjusting the saw's angle to maintain the curve.
- Finishing Touches: If the blade doesn't align perfectly with the line, you can smooth out the edges with sanding during the finishing stage.
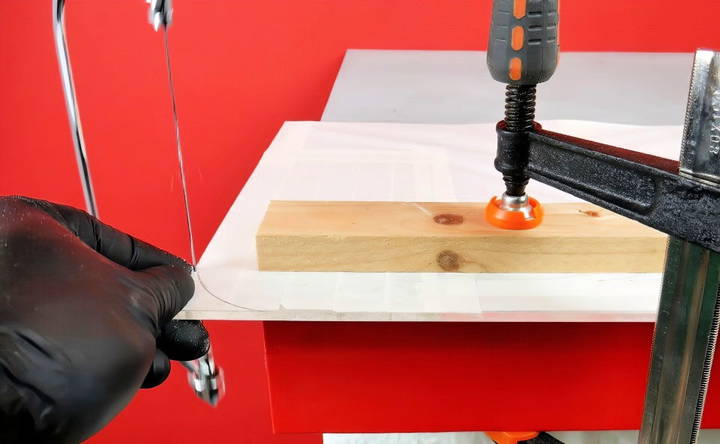
Tip: Take your time with the coping saw, as faster cutting can create jagged edges. Maintain a consistent, steady hand for the best results.
Finishing the Edges
Once your acrylic sheet is cut, the edges will likely be rough or marked. Finishing is essential to smooth and polish these edges, giving them a clean and professional appearance. Finishing includes both sanding and polishing.
Sanding Straight Cuts
Sanding will help remove any jagged or rough edges and prepare the acrylic for polishing.
- Setting Up a Sanding Jig: Place the cut acrylic edge between two pieces of timber, clamping them to create a sanding jig that holds the edge at a 90-degree angle.
- Sanding Process: Wrap coarse sandpaper around a sanding block, and start sanding with long, even strokes. Once a smoother surface is achieved, switch to finer grits, gradually refining the edge to a matte finish.
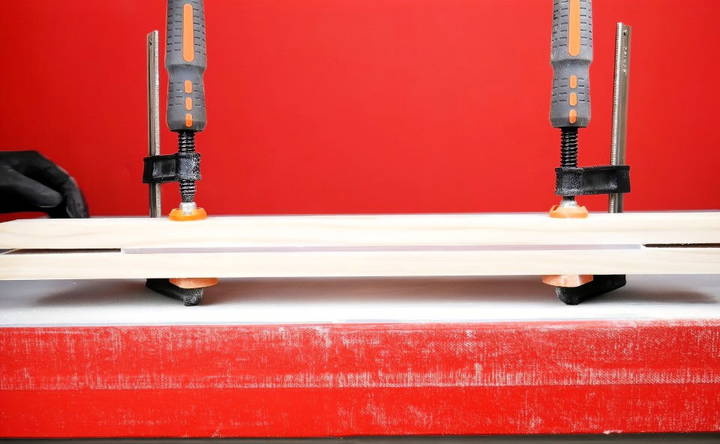
Tip: Move from rough to fine grit sandpaper progressively to avoid deep scratches, which are harder to polish out later.
Sanding Curved Cuts
Curved cuts require extra care to avoid sanding unevenly. Without a jig, it's essential to keep the sanding block steady and maintain the angle.
- Clamp for Stability: Position the cut edge close to the bench edge and secure it with a clamp.
- Sanding the Curve: Begin with rough sandpaper, holding the sanding block at a 90-degree angle, and work along the curve in steady strokes. Move to finer grits until the edge reaches a smooth, matte finish.
Note: Regularly check your work as you sand to ensure you're not over-sanding in any one spot.
Polishing the Edges
Polishing gives the acrylic edge a glossy, finished look, suitable for display or decorative projects.
- Apply Polishing Compound: Use a small amount of cream cleanser or abrasive paste on a soft rag. Apply the paste along the edge and begin buffing in small, circular motions.
- Buffing Process: For straight edges, work the polish along the edge in consistent strokes. For curved edges, wrap the rag around a sanding block to maintain an even polish as you buff.
- Inspect for Smoothness: Continue polishing until the edge is shiny and smooth. Acrylic edges that aren't polished may still show fine scratches or a cloudy appearance, so take time with this step.
Tip: For best results, use a dedicated polishing compound for acrylic if available, as it is designed specifically for acrylic materials and minimizes scratches.
Conclusion:
Cutting acrylic sheets by hand is a manageable project if you have the right tools and approach. By following the scoring and snapping method, using a handsaw, or opting for a coping saw, you can create a variety of cuts tailored to your project's needs. Finishing your edges through sanding and polishing will provide a professional-grade look and smooth, clean edges, making your project look as if it were done with power tools.
With patience and attention to detail, you'll find that acrylic is a rewarding material to work with, even by hand. Each step is a valuable skill, adding versatility to your DIY toolkit.
FAQs About Cutting Acrylic Sheets
Discover expert answers to FAQs about cutting acrylic sheets, including tips and tools for precise and efficient cuts.
Scoring both sides of the acrylic sheet at least three times with a utility knife or a scoring tool should create a deep enough groove to snap it cleanly. Ensuring even pressure along the score line will help avoid uneven breaks.
For rounded cuts, a coping saw with a fine blade works best. Start cutting just inside the marked line, using slow, consistent strokes while keeping the blade at a 90-degree angle to the sheet. Sand the edges after cutting for a smooth finish.
Yes, a Dremel with a cutting disc can work, especially on thinner sheets or for intricate cuts. However, be cautious of heat buildup, as high-speed tools can melt the acrylic. Use low to moderate speed and move the tool slowly.
After sanding with progressively finer grit sandpaper, use a polishing compound like a cream cleanser. Apply it with a rag and buff the edges in circular motions for a smooth, glossy finish. For extra clarity, a flame-polishing technique may be used, but it requires careful handling.
Start with 120-grit sandpaper to remove rough edges and progress to finer grits, like 240 and 400, for a smoother finish. For high-gloss polishing, use ultra-fine grits of 800 or higher.
To minimize cracking, always use the right tools, such as scoring tools for straight cuts and fine-toothed saws for thicker sheets. Applying even pressure and keeping the material firmly clamped can also help prevent breakage.
Yes, but go slow and use a drill bit meant for plastic. Drilling too quickly or using high-speed settings can cause the acrylic to crack. Place masking tape over the area to be drilled, and start with a smaller pilot hole before enlarging it if needed.
While a utility knife can be used, a dedicated acrylic scoring tool is preferable as it creates a deeper, more precise groove, reducing the risk of accidental scratches. This can save time and effort, especially on thicker sheets of acrylic.
The snapping method works best on widths of three inches or more. Narrower strips may not break evenly. For thin strips, consider using a saw instead for more control.
Polishing isn't strictly necessary for glued joints, but smooth, sanded edges result in a stronger bond by maximizing contact between surfaces. Fine sanding will help achieve a cleaner join without polishing.


