Cutting copper pipes may seem straightforward, but choosing the right tool and technique can make all the difference in achieving a clean, precise cut. Whether you're a DIY enthusiast or a professional plumber, knowing which method works best for different situations can save time and effort. This guide will cover five effective methods about how to cut copper pipe, offering tips and insights to ensure a smooth, safe process.
Essential Tools and Preparations
Before you start cutting copper pipes, gathering the right tools and setting up a safe workspace is crucial. Here's a list of the tools you might need and tips for preparing to cut copper pipe.
Tools Needed
- Copper Tubing Cutter – A specialized tool that ensures a clean, smooth cut without deforming the pipe.
- Auto-Cut Tool – Compact and ideal for tight spaces, this tool automatically adjusts as you rotate it around the pipe.
- Hacksaw – A more accessible option but requires precision and a steady hand to avoid rough edges.
- Power Hacksaw (e.g., Sawzall) – A powered saw that speeds up the process but may leave burrs or rough edges.
- 12V Tube Cutter – A powered copper pipe cutter that offers precise, quick cuts.
Workspace Setup
Ensure you have a stable work surface. If possible, use a vise to secure the copper pipe. This minimizes movement and enhances safety. It's essential to wear protective gloves and goggles to protect your hands and eyes from metal particles. Additionally, make sure your work area is well-lit and free from clutter to prevent accidents.
Step by Step Instructions
Learn how to cut copper pipe efficiently with step-by-step guides for different tools. Discover tips for success and choose the right method for you.
Method 1: Using a Copper Tubing Cutter
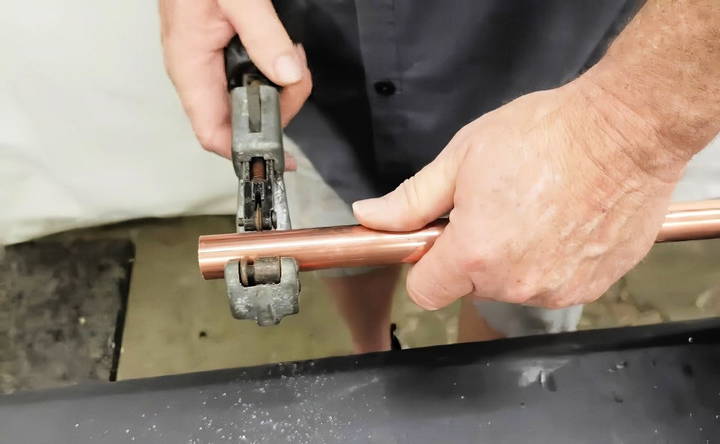
The copper tubing cutter, first invented around 1918, remains one of the most popular tools for cutting copper pipes. It's versatile, adjustable, and straightforward, making it a top choice for professionals and DIYers alike.
Step-by-Step Instructions
- Adjust the Cutter – Open the tubing cutter by rotating the adjustment knob, creating space for the pipe to fit snugly.
- Position the Cutter – Place the cutter around the copper pipe, ensuring it sits flush against the pipe's surface.
- Tighten and Rotate – Gradually tighten the knob, pressing the cutting wheel into the copper as you rotate the cutter around the pipe. Continue rotating until the pipe is completely severed.
- Check the Cut – Examine the cut end of the pipe. If there are any burrs or rough edges, smooth them out using a deburring tool.
Tips for Success
- Adjust Gradually: Tightening too quickly can cause the pipe to deform. Make small adjustments with each rotation.
- Keep the Cutter Steady: A smooth, even pressure will ensure a clean cut and minimize the need for additional filing or deburring.
Method 2: Using an Auto-Cut Tool
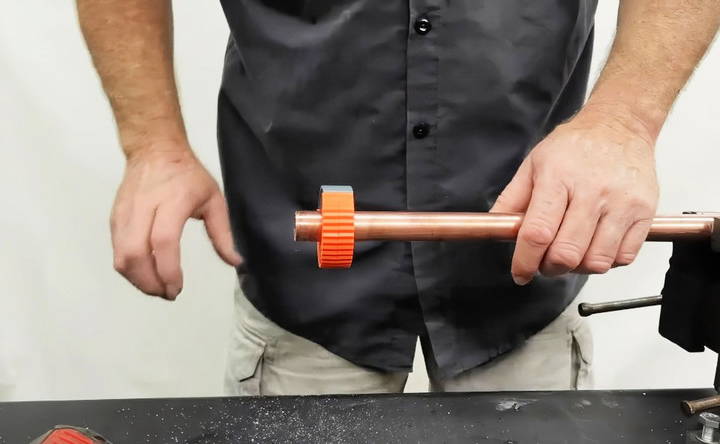
The auto-cut tool is a compact alternative to the traditional tubing cutter, designed for cutting pipes in tight spaces. It automatically adjusts to the pipe's size, making it an excellent choice for confined areas like basement corners or wall cavities.
Step-by-Step Instructions
- Position the Tool – Align the tool with the pipe and snap it onto the copper pipe. Make sure it's seated securely.
- Follow the Direction – Most auto-cut tools have a directional arrow to indicate which way to turn the tool. Rotate it in this direction for optimal performance.
- Rotate Until Cut – Continue turning the tool until it cuts through the pipe. The auto-cut tool will adjust automatically, so there's no need to tighten manually.
Advantages of the Auto-Cut Tool
- Easy in Tight Spaces: Its compact design and automatic adjustment make it ideal for confined or awkward spaces.
- Efficient for Small Jobs: The auto-cut tool is perfect for situations where you need a quick, no-fuss cut without additional adjustments.
Method 3: Cutting Copper Pipe with a Hacksaw
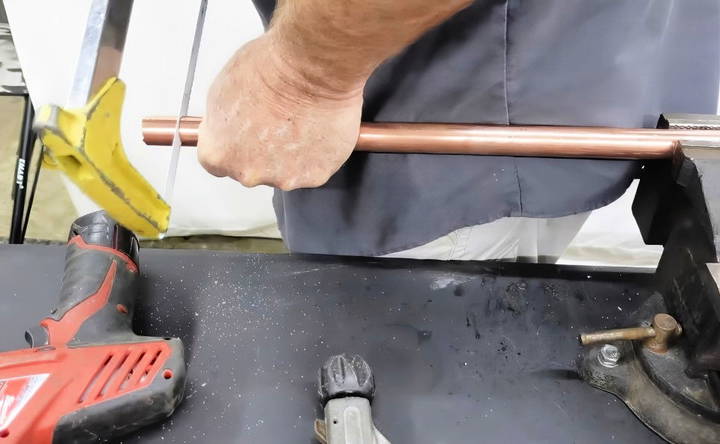
Using a hacksaw is one of the oldest methods for cutting copper pipe. Although it's less efficient and may require additional cleanup, it's still a practical option if you don't have specialized cutting tools.
Step-by-Step Instructions
- Secure the Pipe – Place the copper pipe in a vise or secure it firmly against your workspace to prevent it from moving.
- Position the Hacksaw – Align the hacksaw blade perpendicular to the pipe for a straight cut.
- Saw Slowly – Using controlled, even strokes, cut through the pipe. Patience is essential here, as rushing can lead to rough edges and a crooked cut.
- Smooth the Edge – After the cut, use a deburring tool or sandpaper to smooth any rough edges.
Hacksaw Tips
- Choose a Fine-Toothed Blade: A fine-toothed blade works better on copper, producing a smoother cut.
- Deburring is Essential: Hacksaws can leave rough edges. Proper deburring is critical to avoid difficulties during fitting.
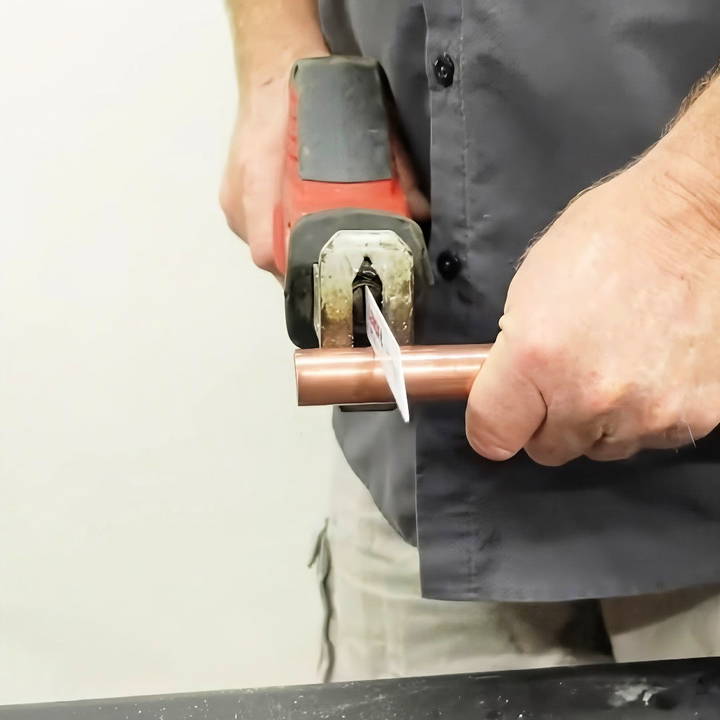
Method 4: Using a Power Hacksaw (Sawzall or Similar)
For a faster, more effortless cut, a power hacksaw like the Sawzall can be used. This method is suitable for cutting multiple pipes or when you need to get the job done quickly.
Step-by-Step Instructions
- Secure the Pipe – Just like with a manual hacksaw, ensure the pipe is firmly clamped or held steady in a vise.
- Align the Blade – Position the Sawzall blade at the cutting point. Make sure it's perpendicular for a straight cut.
- Apply Steady Pressure – Engage the saw, applying minimal pressure. Let the saw's motion do the work, as pushing too hard can create jagged edges.
- Deburr as Necessary – This method often leaves burrs. Use a deburring tool or file to smooth the pipe edge.
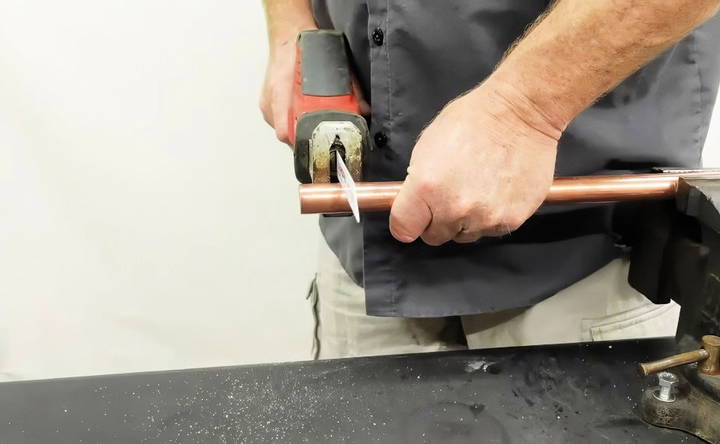
Considerations for Power Hacksaws
- Not Ideal for Precision: This method can leave a rough edge, so it's better suited for general or non-aesthetic cuts.
- Safety First: Since power saws create more debris, wearing safety goggles and gloves is even more important.
Method 5: Using a 12V Tube Cutter
A 12V tube cutter is a battery-operated tool that simplifies the process of cutting copper pipe with minimal effort. It's efficient, precise, and suitable for repetitive cuts.
Step-by-Step Instructions
- Prepare the Cutter – Switch on the 12V tube cutter and ensure it's set for copper pipe.
- Position the Pipe – Insert the pipe into the cutter's jaws.
- Activate the Cutter – Press the trigger to start the cutting mechanism. The tool will rotate around the pipe, cutting through in seconds.
- Inspect the Cut – Once done, examine the cut. This method often produces a clean edge, but deburring may still be needed.
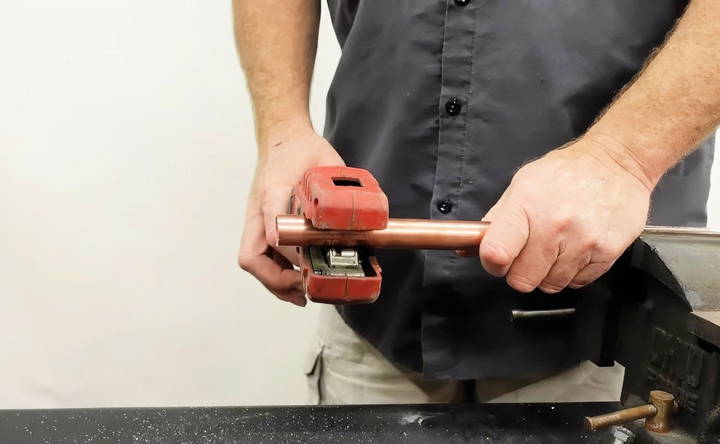
Advantages of the 12V Tube Cutter
- Precision and Speed: This tool offers quick, precise cuts, making it ideal for professionals or those handling multiple pipes.
- User-Friendly: Minimal manual effort is required, making it a great option for beginners.
Finishing Touches: Deburring and Smoothing
No matter which cutting method you choose, deburring is essential to ensure smooth pipe ends that fit correctly with connectors and other fittings. Burrs are small, rough metal fragments that can create challenges when connecting pipes, so it's crucial to remove them.
Using a Deburring Tool
A deburring tool is designed to remove rough edges and ensure a smooth finish. Here's how to use it:
- Insert the Tool – Place the deburring tool inside the pipe end and apply light pressure.
- Rotate the Tool – Rotate the tool around the inside edge to shave off any burrs.
- Check the Edge – Feel the edge to ensure it's smooth. If any roughness remains, continue deburring until the edge is clean.
Choosing the Right Method for Your Needs
With five effective methods available, you might wonder which is best for your project. Here's a quick breakdown to help you decide:
- Best for Precision: The copper tubing cutter provides clean, precise cuts with minimal burrs, ideal for plumbing connections.
- Best for Tight Spaces: The auto-cut tool shines in confined areas where traditional cutters can't fit.
- Best for Budget: A hacksaw is a simple, low-cost option if you don't have access to specialized tools.
- Best for Speed: The 12V tube cutter cuts quickly and easily, making it the tool of choice for repetitive tasks.
- Best for General Use: A power hacksaw or Sawzall is useful for general tasks but may not produce the cleanest cuts.
Conclusion
Cutting copper pipe doesn't have to be a difficult or time-consuming task. By choosing the right tool and following the proper techniques, you can make precise cuts with minimal effort. Remember, each method has its strengths and drawbacks, so select the one that best suits your workspace and needs. After cutting, always deburr the pipe to ensure a smooth finish for seamless fitting. With these methods, you're well-equipped to tackle any copper pipe-cutting project with confidence.
FAQs About Cutting Copper Pipe
Find answers on cutting copper pipe FAQs. Discover tips on tools, methods, and safety for efficient copper pipe cutting.
Yes, you can use a multi-tool, especially in tight spots where larger tools won’t fit. However, it’s not ideal for precise cuts. Go slowly, control the tool carefully, and be sure to deburr the edges afterward for a cleaner fit.
A Dremel with a suitable cutting blade can work, but it’s generally not recommended for larger copper pipes. For small adjustments or cuts in thin pipes, it may be useful, but exercise caution to avoid uneven cuts.
Auto-cut tools are ideal for this, as they automatically adjust and fit in confined areas. A compact power saw like the 12V Milwaukee can also work well if more control is needed.
For larger pipes, a heavy-duty tubing cutter is best, but if unavailable, a fine-toothed hacksaw or Sawzall with a metal blade can also work. Go slow to maintain control and finish by deburring the cut edge.
While pipe cutter blades aren’t typically sharpened, they can be replaced. For frequent cutting, investing in a new blade rather than sharpening can provide smoother cuts and reduce the risk of damage.
An angle grinder can be used, but it’s not ideal for copper since it can produce uneven cuts and excess heat. Angle grinders are better suited for thicker metals like cast iron.
Cable cutters are designed for cutting wire or cable and aren't suited for copper pipes. Using one could damage both the tool and the pipe.
Deburring removes rough edges left after cutting, ensuring that pipes fit snugly with connectors. This step also reduces the risk of leaks, as burrs can interfere with tight seals.
A fine-toothed, bi-metal blade works best on copper pipes. This type of blade reduces jagged edges and minimizes the need for extensive deburring.
Cutting very thin rings with a standard pipe cutter can be challenging. Slow, steady movements can help, but precision tools might be better suited for detailed projects like keychains.


