Felling a tree requires careful planning, the right techniques, and safety measures to ensure a smooth and safe process. This all-inclusive guide leads you through the essential steps of cutting down a tree, especially if you're a beginner, covering everything from tree assessment to making the right cuts and planning your escape route. By the end, you'll have the foundational knowledge to approach tree cutting safely and effectively.
Step by Step Instructions
Learn how to cut down a tree safely with step-by-step instructions. From tree assessment to stump inspection, follow these expert tips and best practices.
Step 1: Assess the Tree and Its Surroundings
Assess the tree and its surroundings to ensure safety and health. Discover effective methods for tree evaluation and environmental impact assessment.
Why Tree Assessment is Important
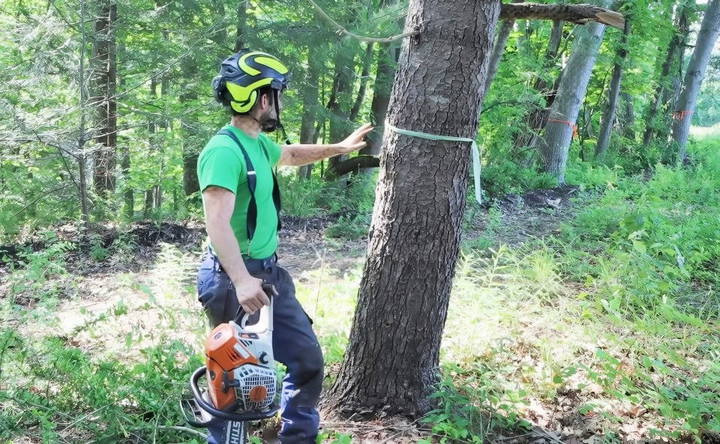
Before starting any cuts, it's essential to evaluate the tree and the environment. This assessment helps you determine the tree's lean, which influences the direction it will likely fall, and allows you to plan accordingly.
- Identify Tree Lean: Stand back and observe which way the tree leans naturally. Trees often grow toward light, meaning they may lean towards open spaces or clearings.
- Examine Nearby Obstacles: Look for objects or structures that could be in harm's way, such as buildings, power lines, or other trees. Plan to direct the tree's fall away from these obstacles.
- Consider the Tree's Condition: Check for signs of decay, dead branches, or weak spots, as these could impact the tree's stability and how it falls.
Step 2: Plan the Direction of the Fall
Once you've assessed the tree's natural lean, you'll want to plan where the tree should fall. If the natural lean aligns with your intended fall direction, you're in luck. Otherwise, you may need to adjust your cuts to encourage the tree to fall in the desired direction.
- Choose the Ideal Landing Spot: Mark an open area free of obstacles where the tree can safely land.
- Use the Tree's Lean: If possible, leverage the tree's lean to guide it toward the intended fall zone. However, slight adjustments can be made if needed, especially with proper face and back cuts.
Step 3: Prepare Your Equipment
To cut down a tree, you'll need the following equipment:
- Chainsaw: A well-maintained chainsaw with a sharp blade is essential. Ensure it's suitable for the tree's diameter.
- Personal Protective Equipment (PPE): Wear safety gear, including a helmet, gloves, eye protection, hearing protection, and sturdy boots. These will protect you from potential hazards during the cutting process.
- Wedges: Having a few plastic or wooden wedges can help guide the tree's fall direction and prevent your saw from getting pinched.
Step 4: Make the Face Cut
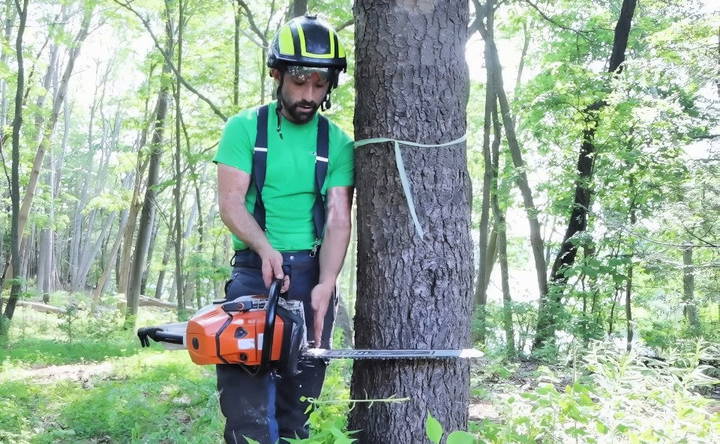
The face cut is the first significant cut, which determines the direction the tree will fall. It consists of two cuts: the top and bottom cut.
Positioning for the Face Cut
Stand on the side of the tree that aligns with the planned fall direction. Approach from the side rather than the back, so you can maintain a better angle and sight line for the face cut.
- Start with the Top Cut: Begin by making a downward cut at an angle of about 70 to 80 degrees. This cut should penetrate about a third of the way through the tree. Use the chainsaw's sight line to maintain a straight cut toward the intended fall direction.
- Make the Bottom Cut: Follow up with a horizontal cut that meets the bottom of your top cut. Together, these cuts should create a wedge (often referred to as the notch), approximately 70 to 80 degrees in total angle. This wedge will direct the tree to fall in the desired direction.
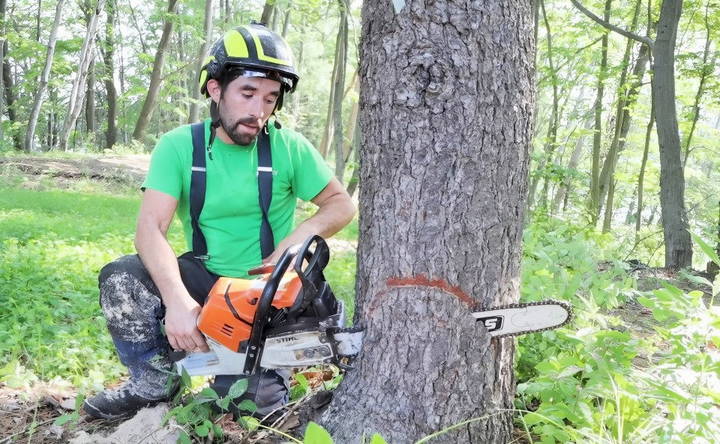
The face cut is crucial in directing the fall, so double-check that the angles and alignment are accurate.
Step 5: Execute the Back Cut
The back cut is made on the opposite side of the tree from the face cut. Its purpose is to release the tree from its stump, allowing it to fall along the path created by the face cut.
Steps for the Back Cut
- Start the Cut Slightly Above the Bottom of the Face Cut: Position the back cut about 1–2 inches above the notch made by the face cut. This slight offset creates a hinge that helps control the tree's descent.
- Ensure the Cut is Parallel to the Ground: Keep the back cut as level as possible. An uneven back cut could result in an unpredictable fall.
- Avoid Cutting Through the Hinge: Leave about 10% of the tree's diameter uncut between the face and back cuts. This uncut portion acts as a hinge, allowing the tree to fall slowly and under control.
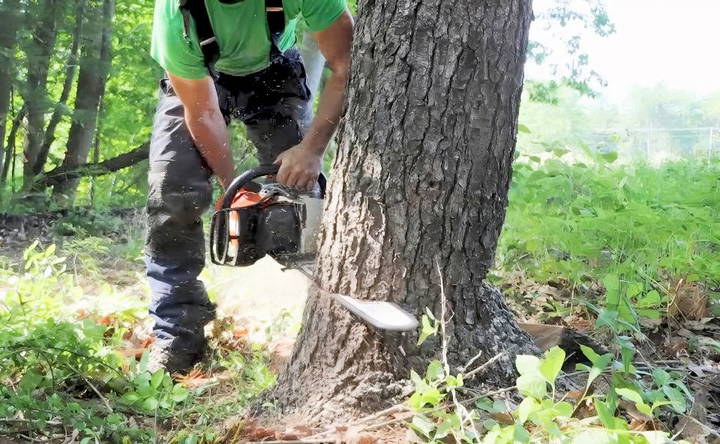
Be cautious and prepared to move away from the tree as you finish the back cut, as this is when the tree will start falling.
Step 6: Plan and Use an Escape Route
Safety is paramount when felling a tree, especially as it begins to fall. An escape route allows you to get out of the tree's fall path quickly.
- Establish a 45-Degree Angle Escape Path: Run away at a 45-degree angle from the direction of the fall to stay out of the tree's canopy throwback zone.
- Keep the Area Clear: Ensure there are no obstacles in your escape path. Having a clear path will enable you to move quickly and safely.
Step 7: Observe the Tree's Descent and Stay Alert
After making your cuts, step back along your escape route and stay aware of the tree's movement. Avoid turning your back entirely; instead, keep an eye on the tree to anticipate any unexpected behavior, like kickback or changes in fall direction.
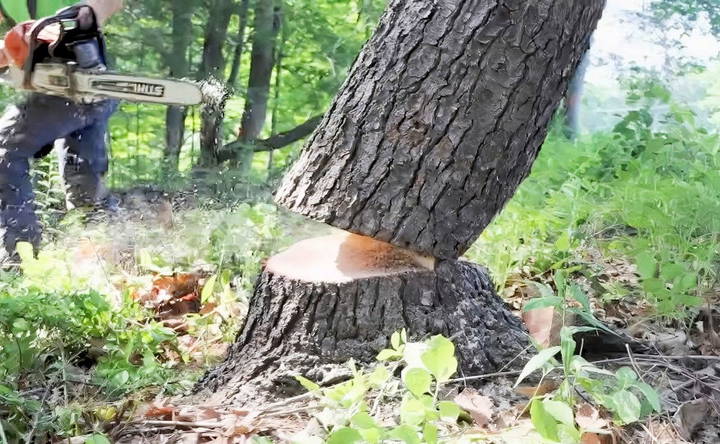
Step 8: Inspect the Stump
Once the tree has fallen, take a moment to inspect the stump. A clean cut can indicate that you executed the face and back cuts correctly.
- Check the Hinge: If the hinge broke evenly, it means the tree fell as planned. Any signs of fiber pull (where the wood fibers pulled out unevenly) could mean your hinge was too thick or you didn't use the correct angle.
- Assess the Cut Quality: Clean, even cuts indicate controlled and precise cuts. If the cuts are uneven, note these for improvement in future tree-felling projects.
Tips and Best Practices
Discover essential chainsaw safety tips, handling advice, and environmental considerations for effective and responsible chainsaw use.
Safety Tips
- Wear Full PPE: Helmets, gloves, and eye protection are essential to prevent injuries from debris or accidental chainsaw slips.
- Be Mindful of Tree Size: For larger trees, consider hiring a professional. Handling large trees can be risky for beginners.
- Practice Makes Perfect: Before tackling larger trees, practice on smaller, less complex trees to build confidence and skill.
Chainsaw Handling Tips
- Keep the Chainsaw Sharp: A sharp blade makes cleaner cuts and reduces the risk of kickback.
- Maintain a Stable Stance: Position yourself securely, keeping a firm grip on the chainsaw, and stay aware of your footing.
- Use the Chainsaw's Sight Line: Many chainsaws have a built-in sight line. Use this to help align your cuts accurately with the intended fall direction.
Environmental Considerations
- Consider Wildlife: Be aware of any nesting animals or wildlife that might be disturbed.
- Avoid Cutting During Wet Conditions: Wet ground can affect your stability, and wet wood can lead to slippery cuts.
Conclusion
Cutting down a tree is a skill that requires planning, precision, and a strong focus on safety. By assessing the tree, planning the cut, and following through with each step carefully, you can guide the tree to fall where you want, ensuring a controlled and safe descent. Practice on smaller trees, maintain your tools, and stay vigilant about safety to continue improving your tree-felling abilities. With these fundamentals in place, you'll have a solid foundation for tackling basic tree-felling tasks.
Now that you've got a clear guide, it's time to put your knowledge to work – but always remember, when in doubt, call in a professional to help.
FAQs About Cutting Down a Tree
Discover answers to FAQs about cutting down a tree, including safety tips, legal considerations, and environmental impacts.
A scarf, also called a “face cut” or “notch,” is the angled cut on the side of the tree where you want it to fall. It guides the tree’s fall direction by creating a hinge that controls the descent, preventing it from tipping back or sideways.
Use tools like tape, paint, or chalk to mark your cuts before starting. Some experienced tree cutters also suggest using a level for an exact horizontal cut, which can improve control and ensure your cuts align perfectly.
Yes, making the back cut an inch or two higher than the face cut helps prevent “kickback,” where the tree base moves backward as it falls. This technique is especially important for larger or leaning trees.
If the back cut aligns with or is lower than the face cut, the tree may “kick back.” Ensure your back cut is slightly higher than the face cut and keep a steady hinge to help guide the tree safely down.
Felling against a lean is more complex and often requires a “bore cut” or special wedges. Consider hiring a professional for trees with heavy opposite leans, as they require additional skill and safety precautions.
A 90-degree angle between the face and back cuts provides a straight hinge, which optimizes control over the tree’s fall. This angle keeps the hinge fibers aligned, preventing sudden shifts or splintering as the tree falls.
While possible, skipping the face cut is not recommended, as it reduces control. Even with a slight lean, a face cut ensures the tree doesn’t twist, kick back, or fall unpredictably.
A Dutchman cut occurs when the face and back cuts don’t meet precisely, creating an unstable hinge that could cause the tree to split or twist unpredictably. Aim for precise alignment to avoid this hazard.
A Humboldt cut results in a squared-off stump and reduces the tree’s tendency to kick back, making it preferable for certain types of trees or terrain. However, it requires more skill than a traditional cut.
To prevent fiber pull, which damages the wood's structural integrity, make a shallow face cut and avoid rushing the back cut. Invaluable for high-value trees, this technique maintains wood quality for lumber.
Wrapping around the tree while cutting increases exposure to kickback and falling debris. Instead, position yourself in a way that lets you complete the back cut from one side and retreat safely as the tree falls.


