Learn how to cut drywall with step-by-step instructions and expert tips for clean, precise cuts. Cutting drywall may seem straightforward, but using the right techniques can make the job faster, safer, and much more efficient. Whether you're tackling a home renovation project or just making minor repairs, mastering the right methods can save time and energy. In this guide, we'll explore essential tools, efficient cutting techniques, and practical tips for professional-quality results.
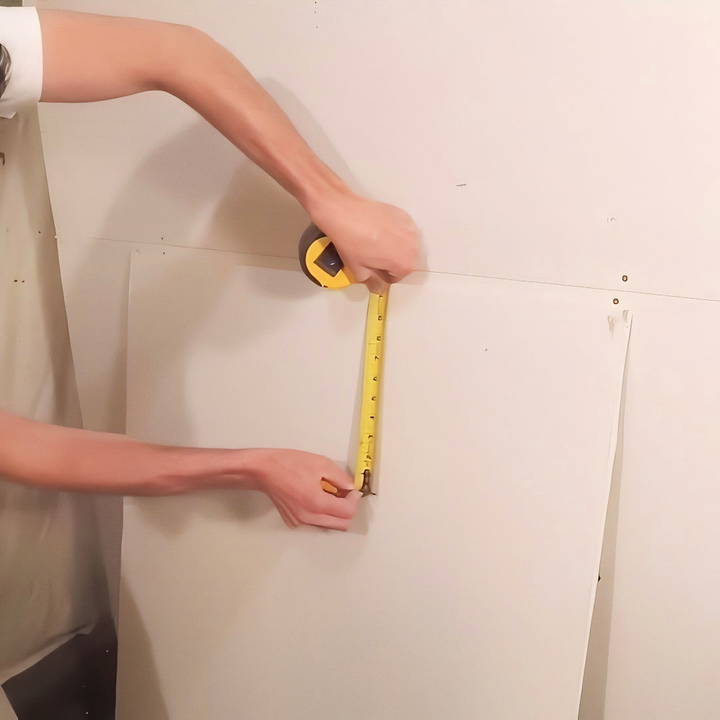
Tools You'll Need for Cutting Drywall
- Tape Measure - Essential for precise measurements.
- Utility Knife - A sharp knife makes clean cuts through drywall.
- T-Square or Straight Edge - Helpful for achieving straight lines.
- Pencil or Marker - For marking measurements (if necessary).
- Drywall Saw (Optional) - Useful for cutting around outlets or in tighter spaces.
Preparing for the Cut
Optimize your woodworking projects with expert tips on measuring and marking. Learn precise techniques in preparing for the cut.
Measuring and Marking
- Plan Your Cut: Before you start, ensure you have a clean, unimpeded surface. Leaning a stack of drywall sheets against a wall can help, especially when working with several pieces.
- Get a Precise Measurement: Use your tape measure and note the dimensions carefully.
- Secure the Drywall: If possible, ensure the drywall is stable by leaning it against a wall or stacked against other sheets. This minimizes movement and creates a smooth cutting experience.
Step by Step Instructions
Discover effective strategies and safety tips for cutting drywall. Learn techniques like the slide cut and how to cut without a t-square efficiently.
Cutting Techniques
Learn essential drywall cutting techniques for precise installation. Discover tips and tools for perfect cuts every time.
1. The Slide Cut Technique
The slide cut technique is a drywall-cutting method that saves time and results in precise cuts.
- Start by making a small puncture at the measurement point. This will act as your guide.
- Position your utility knife in the puncture. Hold the tape measure taut between your fingers, keeping the blade aligned with your mark.
- Slide the knife smoothly along the drywall, applying outward pressure to maintain a steady line. Avoid side-to-side wavering to keep the cut straight.
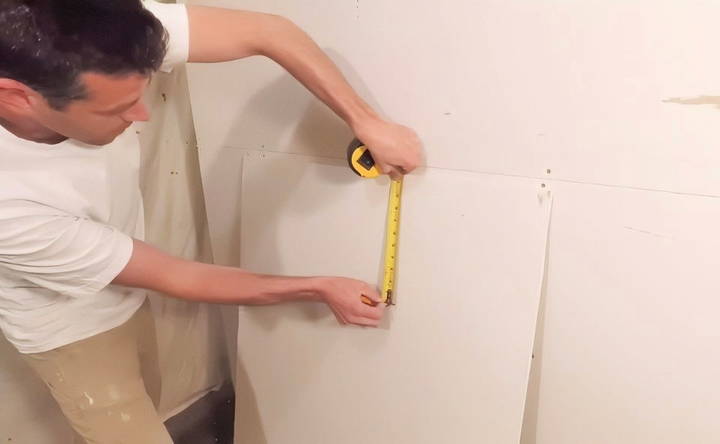
Pro Tip: Keeping outward tension helps lock the knife in a steady position, preventing any wobbles and ensuring a straight cut.
2. Cutting Multiple Narrow Strips
When you need several strips of the same width, make multiple cuts without snapping each piece off immediately.
- Mark intervals at the required width along the drywall edge (e.g., 2 inches, 4 inches, and so on).
- Use the factory edge of the drywall as a guide to keep your cuts straight and consistent. Start with the top measurement and cut down to the last one.
- Once all marks are cut, break each strip along the lines. This method saves time and ensures uniform strips.
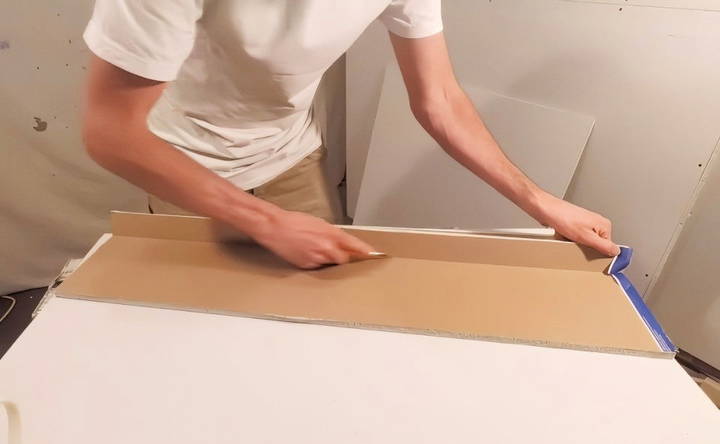
3. Cutting Without a T-Square
Sometimes, a T-square isn't readily available. You can still make accurate cuts with just your tape measure and utility knife.
- Measure the distance required along the drywall's edge.
- Place your tape measure along the edge, with the blade pinched to keep it in line with the measurement. Slide the knife along the drywall, keeping it straight by using the factory edge as a guide.
- For the last few inches that you may miss, stand over the drywall and cut the remaining part while eyeballing for alignment.
Advanced Techniques for Increased Efficiency
Discover advanced techniques for increased efficiency in woodworking, including using scrap pieces for precise cuts and measuring without a tape measure.
Using Scrap Pieces for Exact Cuts
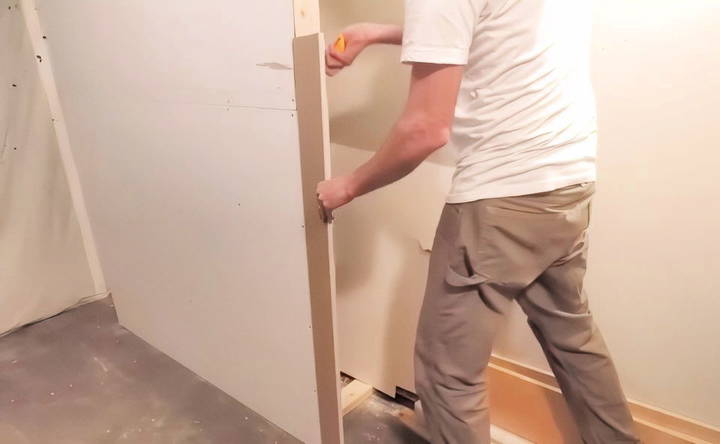
Instead of measuring each cut, you can use a piece of drywall scrap to guide your cuts.
- Attach a Scrap Piece: Nail or tack a scrap piece to the wall where you need the cut.
- Align and Cut: Use the scrap as a guide by aligning the drywall piece you want to cut and tracing along the scrap's edge.
- Snap and Break: With the scored line, snap the drywall to create a precise cut that perfectly fits the intended space.
This method is ideal for cutting small or narrow strips and saves time by eliminating the need to measure and mark each cut individually.
Measuring Without a Tape Measure
For certain cuts, you can use the actual drywall piece as your measuring tool.
- Position the Drywall: Hold the drywall in place against the wall.
- Mark the Cut Area: Instead of measuring with a tape, align the drywall and make a small cut to indicate the spot.
- Score and Snap: Follow the mark to make your full cut. This approach reduces potential errors from measuring and makes for a quick, efficient cut.
Making Irregular Cuts for Outlets and Fixtures
For cuts around electrical outlets or other fixtures, using a drywall saw or a utility knife is often more efficient.
- Measure the Fixture's Dimensions: Measure and mark the location of the outlet or fixture on the drywall.
- Draw the Cutout: Use a pencil to draw the outline directly on the drywall.
- Saw or Cut: Use a drywall saw to carefully cut along the lines. For smaller cuts, your utility knife can also work effectively.
Tip: Cut slightly larger than the fixture size to ensure a perfect fit and room for minor adjustments.
Practical Tips for Professional-Quality Cuts
- Use Factory Edges as Guides: The factory edge of the drywall is smooth and straight, ideal for maintaining consistent cuts. Align your marks with this edge whenever possible.
- Keep the Knife Blade Sharp: A dull blade will create rough cuts and increase the risk of damaging the drywall paper, so replace blades regularly.
- Minimize Tool Switching: Constantly swapping tools wastes time. Find efficient ways to keep your tape measure and knife accessible without frequently putting them down.
- Don't Over-Cut: Aim to cut just the paper layer on one side and then snap the drywall. Over-cutting wastes time and weakens the drywall.
Common Challenges and How to Avoid Them
- Wavy or Uneven Cuts: If your knife wavers during the cut, your drywall pieces won't align properly when installed. Applying outward pressure and using the factory edge can help minimize this.
- Chipped or Frayed Drywall Edges: Avoid rough edges by keeping your knife sharp and using minimal pressure.
- Measuring Errors: When working with multiple measurements, double-check each one. Misalignment can lead to gaps or misfits, so ensure all measurements are precise.
Safety Tips for Cutting Drywall
- Protective Gear: Drywall dust can irritate your eyes and lungs, so wear safety goggles and a mask.
- Stable Surface: Always cut on a secure surface to prevent slips.
- Cut Away from Your Body: To avoid accidental cuts, always position your knife away from yourself when cutting.
Summary
Mastering drywall cutting techniques not only improves efficiency but also the quality of your project. By using the slide cut technique, cutting without a T-square, or measuring without a tape measure, you can save valuable time and effort. Each method outlined here is designed to minimize repetitive motions and maximize your control, making each cut cleaner and more precise. Whether you're a DIY enthusiast or a professional contractor, these techniques can help elevate your drywall skills for faster, more efficient work.
If you follow these steps and integrate these tips, you'll find that cutting drywall becomes a quicker, easier, and more professional-looking task.
FAQs About Cutting Drywall
Discover expert answers to common faqs about cutting drywall. Learn techniques, tools, and tips for perfect results every time.
You can use your tape measure as a straight guide by carefully aligning it along your cut line and pulling your utility knife along its edge. Keep the knife steady and apply gentle pressure to maintain a straight line. For longer cuts, a stable hand and practice make this technique nearly as accurate as using a T-square.
For multiple narrow cuts, measure and mark each width (e.g., 2, 4, and 6 inches) from a factory edge. Make all your cuts at once without snapping pieces until the end. This technique reduces measuring time and maintains uniformity, as each cut aligns with the initial factory edge.
Mark the location of the outlet on your drywall. Use a drywall saw or a RotoZip tool with a tracer tip, which allows you to trace around the outlet box without damaging it. Cut slightly larger than the outlet’s dimensions for a clean fit without excess adjustments.
Screws are generally preferred for a secure hold, but nails can work for temporary placements or when no screws are available. Nails are faster but may loosen over time, so screws provide a more durable solution, especially for finished installations.
Drywall crumbles when not properly scored. Ensure you only cut through the paper on one side and then snap along the score line. If corners crumble, reduce pressure and ensure the scoring depth is even across the line to make cleaner breaks.
To avoid “warbling” (unintended knife wobbles), apply steady outward tension to your knife and tape measure. Keeping your blade steady and straight along the cut line helps prevent any sideways shifts, resulting in a cleaner, more accurate cut.
Yes, if you're more comfortable with the metric system, convert all measurements accordingly. Just ensure consistency across the project. Many people find metric measurements simpler for calculations, especially with smaller measurements that need to be precise.
For bullnose corners, leave a small gap instead of aligning the drywall flush with the corner edge, allowing space for the corner bead. For curved installations, wet the drywall slightly to increase flexibility, and use thin drywall sheets (1/4-inch) for better maneuverability.
Frequent blade changes are essential for clean scoring. A dull blade can tear the paper and create jagged edges. Replace blades as soon as you feel resistance while cutting, ensuring a smoother cut that requires less sanding or rasping afterward.


