Cutting foam board, also known as foam core, is an essential skill for many artists, architects, DIY enthusiasts, and anyone involved in model making, presentation building, or crafting. Achieving smooth, clean cuts without jaggy edges can be challenging, especially if you don't have the right tools or techniques. In this comprehensive guide on how to cut foam board without mess, we'll walk you through each step of the process, covering the essential tools, cutting techniques, and expert tips to ensure clean, professional results.
What is Foam Board?
Foam board is a lightweight, durable material made by sandwiching a layer of foam between two sheets of paper or plastic. It's widely used for mounting, presentations, model making, and craft projects. The outer layers give it a smooth surface, while the foam core provides stability and thickness.
While foam board is versatile and useful, cutting it requires precision to avoid rough, jagged edges. A poor cut can ruin the aesthetics of your project. That's why it's crucial to understand the proper methods for cutting foam board cleanly.
Essential Tools for Cutting Foam Board
Before you begin cutting foam board, it's important to gather the right tools. The right equipment will make the difference between a smooth, clean cut and a jagged, uneven one.
1. Sharp Blade
The number one rule for cutting foam board is to use a sharp blade. Dull blades tear the foam, creating rough edges and causing the paper layer to peel away from the foam. A fresh, sharp blade will make a clean, smooth cut through both the paper and foam layers.
One highly recommended blade for this purpose is the Olfa SAC-1 knife. This type of utility knife features a 30-degree angle blade, which is perfect for making precise cuts. The sharpness of the blade will ensure minimal pressure is needed, reducing the risk of compressing the foam and damaging the edges.
- Pro Tip: Always start with a fresh blade. If your blade begins to feel dull during the process, snap off the dull segment (if you are using a segmented blade) to reveal a new sharp edge. This is critical to maintaining clean cuts throughout your project.
2. Cutting Mat
A self-healing cutting mat is essential to protect your work surface and to provide a smooth base for cutting. These mats are designed to close up after being cut, preventing grooves from forming, which could otherwise affect the precision of future cuts. They also help preserve the sharpness of your blade by providing a clean, resilient surface to work on.
3. Straight Edge or Metal Ruler
A metal ruler or straight edge is crucial for guiding your blade and ensuring straight, even cuts. A plastic ruler is not ideal, as it may get damaged by the blade, causing uneven cuts and potentially ruining the foam board.
Metal rulers with non-slip backing are especially useful, as they prevent slipping during cutting, ensuring both safety and precision.
4. Pencil or Marker
To ensure accurate cuts, you'll need to mark your cutting lines with a pencil or a fine-point marker. It's best to use a tool that will provide a clear and precise line without smudging. If you're using a pencil, ensure it's sharp so that your lines are as accurate as possible.
Step by Step Instructions
Learn how to cut foam boards with our step-by-step guide. Follow simple instructions to get smooth cuts every time and troubleshoot common issues.
Step 1: Set Up Your Work Area
First, make sure your work area is clean and clear of clutter. Place your cutting mat on a stable, flat surface. This ensures that your foam board remains flat and that your cuts will be even.
Ensure you have adequate lighting so that you can see your cutting lines clearly.
Step 2: Position the Foam Board
Place the foam board on your cutting mat. If the foam board is large, you may want to tape it down lightly with painter's tape to prevent it from moving during the cutting process. Be sure not to tape over the area you will be cutting.
Step 3: Mark Your Cutting Line
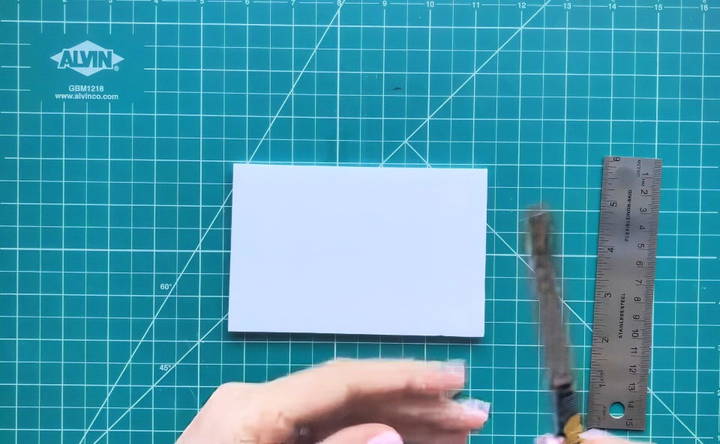
Using your pencil or fine-point marker, carefully mark the line where you want to cut. For accuracy, use your metal ruler or straight edge to draw the line. If your cut needs to be curved or involve intricate shapes, use a template or stencil to mark out the design.
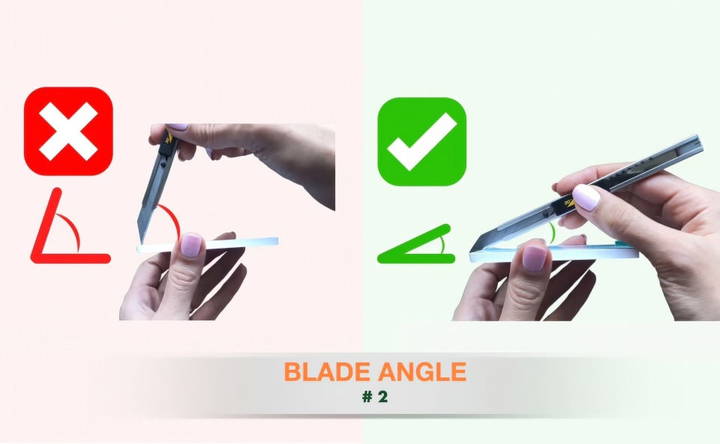
Step 4: Angle of the Blade
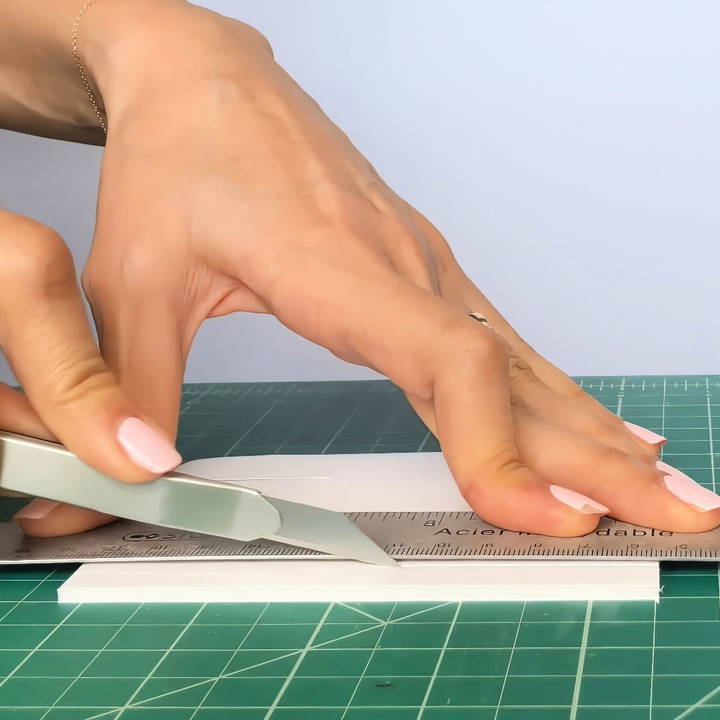
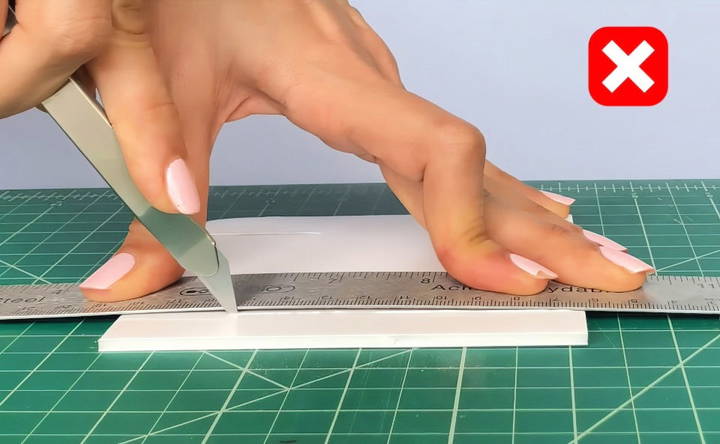
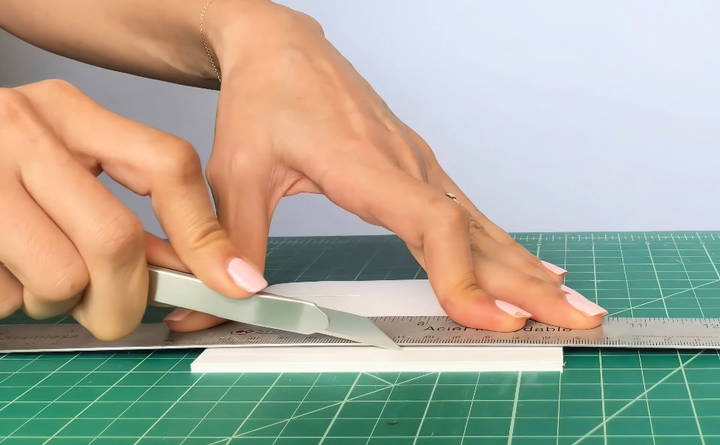
When cutting foam board, the angle of the blade is crucial. For a clean, smooth cut, hold the knife at an angle of less than 45 degrees. This helps to slice through the material rather than tear it, which reduces jagged edges and rough surfaces. The blade should be close to the foam board as you cut.
Avoid cutting with the blade at a steep angle, as this increases the chance of the foam compressing and results in uneven, jagged cuts. A shallow angle ensures better control and cleaner cuts.
Step 5: Use Light Pressure and Multiple Passes
When cutting foam board, resist the urge to cut through it in a single pass. Applying too much pressure can damage the foam, creating rough edges or uneven cuts. Instead, use medium pressure and make several passes with your knife along the same line.
- First Pass: The first pass should be light and serve as a scoring cut, slicing just through the top layer of paper.
- Second Pass: The second pass should go deeper, cutting through the foam layer.
- Third Pass: The final pass should fully cut through the bottom layer of paper, leaving you with a clean, precise cut.
By cutting in multiple passes, you reduce the pressure on the foam, preventing any compression or tearing of the material.
Step 6: Inspect Your Cut
Once you've finished cutting, carefully remove the excess foam board to reveal your cut piece. Check the edges to ensure they are smooth and clean. If any jagged edges remain, you can gently trim them with your knife.
Step 7: Repeat for Additional Cuts
For any additional cuts, repeat the same process. Always ensure that your blade remains sharp and that you are cutting with steady, controlled movements.
Troubleshooting Common Issues
Even with the best tools and techniques, issues can arise when cutting foam board. Here are some common problems and how to resolve them:
1. Jagged Edges
- Cause: This usually occurs when the blade is dull or too much pressure is applied in a single pass.
- Solution: Make sure to use a fresh blade and cut with light pressure in multiple passes. This will reduce jagged edges and ensure a smooth cut.
2. Uneven Cuts
- Cause: This can result from the foam board shifting during the cut or from not following the cutting line closely.
- Solution: Secure the foam board in place with tape and use a metal straight edge to guide your cuts. Ensure your hand is steady as you cut.
3. Compressed Foam
- Cause: Cutting with too much pressure or at too steep an angle can cause the foam to compress, creating dents or uneven thickness.
- Solution: Cut at a shallow angle (less than 45 degrees) and apply only medium pressure, using multiple passes to complete the cut.
Tips for Cutting Intricate Shapes
Cutting intricate shapes, curves, or designs on foam board requires extra care and precision. Here's how to approach more detailed cuts:
- Use a Smaller Blade: For fine details, consider using a smaller craft knife or a precision knife with a sharp, narrow blade. This gives you more control over the cut.
- Go Slow: Take your time when cutting intricate shapes. Rushing can lead to mistakes and jagged edges.
- Use Templates: If possible, use a stencil or template to outline your design before cutting. This ensures accuracy.
- Smooth Curves: When cutting curves, rotate the foam board as you cut rather than trying to move the knife in a curved line. This helps you maintain better control and prevents jagged edges.
Conclusion
Cutting foam board cleanly and precisely is an art that requires the right tools, technique, and patience. By following these steps, using a sharp blade, and making multiple passes with controlled pressure, you can achieve professional-level results in your projects. Whether you're creating models, displays, or craft projects, mastering the technique of cutting foam board will significantly improve the quality of your work. Keep these tips in mind, and you'll be well on your way to making perfect cuts every time.
Now, go ahead and put these tips into practice on your next project!
FAQs About How to Cut Foam Board
Learn tips and answers in our FAQs about how to cut foam boards. Discover techniques, tools, and best practices for perfect cuts every time!
To avoid jagged edges, ensure you are using a sharp blade and holding it at an angle less than 45 degrees. Make several passes with light pressure rather than trying to cut through the foam board in one go.
Yes, you can use the same method for thicker foam, but you will need to make more passes with your blade and maintain a shallow angle. For foam thicker than 5mm, this is especially important to achieve clean cuts.
This method works on foam board with various thicknesses. In the video, the foam board used is 5mm thick, but the same technique can be applied to thicker boards by adjusting the number of passes and blade angle.
Uneven cuts often happen when the foam board shifts or the blade angle is too steep. Secure the foam board with tape if necessary and maintain a shallow blade angle to ensure smooth, even cuts.
While this method can work on Styrofoam, it's tailored more for foam core board. For cutting Styrofoam, consider using a hot wire cutter for more intricate and precise shapes.
Compression happens when you apply too much pressure or cut at a steep angle. To prevent this, apply moderate pressure and make several passes with the blade held at a shallow angle.
If your blade becomes dull, snap off the dull segment (if using a segmented blade) to expose a fresh edge. Sharp blades are essential for achieving clean, smooth cuts.


