Starting out, I remember my first attempt at cutting glass. I was nervous and unsure, but I wanted to learn how to cut glass like a pro. I had seen it done on a few videos and thought, "I can do this too!" I gathered my tools, read up on safety measures, and watched several tutorials to get familiar with the process.
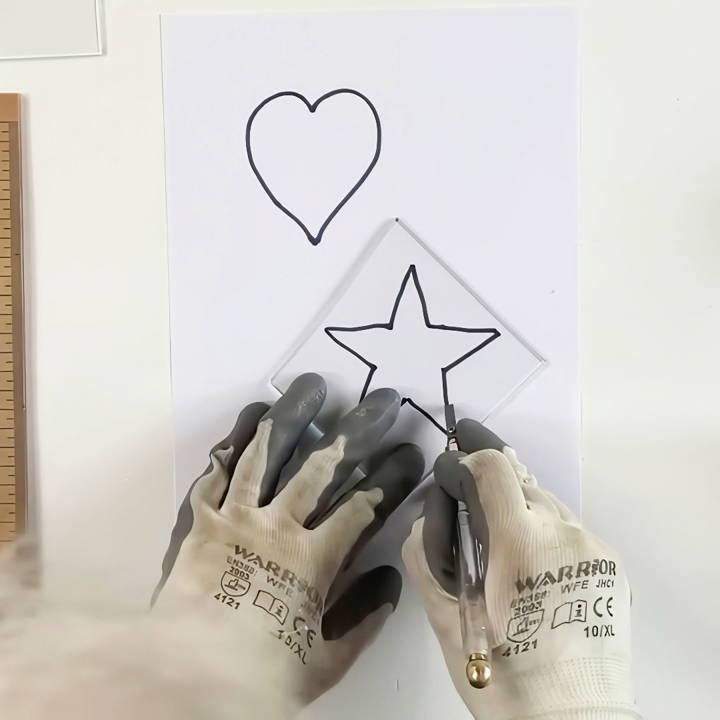
Even though it seemed daunting, I found it exciting to create something new. I learned how to cut glass at home using a glass cutter, a ruler, and some oil. It was a hands-on experience, and I made a few mistakes along the way. But each error taught me something valuable. Now, I want to share these tips with you so you can try them, too.
I'm helping with this: These steps will assist you in cutting glass smoothly and confidently. Now, follow along with this simple guide on how to use a glass cutter and start your glass-cutting project today.
Why Learn Glass Cutting?
Learning to cut glass is not just about completing a task; it's about unleashing your creativity. With this skill, you can customize glass to fit any space, repurpose old glass for new uses, and even craft handmade gifts. It's a practical skill that, once mastered, can save you time and money.
The Basics: What is Glass?
Glass is a hard material typically made from silica (sand), along with other compounds. It's loved for its transparency, durability, and versatility. However, glass is also fragile and requires careful handling, especially when cutting.
Safety Comes First
Before you start, it's crucial to prioritize safety. Always wear protective gloves and eyewear to shield yourself from sharp edges and potential shards. Work in a well-lit, stable environment, and keep a first-aid kit nearby just in case.
Understanding Glass Types
For a project involving glass, it's important to choose the right type. Glass has many varieties with different characteristics and uses. This section will help you understand the types of glass and how to pick the best one for your needs.
Float Glass: The Foundation
Float glass is the starting point for many glass products. It's made by floating molten glass on a bed of molten metal, resulting in a smooth and uniform surface. This type of glass is commonly used in windows and mirrors due to its clarity and versatility.
Tempered Glass: The Protector
Tempered glass is treated with heat to increase its strength. If broken, it shatters into small, blunt pieces, reducing the risk of injury. It's ideal for safety-critical areas like car windows and shower doors.
Laminated Glass: The Safety Net
Laminated glass consists of two or more glass layers with an interlayer, usually made of polyvinyl butyral (PVB), which holds the glass together upon impact. This makes it perfect for windshields and high-security areas.
Insulated Glazing: The Energy Saver
Insulated glazing, or double glazing, involves two glass panes separated by a spacer and sealed to create an insulating air gap. This type is excellent for reducing energy costs and maintaining comfortable indoor temperatures.
Low-E Glass: The Climate Controller
Low-E, or low-emissivity, glass has a microscopically thin coating that reflects heat while letting light pass through. It's used in energy-efficient buildings to help control the climate inside.
Mirrored Glass: The Reflective One
Mirrored glass is coated with a reflective material, making it opaque from one side. It's often used for mirrors and decorative purposes.
Tinted Glass: The Sun Shield
Tinted glass has added colorants that reduce solar radiation and glare. It's a common choice for vehicles and buildings in sunny climates.
Wired Glass: The Fire Resistant
Wired glass includes a wire mesh that makes it fire-resistant. It's used in fire doors and areas where fire safety is a concern.
Choosing the Right Glass
Selecting the right type of glass depends on the requirements of your project. Consider factors like safety, energy efficiency, aesthetics, and the environment. For instance, if you're working on a greenhouse, you might opt for tempered glass for safety and low-E glass for temperature control.
Knowing these glass types aids in making informed project decisions. The right glass meets needs and enhances design and efficiency.
Materials You'll Need and Why
Before we dive into the actual cutting process, it's important to gather all the necessary tools and understand their purposes.
Safety Goggles and Gloves
Safety first! Glass can break unpredictably, and tiny shards can cause serious eye injuries. That's why safety goggles are non-negotiable. Even if you wear glasses like I do, goggles provide the needed protection to cover the entire eye area. Similarly, gloves are essential to protect your hands from cuts.
Glass Cutter
The most critical tool for the job. Glass cutters come in various forms like pencil (or pen) cutters, pistol grip cutters, and custom grip cutters. I started with a pencil cutter as it felt more natural to hold, resembling holding a pen. An important tip: opt for a model that doesn't require oiling through the body, as it can get messy. An external oiling method with a small reservoir for dipping the cutter works wonders and keeps the process clean.
Grossing Pliers and Breaking Pliers
Grossing pliers, with a flat and a curved jaw, are designed for nibbling at the glass to shape it. Breaking pliers are used to apply pressure to make clean breaks along scored lines. They're essential for ensuring the glass breaks where and how you want it to.
T-Square and Tape Measure
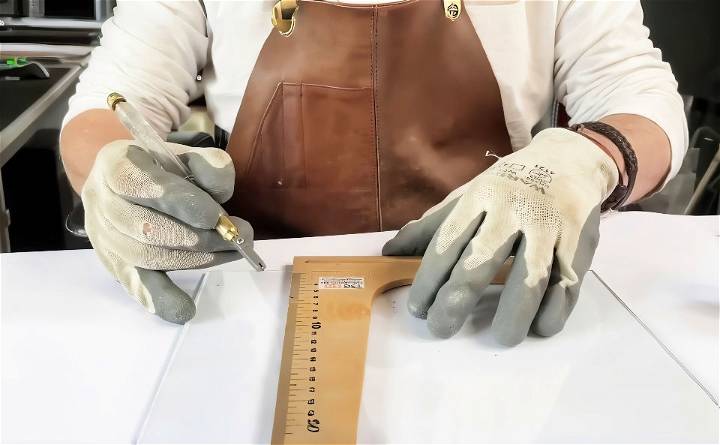
A T-square helps you make straight lines and accurate measurements, which is crucial for cutting borders or any pieces where precision is key. The tape measure is self-explanatory but equally important for getting the right size glass pieces.
Oil for Glass Cutter
Simple WD-40 or any light oil will work. The oil helps in making the scoring smooth and keeps the cutting wheel in good condition.
Step by Step Instructions
Learn how to cut glass safely and precisely with our step-by-step instructions. From tools to techniques, master the art of glass cutting today.
Preparing Your Workspace and Materials
Before starting, make sure your workspace is clean and stable. Safety should be your top priority, so wear your goggles and gloves from the get-go.
- Oil the Glass Cutter - Dip the cutting wheel in your oil reservoir to ensure it's lubricated. This makes scoring the glass smoother and prevents the wheel from wearing out quickly.
- Measure and Mark Your Glass - Use your T-square and tape measure to mark precise lines on the glass where you intend to cut. A non-permanent marker works best for this.
Scoring the Glass
Holding the glass cutter correctly is crucial for a successful cut. Hold it at a 45-degree angle to the glass surface, similar to how you would hold a pen, ensuring that the cutting wheel is perpendicular to the glass.
- Apply Even Pressure and Score Once - Start at the edge closest to you, applying a moderate and consistent pressure as you draw the cutter along your marked line. You'll know you're applying the right amount of pressure when you hear a distinct hissing sound. It's important to score the glass only once; multiple passes can make the break unpredictable.
Breaking the Glass
After scoring, it's time to make the break.
- For Straight Lines - Align the scored line over the edge of your work surface. With your hands positioned on either side of the score, apply a downward pressure. The glass should snap cleanly along the scored line.
- For Curved Lines or Shapes - Start by tapping the underside of the scored line gently with the ball end of your glass cutter. This encourages the score to run. Then, use breaking pliers, keeping the flat side on the top surface, to gently squeeze and break along the curve.
Nibbling and Shaping
For more intricate shapes or to remove small sections, use your grossing pliers. Score your desired shape, then make additional scores within that shape, close to but not crossing the outer score line. Gently nibble away at the piece using your grossing pliers, breaking along the internal scores until you can remove the piece entirely.
Advanced Techniques in Glass Cutting
Experienced in basic glass cutting? Advance with intricate designs and innovative methods. Here's a guide to hone your skills.
- Precision Cutting with the Morton System: The Morton Glass Cutting System is a specialized tool that enables precise cuts and intricate patterns. It's designed for both straight and complex miter cuts, giving you the ability to create detailed and precise glass pieces. This system is particularly useful for stained glass projects where accuracy is key.
- Complex Shapes and Curved Cuts: Advanced glass cutting involves creating shapes that go beyond straight lines. Learning to cut curves and complex shapes requires a steady hand and a deep understanding of glass behavior—practice by starting with gentle curves and gradually moving to more complex designs. Remember, a consistent scoreline is crucial for a clean break.
- Layering and Texturing Techniques: Layering different types of glass can create unique textures and colors. Techniques such as crackle glass, where the glass is intentionally cracked and then fused, can add depth and interest to your pieces. Experiment with layering clear and colored glass to discover new visual effects.
- Coldworking for a Professional Finish: After cutting, glass edges can be refined through coldworking. This involves processes like grinding, smoothing, and polishing to remove sharp edges and improve the overall appearance of the glass. Tools like grinders and lap wheels are used in this stage to achieve a high-quality finish.
- Heat-Based Methods: Some advanced techniques involve the controlled use of heat. Thermal shock can be used to create controlled cracks that follow a specific pattern. This requires heating a portion of the glass and then cooling it rapidly. It's a delicate process that offers unique results but must be approached with caution.
- Safety and Practice: As you delve into these advanced techniques, always prioritize safety. Use appropriate protective gear and work in a safe environment. Practice is essential; don't be discouraged by initial failures. Each attempt is a learning opportunity that brings you closer to mastering these advanced skills.
Use these advanced glass-cutting techniques to expand your creations, enhancing both artistic expression and practical applications.
Project Ideas
Starting a glass cutting project is exciting and rewarding. You can create functional items or artistic pieces showing your style. Here are some project ideas, both practical and decorative, to practice and showcase your skills.
- Custom Glass Coasters: Create a set of unique coasters by cutting small squares or circles out of glass. You can personalize them with etched designs or colored glass to match your home decor. They make great gifts or additions to your coffee table.
- Stained Glass Window Hangings Stained glass isn't just for church windows. Design your own window hanging with pieces of colored glass cut into shapes. When the sunlight hits, it will fill the room with colorful light patterns.
- Glass Plant Terrarium: Build a small terrarium for succulents or air plants. Cut glass panels to form a geometric shape, then seal the edges. It's a beautiful way to bring a bit of greenery indoors.
- Decorative Mirror Frames Transform a simple mirror into a work of art by adding a custom-cut glass frame. You can make it as simple or intricate as you like, and it will add elegance to any room.
- Glass Tile Mosaic Mosaics are a timeless art form. Use your glass-cutting skills to create a mosaic tabletop, backsplash, or wall art. It's a perfect way to repurpose leftover glass pieces.
- Personalized Glassware: Take plain glassware and make it special by cutting designs into the surface. This technique, known as glass etching, can be used to monogram or decorate wine glasses, vases, or jars.
- DIY Glass Cabinet Doors Upgrade your kitchen by adding glass panels to your cabinet doors. Cut glass to fit the door frames, and you've got a new look without the cost of a full renovation.
- Handmade Glass Jewelry Cut small pieces of glass to make pendants, earrings, or brooches. You can layer different colors or glass textures to create unique jewelry pieces.
- Glass Photo Frames Design and cut your own glass photo frames. You can add a personal touch by etching or painting the glass to complement the photo it will hold.
- Upcycled Bottle Glasses: Turn old bottles into new drinking glasses or vases. Cut the top off a bottle and smooth the edges for a chic, eco-friendly item.
These project ideas are just a starting point. With glass cutting, your imagination sets the limits. Prioritize safety, take your time, and enjoy creating something unique.
Troubleshooting Common Issues
Working with glass involves challenges. Mastering these issues improves your skills and results. Here's a guide to troubleshooting common glass-cutting problems, ensuring your projects meet expectations.
Glass Not Breaking Along the ScoreLine
Sometimes, despite a seemingly perfect score, the glass doesn't break where you want it to. This can be due to an uneven score or insufficient pressure. To resolve this, make sure to use consistent pressure when scoring and invest in a high-quality glass cutter for a more reliable score.
Jagged or Rough Edges After Cutting
If the edges of your glass are not smooth after a cut, it could be due to a dull cutting wheel or improper technique. Keep your tools sharp, and try to maintain a fluid, consistent motion when scoring. After breaking the glass, use sandpaper or a grinding stone to smooth out any roughness.
Cracks and Breaks in the Wrong Places
Unwanted cracks can occur if the glass is not properly supported or if too much force is applied during the break. Use a cutting mat or a similar surface for support, and apply gentle but firm pressure when snapping the glass along the score.
Difficulty Cutting Curves
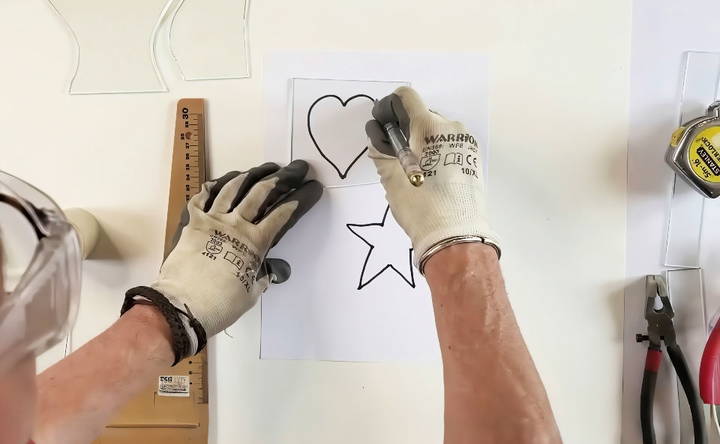
Cutting curves requires a steady hand and practice. Start with shallow curves and gradually work up to tighter ones. Keep the cutter upright and maintain consistent pressure throughout the curve. If the glass doesn't break cleanly, gently tap along the underside of the score line with the ball end of the cutter.
Wastage Due to Fractures
Managing fractures is crucial to minimize wastage. Ensure good cutting parameters and proper equipment calibration to prevent fractures. Training on glass handling is also beneficial.
Inconsistent Results
Inconsistency in results can stem from varying glass types or thicknesses. Familiarize yourself with the properties of different glass types and adjust your cutting technique accordingly. Consistent practice on the same type of glass can lead to more predictable outcomes.
Fixing common issues improves your glass cutting and reduces mistakes. Patience and practice are key to mastering it. Each project boosts your experience and confidence.
FAQs About How to Cut Glass
Discover answers to your FAQs about how to cut glass safely and effectively. Learn tips, tools, and techniques in this comprehensive guide.
Scoring and breaking glass is a two-step process:
Scoring: Hold the cutter at a 90-degree angle to the glass and a 45-degree angle to the direction of the cut. Press firmly and listen for a consistent sound as you make a single, continuous score.
Breaking: After scoring, tap the underside of the glass along the score line with the ball end of the cutter. Then, hold the glass with your fingers near the edges and apply gentle pressure to snap it along the score.
Yes, you can cut glass into various shapes using the following method:
Curves and shapes: Use grozing pliers to score and break curves. Make a series of concentric scores within the desired shape, then tap and pull the pieces out with the pliers.
Safety is paramount when cutting glass. Here are some key precautions:
Protective gear: Always wear safety goggles and gloves.
Clean workspace: Ensure your work area is free of clutter and easy to clean in case of glass breakage.
Proper handling: Handle glass edges and tools with care to avoid injury.
For a clean cut, follow these tips:
Clean glass: Make sure the glass is free from dirt or grime, which can affect the score line.
Even pressure: Apply consistent pressure when scoring to create a weak line for a clean break.
One score: Only score the glass once; do not go over the same line again to prevent weakening the glass further.
Cutting curves and circles requires a bit more finesse but can be achieved with the right technique:
Curves: To cut a curve, make a gentle, continuous score along your desired line. Then, use grozing pliers or running pliers to carefully break small sections along the score line.
Circles: For circles, you can use a compass-style glass cutter. Score a perfect circle by rotating the cutter around a central point. Then, make relief cuts from the edge of the circle to the score line and gently tap out the pieces.
Final Thoughts
In conclusion, practicing these steps and learning from my mistakes helped me get better at cutting glass. You can do the same with patience and the right tools.


